Atag VA6011CF User manual

gebruiksaanwijzing
afwasautomaat
mode d’emploi
lave-vaisselle
Bedienungsanleitung
Geschirrspüler
instructions for use
dishwasher VA6011CF
VA6053CF
VA6070CF
COP04
deel 2: voor gebruik
partie 2: pour usance
Teil 2: für Gebrauch
part 2: for use

27
Description of the appliance 27
Washing programmes 28
The control panel 29
Operating sequence 31
Using your appliance 33
Loading your appliance 33
T e lower basket 33
T e cutlery basket 33
T e upper basket 34
Adjusting t e eig t of t e upper basket 35
Contents
1. Levelling spacers
3. Upper spray arm
3. Salt container
4. Lower spray arm
5. Detergent dispenser
. Control panel
7. Rating plate
8. Rinse aid dispenser
9. Large filter
10. Central filter
11. Upper basket stop
12. Upper basket
Description of the appliance
1
2
3
4
5
7
8
9
10
11
IN86
12
6

28
Programme Degree of soil
and type of load Required push
button Recommended quantity
of detergent Cycle
description
Washing programmes
Intensive
70°C
Rinse and
Hold
Heavy soil.
Crockery, cutlery, pots and
pans
Any.
Partial load (to be completed
later in t e day)
Normal soil.
Crockery and cutlery
Lig t soil.
Crockery and party crockery
Normal soil.
Crockery and cutlery
Normal Plus
5°C
**
Quick wash
50°C
** T is is a special programme for quick was ing a full load of lig tly soiled dis es, glasses and crockery
(except pots) so t at you may re-use t em promptly. Due to t e s ortness of t is programme, no drying
p ase is provided.
*Testing programme for EN 50242 (see "Hints for Test Centres").
Hot prewas
Main was up to 70°C
3 cold rinses
1 ot rinse
Turbo drying
1 cold rinse (to avoid
food scraps from
sticking toget er)
Warm prewas
Main was up to 65°C
2 warm rinses
1 ot rinse
Turbo drying
Cold prewas
Main was up to 50°C
2 cold rinses
1 ot rinse
Turbo drying
Main was up to 50°C
1 cold rinse
1 ot rinse
*
Bio 50°C
wash prewash
//
20 g 10 g
20 g 10 g
25 g 5 g
30 g /

29
1. On/Off indicator light
2. On/Off push button
3. Door handle
4. Programme push buttons
5. "Half load" push button
By pressing t is pus button, was ing can be
confined to a single basket.
T e indicator lig t corresponding to t e
selected basket comes on.
upper basket
lower basket
If both indicator lights are off, washing will
be carried out in both baskets.
T is option is very useful and economical
w en only a few dis es need was ing.
Remember to load all the dishes into the
selected basket.
This option is not available with the
programme "Rinse and Hold".
. Delay start push button
Allows t e start of t e programme to be
delayed by 3, 6, or 9 ours.
This option is not available with the
programme "Rinse and Hold".
7. "Programme start" push button
T is is t e last pus button to press after
aving set t e programme and closed t e
door. It starts t e programme.
8. Indicator lights
Salt
Illuminates w en t e salt as run out, to
remind you to refill t e salt container.
Rinse aid
Illuminates w en t e rinse aid as run
out, to remind you to refill t e rinse aid
dispenser.
8. Programme phase indicator lights
Eac p ase is indicated wit a symbol.
Prewash / Rinse and Hold
Wash
Rinse
Drying
As soon as you select a was ing programme,
t is illuminates all t e p ases t e programme
consists of.
As t e programme progresses, t e p ase
under way will illuminate.
At t e end of t e programme t e p ase
inidcator lig ts turn off.
The control panel

30
Audible signals
Audible signals have been introduced to help
indicate which operations the dishwasher is
performing.
Short "instruction accepted" signal
W en any of t e pus buttons are pressed, a s ort
audible signal informs you t at t e mac ine as
accepted t e instruction given.
Long "programme run" signal
A continuous audible signal informs you t at t e
was ing programme is starting.
Intermittent "end of programme" signal
An s ort intermittent audible signal informs you t at
t e was ing programme as ended.
"Alarm" intermittent signal
T e mac ine is fitted wit a number of alarm
systems to elp you determine t e cause of any
problems (see "Somet ing not working"). An
intermittent audible signal informs you t at an
alarm is activated.
To deactivate t ese audible signals, press
simultaneously bot "Bio 50°" and "Quick Wash 50°"
programme pus buttons for at least 3 seconds,
during t is time you will ear an intermittent audible
signal w ic informs you t at t e audible signals ave
been deactivated.
To reactivate t ese audible signals, press
simultaneously bot "Bio 50°" and "Quick Wash 50°"
programme pus buttons for at least 3 seconds,
during t is time you will ear an intermittent audible
signal w ic informs you t at t e audible signals ave
been reactivated.
Both operations (to deactivate or reactivate
the audible signals) must be carried out
before starting or during a washing
programme.
If the dishwasher is switched off after these
operations without starting a washing
programme the dishwasher will not
memorise the setting.
SO339

31
1. Check the filters
Ensure t ey are clean and properly positioned
(see "Maintenance and cleaning").
2. Press the On/Off push button
T e On/Off indicator lig t and t e indicator
lig t of t e last programme selected will come
on (if options ave been selected wit
t e programme; t e corresponding indicator
lig ts will also illuminate).
3. Check that there is rinse aid
and salt
T e corresponding indicator lig ts will
illuminate if refilling is necessary.
4. Load the dishes
Remove any scraps of food.
Pull t e lower basket out and arrange t e
saucepans, plates and cutlery in it.
Pull t e upper basket out and arrange t e
plates, saucers, glasses and cups etc. in it.
Slide t e baskets back into t e mac ine.
5. Ensure that the spray arms
can rotate freely.
. Measure out detergent
Add t e required amount of detergent into t e
dispenser.
Close t e detergent dispenser lid.
Important!
If the "half load" option is selected
remember to reduce the quantity of
detergent.
7. Close the dishwasher door
8a. Setting and starting the
programme without "delay
start"
Press t e pus button t at corresponds to t e
programme you ave selected: all indicator
lig ts of t e p ases of t at programme will
come on.
You may also select t e was ing of only one
basket by c oosing t e "half load" option.
T e indicator lig t of t e selected basket
will illuminate.
Remember to load all dishes into the
selected basket.
Press t e "programme start" pus button, all
t e indicator lig ts of t e p ases forseen for
t at programme will turn off except for t e
p ase under way.
An audible signal will inform you t at t e
programme as started.
Operating sequence

32
8b. Setting and starting the
programme with "delay start"
Once a programme and required options
ave been selected (see point 8a.) to use
"delay start" proceed as follows:
Select t e delay time by pressing t e "delay
start" pus button; you can c oose between
3, 6, or 9 ours.
T e corresponding indicator lig t will come on.
Le setting made previously will not be
modified.
To set t e time setting to zero press t e
"delay start" pus button until t e indicator
lig ts of t e ours turn off.
Press t e "programme start" pus button, un
audible signal informs you t at t e countdown
starts. T e running of t e countdown is
emp asized by t e indicator lig t of t e ours
t at from fixed is now flas ing.
The opening of the door will not stop the
countdown.
Once t e delayed time as elapsed t e
programme will start automatically.
To stop a countdown in progress wit out
modifiying t e ot er settings, press for about 3
seconds t e "programme start" pus button.
9. To cancel a programme in
progress
To stop und undo a programme already
running press and keep pressed for at least 3
seconds t e "programme start" pus button.
An audible signal will inform you t at t e
previous programme as been annuled and it
is now possible to modify t e settings and/or
select a new was ing programame.
10. At the end of the washing
programme
T e dis was er will automatically stop and
an intermittent audible signal will sound w en
t e programme as ended (wit t e delay
start t e audible signal is automatically
excluded).
All indicator lig ts turn off except for t e one
corresponding to t e programme t at as just
ended.
Switc off t e dis was er by pressing t e
On/Off pus button and open t e door.
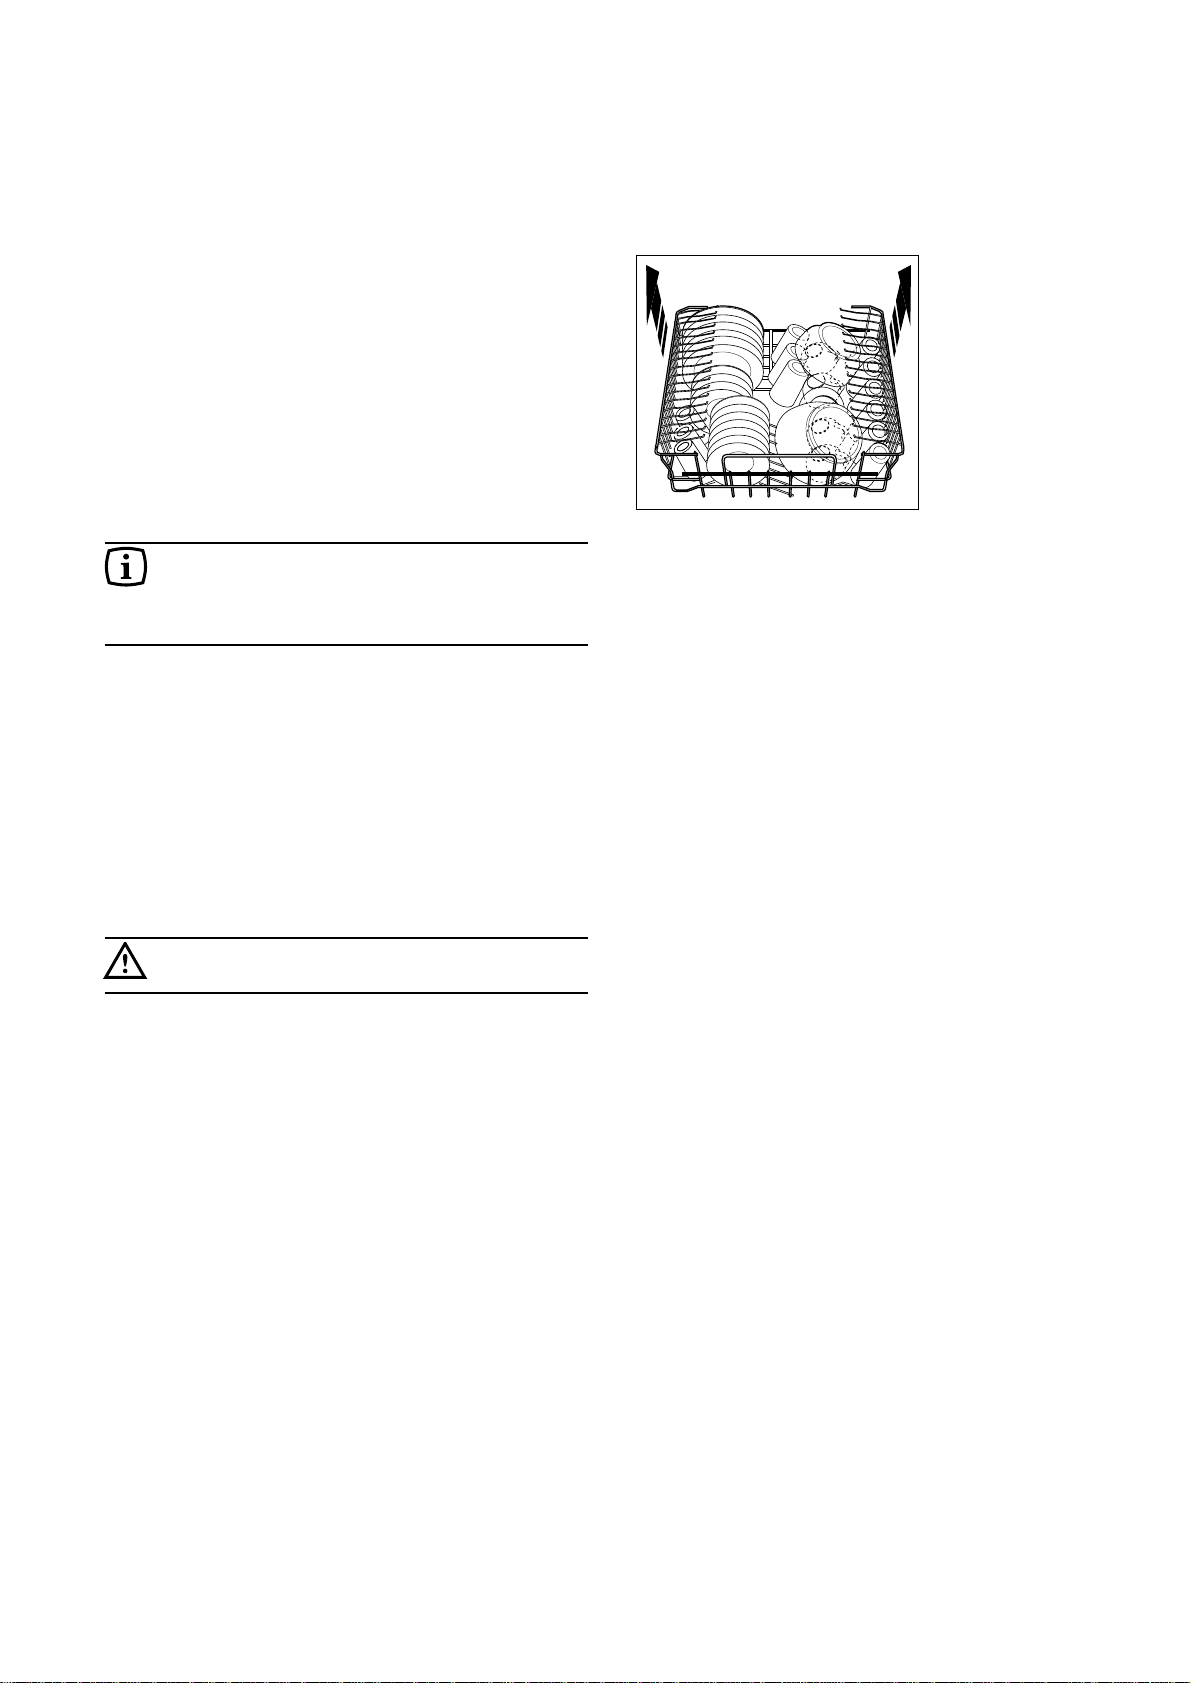
Wait a few minutes before removing t e
dis es; in t is way t ey will be cooler and t e
drying will be improved.
Empty t e lower basket first and t en t e
upper one; t is will avoid water dripping from
t e upper basket onto t e dis es in t e lower
one.
Important!
In general it is not advisable to open the
door while the machine is working; if the
door is opened however, a safety device
ensures that the machine stops.
Care must be taken if the door is opened
during the hot phase or immediately
after a programme has finished, as
steam may escape.
When the washing programme has
finished, it is recommended that the
dishwasher is unplugged and the water
tap turned off.

33
Loading your appliance
Before placing dis es in t e mac ine, remove any
scraps of food, to avoid clogging t e filters and
consequently reducing t e performance.
Do not load very small items which can fall
through the baskets.
Open t e door and slide out t e baskets to load t e
dis es.
The lower basket
T e lower basket is designed to take saucepans, lids,
plates, salad bowls, cutlery etc.
Serving dis es and large lids s ould be arranged
around t e edge of t e basket, ensuring t at t e upper
spray arm can turn freely.
T e two rear rows of prongs on t e lower basket can
be easily lowered to allow you to load pots, pans and
bowls.
To lower the prongs:
- Slig tly pull t em upward and let t em drop down
(see picture).
- To bring t em back to t e standing position, just pull
t em up again.
The cutlery basket
Long bladed knives stored in an upright
position are a potential hazard.
Long and/or sharp items of cutlery such as
carving knives must be placed horizontally
in the upper basket.
Take care when loading or unloading sharp
items such as knives.
Cutlery s ould be placed in t e removable cutlery
basket wit t e andles facing downwards. If t e
andles protrude from t e bottom of t e basket,
obstructing t e lower spray arm, load t e cutlery wit
t e andles facing upwards.
Ensure t at cutlery is positioned in t e compartments
and t at soiled surfaces do not touc eac ot er.
For best results use t e cutlery grid insert provided.
Mix spoons wit ot er cutlery to prevent t em from
sticking toget er.
Silver cutlery tends to go black if mixed wit steel
cutlery. Place it in t e cutlery basket separate from t e
ot ers.
Using your appliance
UI49
UI19
UI18
UI04
UI71
UI85

34
The upper basket
T e upper basket is designed for plates (dessert
plates, saucers, dinner plates of up to 25 cm in
diameter), salad bowls, cups and glasses.
Long-stem glasses can be suspended from t e prongs
of t e cup racks.
Arrange items so t at water can reac all surfaces.
For taller items, t e cup racks can be folded upwards.
Lig t items (plastic bowls etc.) s ould be loaded in t e
upper basket and arranged so t ey do not move.
In case that plates are loaded in the upper
basket:
load them starting from the rear positions of the
basket; tilting them slightly forwards and avoiding the
front positions near the door.
Before closing the door, ensure that the
spray arms can rotate freely.
US47
US71

35
Adjusting the height of the upper
basket
If was ing very large plates (over 27 cm and up to 32
cm in diameter) you can load t em in t e lower basket
after moving t e upper basket to t e ig er position.
Never lift or lower the basket on one side
only.
To move to the higher position proceed as follows:
1. Pull out t e basket until it stops.
2. Carefully lift bot sides upwards until t e
mec anism is engaged and t e basket is stable.
When the top basket is in the higher
position it will only take plates up to 20 cm
in diameter and you will not be able to use
the cup racks.
To lower the basket to the original position
proceed as follows:
1. Pull out t e basket until it stops.
2. Carefully lift bot sides upwards and t en allow t e
mec anism to drop back down slowly, keeping old
of it.
After loading your machine always close
the door, as an open door can be a hazard.
RC04

Postbus 1033 • 6920 BA Duiven • Nederland
152976 93/0
Nederland Home Product Service (ATAG)
Postbus 249
6920 AE DUIVEN
tel: 0900 - 5550001
fax: 026 - 8821444
België
ATAG België NV
9420 Erpe-Mere
tel: 053 - 806208
fax: 053 - 806057
This manual suits for next models
2
Table of contents
Other Atag Dishwasher manuals

Atag
Atag DW8114XB User manual

Atag
Atag VA6811RT User manual

Atag
Atag VA7213SLO User manual

Atag
Atag VA61313KT User manual

Atag
Atag VA55111BT User manual

Atag
Atag VA6211ST User manual

Atag
Atag VA63211RF/A01 User manual

Atag
Atag VA5511AT Operation manual

Atag
Atag VA 6511NT/A01 User manual

Atag
Atag VA9711PT User manual