Loading the dishwasher
Greener dishwashing
Do not rinse under running water
Simply scrape off large food particles before loading the dishwasher.
Choose a green detergent
Read the environmental declaration on the packaging!
Run programmes only with a full load
Wait to run a programme until the dishwasher is full, this way you save
energy. Use the Rinse and hold programme to rinse the dishes if there
are any unpleasant odours while you wait for the dishwasher to become
fully loaded.
Run programmes at a lower temperature
If the dishes are only slightly dirty, you can select a programme with
a low temperature.
Select ECO wash
This programme is intended for cleaning normally dirty dishes and is
the most effective programme in terms of combined energy and water
consumption.
The dishwashing programme is designed for an effective wash using
as little energy and water as possible. The programme washes at a
low temperature for a long time.
Select Green mode
The dishwasher has different programme modes. To save energy and
water, use Green mode. (Available with: Normal wash, Daily wash)
Open the door a little once the programme has finished
Better drying results are achieved if you open the door a little once the
programme has ended. (If the dishwasher is built-in the surrounding
furnishings must be resistant to any condensation from the dishwasher.)
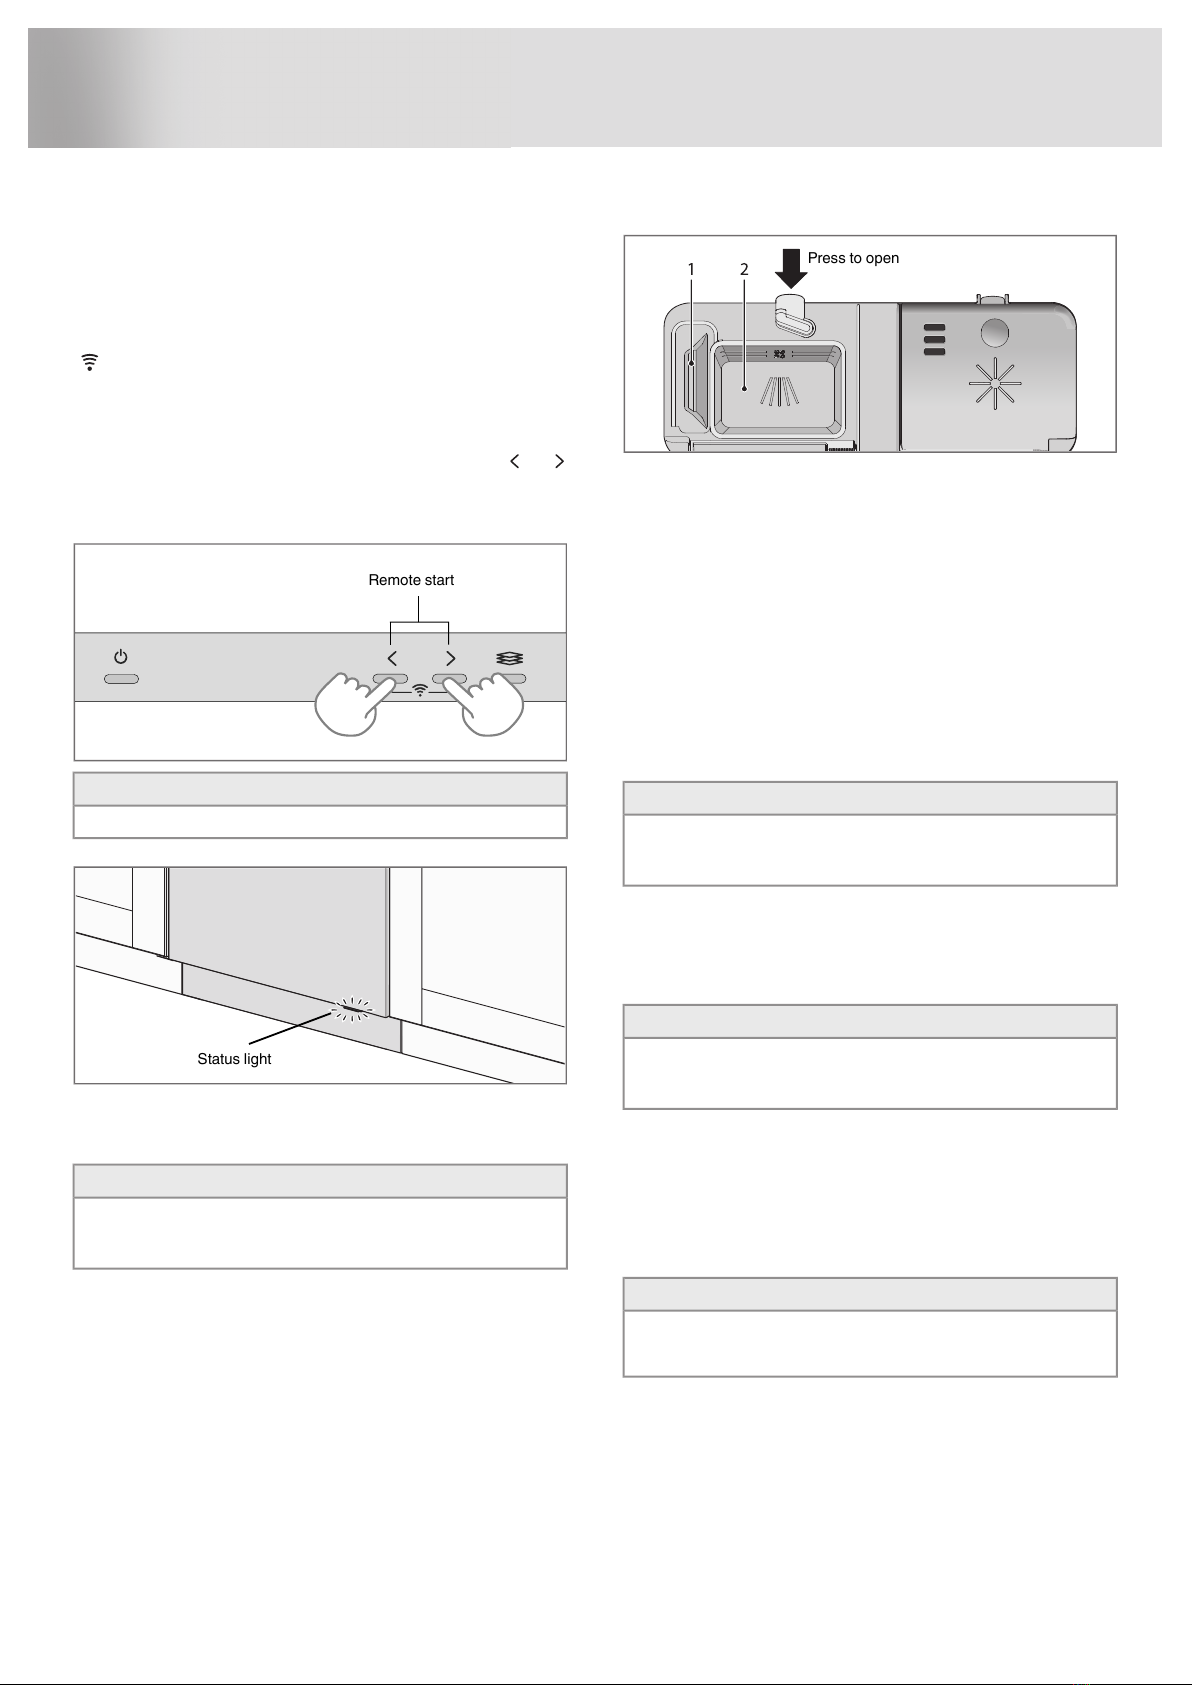
Connect to cold water
Connect the dishwasher to the cold water supply if the building is
heated using oil, electricity or gas.
Connection to hot water supply
Connect the dishwasher to the hot water supply (max. 70 °C) if the
building is heated using an energy-efficient means such as district
heating, solar power or geothermal power. Choosing a hot water
connection cuts dishwashing times and reduces the dishwasher's
energy consumption.
NOTE!
Do not exceed the permitted water supply temperature. Certain
materials used in some cookware cannot withstand strong heat.
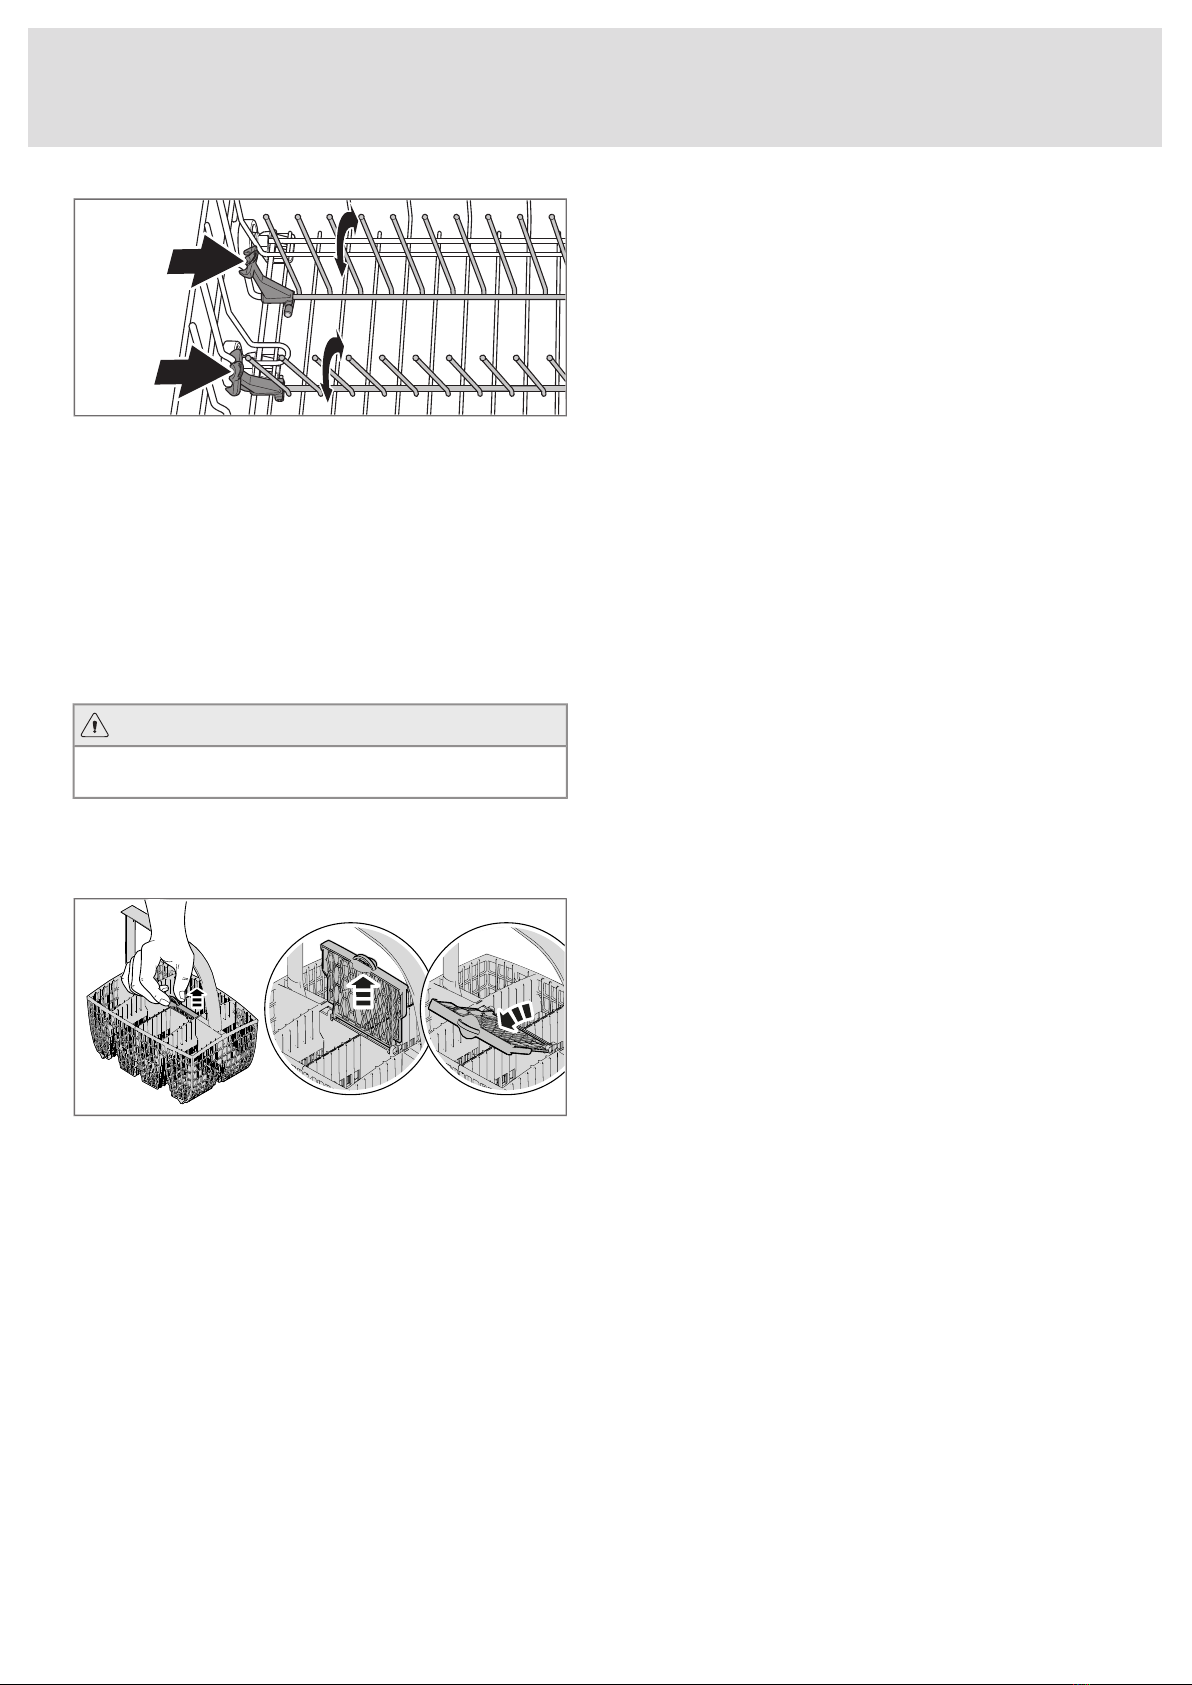
Fragile dishes
Some cookware is not dishwasher safe. This can be for several reasons.
Some materials cannot withstand strong heat, others can be damaged
by dishwashing detergent.
Exercise caution with, for example, handmade items, fragile decoration,
crystal/glassware, silver, copper, tin, aluminium, wood and plastic.
Look for the "Dishwasher safe" marking.
Fragile decoration
Porcelain with decoration on top of the glazing (the items feel rough)
should not be washed in a dishwasher.
Crystal/Glass
Wash fragile items made of crystal/glass using the gentle dishwashing
programme Crystal glass. Remember to use a small amount of
detergent and to place items so that they do not touch each other
during the wash.
Drying is faster and a better result is achieved if you use rinse aid. You
will also achieve a better dishwashing result with clear and spotless
dishes.
Hand-painted glassware, as well as antique and very fragile items,
should not be washed in a dishwasher.
Silver
Silver and stainless steel items should not come into contact, as the
silver can become discoloured.
Aluminium
Aluminium can lose its shine if washed in a dishwasher. However, good
quality aluminium pans can be washed in a dishwasher, even if some
of the shine will be lost.
Cutlery with glued handles
Some types of glue are not dishwasher safe. In such cases, the handles
may loosen.
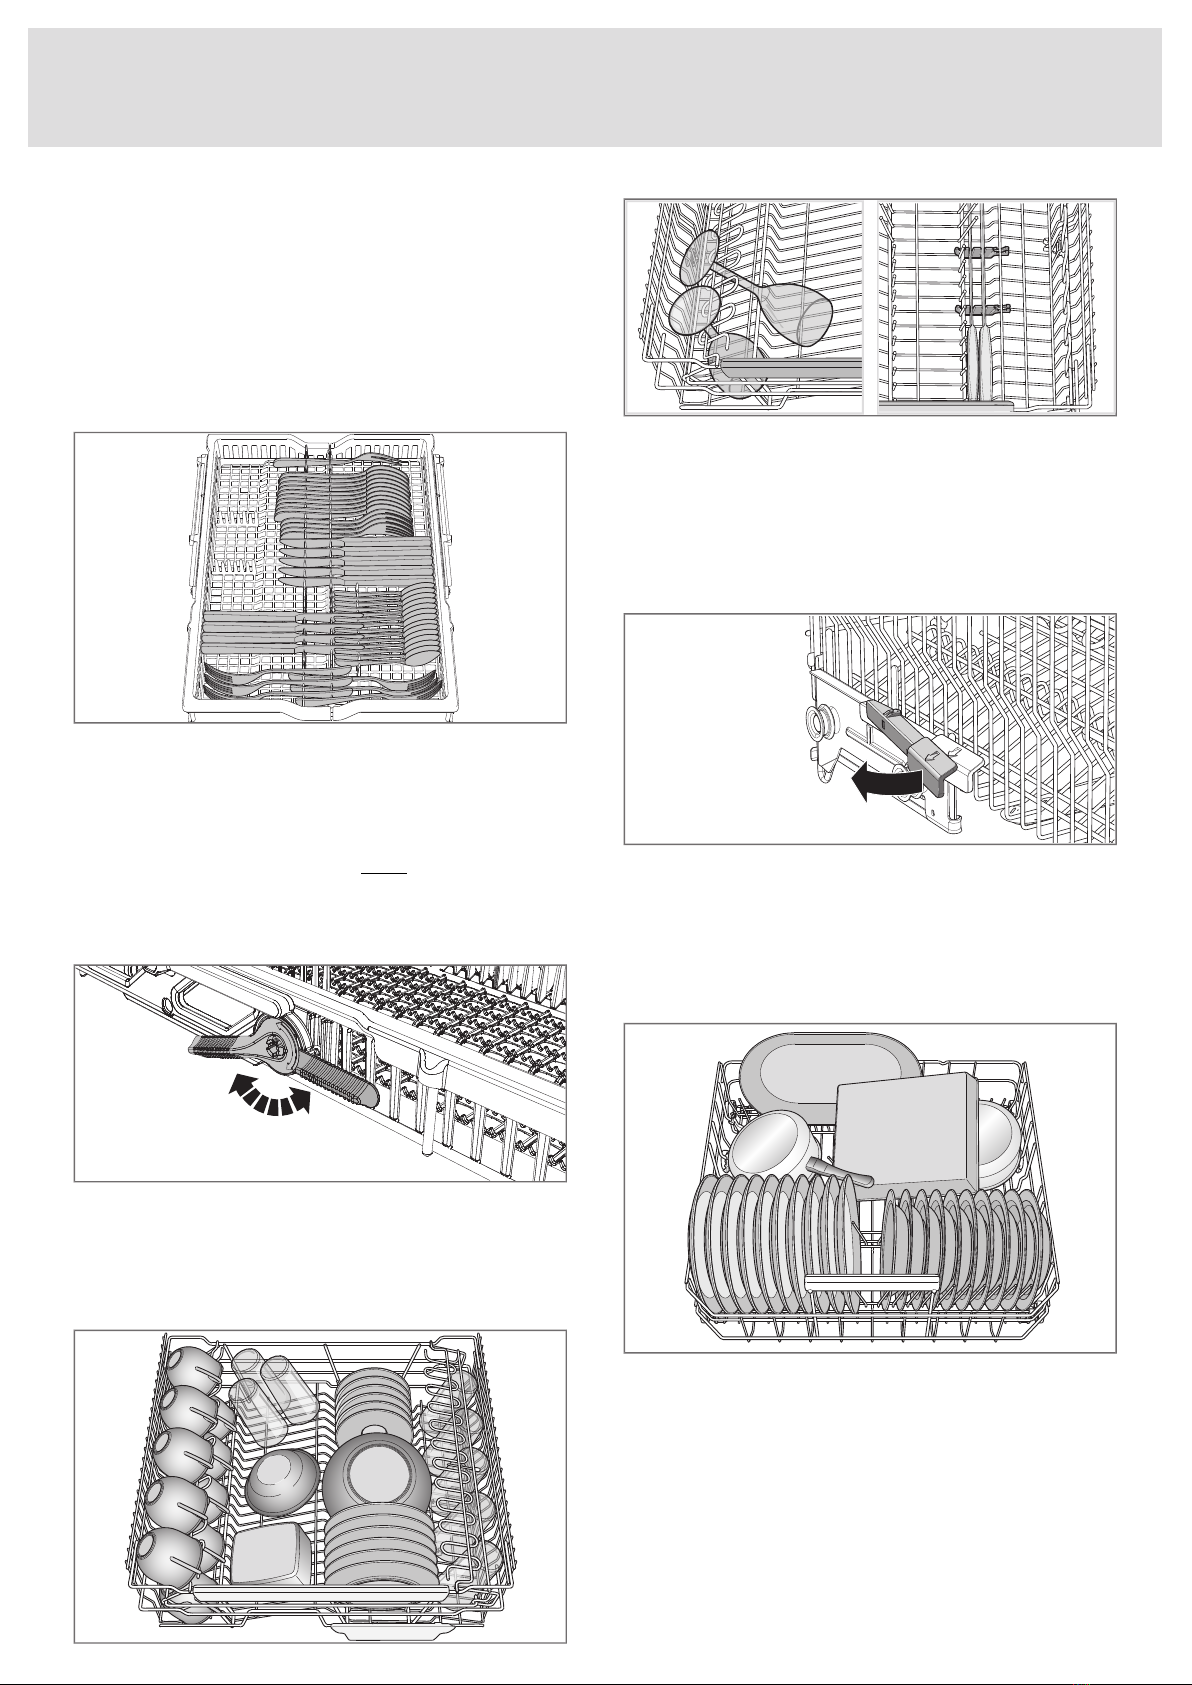
Points to consider
•All dirty surfaces should face inwards and downwards!
•Dishes should not be placed in or on each other.
•Angle dishes with hollows, such as cups, so that the rinse water
will run off. This is also important for plastic items.
•Make sure small items cannot fall through the dishwasher basket;
place them in the top cutlery tray.
NOTE!
Check that the spray arms can rotate freely.
7