manuals.online logo
Brands
  1. Home
  2. •
  3. Brands
  4. •
  5. Atomberg
  6. •
  7. Fan
  8. •
  9. Atomberg RENESA User manual

Atomberg RENESA User manual

B
O
O
S
T
,
S
L
E
E
P
&
T
I
M
E
R
M
O
D
E
R
E
M
O
T
E
W
I
T
H
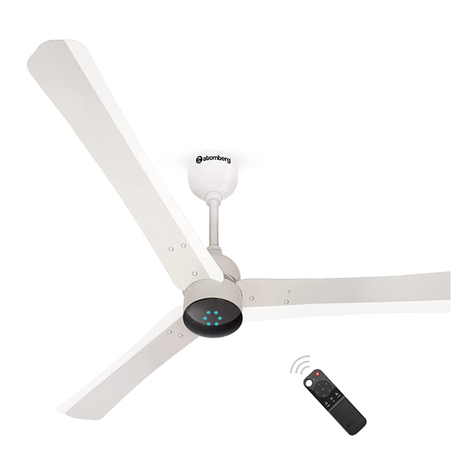
CEILING FAN
INSTRUCTION
MANUAL
IMPORTANT NOTE:
Read this manual carefully before installing or
operating your new Atomberg RENESA Ceiling Fan.
Ensure you save this manual for future reference.
290mm X 210mm: same size artwork
Problem Cause Solution
Fan does Fuse down / MCB shut off Check fuse of the MCB on the mains.
not start
Loose wire connection to Check the wire connection and restore
fan or to the switch on the the connection
panel
Fan still does not start Please contact the service number
provided.
Regulator is connected to It is recommended that the regulator
the fan should not be connected to this ceiling
fan and it is instead controlled using
the remote provided with it.
Fan making Bearing inside the housing This ceiling fan is designed to be
noise has problems longlasting. However, after many years
of use the bearing may wear off and
may need to be replaced.
Fan blades are not seated Make sure the blades are properly
properly on the motor fastened to the body. Loose connection
may cause accidents.
Shackle kit rattling Make sure that the screws and nuts are
securely fastened along with washer
provided.
Fan is Nut holding motor shaft Securely fasten the nut and bolts along
wobbling and the down rod is loose with washers as per the instructions
provided in this manual.
Nut holding down rod and Securely fasten the nut and bolts along
shackle kit is loose with washers as per the instructions
provided in this manual.
Screws in shackle kit and Securely fasten the nut and bolts along
the ceiling hook are loose with washers as per the instructions
provided in this manual.
Fan blades are not seated A common mistake is fixing the blade in
properly on the motor the reverse direction. Please set it right
and securely fasten the screws.
Fan blades are Make sure that the blades are not bent
out of balance during cleaning. Also, interchanging
them helps balance the blades.
Restart/speed Regulator not bypassed Make sure the regulator is eliminated
variation from the connection.
Blades have wrong sweep Check the sweep of blades with the fan
sweep before assembling.
WARNING
MAINTENANCE
Periodic cleaning of your ceiling fan is the only maintenance needed.
When cleaning, use only a soft lint-free cloth or brush to avoid scratching the
smooth paint finish. You can use moist cloth to remove stains if any. However, do
not use water directly. Abrasive cleaning agents are not required and should be
avoided to prevent damage to the outer finishing.
Do not use water when cleaning your ceiling fan. It could damage the motor by
causing short-circuit and create the possibility of an electrical shock.
Do not bend the blades while cleaning. A bend in the blade may result in unstable
fixing and affect the air delivery.
ATOMBERG TECHNOLOGIES PVT LTD
Corporate office: Rupa Solitaire, Office No. 1205
Millenium Business Park, Mahape, Navi Mumbai 400 710.
Manufacturing unit: Plot No D-130 B, TTC Industrial Area
Shirawane, Navi Mumbai 400 706.
Remote key
Function Description LED status
1 Speed 1 Sets the fan to speed 1 One LED will glow for 1 sec.
2 Speed 2 Sets the fan to speed 2 Two LED will glow for 1 sec.
3 Speed 3 Sets the fan to speed 3 Three LED will glow for 1 sec.
4 Speed 4 Sets the fan to speed 4 Four LED will glow for 1 sec.
5 Speed 5 Sets the fan to speed 5 Five LED will glow for 1 sec.
B Boost Speed Sets the fan to boost All LEDs blink thrice.
Toggle (Turn
switch OFF
and ON)
LED LED ON/OFF Turn ON/OFF LEDs. All six LEDs will glow.
Sleep Reduce
•
Sleep mode works for Sleep Mode Enable- Four LEDs
speed of 4 Hours. Speed is reduced in square blink twice.
fan by 1 by 1 every 2 hours. Sleep Disable - Odd and Even
every 2
Afterwards, the fan
LEDs blink in a pattern thrice.
hours for continues to run on a
4 hours reduced constant speed.
Fan speed will not reduce
below speed 1.
•
If sleep mode is already
set and sleep key is pressed,
it will disable sleep mode.
Timer OFF Timer/
•
Fan automatically
Timer 1-One LED blinks twice.
Wakeup switches OFF/ON after the Timer 2-Two LEDs blink twice.
Timer set hours (1,2, 3 & 6 Hrs).
Timer 3-Three LEDs blink twice.
•
Number of LEDs suggest
Timer 6-All LEDs blink twice.
number of hours set.
Timer Disable
-
Odd and Even
•
Press the Timer key 5 times
, LEDs blink in a pattern thrice.
to disable Timer or once
after 6 Hr timer indication.
SLEEP mode adds smart comfort, as the temperature drops over the night and if
you wish to auto-reduce the speed.
With TIMER mode, you can switch OFF or switch ON the fan automatically after
set hours to
further save energy.
DO NOT use the fan regulator as the fan is operated using a remote.
Eliminate the regulator by using a direct connection from the switch to the fan.
WARNING
CONTROL FAN SPEED WITHOUT REMOTE
The fan's main switch can be used to control its speed. Turn the fan's switch OFF
& ON repeatedly to set the fan to the desired speed. Delay between the toggling
between the OFF and ON buttons should be approximately 1 second. If toggling is
too fast or too slow, it will not work. While toggling, the LEDs will glow to indicate
the speed of the fan. Refer to the below table to control the fan using the switch.
TROUBLESHOOTING
Your ceiling fan is designed to be longlasting with a strong body and well-tested
electronics, however if any problem arises, please refer to the guidelines shared.
Please contact a local electrician or service engineer if you need any help.
1 time Previous Fan runs at the No indication
speed same speed
2 times Speed 1 Lowest speed 1 1 LED will glow and turn off
after 1 second.
3 times Speed 2 Speed 2 2 LEDs will glow and turn off
after 1 second.
4 times Speed 3 Medium speed 3 3 LEDs will glow and turn off
after 1 second.
5 times Speed 4 Speed 4 4 LEDs will glow and turn off
after 1 second.
6 times Speed 5 High speed 5 5 LEDs will glow and turn off
after 1 second.
7 times Boost Boost mode speed 6 LEDs will glow and turn off
after 1 second.
LED statusDescriptionsSpeed
Note:
Sleep mode will not work if fan is off.
FEATURES
India's most energy-efficient
RENESA
ceiling fan
•
More than 65% energy saving as
compared to an ordinary fan
•
Highest service value (air delivery/power consumed)
in India
•
Runs 3 times longer on inverter resulting in longer battery runtime
•
Smart
sensorless algorithm for greater reliability
•
No heating of fan even after long hours
of runtime, resulting in an extra-long life
•
Consistent speed even at low voltages
•
Easy speed controls using a smart remote
•
LED indications for easy remote use
•
TIMER feature automatically switches OFF the fan when fan is running state and
switches ON the fan when fan is in OFF state
•
SLEEP will work for only 4 hours
of Sleep keypress. For the first 2 hour, it will reduce speed by 1, and then after the
next 2 hours, it will be reduced by 1 speed
•
Full copper motor and double ball-bearing
for better stability and longer life
•
Aluminum body and blade, resulting in zero rust
•
Zinc-plated parts and accessories for rust-free life
•
Protective coating over
electronics for better resistance against moisture
•
All fans are tested for durability
in extreme conditions before shipping.
SAFETY INSTRUCTIONS
Be careful of the fan and blades while cleaning, painting, or working near the fan.
Always turn off the power to the ceiling fan before servicing.
Do not put your hand or any other objects near the fan blades while the fan is running.
Do not modify the blade design to change the air flow.
INSTALLATION
Assembly:
Mandatory Step:
Bypass or eliminate the regulator from
the connection before installing on Atomberg
fan for optimal performance
BIG ENERGY SAVINGS
Atomberg is India's most energy-efficient ceiling fan. A super-efficient BLDC motor
technology is used, which consumes very little energy. Atomberg fans consumes
just 1/3rd of the power used by ordinary induction fans. Ordinary induction fans
run on 75watts, whereas Atomberg fans run on just 28watt at full speed.
There is huge saving potential for households, and institutions such as hospitals,
colleges, schools and commercial spaces.
Shackle kit
Top canopy
Down rod
Bottom canopy
Blade
Shaft with motor
The picture shown above depicts the exact order of placement of various parts.
Step 1.
Motor
Carefully remove the motor from the box and
keep it on soft padding to prevent it from getting
scratched.
Step 2.
Ceiling
Hook
Insert the canopy into the shaft and securely,
attach the shackle to the hanger or ceiling
hook using the screws provided with the package.
Fasten the nut, and make sure that you fit the
safety nut, washer and the R-pin to prevent slipping.
Adjust the top canopy so that it covers both the
assembly and the connection.
Step 3.
Align the holes on the blade shank with the motor
holes. Securely fasten the blades with the screws
and washer provided.
HOW TO HANG THE FAN
Down rod
Spring
washer
R pin
Nut
Hex
screw
Canopy
Step 4.
ELECTRICAL WIRING INSTRUCTIONS
Ceiling
At least 7 feet
At least 1 foot
Floor
Step 5.
Step 6.
Make the correct wire connections to
operationalise the fan.
Adjust the canopy as required
Color codes of the wires may vary from region to
region. Please check your state or country notifications
regarding the same.
Dear Customer,
Congratulations on purchase of ATOMBERG'S super efficient RENESA ceiling fan.
Please read this guide before using this product. It would also be advisable to
store this
guide safely for future reference.
WARNING
Do not install or use fan if any part is damaged or missing.
This product is designed to be used only with those parts or accessories supplied
with this product and/or any accessories designed specially for use with this
product by Atomberg. Any such use of other parts or accessories
may turn the product warranty null and void, and may result in personal injury
or property damage as well.
WARNING
MOTOR 3 ALUMINIUM
BLADES
DOWN
ROD
SHACKLE
KIT
MANUAL
2
CANOPIES WARRANTY
CARD
REMOTE
PACKAGE CONTENTS
Observe the following to reduce the risk of fire, electric shock or injury:
Only use this unit in the manner intended by Atomberg. If you have any
questions regarding the product, please contact
Atomberg.
Before servicing or cleaning, switch off the main power panel and switch.
Wiring of the fan must be done only by a qualified and certified electrician.
The fan blade must be hung with at least 1 foot of
clearance from the ceiling for optimal performance
and safety.
Any object next to the fan must be at least 2 feet
away from the tip of the fan blade to reduce chances
of risk or injury.
The fan must be hung with at least 7 feet of
clearance from the floor to the blades.
WARNING
WARNING
Longlasting AAA batteries are used in the remote
USING YOUR CEILING FAN
Congratulations! You have successfully installed your new ceiling fan using the
instructions provided in this guide.
1 Restore the electrical power.
2
Power 'ON' the ceiling fan using switch on the panel in the room. The LED
indicator flashes ‘ON’ when power supply is restored.
3 Use your remote to operate the ceiling fan.
4 If you are leaving the room or facility for a long duration or on holiday, then
power
'OFF' the ceiling fan using the switch on the panel.
The performance of the fan gets affected if the regulator is not bypassed, and
may lead to speed variations, restarting or low speed. Eliminate regulators by
using a direct connection from the switch to the fan.
HOW TO USE YOUR REMOTE
Any connection to wires must be securely sealed using electrical insulation tape
to prevent electric shock or fire hazard.
Avoid pinching of wires between the shackle kit, down rod and ceiling hook
assembly to prevent electric shock or fire hazard.
WARNING
“Not recommended for use in high humid areas" like Washroom, direct or indirect
exposure to water entries etc.
Insert the screw to assemble the shaft and the down rod. Insert the washer, nut and
R-Pin in the sequence depicted in the illustration below. Pull down the canopy to
cover the connector box.
WARNING
If the blades are not secured properly with the screws and the washer, it may
cause injury during operation. Also, an imbalanced fan may cause damage to
the motor and reduce the lifetime of the fan.
Any damage caused by incorrect installation and wrong practices followed while
connecting the fan are not covered under the warranty terms. Please check the
warranty terms in detail.
Do not turn on the fan until the blades are securely fastened to the ceiling fan.
The remote provided along with
your
ceiling fan is ergonomically
designed.
The soft controls on the remote are
longlasting.
SPEED
CONTROL
BOOST
MODE
TIMER
MODE
SLEEP
MODE
LED
CONTROL
ON/OFF
CONTROL

Other Atomberg Fan manuals

Atomberg Ozeo User manual

Atomberg

Atomberg Ozeo User manual

Atomberg RENESA SMART + User manual

Atomberg

Atomberg RENESA SMART + User manual

Popular Fan manuals by other brands

BOCCA TS-BLACK User instruction manual

BOCCA

BOCCA TS-BLACK User instruction manual

NuAire DRIMASTER 2000 Installation and Maintenance

NuAire

NuAire DRIMASTER 2000 Installation and Maintenance

Craftmade Pro Plus installation guide

Craftmade

Craftmade Pro Plus installation guide

NuTone LOSONE SELECT L1500C Specification sheet

NuTone

NuTone LOSONE SELECT L1500C Specification sheet

Grower Select HS583 installation manual

Grower Select

Grower Select HS583 installation manual

FABRILAMP EINAR 158798110 manual

FABRILAMP

FABRILAMP EINAR 158798110 manual

Cumberland Mega-Flow Panel Installation

Cumberland

Cumberland Mega-Flow Panel Installation

Venmar H50100H installation guide

Venmar

Venmar H50100H installation guide

nilan CTS700-TOUCH Compact P GEO installation instructions

nilan

nilan CTS700-TOUCH Compact P GEO installation instructions

cecotec FORCESILENCE 1010 EXTREMECONNECTED instruction manual

cecotec

cecotec FORCESILENCE 1010 EXTREMECONNECTED instruction manual

ARDES AR5EA50PB manual

ARDES

ARDES AR5EA50PB manual

Emerson CF788CK00 owner's manual

Emerson

Emerson CF788CK00 owner's manual

All Seasons Hire Cyclone 50 operating instructions

All Seasons Hire

All Seasons Hire Cyclone 50 operating instructions

aireRyder F0018 manual

aireRyder

aireRyder F0018 manual

enervent Salla eWind installation instructions

enervent

enervent Salla eWind installation instructions

NuTone QTN130LE1 manual

NuTone

NuTone QTN130LE1 manual

Fanimation Edgewood TF971 Series owner's manual

Fanimation

Fanimation Edgewood TF971 Series owner's manual

RenewAire LE10XRT manual

RenewAire

RenewAire LE10XRT manual

manuals.online logo
manuals.online logoBrands
  • About & Mission
  • Contact us
  • Privacy Policy
  • Terms and Conditions

Copyright 2025 Manuals.Online. All Rights Reserved.