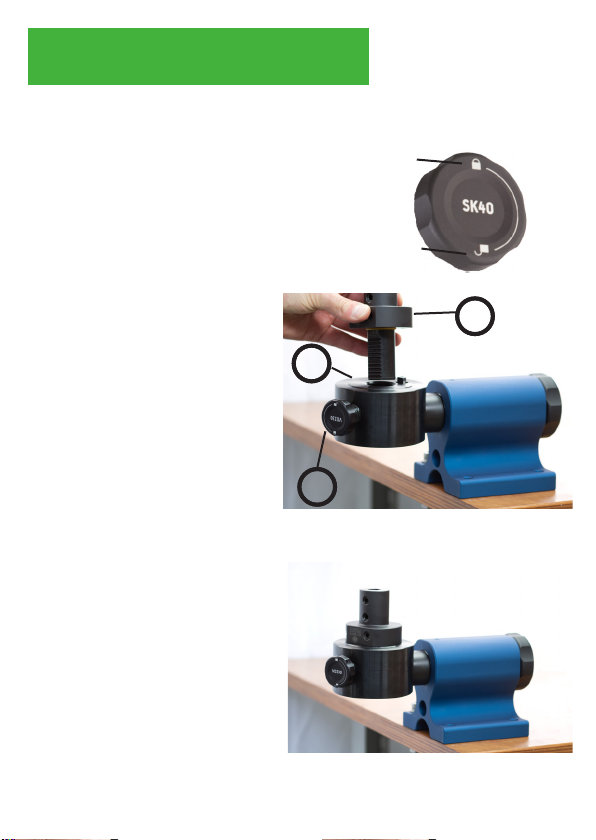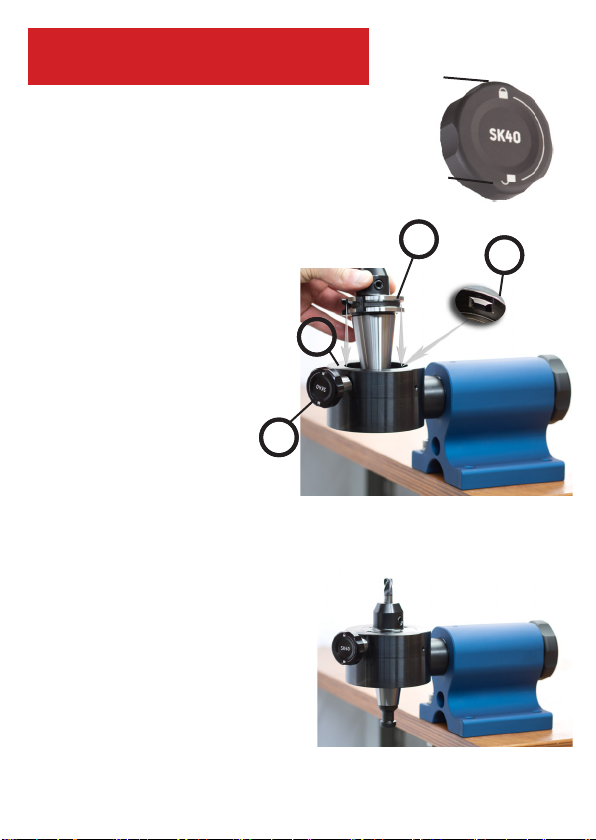
Schritt 2:
Setzen Sie Ihr Werkzeug (4) in den Ad-
apter (1) ein. Achten Sie darauf, dass die
Bundnuten die Nasen (5) treen.
Step 2:
Place your tool holder (4) into the adaptor
(1). Be sure that the key (5) nds into the
slot.
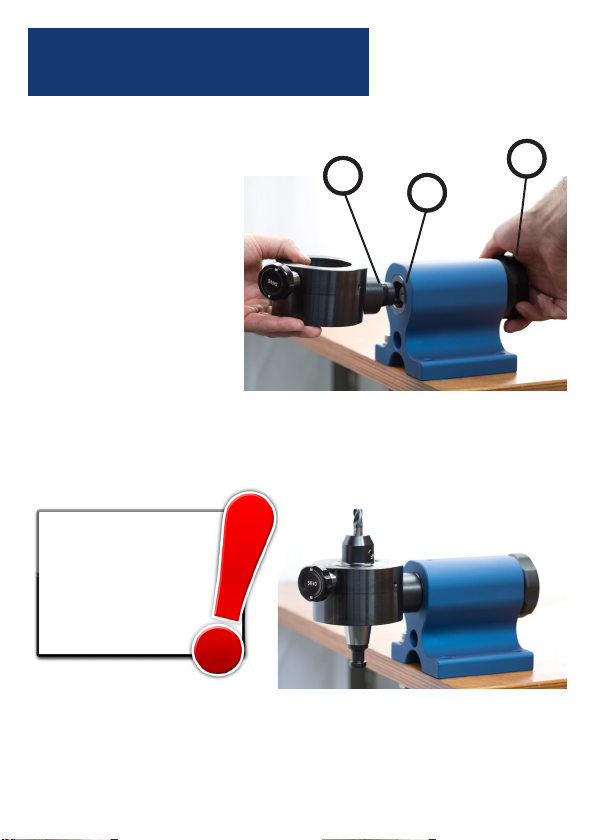
Schritt 3:
Drehen Sie Ihr Werkzeug (4) um ca. 30°
gegen den Uhrzeigersinn damit der Bol-
zen (6) in die Bundnut trit.
Step 3:
Rotate your tool holder (4) counter clock
wise round about 30°. Be sure that the
bolt (6) nds into the slot.
Schritt 4:
Schließen Sie den Bolzen (6). Das Zei-
chen „geschlossen“ sehen Sie nun oben.
Step 4:
Close the bolt (6). Now the sign „closed“
has to be on the top of the wheel.
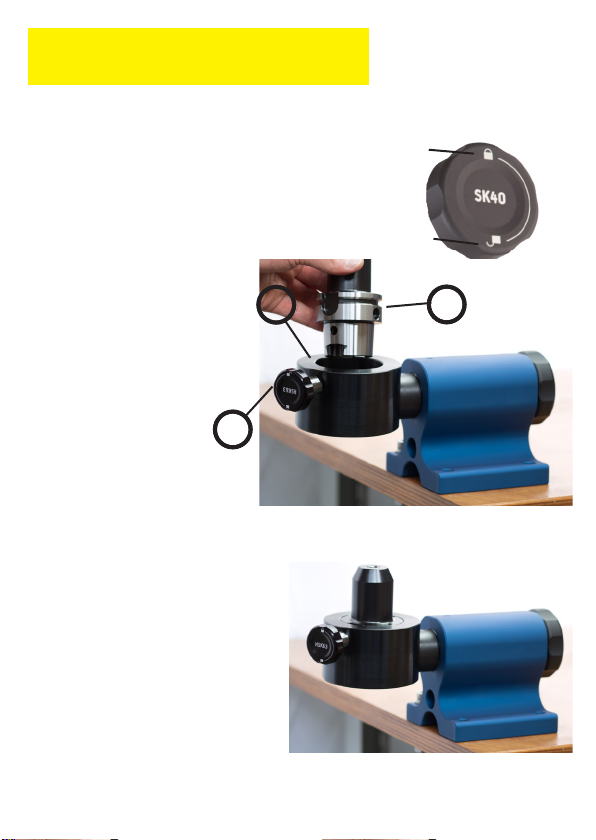
Schritt 1:
Önen Sie den Bolzen (6). Das Zeichen
„oen“ sehen Sie nun oben.
Step 1:
Open the bolt (6). Now the sign „open“
has to be on the top of the wheel.
Offen / Open
Geschlossen /
Closed
Bedienung Adapter SK
Operating adaptor SK
6
1
45