AUDAX DS8 PC User manual

Audax Body Worn Video System
Docking Station (DS) System –DS8 PC
Software User Manual

Index
1. Introduction
1.1 Software working environment
1.2 Connecting the Docking Station (DS)
1.3 Turning the DS on
1.4 Main interface introduction
1.4.1 Icons
1.4.2 Individual Icons
2. Downloading data from cameras
3. Reviewing Files / System settings
3.1 Admin / User Login
3.2 Review Files
3.2.1. Searching for a file
3.2.2. Playback a video file
3.2.3. Protecting a file
3.2.4. Downloading a file to a removable drive
3.2.5. Burning video files to CD / DVD
3.2.6. Importing files from another storage directory (not used)
3.3. Reports
3.4. Log
3.5. Personnel
3.5.1 Setting Officer ID
3.6. NFC
3.6.1. Using NFC
3.7. Security
3.7.1. Creating a user
3.7.2 Authorizing a user
3.8. Options
3.8.1. Changing the location for storing video files
3.8.2. Setting file retention time
3.8.3. Clearing files in camera after download
3.9. Language
3.10. Exit
4. Change Password
5. Camera Settings

1. Introduction
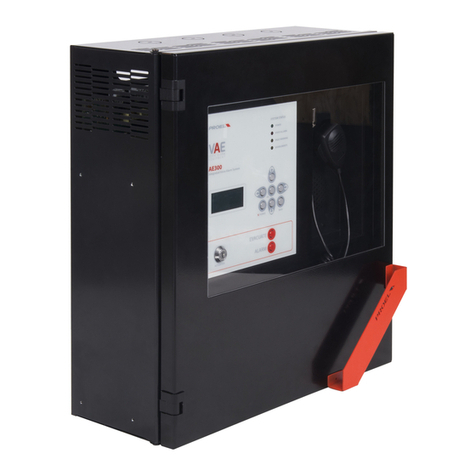
The DS8 PC Docking Station (DS) comes with an internal PC and Touchscreen All the
software has already been installed on the PC so just turn on and go.
1.2 Connecting the Docking Station (DS)
The DS is supplied with the following components:
•Power Cable
•Ethernet Cable
•Wi-Fi Antenna
•2 x Keys for removable HDD
Connect the Power Cable to the DS. Plug Power Cable into an appropriate socket and
turn on power at the Main switch.
Plug in the Ethernet Cable AND/OR attach the Wi-Fi Antenna (next to NFC Reader) to
allow for Network access.
Ensure that the Removable HDD Keys are kept in a safe place
1.3 Turning the DS on
At the rear of the DS you will see TWO switches.
a. Turn the O / I switch to the Iposition
b. Push button 2 on to boot up the PC
Once the PC has started up, you will automatically be taken to the Main Interface Screen.
Wi-Fi and Network can be set up on the DS8 PC in the same way as a standard Computer
1
2

1.4 Main interface introduction
1.4.1 Icons
a. Icons at the top right of the main Screen give access to system settings as well as
managing data from the BWV Cameras.
b. Individual panels give information on the BWV Camera docked and show the status of
download of data.
c. The bottom panel shows information on your computer system and storage space
capacity.
1.4.2 Individual Icons
a. Review Files on DS – This allows you to review the files which have been downloaded
from the BWV Cameras.
This Icon will also take you to other area of the DS Software for adding / amending
deleting system settings; these are shown in para 3 below
NOTE: This is a password protected area and details of this are given in para 3.1 below.
b. Change Password – this allows you to change the password(s) for the DS Software.

c. Setting Camera – this allows you to modify settings on the BWV Camera. Details of
this are given in para 5 below.
d. Exit System – click this icon to exit from the DS Software. You can choose “Exit
System” from the options and will then be asked to input a Password which the default is
2014.

2. Downloading data from cameras
Open the “MyDocking” software and insert a camera (or cameras) on the DS. Download
of data from the camera(s) will automatically happen.
3. Reviewing Files / System settings
The “Review Files on DS” icon allows you to review the files which have been downloaded
from the BWV Cameras but will also allow access to other areas for adding / amending
deleting system settings.
3.1 Admin / User Login
Clicking this icon initially takes you to the login screen:
Default settings are:
User ID admin
Password 888

Click “Login” to confirm. You will see the following screen:
Select the appropriate Icon as indicated and listed below
3.2 Review Files
You can search for a file by camera ID, Officer name, recorded date etc. You also
playback a video file and label these files. You may delete a file, protect a file, download
a file to your removable drive etc. following the instructions below
3.2.1. Searching for a file
Enter the query condition(s) and click the “Search” button.

3.2.2. Playback a video file
Select a file and click the “play” button. The file will commence playback.
If you would like to show more information on the file, click the “Detail” button or double
click the recording

Further information can be added in the “File Details” screen
3.2.3. Protecting a file
You can protect a file in order to prevent the file from being automatically deleted by
clicking the “protect” button after select a file. In the same way, you can remove file
protection by clicking the “unprotect” button to cancel protect status.

3.2.4. Downloading a file to a removable drive
Note: You will need select a directory for storage in the file pop-up window.
3.2.5. Burning video files to CD / DVD
Assuming your PC has CD/DVD burning features, you can select this option to burn file(s)
to blank media.
3.2.6. Importing files from another storage directory
Not used with this system

3.3. Reports
The “Report” feature will only provide some basic information.
3.4. Log
The User can see (and download) log information for the DS system.
Note: Logs are automatically cleaned on a regular basis. The time interval is
approximately 6 months.

3.5. Personnel
3.5.1 Setting Officer ID
If you would like to have all files that show camera information and officer information, you
have to allocate officer information to that camera.
a. Add the officer details
b. Allocate a camera to the new officer.
Note: You also may do this after downloading files from camera.

3.6. NFC
The DS uses NFC (Near Field Communication) in order to allocate a camera to an
individual officer.
An Audax NFC Card(s) may have been supplied to you as part of your purchase. Each
card has already been given its own unique Card ID Number however, it is possible for
you to change this.
Open the NFC tab, place and hold the Card on the NFC reader (left hand side of DS) and
click “Read”. The screen will show the current Card ID as per the image below.
If you wish to have a different Card ID, enter the New Card ID and click “Write”. The
screen will show as per the image below:

3.6.1. Using NFC
In the Screen example shown below, you will note that the Officer ID on the camera is
currently set to 0
When the officer comes to take the camera from the DS (01 in this example), they initially
should click the grey section of box 01 on screen to select the camera required.
At that point, they will have 5 seconds in which to place the NFC Card on the NFC Reader.
The Screen will show a countdown in seconds

Once the NFC Card has been placed on the reader, the DS will beep and the ID Number
of the NFC Card will be allocated to the Camera as per the screen below:
The camera now shows the correct ID of AUDAX0 (in this example), and the officer can
now remove the camera from the DS.
All recorded data on the camera will now be tagged with the Officer ID Number
3.7. Security
This feature is provided to the administrator in order to add / manage other MyDocking
Software users and select appropriate permissions for them.

3.7.1. Creating a user
Click the “add” button
User information
•The new user needs to be allocated a user number (ID), user name and a
Password.
•The password needs to be six digits, which can include letters and numbers.

3.7.2 Authorizing a user
Use the admin account log in system and navigate to security as shown below:
Select (or deselect) the required permissions by a clicking the boxes.
3.8. Options
3.8.1. Changing the location for storing video files
The Default storage drive is E:// however, not all users will have this drive.
If the storage space needs to be amended; selecting the “options” icon will show you the
screen below:
Select the correct storage drive as shown above. Click “Save” and then “Exit”.

3.8.2. Setting file retention time
There are three storage strategies. These can be changed from the “Options” menu
a. Cover the oldest file
The DS system will delete the oldest file when your PC has run out of space. The DS will
only delete a few files and empty enough storage space for the newer files to be
downloaded.
b. Auto purge expired file
The DS system will delete all expired files and empty much more storage than the system
indicated above.
Select “Auto purge expired file” and add the appropriate time period (days) for the files to
be deleted.
c. Manual clean up space
The DS system will NOT delete any files. This will need to be carried out manually.
3.8.3. Clearing files in camera after download
The DS system can be automatically set to delete all files from the Camera once a
successful upload has occurred.
To select (or deselect) this, click the “Delete uploaded files” box

3.9. Language
Use the “drop down” list to change the language. Click “Setting” to confirm choice.
3.10. Exit
Press the Exit Icon to take you back to the Main Screen
4. Change Password
Clicking this will allow you to change passwords. You will see the following screen:
•1. Enter the User Name
•2. Enter the Old password
•3. Enter the New password
•4. Confirm the New password
•5. Click “Confirm” to apply the New password

5. Camera Settings
From the “Setting Camera” icon, you have the option to input Camera Settings from within
the DS System. This can be carried out on either an individual basis or for a bulk upload
for up to 8 cameras, which are connected in the DS.
Not all settings are listed however, the main ones are available to select. Once the
correct Setting has been made, click the “Setting” button to upload to the camera(s).
