Aukey VT-CM1 User manual

User Manual
Wireless IP Camera

- 01 -
Introduction
Hi. Thank you for purchasing the AUKEY VT-CM1 Wireless Security IP Camera. Please read this user
manual carefully and keep it in a safe place for future reference. If you need any assistance,
please contact our support team with your product model number and Amazon order number.
Package Contents
●Wireless Security IP Camera
●Micro USB Cable
●USB Adapter
● EthernetCable
●Reset Pin
●Mounting Bracket, Screws, Anchors
●User Manual
●Warranty Card
Product Diagram
Infrared LED
Camera Lens
Wireless Network Indicator
Speaker
Sensor
Wired Network Indicator
Microphone
Reset Button
Power Port
Micro SD Slot
Function Button
LAN Port

- 02 -
Specifications
Image Sensor
Night Vision Distance
Video Resolution
Angle of View
Network Protocols
Storage Space
Operating Temperature
Power Input
Dimensions
1/2.7" 2 Megapixel CMOS Image Sensor
Up to 49ft/15m
1920 x 1080 @ 30fps
(H)80°, (V)45°, (D)92°
Wired Ethernet
Wireless: 2.4Ghz (802.11b/g/n) WEP, WPA, WPA2 Encryption
TCP/IP, UDP/IP, HTTP, DHCP, RTMP, MUTP
Supports up to 64Gb Micro SD Card
14 ℉- 131 ℉(-10 ℃- 60 ℃)
DC 5V 2A
85 x 85 x 120mm / 3.4” x 3.4” x 4.7”
Connectivity
Getting Started
Insert micro SD card into the camera. Connect one end of the included Micro USB cable to the
Power Port of VT-CM1 and the other end to a USB charger. Plug into a wall socket.

- 03 -
Operating Camera via Mobile Phone
Download the App
Option 1: Download the App “MIPC” from the App Store (iOS 7.1 or later) or Google Play (Android
4.3 or later).
Option 2: Scan the QR code below that corresponds with your device's OS to download and
install the App.
Sign Up & Login
New Account: Select “Sign up” and create a Username and Password.
Existing Account: Enter Username and Password then click “Sign In”.
Forgot username or password?Press Reset Button with the included pin to reboot camera.
Connecting
Click “+” on the upper left to add device.
Option 1: Select “Manual input device ID”. Enter ID and password found at the bottom of the
VT-CM1.
Option 2: Scan the QR code at the bottom of the VT-CM1.
iOS Android
Mount the Camera
●Affix the base to a flat surface
●Secure with the included screws and anchors
●Adjust to desired angle

- 04 -
Wireless Connection
*Wireless Network Indicator will flash green 3 times every 3 seconds once successfully connected.
1. Click Wi-Fi icon 4. Wi-Fi is connecting2. Use the included pin to press
reset button for a few seconds
until you hear a voice prompt
3. Click the button "Already
heard the voice hint"
5. Wi-Fi connected 6. Change password 7. Click “Ok”
Networking mode
Your device is not online,please select the
networking mode
Smart Wi-Fi Setup
No Ethernet cable needed
Wi-Fi Prerequisites Wi-Fi connection
Please press RESET button 1 second and
then take off,after listen the voice hint,WI-
FI lights start flashing in red and green,see
the above pictures
Ethernet Setup
Ethernet cable needed for setup only Already heard the voice hint
Sound is helpful for Wi-Fi connection
please keep the phone speaker close to
the camera’s mic
Camera Router Server
177s
Wi-Fi connection QR code connection
Wi-Fi connection
Wi-Fi connection
QR code connection
Configuration success
Modify Password
Device ID :1jfiegbp3fzxq
Your password of device is too simple,
please modify password. New password
shall not be less than six characters.
Device ID :1jfiegbp3fzxq
Camera Router Server
136s
Change
OK
1、Add device
2、Modify password
3、Config Wi-Fi
Success
Success
Success
Finish

- 05 -
Wired Connection
Connect camera to your network with the included Ethernet cable.
*Wired Network Indicator will flash green 3 times every 3 seconds once successfully connected.
1. Click Ethernet icon 3. Change password
4. Select Wi-Fi network
2. Device connecting
5. Enter password
6. Click “Apply”
7. Click “Ok”
Config Wi-Fi Finish
Device ID :1jfiegbp3fzxq
Your device is still not connected to your Wi-
Fi,please configure your Wi-Fi.
1、Add device
2、Modify password
3、Config Wi-Fi
Config Wi-Fi
Device ID :1jfiegbp3fzxq
Your device is still not connected to your Wi-
Fi,please configure your Wi-Fi.
Apply
Skip
Please input Wi-Fi name
input password
Apply
Skip
123456789
.......
Success
Success
Success
Device ID :1jfiegbp3fzxq
OK
Networking mode Ethernet connection Modify password
Your device is not online,please select the
networking mode
Smart Wi-Fi Setup
No Ethernet cable needed
Ethernet Setup
Ethernet cable needed for setup only
Device ID :1jfiegbp3fzxq
Your device in not online,please check the
device’s line connection.
1.Power adaptor 2.Power slot 3.Ethernet slot
4.Ethernet
Waiting for device to be online.
Step 1:Power on your device.
Step 2: Connect one end of a network
cable to connect to your router and the
other end of the access device network
port.
Device ID :1jfiegbp3fzxq
Your password of device is too simple,
please modify password. New password
shall not be less chan six characters.
Change
1 2 3 4
1
2 3
4

- 06 -
Main Interface
Voice Control
Turn on/off the microphone and speaker
Two-way Audio
Press icon to speak from mobile device
Snapshot
Tap icon to take a photo
Live Mode Viewing
Pan: Swipe the screen from left or right
Tilt: Scroll the screen up or down
Zoom: Use two fingers to zoom in/out
Video
Tap icon to start video recording
View Content
1. Snapshot
View recorded photos
2. Record
View recorded videos
3. All
View all recorded photos and videos
4. Calendar
Filter date to find specific recordings
Device Settings
Adjust brightness, contrast, saturation, sharpness,
mode (auto, day, night), resolution
①②③④
Live Records Settings
Snapshot Record All
You don’t have record
WEONESOAY 2016-10-12 14:45:19
127KB
Live Records Settings

- 07 -
Customize Your System
Operating Camera via PC
To access camera via web browser or download for PC, please visit www.mipcm.com. Connect
camera to your network with the included Ethernet cable.
Log In & Sign Up
New Account: Select “Sign up” and create a Username and Password.
Existing Account: Enter Username and Password then click “Sign In”.
Forgot username or password?Press Reset Button with the included pin to reboot camera.
Set recording start and end time
Set alarm for motion detection
Set up Wi-Fi connection
Model, version and device ID
Check available and used storage
Live Records Settings
Settings
About
Nickname
Device admin password
Device guest passeord
Network
OSD
SD card
Storage Device
Motion and Notification
Schedule alerting
Schedule recording
Day/Time
System
NEW
User name
Password
Stay signed in
Click to download the PC client
English Sign up
Download

- 08 -
Connecting
1. Click “+” on the lower left of screen and input device ID, click "Next"
2. Enter password, click “Add”
3. Change password
4. Select Wi-Fi Network and enter password
5. Device is added successfully
*Wireless Network Indicator will flash green 3 times every 3 seconds once successfully connected.
Note: ID and password can be found on the bottom of VT-CM1.
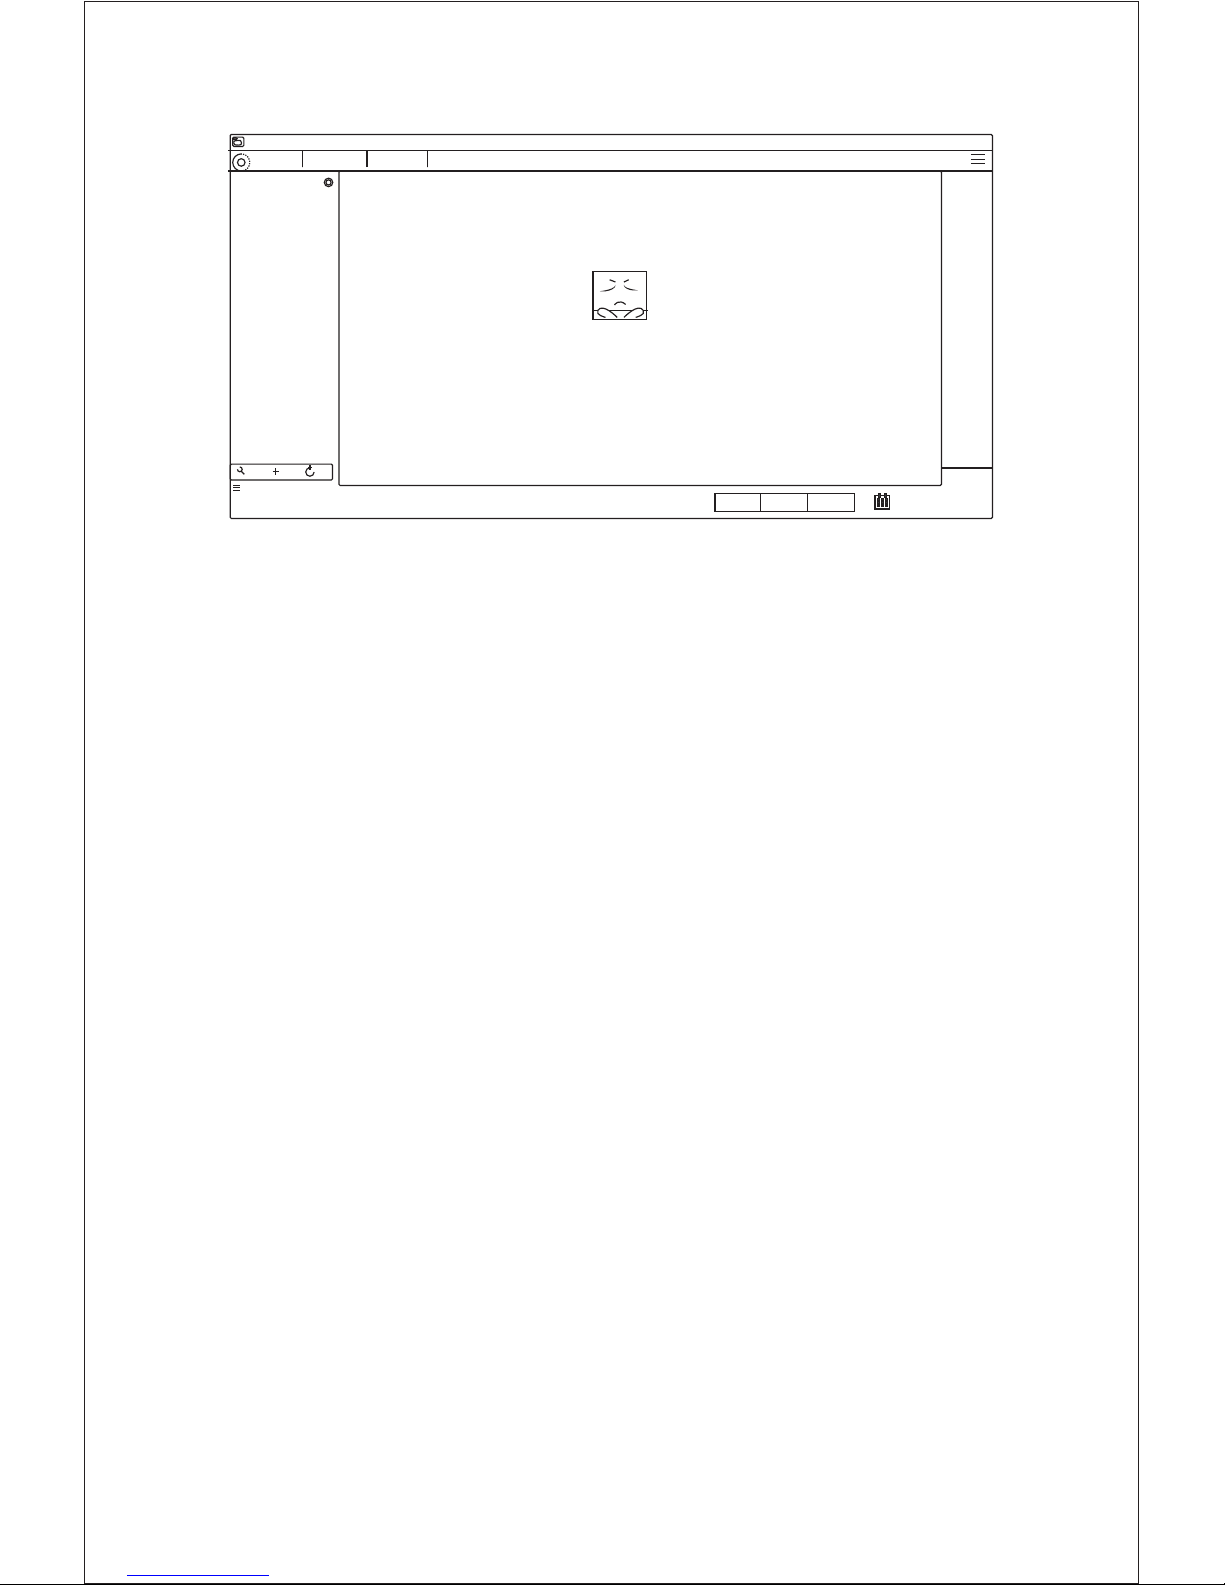
①Stop/ Play
② Video
Click icon to start video recording
③ Snapshot
Click icon to take a photo
④ Two-way Audio
Click icon to speak from PC
(Microphone required)
Main Interface
⑤ Voice Control
Turn on/off the microphone and speaker
⑥ Arrow Keys
Adjust camera direction - Left / Right / Up / Down
⑦ Device Settings
Adjust brightness, contrast, saturation,
sharpness, mode, resolution
⑧ Live Mode Viewing
⑧
⑦
①②③④⑤
●Device ID :1jfiegbp3fzxq
!
⑥
Brightness
Contrast
Saturation
Sharpness
Mode
Flip F
Auto
Power
frequency
60hz
Reset
Brightness
Contrast
Saturation
Sharpness
Mode
Flip
Power
frequency
F
Auto
Reset
60hz
MIPC
Home
Playback Records
Settings
Add device
Input device ID:
- 09 -
View Contents
①Record
View recorded videos
②Snapshot
View recorded photos
③ All
View all recorded photos and videos
④ Calendar
Filter date to find specific recordings
Product Care
● Do not attempt to disassemble or modify the product
● Keep away from liquid, extreme heat, and strong magnetic fields
● Ensure the working temperature is 14 ℉- 131 ℉(-10 ℃- 60 ℃)
● Please format your Micro SD card before you start recording
Warranty & Customer Support
For questions, assistance, support, or warranty claims, please contact us at the address below that
corresponds with your region. Please include your Amazon order number and product model
number.
*Please note, AUKEY can only provide after sale service for products purchased directly from AUKEY. If you have
purchased from a different seller, please contact them directly for service or warranty issues.
①②③④
●Device ID :1jfiegbp3fzxq
!
Snapshot Record All Day
No history
Home Playback Records Settings
MIPC
Table of contents


