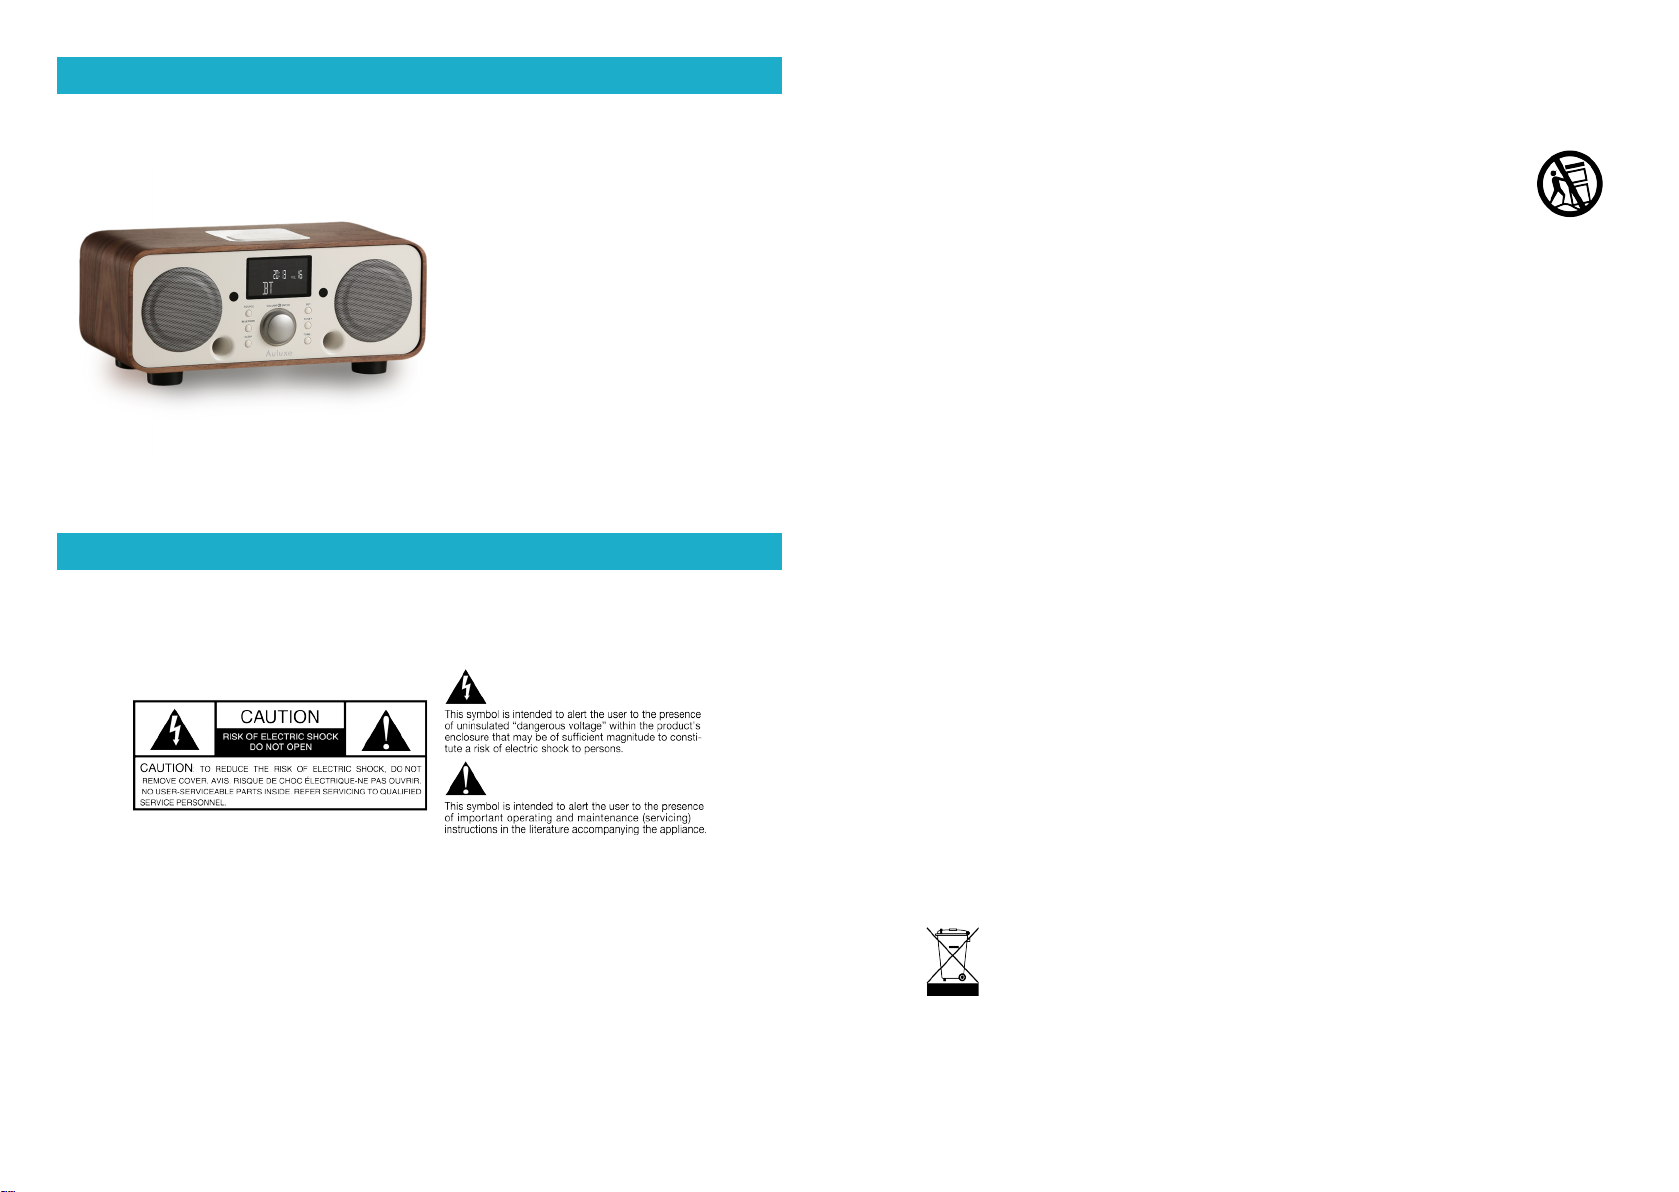
AULUXE New Breeze User manual

New Breeze
AW3021 / Wireless Music System
Instruction Manual
사용 설명서
"Made for iPod. iPhone," means that an electronic accessory has been designed to connect specifically
to iPod, iPhone and has been certified by the developer to meet Apple performance standards.
iPod. iPhone is a trademark of Apple Inc., registered in the U.S. and other countries.
“Made for iPod, iPhone”은 전자 액세서리가 Apple 성능 표준을 만족하는 iPod, iPhone 용으로 설계되었음을 의
미합니다 .iPod. iPhone 은 미국 및 기타 국가에 등록된 Apple Inc. 의 등록 상표입니다 .
Technical data
Operating Voltage :
100-240V AC / 50-60 Hz
Rated Output Power :
Total 30 Watts
Frequency Range :
40Hz-20KHz
Radio Reception Range :
FM 87.5~108.0 MHz
Dimensions (W x D x H) :
340 x 150 x 170 mm
Weight :
3.1 kg / 6.83 lb
Important Safety Instruction
01. Read these instructions.
02. Keep these instructions.
03. Heed all warnings.
04. Follow all instructions.
05. WARNING – To reduce the risk of fire or electric shock, do not expose this apparatus to rain or
moisture.
06. Clean only with a dry cloth.
07. Do not block any ventilation openings. Install in accordance with the manufacturer’s instructions.
08. Do not install near any heat sources such as radiators, heat registers, stoves, or other apparatus
(including amplifiers) that produce heat.
To assure the finest performance, please read this manual carefully. Keep it in a safe
place for future reference.
09. Do not defeat the safety purpose of the polarized or grounding-type plug. A polarized plug has
two blades with one wider than the other. A grounding type plug has two blades and a third
grounding prong. The wide blade or the third prong are provided for your safety. If the provided
plug does not fit into your outlet, consult an electrician for replacement of the obsolete outlet.
10. Protect the power cord from being walked on or pinched particularly at plugs,
convenience receptacles, and the point where they exit from the apparatus.
11. Only use attachments/accessories specified by the manufacturer.
12. Use only with the cart, stand, tripod, bracket, or table specified by the
manufacturer, or sold with the apparatus. When a cart is used, use caution when moving the
cart/apparatus combination to avoid injury from tip-over.
13. Unplug this apparatus during lightning storms or when unused for long periods of time.
14. Refer all servicing to qualified service personnel. Servicing is required when the apparatus has
been damaged in any way, such as power-supply cord or plug is damaged, liquid has been
spilled or objects have fallen into the apparatus, the apparatus has been exposed to rain or
moisture, does not operate normally, or has been dropped.
15. Operate this product only from the type of power source indicated on the back panel. For
products using an external power supply, use an exact replacement if lost or damaged. For
products operating from battery power, refer to the user manual.
16. Unplug this product from the wall outlet and refer servicing to qualified service personnel under
the following conditions:
a. When the power supply cord or plug is damaged.
b. If liquid has been spilled or objects have fallen into the product.
c. If the product has been exposed to water or rain.
d. If the product does not operate normally by following the operating instructions.
e. If the product has been dropped or damaged in any way.
f. When the product exhibits a distinctive change in performance.
17. Keep this product a safe distance away from naked flame, such as a lit candle.
18. Apparatus shall not be exposed to dripping or splashing and no objects filled with liquids, such
as vases, shall be placed on the apparatus.
19. When replacement parts are required, be sure your service technician has used replacement
parts specified by the manufacturer or have the same characteristics as the original part.
Unauthorized substitutions may result in fire, electric shock, or other hazards.
20. Upon completion of any service, ask the service technician to perform safety checks to confirm
the product is in proper operating condition.
21. The recommended operating temperature range is 5ºC to 40ºC (41ºF – 104ºF).
22. WARNING – The mains are not disconnected in the off position, but the circuits are de-powered.
23. The power cord plug serves as the disconnect device and should remain readily accessible.
This product can be recycled. Products bearing this symbol must NOT be thrown
away with normal household waste.
At the end of the product’s life, take it to a collection point designated for recycling of electrical and
electronic devices. Find out more about return and collection points through your local authority. The
European Waste Electrical and Electronic Equipment (WEEE) Directive was implemented to dramatically
reduce the amount of waste going to landfills, thereby reducing the environmental impact on the planet
and on human health. Please act responsibly by recycling used products. If this product is still usable,
consider giving it away or selling it.
1 2
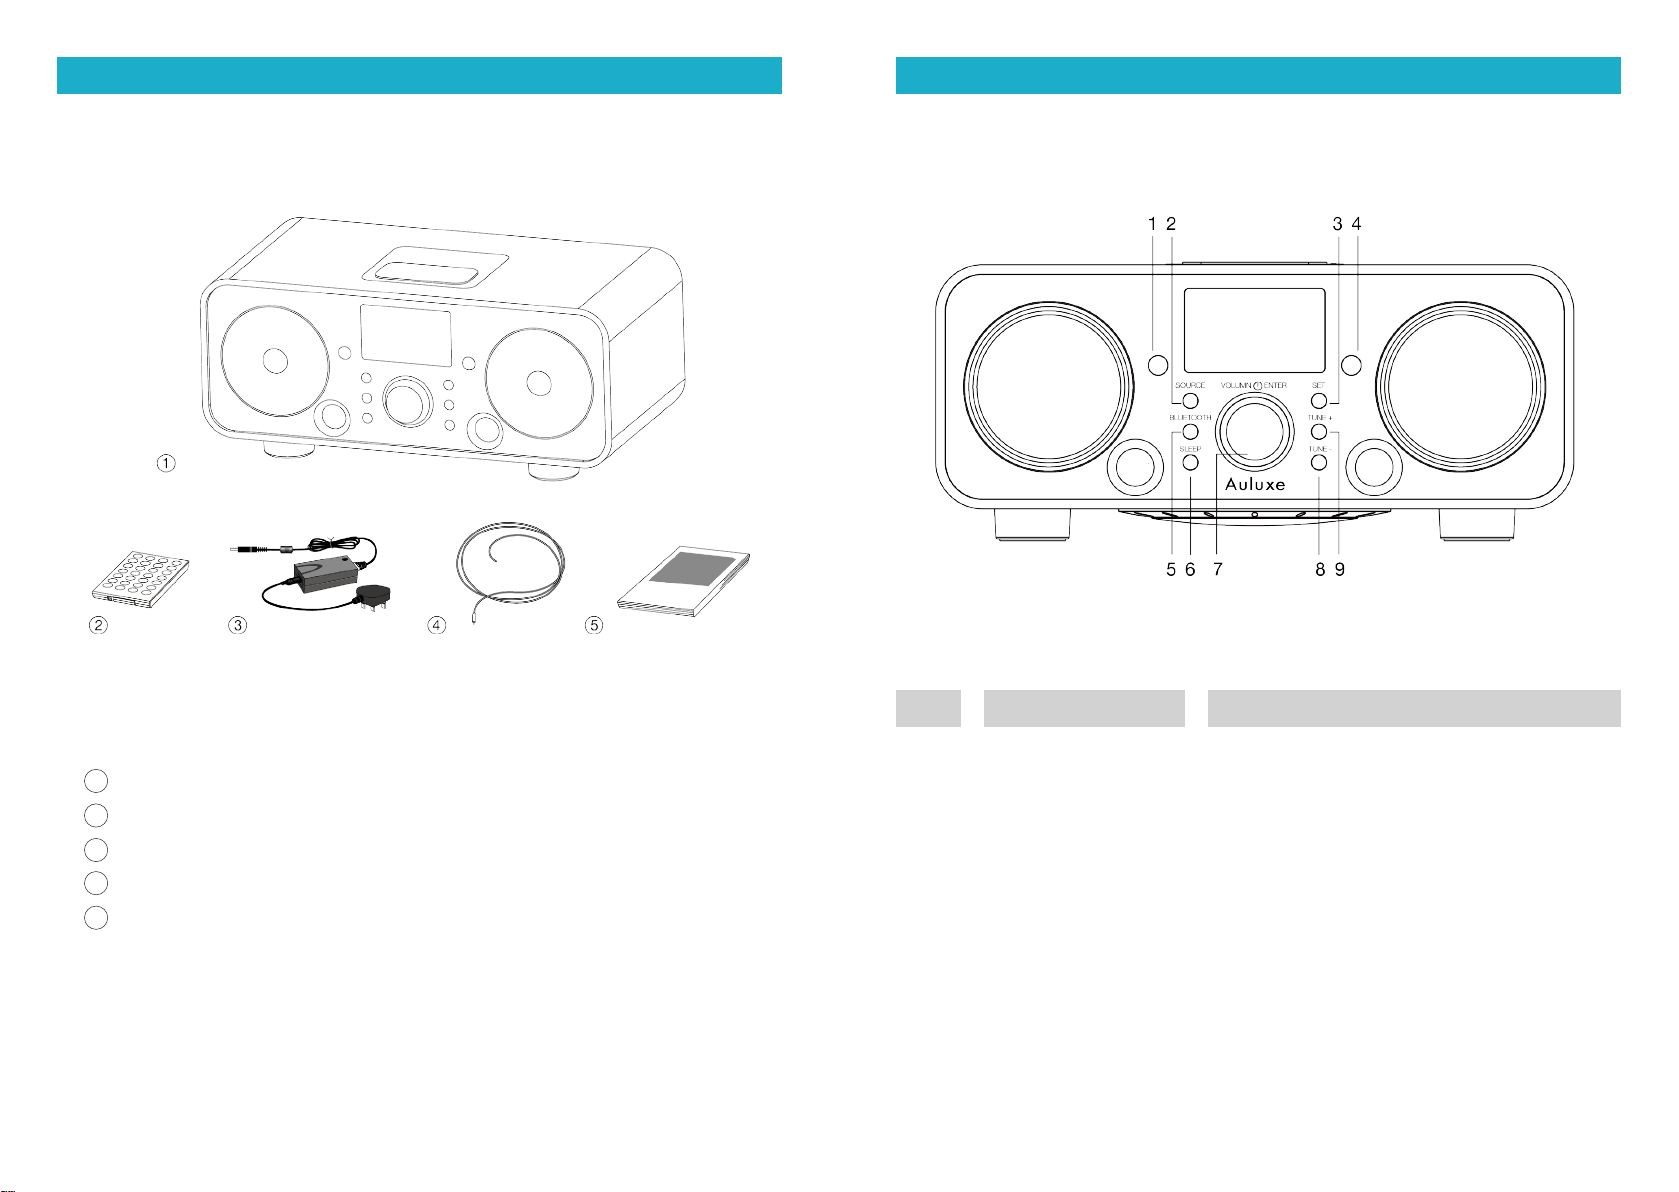
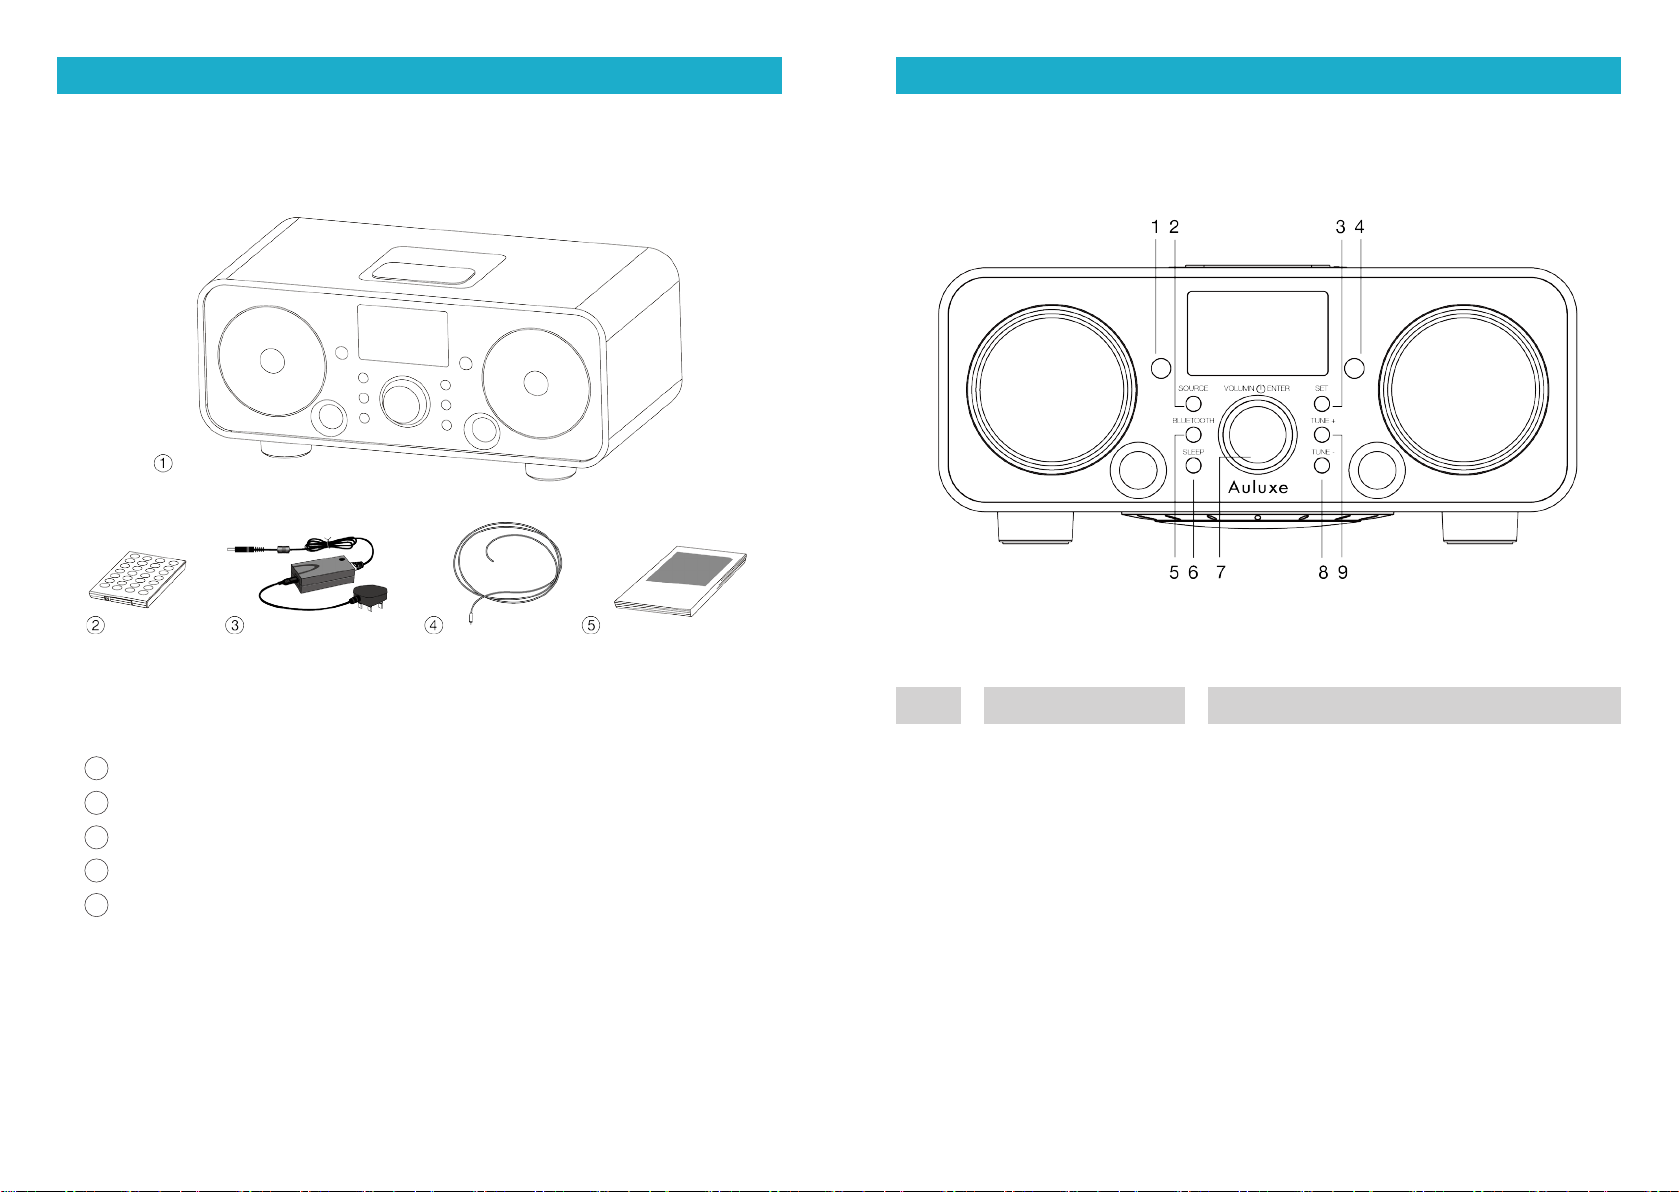
Getting to know your product
Open the box and check for the following items:
1 The host machine – New Breeze
2 One remote controller
3 One power cord and adapter
4 One FM antenna
5 One instruction manual
Item
1
2
3
4
5
6
7
8
9
Name
INFRARED RECEIVER
SOURCE
SET
MICROPHONE
BLUETOOTH
SLEEP
VOLUME /ENTER
TUNE -
TUNE +
Description
Remote infrared receiver
Audio source
Settings
Hands-Free function microphone
Bluetooth
Sleep mode
Volume knob (press and hold for 3 seconds to
switch your product on and off)
Tuning –
Tuning +
Buttons
Front
3 4

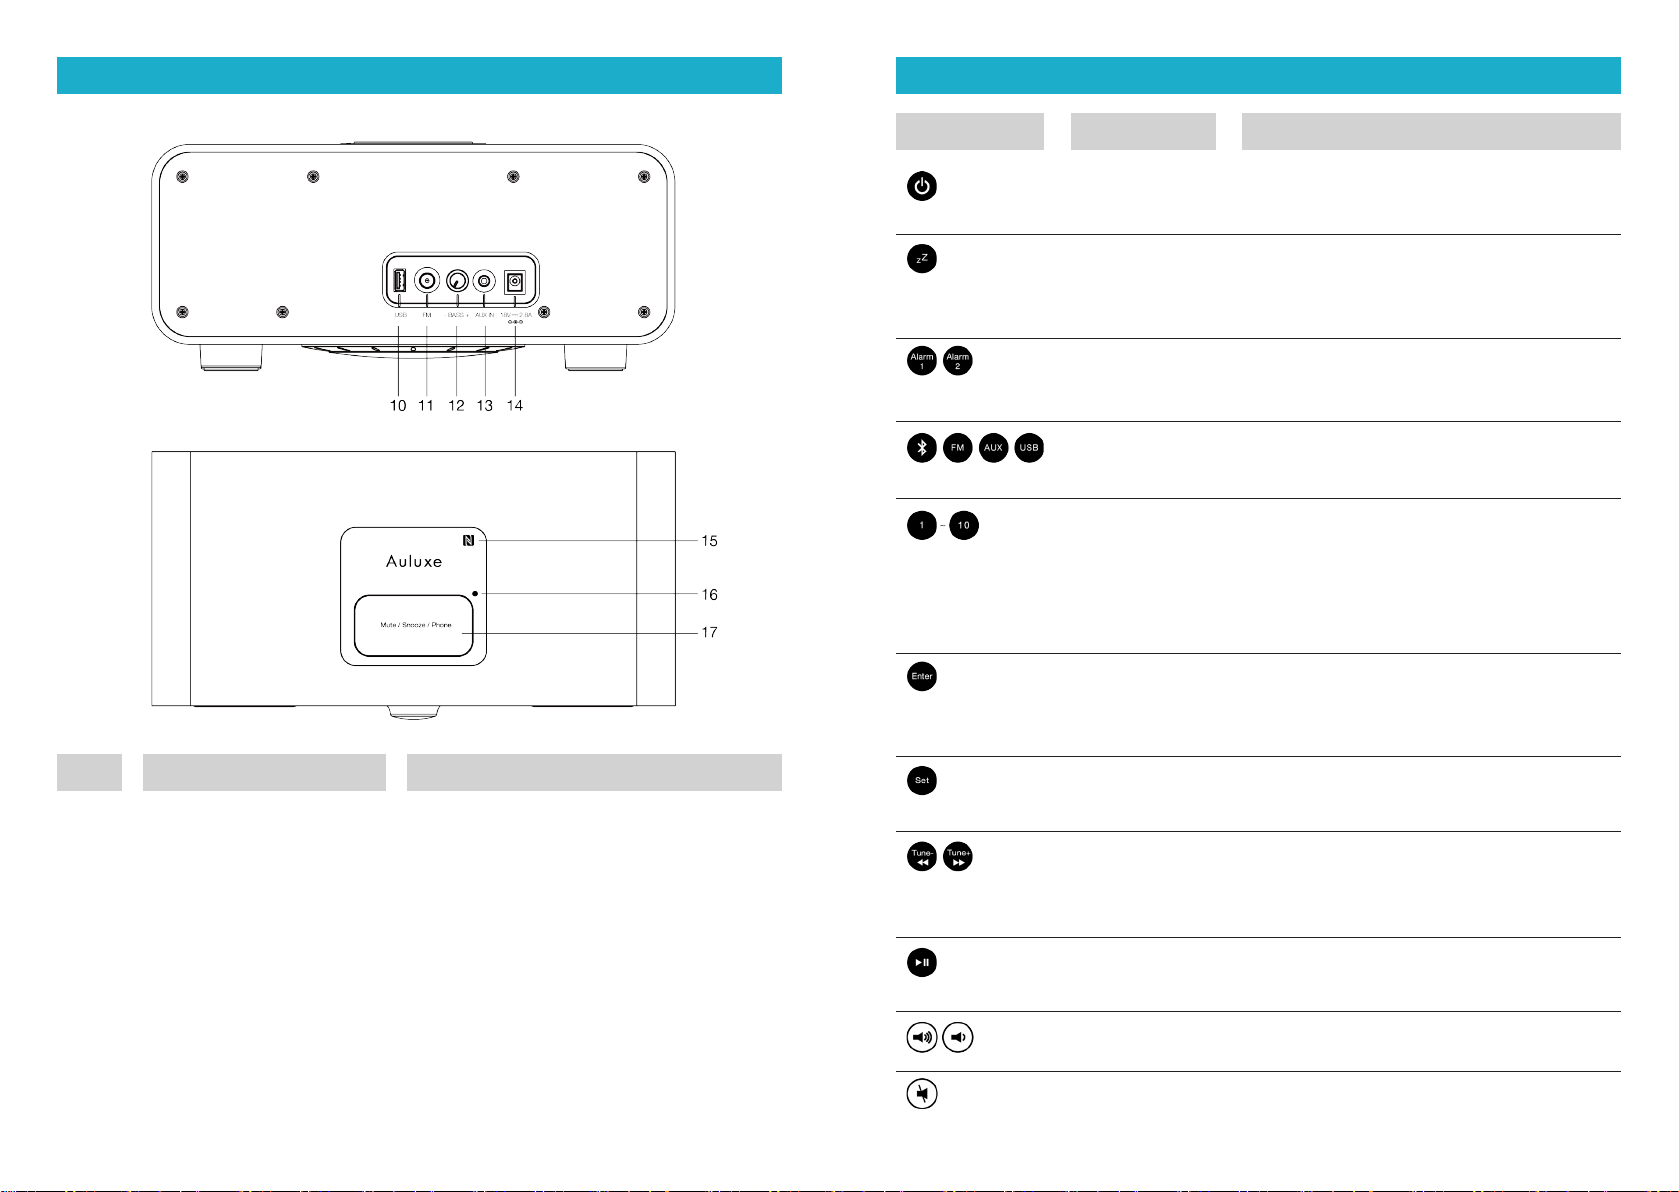
Item
10
11
12
13
14
15
16
17
Item
Name
USB
FM
- BASS +
AUX IN
DC IN
NFC
LIGHT SENSOR
MUTE / SNOOZE / PHONE
Name
Power
Sleep
Alarm 1/2
Audio source
Preset channel
Enter
Set
Search channels
Search track
Play
Volume + / -
Snooze / mute
Description
USB audio input ( for charging and
music playing )
FM antenna input
Subwoofer knob
3.5mm AUX audio input
Power input DC18V 2.8A
NFC connect sensor
Light sensor for display
Snooze switch / mute / hands-free
Description
Power on / off your New Breeze or turn off
the alarm when it sounds.
You can set the sleep timer to play music for
a preset time (15 - 90 minutes) and turn off
your product automatically.
Fast on / off the alarm and display alarm
time.
Audio sources: BLUETOOTH / FM / AUX /
USB.
Preset channel 1-10. To preset favorite
channel: Turn to desired station, press and
hold any of the number keys from 1 to 10,
the station is then saved in the number you
selected.
1. Enable snooze mode for alarm.
2. Select options in menu, play selected
tracks, or jump to any position in a song.
Press to confirm your selection in Settings
mode.
1. Tune to broadcasting channel's frequency.
2. Jump to last / next track during playback.
Press and hold to fast backward / forward
Press to play / pause music playback when
a USB drive is connected with iPod / iPhone.
To increase / decrease volume.
Enable sleep mode when alarm sounds or
mute the alarm.
Buttons Remote control buttons
Back
Top
5 6

Set up clock, alarm, sleep timer and screen brightness
Set up clock
The clock is in 24-hour time format with AM/PM displayed.
1. Press the SET key of your New Breeze or the remote controller. Note: The
CLOCK indicator will start flashing.
2. Press the volume knob of your New Breeze or the ENTER key of the remote
controller and select TIME SET. Note the minute indicator of the clock will start
flushing.
3. Press the [TUNE] +/- key of your New Breeze or the [TUNE] +/- (◄◄/►►) key
of the remote controller to set minute.
4. Press the volume knob of your New Breeze or the ENTER key of the remote
controller. Note: The hour indicator will start flushing.
5. Press the [TUNE] +/- key of your New Breeze or the [TUNE] +/-(◄◄/►►) key
of the remote controller to set hour.
6. Press the volume knob of your New Breeze or the ENTER key of the remote
controller to finish the time setup and exit the time setup mode.
Set up the time format
1. Press the SET key of your New Breeze or the remote controller. Note: The
CLOCK indicator will start flashing.
2. Press the volume knob of your New Breeze or Press the volume knob of your
New Breeze or the time Format.
3. Press the [TUNE] +/- key of your New Breeze or the [TUNE] +/- (◄◄/►►) key
of the remote controller to select 24 or 12 hour format.
4. Press the volume knob of your New Breeze or the ENTER key of the remote
controller to finish the time format setup.
Set up alarm
1. Press the SET key of your New Breeze or the remote controller. Note: The
CLOCK indicator will start flashing.
2. Press the [TUNE] +/- key of your New Breeze or the [TUNE] +/- (◄◄/►►) key
of the remote controller and the ALARM option will start flashing.
3. Press the volume knob of your New Breeze or the ENTER key of the remote
controller. Note: The ALARM 1 option will start flashing.
4. Press the volume knob of your New Breeze or the ENTER key of the remote
controller. Note: The ON option will start flashing.
5. Press the [TUNE] +/- key of your New Breeze or the [TUNE] +/- (◄◄/►►) key
of the remote controller to set desired wake up alarm.
6. Press the volume knob of your New Breeze or the ENTER key of the remote
controller. Note: The minute indicator of the clock will start flashing.
7. Press the [TUNE] +/- key of your New Breeze or the [TUNE] +/- (◄◄/►►) key
of the remote controller to set minute of the alarm.
8. Press the volume knob of your New Breeze or the ENTER key of the remote
controller. Note: The hour indicator will start flashing.
9. Press the [TUNE] +/- key of your New Breeze or the [TUNE] +/- (◄◄/►►) key
of the remote controller to set hour of the alarm.
10. Press the volume knob of your New Breeze or the ENTER key of the remote
controller to select source of the alarm from "BEEP--FM--AUX--" by pressing
the TUNE +/- key. Press ENTER key to finish the alarm setup.
11. The alarm will continue to sound for one hour after its set time.
Snooze
1. Press the SNOOZE key of your New Breeze or the remote controller to pause
the alarm for 7 minutes once it has sounded.
Set up the sleep timer
You can set the sleep timer to play music in given time span (15-90 minutes) and
turn off your product automatically. The main screen displays the sleep symbol after
the SLEEP function is enabled.
7 8

1. To set up the sleep timer : Turn on your New Breeze, press the [TUNE] +/- key
of your New Breeze or the [TUNE] +/- (◄◄/►►) key of the remote controller
to select desired time from options of 15, 30, 45, 60, 75, and 90 minutes.
2. Press the SLEEP key of your New Breeze or the remote controller and set time
of the sleep timer to "00" to disable it.
Set up brightness
1. Press the SET key of your New Breeze or the remote controller and the
DISPLAY indicator starts flashing.
2. Press the ENTER key of your New Breeze or the remote controller to set up
DISPLAY mode.
3. Press the ENTER key of your New Breeze or the remote controller. Note: The
DISPLAY BACKLITE option displays and the Au indicator will start flashing.
4. Press TUNE +/- key to select on of the options “ Au—1—2—3—4—5”. Press
ENTER to finish the DISPLAY settings.
Operation instructions
Bluetooth playback
1. Press the SOURCE key of your New Breeze or the BT key of the
remote controller to enter the BT mode.
2. Press and hold the Bluetooth(Pairing) key for 3 seconds.
3. Turn on the Bluetooth function of your phone and select the Auluxe
New Breeze device.
4. You can start playing music in your handheld device once it is paired
with your product.
NFC
The NFC function enables your Android smartphone to fast pair with
another Bluetooth device.
1. Switch on the NFC function of your Android smartphone (if available).
2. Move your smartphone above the "N" logo of your product. Note: The
logo is a removable sticker.
3. The Bluetooth pairing function starts once the NFC is established.
Play your favorite program
To get the best audio quality in FM mode, please fully stretch out the rolled
antenna line at the back of your product. DO NOT make any modification
to your antenna nor have it blocked by other object or connected to any
other antenna.
1. To switch to radio mode :
Press the SOURCE key of your New Breeze or the RADIO key of the
remote controller to enter FM mode and display broadcast frequency
at bottom of the screen.
2. To switch to desire channel :
Press the volume knob of your New Breeze once to enter the station
searching mode.
3. To adjust volume :
Press the volume knob of your New Breeze or the VOL+/- key of the
remote controller.
4. Press and hold the volume knob of your New Breeze for 3 seconds or
the POWER key of the remote controller to power off your product.
Flash drive player
Your New Breeze's USB port features a Flash drive player for you to play
music in your iPod / iPhone / iPad or charge your iPod / iPhone and
Android smartphone.
Playback music contained in other audio devices
1. To play music :
Connect one end of the 3.5mm audio wire to the audio output port of
any player and the other end to the AUX connector at the back side of
your Bluetooth and select AUX as the audio SOURCE.
2. Press the SOURCE key of your New Breeze or the AUX key of the
remote controller to enter the AUX mode.
3. To adjust volume :
Press the volume knob of your New Breeze or the VOL+/-key of the
remote controller. You may need to adjust volume of your player.
4. Press and hold the volume knob of your New Breeze for 3 seconds or
the POWER key of the remote controller to power off your product.
9 10

규격
동작 전압 :
100-240V AC / 50-60 Hz
정격 출력 :
Total 30 Watts
주파수 범위 :
40Hz-20KHz
라디오 수신 범위 :
FM 87.5~108.0 MHz
규격 (W x D x H) :
340 x 150 x 170 mm
중량 :
3.1 kg / 6.83 lb
중요 안전 수칙
1. 본 설명서를 읽어 보세요 .
2. 본 설명서를 보관하세요 .
3. 모든 경고문에 유의하세요 .
4. 모든 지침을 따르세요 .
5. 경고 – 화재 및 감전의 위험을 줄이기 위하여 본 기구를 습기에 노출시키지 마세요 .
6. 마른 헝겊으로만 닦아주세요 .
7. 통풍구를 막지 마세요 . 제조업체의 설명서에 따라 설치하세요 .
8. 라디에이터 , 난방 기구 , 스토브 또는 기타 기구와 같은 열을 발생시키는 열원 근처에
설치하지 마세요 ( 증폭기 포함 ).
최고의 성능을 위해 본 설명서를 주의 깊게 읽어주십시오 . 상시 사용할 수 있도록 안전한
장소에 보관하십시오 .
9. 안전을 위해 만들어진 유극 또는 접지형 플러그를 훼손하지 마세요 . 유극 플러그는 서로 다른
폭을 가진 두 개의 날을 가지고 있습니다 . 접지형 플러그는 두 개의 날과 한 개의 접지 단자가 있
습니다 . 넓은 날과 세 번째 접지 단자는 안전을 위해 제공된 것입니다 . 만약 제공된 플러그가 고
객님의 콘센트와 맞지 않을 경우 전기기술자와 상담하여 구식 콘센트를 교체하세요 .
10. 특히 기구에서 나오는 부분의 플러그나 콘센트 부분이 밟히거나 끼지
않도록 보호하세요 .
11. 제조업체가 명시한 부속품 / 액세서리만 사용하세요 .
12. 제조업체가 명시한 카트 , 스탠드 , 삼각대 , 브라켓 또는 테이블만 사용하고 기구와 함께 판매
될 수 있습니다 . 카트 사용시 카트 / 장비가 함께 넘어질 수 있으므로 부상을 입지 않도록 주의해
주세요 .
13. 번개가 치거나 장기간 미사용시 장치의 플러그를 빼주세요 .
14. 모든 서비스는 인증된 서비스 직원에게 의뢰해주세요 . 전원코드 또는 플러그가 손상되거나 액체
또는 물체가 장치에 떨어지거나 비 또는 습기에 노출로 인해 장치가 손상되어 정상 작동되지 않는
경우 서비스가 필요합니다 .
15. 뒷판에 표시된 전력원에 해당하는 유형에서만 제품을 작동하세요 . 외부 전원 공급 장치를 사용하
는 제품의 경우 분실되거나 손상된 경우 정확한 교체품을 사용해 주세요 .
배터리 전원을 통한 작동은 사용 설명서를 참조하세요 .
16. 다음 조건에서는 벽면 콘센트에서 본 제품의 플러그를 뽑은 후 인증된 서비스 직원에게 서비스를
의뢰해 주세요 :
a. 전원 코드 또는 플러그가 손상된 경우 .
b. 액체가 쏟아졌거나 물체가 제품에 떨어졌을 때 .
c. 제품이 물 또는 비에 노출되었을 때 .
d. 제품이 작동 설명서에 따라 정상적으로 작동하지 않는 경우 .
e. 제품이 떨어지거나 손상을 입은 경우 .
f. 제품이 성능에 큰 변화를 보이는 경우 .
17. 본 제품은 촛불과 같은 화기에서 멀리 떨어진 안전한 곳에 두세요 .
18. 기구는 튀거나 떨어져서는 안되며 액체로 채워진 화분과 같은 물건을 기구 위에 올려 놓지 않아야
합니다 .
19. 부품 교체 시 서비스 기술자가 제조업체가 지정한 교체품 또는 원래 부품과 동일한 특성을 가지고
있는 부품을 사용하는지 확인하세요 . 승인되지 않은 교체는 화재 , 감전 , 기타 위험을 초래할 수
있습니다 .
20. 서비스 완료 시 서비스 기술자에게 제품이 올바른 작동 상태를 확인하세요 .
21. 권장 작동 온도 범위는 5℃ - 40℃ (41 ℉ - 104 ℉ ) 입니다 .
22. 경고 – 주요장치는 꺼짐 상태에서도 꺼지지 않지만 회로는 꺼집니다 .
23. 전원 코드 플러그는 차단 장치 역할을 하므로 접근하기 쉽게 유지해야 합니다 .
본 제품은 재활용할 수 있습니다 . 이 기호가 부착된 제품은 일반 가정 쓰레기와 함께
버릴 수 없습니다 .
제품의수명이끝나면 전기 전자 기기의 재활용을 위하여 지정된 취급소로 가져가십시오 . 반환 및 취급소에 대한 자
세한 사항은 지방당국을 통해 알아보시기 바랍니다 . 유럽 전자전기장비폐기 (WEEE) 지침은 토양 폐기물의 양을
획기적으로 감소시킴으로써 지구 및 인체 건강에 영향을 미치는 환경 영향을 줄이기 위해 시행되었습니다 . 중고
제품의 재활용을 통해 책임감 있게 행동하십시오 . 아직 사용할 수 있다면 기부하거나 판매를 고려해 보십시오 .
11 12
제품 알아보기
상자를 열어 다음 항목이 있는지 확인하세요 .
1 호스트 머신 - New Breeze
2 리모컨 1 개
3 전원 코드 및 어댑터 1 개
4 FM 안테나 1 개
5 사용 설명서 1 개
항목
1
2
3
4
5
6
7
8
9
이름
INFRARED RECEIVER
SOURCE
SET
MICROPHONE
BLUETOOTH
SLEEP
VOLUME /ENTER
TUNE -
TUNE +
설 명
원격 적외선 수신기
오디오 음원
설정
핸즈프리 기능 마이크
블루투스
절전 모드
음량 스위치 (3 초 동안 길게 눌러 제품을 켜고 끕
니다 )
튜닝 -
튜닝 +
버튼
앞면
13 14
항목
10
11
12
13
14
15
16
17
항목
이름
USB
FM
- BASS +
AUX IN
DC IN
NFC
LIGHT SENSOR
MUTE / SNOOZE / PHONE
이름
Power
Sleep
Alarm 1/2
Audio source
Preset channel
Enter
Set
Search channels
Search track
Play
Volume + / -
Snooze / mute
설 명
USB 오디오 입력 단자 ( 충전 및 재생용 )
FM 안테나 입력 단자
서브우퍼 스위치
3.5mm AUX 오디오 입력단자
정격 전압 . DC18V---2.8A
NFC 연결 센서
라이트 센서
스누즈 스위치 / 무음 / 핸즈프리
설 명
New Breeze 전원 On/Off 또는 알람 끄기 .
음악 재생 시간을 설정할 수 있으며 자동으로
꺼집니다 . (15 분 -90 분 )
빠른 알람 종료 및 알람 시간 보기 .
오디오 음원 : 블루투스 / FM / AUX / USB.
프리셋 채널 1-10. 프리셋 채널 설정 : 원하는
주파수에서 1-10 중 원하는 번호를 길게 누르
면 선택한 번호로 주파수가 저장됩니다 .
1. 알람 시 스누즈 모드 활성화 .
2. 메뉴의 옵션 선택 / 선택 트랙 재생 / 노래
이동 .
설정 모드에서 선택 확인 시 누릅니다 .
1. 방송 채널 주파수 조정
2. 재생 중 마지막 / 다음 트랙 이동 . 누르고
있으면 감기 / 되감기
누르면 재생 /iPod, iPhone USB 연결시 음악
일시정지
음량 증가 감소
알람 시 절전 모드 활성화 또는 알람 끄기 .
버튼 리모컨 버튼
후면
윗면
15 16

시간 , 알람 , 수면 타이머 , 화면 밝기 설정
시간 설정
시계는 AM/PM 이 표시된 24 시간 형식입니다 .
1. New Breeze 또는 리모컨의 SET 키를 누르세요 . 참고 : CLOCK 표시가 깜빡입니다 .
2. New Breeze 의 볼륨 스위치를 누르거나 리모컨의 ENTER 버튼 누르고 TIME SET 을
선택하세요 . 시계의 분 표시기가 깜빡이기 시작합니다 .
3. New Breeze 의 [TUNE] +/- 버튼을 누르거나 리모컨의 [TUNE] +/- 버튼을
(◄◄/►►) 눌러 분을 설정합니다 .
4. New Breeze 의 볼륨 손잡이를 누르거나 리모컨의 ENTER 버튼을 누르세요 .
주의 : 시간 표시기가 깜빡이기 시작합니다 .
5. New Breeze 의 [TUNE] +/- 버튼을 누르거나 리모컨에 [TUNE] +/- (◄◄/►►)
버튼을 눌러 시간을 설정합니다 .
6. New Breeze 의 볼륨 손잡이를 누르거나 리모컨에 ENTER 버튼을 눌러 시간 설정을
끝내고 시간 설정 모드를 종료합니다 .
시간 형식 설정
1. New Breeze 또는 리모컨의 SET 버튼을 누르시오 .
주의 : CLOCK 표시가 깜빡이기 시작합니다 .
2. New Breeze 의 볼륨 스위치를 누르거나 리모컨의 ENTER 버튼을 눌러 시간 형식을
설정합니다 .
3. New Breeze 의 [TUNE] +/- 버튼을 누르거나 리모컨의 [TUNE] +/- ( ◄◄/►►)
버튼을 눌러 24 또는 12 시간 형식을 선택합니다 .
4. New Breeze 음량 스위치를 누르거나 리모컨의 ENTER 버튼을 눌러 시간 형식 설정을
끝내세요 .
알람 설정
1. New Breeze 또는 리모컨의 SET 버튼을 누르세요 . 주의 : CLOCK 표시가 깜빡이기
시작합니다 .
2. New Breeze 의 [TUNE] +/- 버튼을 누르거나 리모컨의 [TUNE] +/- (◄◄/►►)
버튼을 누르세요 . ALARM 옵션이 깜빡이기 시작합니다 .
3. New Breeze 음량 손잡이 또는 리모컨의 ENTER 버튼을 누르세요 .
주의 : ALARM1 옵션이 깜빡이기 시작합니다 .
4. New Breeze 음량 손잡이 또는 리모컨의 ENTER 버튼을 누르세요 .
주의 : ON 옵션이 깜빡이기 시작합니다 .
5. New Breeze 의 [TUNE] +/- 버튼 또는 리모컨의 [TUNE] +/- (◄◄/►►) 버튼을
눌러 원하는 알람을 설정하세요 .
6. New Breeze 의 음량 손잡이 또는 리모컨의 ENTER 버튼을 누르시오 .
주의 : 시간의 분 표시가 깜빡이기 시작합니다 .
7. New Breeze 의 [TUNE] +/- 버튼 또는 리모컨의 [TUNE] +/- (◄◄/►►) 버튼을
눌러 알람의 분을 설정하세요 .
8. New Breeze 의 음량 스위치 또는 리모컨의 ENTER 버튼을 누르세요 .
주의 : 시간 표시가 깜빡이기 시작합니다 .
9. New Breeze 의 [TUNE] +/- 버튼 또는 리모컨의 [TUNE] +/- (◄◄/►►) 버튼을
눌러 원하는 알람 시간을 설정하세요 .
10.New Breeze 의 음량 손잡이 또는 리모컨의 ENTER 버튼을 눌러 TUNE +/- 버튼으로
"BEEP--FM--AUX--" 로부터 알람음을 선택 하세요 . ENTER 버튼을 눌러 알람 설정
을 종료하세요 .
11. 설정 시간 이후 한 시간 동안 알람이 울립니다 .
스누즈
New Breeze 또는 리모컨의 SNOOZE 버튼을 눌러 한 번 알람이 울리면 7 분 동안
정지하도록 하세요 .
절전 타이머 설정
주어진 시간에 (15 분 ~90 분 ) 음악을 재생하고 제품의 자동으로 끄기 위해 절전타이머를
설정할 수 있습니다 . 메인 화면은 SLEEP 기능이 활성화 된 후 절전 기호가 표시됩니다 .
17 18

작동 설명서
블루투스 재생
1. New Breeze 의 SOURCE 버튼 또는 리모컨의 BT 버튼을 눌러 BT 모드로
들어갑니다 .
2. Press and hold the 블루투스 ( 페어링 ) 버튼을 3 초동안 누르고 있습니다 .
3. 모바일의 블루투스 기능을 켜고 Auluxe New Breeze 장치를 선택합니다 .
4. 이 제품과 연결된 장치의 음악을 재생할 수 있습니다 .
NFC
NFC 기능은 안드로이드 스마트 폰과 다른 블루투스 장비를 빠르게 페어링
해 줍니다 .
1. 안드로이드 스마트폰의 NFC 기능을 켜세요 .
2. 제품의 ‘N’ 로고 위로 이동시키세요 .
주의 : 그 로고는 제거할 수 있는 스티커 입니다 .
3. NFC 가 설정되면 블루투스 페어링 기능은 시작됩니다 .
라디오 프로그램 재생
FM 모드의 최상 오디오 품질을 위해 제품 뒤 쪽에 말린 안테나를 완전히 펼치세
요 . 안테나를 개조하거나 다른 물체로 막거나 다른 안테나와 연결하지 마세요 .
1. 라디오 모드 켜기 :
New Breeze 의 SOURCE 버튼 또는 리모컨의 RADIO 버튼을 눌러 FM 모드로
들어갑니다 . 디스플레이에는 방송 주파수가 아래 표시됩니다 .
2. 원하는 채널 변경 :
New Breeze 의 음량 손잡이를 눌러 방송 검색 모드로 들어갑니다 .
3. 음량 조절 :
New Breeze 의 음량 손잡이 또는 리모컨의 VOL+/- 버튼을 누르세요 .
4. New Breeze 의 음량 손잡이를 3 초간 누르거나 리모컨의 POWER 버튼을
눌러 제품 전원을 끕니다 .
플래시 드라이버 플레이어
New Breeze 의 USB 포트로 iPhone / iPad 의 음악을 재생할 수 있고 iPod /
iPhone 과 안드로이드 스마트 폰을 충전할 수 있습니다 .
다른 오디오 장치로 재생
1. 3.5mm 오디오 선 한 끝을 오디오 출력 포트에 연결하고 다른 한 끝을
블루투스 뒤 AUX 연결 부에 연결하세요 . 오디오 SOURCE 로 AUX 를
선택하세요 .
2. New Breeze 의 SOURCE 버튼 또는 리모컨에 AUX 버튼을 눌러 AUX 모드로
들어가세요 .
3. 음량 조절 :
New Breeze 의 음량 손잡이 또는 리모컨의 VOL+/- 버튼을 누르세요 .
플레이어의 음량을 조절 할 수도 있습니다 .
4. New Breeze 의 음량 손잡이를 3 초간 누르거나 리모컨의 POWER 버튼을
눌러 제품의 전원을 종료합니다 .
19 20
1. 절전 타이머 설정 : New Breeze 를 켜고 , New Breeze 의 [TUNE] +/- 버튼 또는
리모컨의 [TUNE] +/- (◄◄/►►) 버튼을 눌러 15, 30, 45, 60, 75, 90 분옵션으로
원하는 시간을 설정합니다 .
2. New Breeze 또는 리모컨의 SLEEP 버튼을 눌러 절전 타이머 시간을 끄기 위해 “00”
으로 설정합니다 .
밝기 조정
1. New Breeze 또는 리모컨의 SET 버튼을 누르세요 . DISPLAY 표시가 깜빡입니다 .
2. New Breeze 또는 리모컨의 ENTER 버튼을 눌러 DISPLAY 모드로 설정합니다 .
3. New Breeze 또는 리모컨의 ENTER 버튼을 누르세요 .
주의 : DISPLAY BACKLITE 옵션이 표시되고 Au 표시가 깜빡이기 시작합니다 .
4. TUNE +/- 버튼을 눌러 "Au--1--2--3--4—5" 옵션 중 하나를 선택합니다 .
ENTER 버튼을 눌러 DISPLAY 설정을 종료합니다 .

This manual may not be reproduced, distributed, modified or
posted to Websites without the express written permission of
Auluxe Corporation.
Designed and engineered by Auluxe
Printed in China
© 2017 Auluxe Corporation All Right Reserved.
Retailer store stamp for guarantee certificate.
구입하신 영수증과 정품인증 스티커를 반드시 여기에 부착하여 주십시오 .
This manual suits for next models
1
Table of contents
Other AULUXE Stereo System manuals


