GENERAL SPECIFICATIONS
ON/OFF SWITCH
There is a two-position switch (“1”and “0”) on your water heater. This
switch is used for energizing or cutting the power from the system. When
the switch is at “1” position, it means that the system is energized and
when it is at “0” position, system is o.
LEVEL BUTTONS
There are 3 level buttons at the front side of your water heater (“1”, “2” and
“3”). These buttons can operate the resistor of the water heater in three
dierent power levels (3, 4 and 7 kW).
TEMPERATURE AND LEVEL DISPLAY
The upper two-digit display demonstrates the outlet water temperature
and the lower one demonstrated the power level.
CONTROL UNIT
It automatically adjusts the power levels of your water heater in
accordance with preferences. It precisely adjusts the ow of water and
operates the heater. Also, it measures and demonstrates the outlet water
temperature.
MAGNETIC FLOW SENSOR
Your water heater has a magnetic sensor which precisely detects the ow
of water
SAFETY THERMOSTAT
It cuts electricity supply when the outlet water temperature is above 70
°C. The heater starts to operate again when this temperature drops below
60 °C.
SAFETY THERMOSTAT WITH RESET FUNCTION
This is the second safety measure for cases where the water is over-heat-
ed. It cuts electricity supply t the heater when the safety thermostat
cannot function or in case of a failure.
CAUTION! When the safety thermostat with reset function operates,
your water heater will not start again. In this situation, please contact
service personnel without intervening.
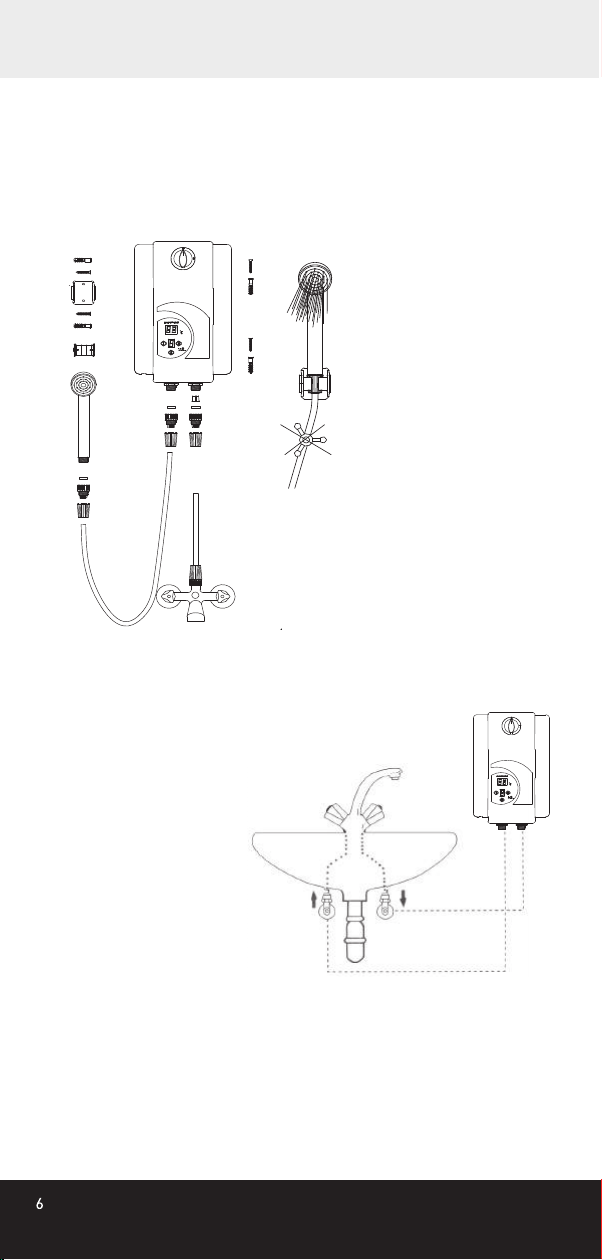
OPERATION
1 – Turn the on/o switch to “1” position (stand-by). You appliance will be
ready for operation by giving an opening signal and demonstrating an
animation in the temperature display moving in clockwise direction
(Figure 1).
2-Open the hydrant (Figure 2). The temperature display of your water
heater will operate and show the momentary inlet water temperature.
3-Adjust the ow rate of the water using the faucet.
4-In accordance with the season and your liking, adjust the heater power
level to 1, 2 or 3 using the level buttons (Figure 3).