Auralic ALTAIR G1 User manual

Copyright © 2008-2019 AURALIC LIMITED (AURALiC) and licensors.
All rights reserved. No part of this publication including but not limited to,
graphics, text, code or interactive features, may be reproduced without the
express written permission from AURALiC or its licensors. The content of this
manual is provided for information use only, is subject to change without notice,
and should not be construed as a commitment by AURALiC. AURALiC assumes
no responsibility or liability for any errors or inaccuracies that may appear in this
manual. AURALiC, inspire the music, Lightning Streaming, Purer-Power,
ORFEO and their graphic logos are trademarks or registered trademarks of
AURALiC in the United States and/or other countries. AURALiC's trademarks
may not be used in connection with any product or service that is not
AURALiC's, in any manner that is likely to cause confusion among customers or
in any manner that disparages or discredits AURALiC. All other trademarks not
owned by AURALiC that appear on this site are the property of their respective
1

owners, who may or may not be affiliated with, connected to, or sponsored by
AURALiC.!
2

Table of Contents
Declaration of Conformity 5.................................................................................
Warranty 7..............................................................................................................
Unpacking 7...........................................................................................................
Placement and Cabling 8.....................................................................................
Placement 8...................................................................................................................
Check Your AC Mains Voltage 8..................................................................................
Cabling 9.......................................................................................................................
Front Panel 11.......................................................................................................
Using your ALTAIR G1 12.....................................................................................
Power Up and Sleep 12................................................................................................
Welcome Screen 12......................................................................................................
Home Menu 13..............................................................................................................
Playing 14......................................................................................................................
Queue 15.......................................................................................................................
Input 16..........................................................................................................................
System 17......................................................................................................................
Streamer 19...................................................................................................................
Processor 20.................................................................................................................
Library 21......................................................................................................................
Lightning Web Control Interface 26....................................................................
Lightning DS for iOS 27........................................................................................
Use with Other Software 27.................................................................................
Use ALTAIR G1 as USB DAC 28...........................................................................
Use ALTAIR G1 as a Streamer 28........................................................................
Network Setup 28..................................................................................................
Connecting to your network via Ethernet 29.............................................................
Connecting to your network via Wi-Fi 31...................................................................
Getting Started with Lightning DS 35.........................................................................
Smart-IR Remote Control 38................................................................................
Maintenance & Service 39....................................................................................
Contact 39..............................................................................................................
Specifications 41...................................................................................................
AURALiC Product Registration Form 42............................................................
3

IMPORTANT SAFETY INSTRUCTIONS
●All safety and operating instructions must be read before actual
operation, and retained for future reference.
●This product should be connected only to the type of power source
indicated on the back of the unit. If you are not sure of the type of your
mains power supply, please consult your dealer or local power company.
●To completely disconnect this product from the AC mains, disconnect the
power supply cord plug from the AC receptacle.
●Do not use the product near water, i.e. near a bathtub, kitchen sink,
laundry tub, in a wet basement, near a swimming pool etc.
●Do not install the product near heat sources such as radiators, heat
registers, stoves, or other apparatus that produce heat. See “Placement
and Cabling” on page 7.
●Do not let objects or liquids fall into the product. Do not expose the
product to dripping or splashing. Do not place a vessel containing liquid
on top of the product.
●Clean only with a soft, dry cloth.
●Do not attempt to service this product yourself. Opening or removing
covers may expose you to dangerous voltage. Refer all servicing to
authorized service personnel. See “Service” on page 34.
4

Declaration of Conformity
"
!
AURALiC (Beijing) Technology Co., Ltd.
Room 101, Building No.17, 1A Chaoqian Road
Beijing, 102200, China
declares under our sole responsibility as the manufacturer of the product:"
ALTAIR G1
Digital Audio Streamer
"
is compliant with Directive 2011/65/EC (RoHS) Restriction on Hazardous Substances,
and is in conformity with the provisions of the following EC Directive, including all amendments,
and with national legislation implementing these directives:
2014/35/EU Low Voltage Directive (LVD)
2014/30/EU Electromagnetic Compatibility Directive (EMC)
2014/53/EU Radio and Telecommunication Terminal Equipment (R&TTE) Directive
2012/19/EU Waste of Electrical and Electronic Equipment Directive
The following harmonized standards were applied:
Health and safety of the
user:
EN 60065:2002+A1:2006+A11:2008+A2:2010
+A12:2011
Electromagnetic
compatibility:
EN301489-1 V1.9.2(2011-09)
EN301489-17 V2.2.1(2012-09)
EN55013:2013
EN55020:2007+A11:2011
EN61000-3-2:2014 Class A
EN61000-3-3:2013
EN61000-4-2:2009
EN61000-4-3:2006+A1:2008+A2:2010
EN61000-4-4:2012
EN61000-4-5:2014
EN61000-4-6:2014
EN61000-4-11:2004
Effective use of the spectrum
allocated:
EN300328-V1.9.1(2015-02)
EN301893-V1.8.1(2015-03)
EN300440-1 V.1.6.1(2010-04)
EN300440-2 V1.4.1(2010-08)
5

This product that carries the CE Mark, which was first affixed in 2019.
6

Warranty
AURALiC offers a 90-day factory warranty from the date of purchase that can be
extended to a 3-Year limited warranty. This non-transferable warranty is
available to the original owner by completing the product registration form
including the original sales information from your authorized AURALiC dealer
within 30 days from purchase. You can either activate the device using Lightning
DS software with your AURALiC account or fill out the ‘AURALiC Product
Registration Form’ on page 37 and send it back to the address provided to
finish the registration.
Warranty coverage includes all parts and labor. Warranty is void if damage is
due to abuse, neglect or unauthorized modifications. Costs associated with the
return of this product are the sole responsibility of the owner. All repair work
must be done by AURALiC or by an authorized AURALiC repair agency. Work
done by unauthorized persons will void any and all warranty coverage.
AURALiC products are uniquely identified with a serial number (S/N) printed on
the label attached under the unit. This number is required to validate your
warranty. Please provide your serial number if service is required.
Before the product can be returned for service, an RMA (Return Material
Authorization) number must be issued by AURALiC. Contact your dealer or
AURALiC for further information. Units without an RMA number will not be
accepted for service.
Unpacking
Please check that the following items are in the box:
●ALTAIR G1
●AC Power Cord
●USB Cable
●User’s Guide
●Wi-Fi Antennas (2 pieces)
Carefully unpack each piece; if there is any damage, or if anything is missing,
please contact your dealer or AURALiC.
7

Please be sure to retain the original shipping carton and all packing materials as
they are specially designed to protect the unit during transportation and
shipping.
Placement and Cabling
Placement
ALTAIR G1 should be placed on a solid and stable surface with good ventilation.
Do not install this product near any heat sources such as radiators or other
products (such as amplifiers) that produce heat. Place the product so that its
location or position does not interfere with its proper ventilation. For example, it
should not be situated on a bed, sofa, rug, or similar surface that may block the
ventilation openings, or placed in a built-in installation such as a bookcase or
cabinet that may impede the flow of air through the ventilation openings.
Check Your AC Mains Voltage
ALTAIR G1 is shipped with its mains voltage preset for operation in the
destination country. The mains voltage setting is written on the back of the unit,
besides the power cord socket. Mains voltage setting is not intended to be
changed by the user. If it needs to be changed, contact your dealer or
AURALiC.
The power cord has a three-wire grounding type plug (a plug having a third pin
for grounding). It will only fit into a grounded power outlet. If you are unable to
ONLY SHIP THIS PRODUCT IN ITS ORIGINAL PACKAGING!
Ventilation Requirement
ALTAIR G1 dissipates up to 50 Watts of power during normal operation. It
should be installed in a space with at least one inch of clearance above,
behind and on both sides of its enclosure to provide adequate ventilation.
Avoid placing it directly above other equipment that produces heat.
8

insert the plug fully into the outlet, contact your dealer or AURALiC. Do not
defeat the safety purpose of the grounded plug.
Cabling
The I/O ports on the rear of ALTAIR G1:
•AES, COAX and TOS
The maximum sampling rate supported by AES/EBU, Coaxial and Toslink
inputs is 24Bit/192KHz. All input data will be buffered by the Lightning Tesla
platform to removing jitter and forwarding the signal to the DAC circuit with
its own Femto clock to regulate timing.
•USB HS
The maximum sampling rates supported by USB HS are 32Bit/384KHz and
DSD512. USB 2.0 HS uses asynchronous transmission. All PCM data will be
buffered by the Lightning Tesla platform, removing jitter and forwarding the
signal to the DAC circuit with its own Femto clock to regulate timing. DSD
data will be buffered by separate circuit, removing jitter and forwarding the
signal to the DAC circuit with its own Femto clock to regulate timing.
•HDD
USB host port for connecting USB removable storage. When USB storage is
present, Lightning Server will read the content on the USB storage and scan
the music files automatically. The partition formats supported are FAT32,
exFAT, NTFS, EXT-2/3/4 and limited support of Apple HFS+. The maximum
ALTAIR G1 MUST BE USED WITH CORRECT
MAINS VOLTAGE AND PROPERLY EARTHED!
9

current driving ability of this port is 5V/500mA. AURALiC recommend you
use USB storage with a dedicated power supply for sound quality
considerations. Lightning Server will only scan the largest partition on your
USB storage for music data.
•STREAM
Gigabit Ethernet connection for ALTAIR G1. Go to:
Home Menu>Settings>Network>Connection Type>Wired>Join Network
to switch to Ethernet.
•ATN1 and ATN2
Wi-Fi antennas for ALTAIR G1. The Wi-Fi antennas also work as Bluetooth
receiver antennas. Go to Home Menu>Settings>Network>Connection
Type>Wireless and select the Wi-Fi network you want to join.
•RIGHT/LEFT OUT
The balanced, single-ended analog outputs of ALTAIR G1 are individually
buffered and can be used simultaneously. However, it is recommended to
disconnect unused ports to avoid potential electromagnetic interference
induced by cables. The amplitude of analog outputs is adjustable with a
maximum level of about 4.4Vrms for both XLR and RCA outputs. The output
impedance of XLR output is very low at 4.7ohm, so it can be used to drive a
wide variety of power amplifiers. Please pay special attention NOT to short
any pin of any analog output to ground.
•AC Mains
For the best sound quality, we suggest using a standalone power supply for
ALTAIR G1 to isolate it from other digital source components that use
switching power supplies. The power consumption of ALTAIR G1 is less than
50W. A heavy gauge power cord is not recommended as the weight of the
power cord connector may damage the power cord socket on the back of the
unit. Please double-check the AC mains voltage on the back of the unit
before connecting to the power.
Please make sure to power off all units in your system before any cabling job;
failure to follow this instruction may result in permanent damage to the device
and void any warranty.
10

Front Panel
The front panel of ALTAIR G1:
•Rotary Knob
The rotary knob can be rotated clockwise or anti-clockwise through 20 steps
for a full cycle, and can be pressed for operation confirmation.
•Headphone Output
There is a 6.35mm headphone jack on the front panel for monitor use. The
jack is not individually buffered and are connected inside ALTAIR G1.
•Front Panel Display
The 4-inch high-resolution true color display on the front panel gives you full
access to ALTAIR G1 settings as well as displaying enriched metadata.
•Smart-IR sensor
The IR remote control sensor is hidden behind the front panel display.
ALTAIR G1 is equipped with AURALiC’s Smart-IR control technology. You
can assign the device’s functions to any buttons you choose on your IR
remote control. Please refer to ‘Smart-IR Remote Control’ on page 33 for
detailed instructions.
ALWAYS POWER OFF ALTAIR G1 BEFORE CABLING!
11

Using your ALTAIR G1
Power Up and Sleep
ALTAIR G1 will power up automatically after the main power on the back of the
unit is switched on. To put the device into sleep mode, please press and hold
the rotary knob for a couple of seconds till you see confirmation message,
select yes and press the knob to confirm your operation. To bring the unit back
to work in sleep mode, please press the rotary knob briefly.
You can also use Smart-IR function to assign remote button for function. Please
refer to ‘Smart-IR Remote Control’ on page 33 for detailed instruction.
Welcome Screen
ALTAIR G1 has two different main display styles depends on what input channel
you are using.
•Using ALTAIR G1 with streaming input channel
When the ALTAIR G1 while using the streaming input channel, you are greeted
by the Welcome Screen (above), which displays your device model, device
firmware version and the IP address of your device. Refer to page 22 for details
on accessing the web interface to set up your device using its IP address.
12

You may press the rotary knob to leave the Welcome Screen and go to the
Home Menu. If you select a track to play using control software, ALTAIR G1 will
jump to the ‘Now Playing’ screen automatically.
•Using ALTAIR G1 with all other input channels
When the ALTAIR G1 starts up with any input channels other than streaming
input, the Welcome Screen will show current input channel, sampling rate and
volume number. If you have muted ALTAIR G1 by either remote control or
Lightning DS App, the volume number will flash to remind you of its status.
You may press the rotary knob to leave the Welcome Screen and go to the
Home Menu.
Home Menu
13

The Home menu is the root level menu of your ALTAIR G1. There are seven
destinations available from the Home Menu:
1. ‘Playing’: This interface will be available for access when ALTAIR G1
uses its streaming input channel. The Now Playing interface displays
track information and status, playback mode (shuffle, repeat) and
volume.
2. ‘Queue’: This interface will be available for access when ALTAIR G1 uses
its streaming input channel. The Queue interface shows what’s currently
in the ALTAIR G1 queue. Individual tracks in the queue may be selected
for playback.
3. ‘Input’: Select input channel of ALTAIR G1.
4. ‘System’: General hardware-related setup, including network information,
output channel, display language, etc.
5. ‘Streamer’: This interface will be available for access when ALTAIR G1
uses its streaming input channel. You can access to settings for the
ALTAIR G1’s streaming software.
6. ‘Processor’: ALTAIR G1 processor settings. The processor function is
only available while ALTAIR G1 uses streaming input channel.
7. ‘Library’: Browse/play music from your library, and set up ALTAIR G1’s
built-in Lightning Server.
8. ‘Exit’: Exit Home Menu and go back to Welcome Screen.
Rotate the rotary knob clockwise or counter-clockwise to highlight a destination,
and press the rotary knob to select it. To exit Home menu, please select ‘Exit’.
Playing
14
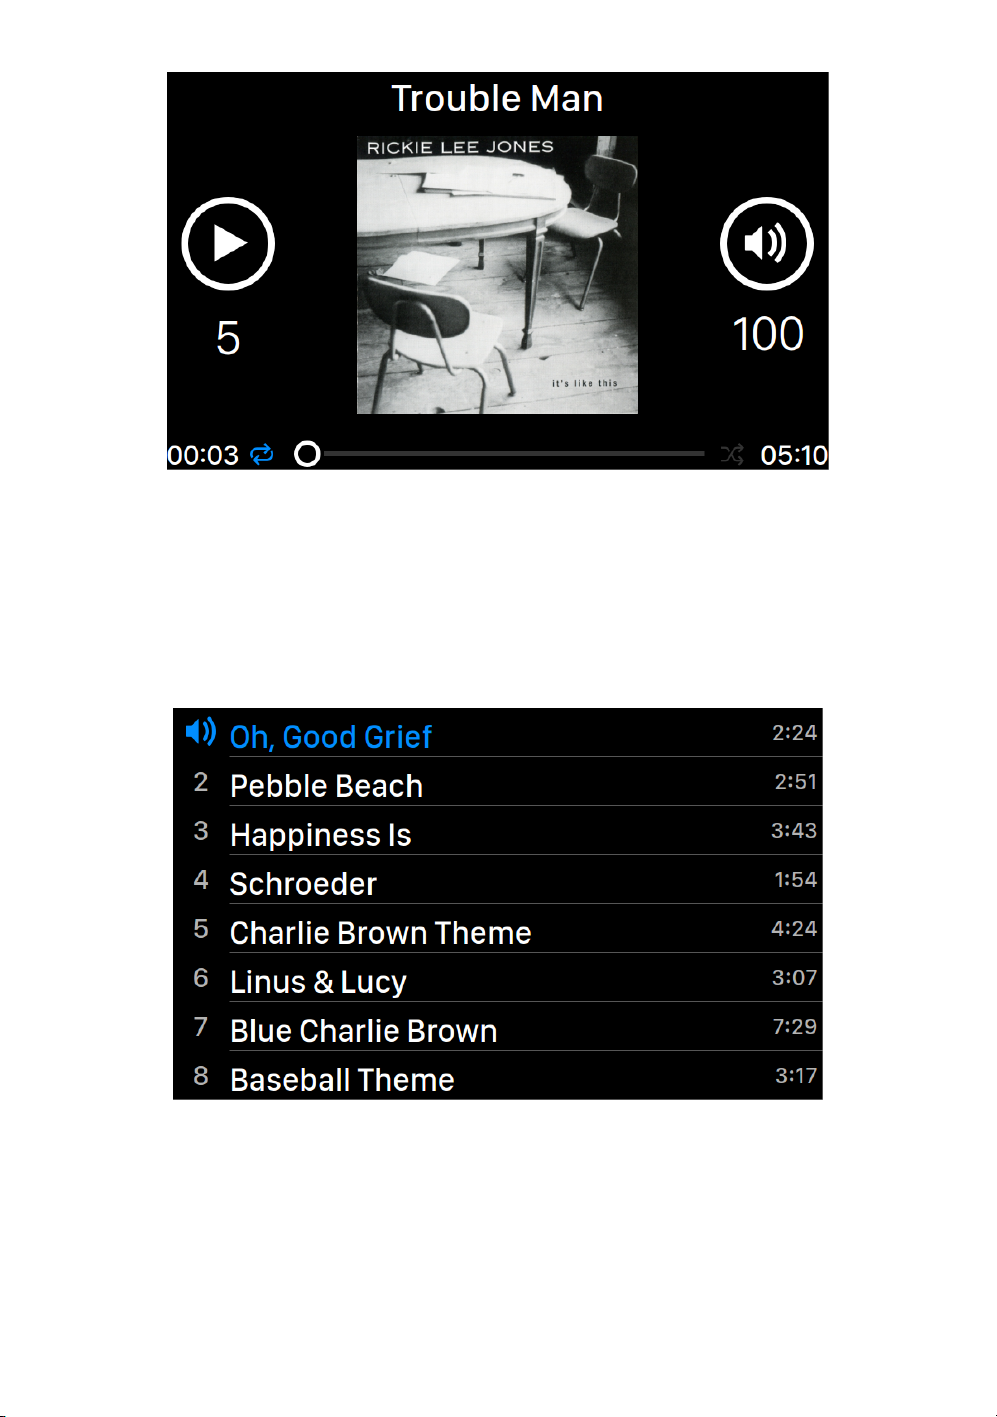
Playing displays playback status, track progress, playback mode, volume, and
metadata for the current track. Rotate the rotary knob clockwise or counter-
clockwise to adjust volume, and press the rotary knob to exit the Now Playing
interface.
Queue
The ALTAIR G1 playback Queue is stored in device memory. Rotate the rotary
knob clockwise or counter-clockwise to select a track and press the rotary knob
to activate ‘Select Operation’ popup menu:
15
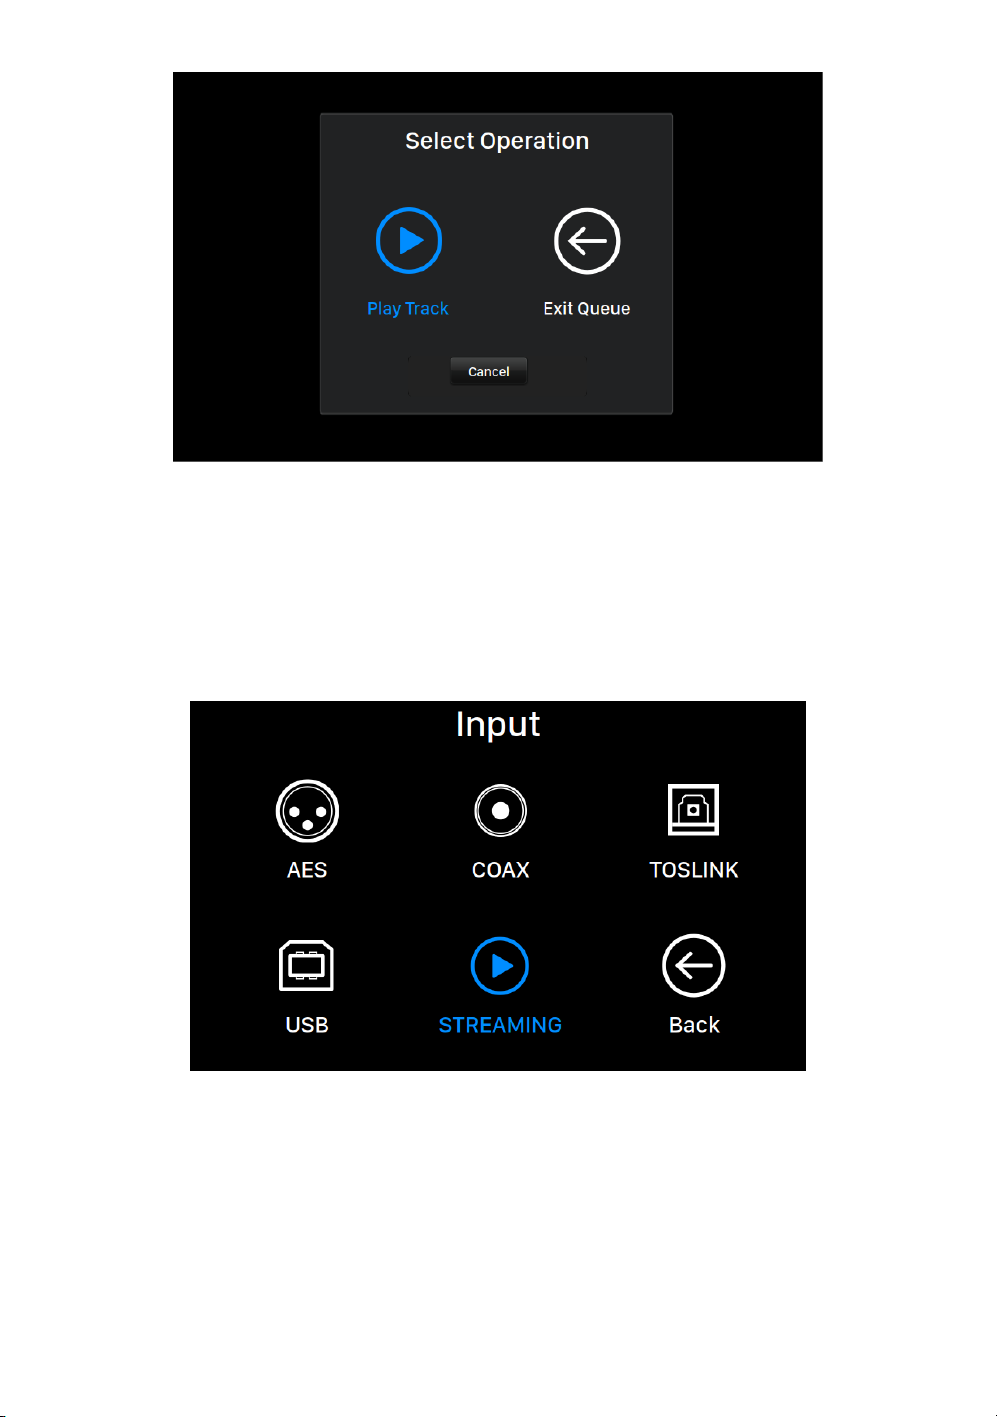
Please rotate the rotary knob clockwise or counter-clockwise to select the
operation you would like to execute and press the rotary knob to confirm your
selection. Please select ‘Exit Queue’ if you would like to exit the Queue interface
back to Home Menu.
Input
The Input menu allows you to select the physical input channel of the ALTAIR
G1. Rotate the rotary knob clockwise or counter-clockwise to highlight a
destination, and press the rotary knob to select it.
The Streaming input channel will only be available to select when ALTAIR G1 is
connected to your home network.
16

System
The System menu contains all interface and hardware related settings. Rotate
the rotary knob clockwise or counter-clockwise to highlight a destination, and
press the rotary knob to select it.
To exit the System menu, please rotate the rotary knob clockwise to the last and
select ‘Back to Menu’.
1. ‘Enable Volume Control’: Allows volume control of your device via
software such as Lightning DS.
2. ‘Volume Mode’: Set up the DAC’s volume control.
3. ‘Maximum Volume’: Define a maximum volume that any control
software can set for the streaming device. Use this option if you want to
prevent accidental operation that may result in potential damage to your
loudspeakers with excessive volume. You can select a maximum number
between 10 and 100. Note: You may not be able to play DSD music if
you have enabled this option while using software type volume control.
4. ‘Filter Mode’: Your streaming device has four built-in filter modes, each
employing five digital filters optimized for corresponding sampling rates.
Developed using a combination of objective data models and subjective
testing, these modes optimize sonic quality for varying music types and
formats: Precise: A traditional filter design using a single filter algorithm
for all sampling rates. Precise mode provides the most exacting sonic
representation of source material. Dynamic: With the same pass-band
and stop-band performance as Precise mode, but providing less group
delay, Dynamic mode is the ideal balance between measurable precision
17

and subjective quality. Balance: Balance mode is designed to achieve
minimum pre‐echo and ringing effects. Slow roll-off filters show moderate
pass-band and stop-band performance; however group delay is
minimized. Smooth: Smooth mode scored highest on subjective listening
tests during development. All filters in this mode are minimum phase
type, which means there is no pre-echo at all. Smooth mode filters are
designed with very small group delay to eliminate ringing as well.
5. ‘Channel Balance’: Adjusts the left/right balance of analog output. This
setting does not affect digital or USB output.
6. ‘Volume Mode’: Set up the DAC's volume control.
7. ‘Output Level’: Select reference level of analog output. The number
represents the actual output voltage when the DAC receives a full-scale
digital signal. Consider reducing the output level if you use a separate
analog pre-amplifier or an integrated power amplifier with high input
sensitivity; our default setting may overload the amplifier’s input circuit.
8. ‘Display Settings’: Set preferences for the front panel display.
a. Idle Status: Select whether you’d like the display to always
remain on, or to turn off automatically.
b. Display Brightness: Select the brightness of your device's front
display.
9. ‘Smart-IR Settings’: Use this feature to assign your device’s functions to
any buttons you choose on your IR remote control.
10.‘Network’: Set up your device’s network connection.
a. Connection Type: Choose Ethernet or Wi-Fi to connect your
device.
i. Wired: Set up an Ethernet connection for your device.
ii. Wireless: Set up a Wi-Fi connection for your device.
b. Network Information: Show network connection information such
as IP address, Wi-Fi network, etc.
c. Start Wi-Fi Hotspot: Your device will create a Wi-Fi hotspot
named 'AURALiC-Lightning'. You can use your computer, iPhone
or iPad to connect to this Wi-Fi network and set up the device’s
network settings. You cannot play music while in Wi-Fi Hotspot
mode.
11. ‘Hardware Information’: Display device hardware information such as S/
N and firmware version.
12.‘Language’: Select a different interface language for your device.
13. ‘Firmware Update’: Check and update device firmware. Please make
sure your device is connected to Internet.
14.‘Erase All User Settings’: Erase all settings on your device. Your device
will reboot automatically when the operation is complete. This operation
will not erase music data on your internal storage.
18

15.‘Back to Menu’: Back to Main Menu Screen.
Streamer
The Streamer menu contains all streaming and rendering related setup options.
Use the rotary knob to highlight a menu item, and press the knob to select.
1. ‘Room Name’: The name of your Lightning Streaming device used for
both the device itself and the Lightning Server configuration running on
the device.
2. ‘Available Input Methods’: Enable or disable particular virtual input
channel. Disabling unused input methods may improve overall sound
quality.
3. ‘MQA Pass-through’: When enabled this setting will pass the original
music signal through your streaming device without making any changes,
allowing an external DAC to use its own decoding functions. Use this
option when connected to an MQA-enabled DAC for example. (You may
also need to disable the volume control function of your streaming device
or set the volume to 100 to ensure full-level pass-through of the signal.)
4. ‘Decoding Method’: AURALiC streaming devices are capable of
decoding MQA files using AURALiC’s proprietary resampling and de-
blurring method. You can select from the sampling rate settings for the
process described here. Please note that this process is not an MQA-
created or MQA-licensed process.
a. ‘Auto’: Your streaming device will detect the best decoding
sampling rate based on the information in the MQA file. It will also
detect the maximum sampling rate of a USB-connected DAC.
b. ‘2x Sampling Rate’: Your streaming device will always decode
19

MQA files at 88.2 kHz or 96 kHz depending on the original file’s
sampling rate. "
c. ‘4x Sampling Rate’: Your streaming device will always decode
MQA files at 176.4 kHz or 192 kHz depending on the original file’s
sampling rate.
d. ‘8x Sampling Rate’: Your streaming device will always decode
MQA files at 352.8 kHz or 384 kHz depending on the original file’s
sampling rate. "
5. ‘TIDAL’: Getting the best streaming quality from TIDAL. The maximum
streaming quality of music from TIDAL depends on the fi le formats stored
on TIDAL’s servers, and the subscription type of your TIDAL account.
These settings can maximize the streaming quality of your TIDAL
content. FLAC MQA: FLAC in the MQA format, which is compressed and
lossy. You may benefit from this setting if your DAC supports MQA
decoding. (MQA fi le has a degraded dynamic range compared to non-
MQA file if you play it on a non-MQA DAC.) FLAC Lossless: FLAC in
lossless CD quality at a sampling rate of 44.1K or 48K. This is the best
option if you stream to a DAC without an MQA decoder. MP3 High: Lossy
MP3 (or MP4) format, at a higher bitrate. MP3 Low: Lossy MP3 (or MP4)
format, at a lower bitrate.
6. ‘Qobuz’: Getting the best streaming quality from Qobuz. The maximum
streaming quality of music from Qobuz depends on the file formats
stored on the Qobuz servers, and the subscription type of your Qobuz
account. These settings can maximize the streaming quality of your
Qobuz content: FLAC Up to 384K: FLAC in Hi-Res lossless format up to
a maximum sampling rate of 384K. FLAC Up to 96K: FLAC in Hi-Res
lossless format up to a maximum sampling rate of 96K. FLAC Lossless:
FLAC in lossless CD quality at a sampling rate of 44.1K or 48K. MP3
Lossy: Lossy MP3 (or MP4) format.
7. ‘Back to Menu’: Back to Home Menu.
Processor
20
Table of contents
Other Auralic Media Converter manuals


