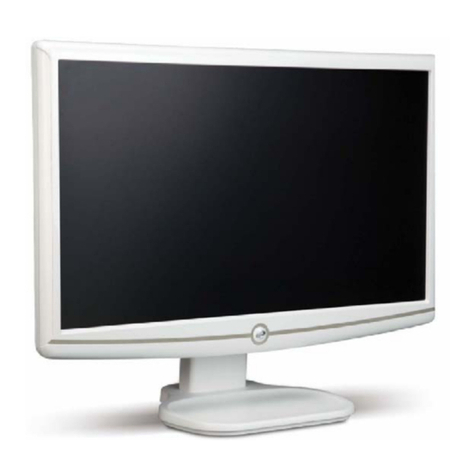
Auria EQ2367 User manual

23" LCD MONITOR
User Guide
MODEL EQ2367

English
Contents
Safety Precautions ...............................................................................................1
First Setup ............................................................................................................2
Quick Installation ..................................................................................................2
Front View of the Product .....................................................................................3
Rear View of the Product......................................................................................3
Using On Screen Display (OSD) Functions..........................................................4
Supporting Timing Modes ....................................................................................8
Technical Information........................................................................................... 9
Care and Maintenance .......................................................................................10
Troubleshooting ..................................................................................................10

English
Safety Precautions
This monitor is manufactured and tested on a ground principle that a
user’s safety comes first. However, improper use or installation may result danger
to the monitor as well as to the user. Carefully go over the following WARNINGS
before installation and keep this guide handy.
WARNINGS:
This monitor should be operated only at the correct power sources indicated
on the label on the rear end of the monitor. If you’re unsure of the power
supply in your residence, consult your local dealer or power company.
Do not try to repair the monitor yourself as it contains no user- serviceable
parts. The monitor should only be repaired by a qualified technician.
Do not remove the monitor cabinet. There is high-voltage parts inside that
may cause electric shock to human bodies, even when the power cord is
disconnected .
Stop using the monitor if the cabinet is damaged. Have it checked by a
service technician.
Put your monitor only in a clean, dry environment. Unplug the monitor
immediately if gets wet and consult your service technician.
Always unplug the monitor before cleaning it. Clean the cabinet with a clean,
dry cloth. Apply non-ammonia based cleaner onto the cloth, not directly onto
the glass screen.
Keep the monitor away from magnetic objects, motors, TV sets, and transformer.
Do not place heavy objects on the cable or power cord.
For PLUG CABLE EQUIPMENT, the Socket-outlet shall be installed
near the equipment and shall be easily accessible.
Mounting the Monitor
The monitor panel can be attached to a wall, swing arm, or other mounting fixture.
CAUTION: This monitor supports the VESA industry standard 100 mm mounting holes. To attach
a third-party mounting solution to the monitor, four 4 mm, 0.7 mm pitch, and 8 mm long screws are
required. Longer screws must not be used because they may damage the monitor. It is important
to verify that the manufacturer’s mounting solution is compliant with the VESA standard and is rated
to support the weight of the monitor display panel. For best performance, it is important to use the
power and video cables provided with the monitor.
1

English
First Setup
Congratulation for purchasing this monitor of high performance!
This monitor comes with the following accessories:
Power Cord
VGA Cable (15 pin)
Warranty Card
Quick Installation
1. Connect power cord
Connect the power cord to a properly grounded AC outlet, then to the monitor.
2. Connect Analog video cable (VGA cable)
Make sure both monitor and computer are powered OFF. Connect the video
cable (D-Sub cable) to the computer, then to the monitor.
3. Or Connect DVI cable
Connect the DVI cable from DVI output of computer to the DVI input of the monitor.
4. Or Connect HDMI cable
Connect the HDMI cable from HDMI output of computer or other equipment with HDMI
output to the HDMI input of the monitor.
Note: Other HDMI output equipment such as Blue-Ray players, DVD Players, Cable
boxes, VCR/VCD players, and portable PCs.
5. Connect audio cable
Connect the audio cable from audio output of computer to the audio input of the
monitor.
6. Power-ON computer and monitor
Power-ON the computer, then Power-ON the monitor.
7. Windows users:Setting the Timing Mode (Resolution and Refresh Rate)
Recommended:
Resolution Right-click on the Windows desktop > Properties > Settings >
“Desktop Area”. Set the resolution.
Refresh Rate (vertical frequency) See your graphic card’s user guide for instructions.
23.6”
1920 x 1080 @ 60 Hz
2

English
Front View of the Product
➊ LED INDICATOR
Rear View of the Product
➋AUTO AUTO ADJUSTMENT(VGA ONLY)
➌+INPUT SOURCE SELECT HOTKEY
AND SCROLL UP/INCREASE
➍MENU OSD TURN ON
➎- VOLUME CONTROL HOTKEY AND
SCROLL DOWN/DECREASE
Control Buttons
➏ POWER ON/OFF
➐AC IN POWER INPUT
➑HDMI HDMI INPUT
➒DVI DVI INPUT (DVI 24 PIN)
➓VGA VGA INPUT (D-SUB 15 PIN)
Input
AUDIO PC AUDIO INPUT
3

English
English
Using On Screen Display (OSD) Functions
Display main menu.
MENU Enter the selection
Auto adjust the image when not in OSD menu.
AUTO Exit the selection. OSD menu turn off.
Select the desired item when in OSD menu.
+When not in OSD menu, it is to show the input source and
then press – or + to change the input source.
Select the desired item when in OSD menu.
-When not in OSD menu, it is to show the volume bar and
then press – or + to decrease or increase the volume.
Main Menu
If push the MENU key the screen will appear this main menu page, you can
use the + or - key ( Shown in Pic1 ) to select the function you need.
The end of this page will be shown the working resolution and frequency.
Pic 1
4

EnglishEnglish
English
Luminance
In this mode, that could into the sub-page ( Shown in Pic 2 ) to adjust the
luminance of the screen image.
Brightness : To adjust the luminance of the video.
+
: increase brightness,
-
: decrease brightness.
Contrast : To adjust the foreground level of screen image.
+
: increase contrast,
-
: decrease contrast.
Picture (VGA Only)
In this mode, that could into the sub-page ( Shown in Pic 3 ) to adjust
display’s function of the picture.
Phase : To adjust the picture’s quality
Clock : To adjust the picture’s quality
H./V. Position :To adjust the horizontal and vertical position of the video.
H. Position :
+
: move screen to the right ;
-
: move screen to the left.
V. Position :
+
: move screen up ;
-
: move screen down.
Pic 2
Pic 3
5

English
Color
In this function, that could into the sub-page ( Shown in Pic 4 ) to adjust
display color of the picture.
Color Temperature :
To select the color for improving brightness and color saturation between
9300K,7500K,6500K,User Color and sRGB ( shown in Pic5 ).
sRGB :
This is quickly becoming the industry standard for color management, with
support being included in many of the latest applications. Enabling this
setting allows the LCD display to more accurately display colors the way
they were originally intended. Enabling the sRGB setting will cause the
Contrast adjustments to be disabled.
User Color :
Individual adjustments for red (R), green (G), blue (B).
1. Press button MENU to select the desired color.
2. Press
+
or
-
button to adjust selected color.
Pic 4 Pic 5
6

English
OSD Settings
This function will into the sub-page ( Shown in Pic 6 ) to adjust display’s
function for OSD.
OSD Position : Press button + or - to select between horizontal and
vertical OSD Position adjustment.
Horizontal : To horizontally adjust the OSD position.
+
: move OSD to the right,
-
: move OSD to the left.
Vertical : To vertically adjust the OSD position.
+
: move OSD up,
-
: move OSD down.
Transparency : To adjust the Transparency of the OSD image.
OSD Time Out : To automatically turn off On Screen Display(OSD)after a
preset period of time.
Setup
This function will into the sub-page ( Shown in Pic 7 ) to adjust display’s
function for OSD.
Language : To allow users to choose from available languages.
Audio:To adjust the volume of speaker output.
Input : When press Input Select change Input signal to VGA or DVI and HDMI.
HDMI-Audio Select : The default setup is Digital Audio. When you use
DVI to HDMI cable to plug into the HDMI connector, you must to set the
audio select to Analog Audio.
DCR: To turn On or Off the DCR function(dynamic contrast ratio).
Reset: To recall the default values.
Pic 6
Pic 7
7

English
Supporting Timing Modes
Note: “◎” Support “-"No support
Warning : Do not set the graphic card in your computer to exceed these maximum refresh
rates. Doing so may result in permanent damage to your monitor.
8
NO. Resolution Mode 23.6"
1 640 х480@60Hz VESA ◎
2 640 х480@67Hz MAC ◎
3 640 х480@72Hz VESA ◎
4 640 х480@75Hz VESA ◎
5 720 х400@70Hz DOS ◎
6 800 х600@56Hz VESA ◎
7 800 х600@60Hz VESA ◎
8 800 х600@72Hz VESA ◎
9 800 х600@75Hz VESA ◎
10 832 х624@75Hz MAC ◎
11 1024 х768@60Hz VESA ◎
12 1024 х768@70Hz VESA ◎
13 1024 х768@75Hz VESA ◎
14 1152 х864@60Hz CVT ◎
15 1152 х864@75Hz VESA ◎
16 1152 х870@75Hz MAC ◎
17 1280 х720@60Hz CEA-861 ◎
18 1280 х960@60Hz VESA ◎
19 1280 х1024@60Hz VESA ◎
20 1280 х1024@75Hz VESA ◎
21 1360 х768@60Hz VESA -
22 1600 х1200@60Hz VESA ◎
23 1680 х1050@60Hz CVT-RB ◎
24 1680 х1050@60Hz CVT ◎
25 1920 х1080@60Hz CVT-RB ◎
26 480i@60Hz Video ◎
27 480p@60Hz Video ◎
28 576i@50Hz Video ◎
29 576p@50Hz Video ◎
30 720p@50Hz Video ◎
31 720p@60Hz Video ◎
32 1080i@50Hz Video ◎
33 1080i@60Hz Video ◎
34 1080p@50Hz Video ◎
35 1080p@60Hz Video ◎

English
Technical Information
T
echnical
Specification
LCD Display 23.6”
Power Management Energy Star compliant VESA DPMS compatible
< 1 W
Tilt 5° to forward ~ 15° to backward
Temperature Operating: 0°C ~ +40°C Storage: -20°C ~ + 60°C
Compliance
cTUVus
ROHS (REACH)
Energy star
FCC
Input voltage Input Voltage AC100-240 V
LED Indicator Blue Color:Active
Orange Color:Standby 、No Signal、Not Support
Pixel size 0.282x 0.282 mm
Display Colours 16.7M
(6bits + Hi FRC)
Active Display Area 521.3 x 293.2 mm
Internal Speaker 2W x 2
Net Weight 4.93 Kg
Dimensions
(Physical)
( WxHxD )
23.6” : 568 x 419 x 210 mm
Connector
Power (A/C Input)
HDMI
DVI
VGA
Audio (Stereo Phone Jack)
9

English
Care and Maintenance
Care
Avoid exposing your monitor directly to sunlight or other heat source. Place
your monitor away from the sun to reduce glare.
Put your monitor in a well ventilated area.
Do not place any heavy things on top of your monitor.
Make certain your monitor is installed in a clean and moisture-free area.
Keep your monitor away from magnets, motors, transformers, speakers,
and TV sets.
Safety Tips
If smoke, abnormal noise or odor came out from your monitor, caution you
should remove the power cord immediately and call your service center.
Never remove the rear cover of your monitor cabinet. The display unit
inside contains high-voltage parts and may cause electric shock to human
bodies.
Never try to repair your monitor yourself. Always call your service center
or a qualified technician to fix it.
Troubleshooting
No power
Make sure A/C power cord is securely inserted to both the AC-INLET
socket on the monitor and the wall outlet.
Plug another electrical device into the power outlet to verify that the
outlet is supplying proper voltage.
Make sure all signal cables are installed.
Power on but no screen image
Make sure the video cable supplied with the monitor is tightly secured to
the video output port on back of the computer. If not, tightly secure it.
Adjust brightness.
Wrong or abnormal colors
If any colors (red, green, blue) are missing, check the video cable to make
sure it is securely connected. Loose or broken pins in the cable connector
could cause an improper connection.
Connect the monitor to another computer.
According to WEEE regulation, this monitor can’t be handled as normal trash in
Europe when it is out of usage. Please refer to the recycle information from our
website to handle it.
10

Français
Contenu
Précautions de Sécurité........................................................................................1
Première Installation .............................................................................................2
Installation Rapide.................................................................................................2
Vue avant du produit .............................................................................................3
Produit vu de dos..................................................................................................3
Utiliser les fonctions d’affichage d’écran (OSD)....................................................4
Support des modes minutage...............................................................................8
Informations Technique........................................................................................ 9
Soins et Maintien ................................................................................................10
En Cas de Problème...........................................................................................10

Français
Précautions de Sécurité
Ce moniteur à été fabriqué et testé à partir du principe que la sécurité de
l’utilisateur est primordiale. Néanmoins, l’utilisation ou l’installation
incorrecte peut causer un danger à l’appareil aussi bien que à l’utilisateur. Lisez
attentivement les AVERTISSEMENTS suivants avant de commencer l’installati
on et gardez ce guide à portée de main.
AVERTISSEMENTS:
Ce moniteur ne doit être utilisé que en connexion avec les sources
d’alimentation correctes, indiquées sur l’étiquette à l’arrière du moniteur.
Si vous n’êtes pas sur de l’alimentation dans votre résidence, consultez
votre revendeur locale ou la compagnie d’électricité.
N’essayez pas de réparer le moniteur vous même, car il ne contient
pas de composants réparables par l’utilisateur. Le moniteur ne peut
être réparé que par un technicien qualifié.
N’enlevez pas la cache du moniteur. Il y à des composants sous haute
tension à l’intérieur qui peuvent causer des choques électriques, même
quand le cordon d’alimentation est déconnecté.
N’utilisez plus le moniteur si la caisse est endommagée. Appelez un
technicien d’entretien pour la contrôler.
Placez votre moniteur dans un endroit propre et sec. Si le moniteur se
mouille déconnectez le immédiatement et consultez votre technicien
d’entretien.
Déconnectez toujours votre moniteur avant de le nettoyer. Nettoyez
la caisse avec un chiffon sec et propre. Appliqué un nettoyant non-
ammonisé sur le chiffon, jamais directement sur l’écran.
Gardez le moniteur éloigné d’objets magnétiques, de moteurs, de sets de
télévision et de transformateurs.
Ne placez pas d’objets lourd sur le câble ou le cordon d’alimentation.
Pour des EQUIPMENTS à FICHE, la fiche de sortie doit être installé près
de l’arrière de l’équipement et à un endroit facilement accessible.
Installation du moniteur
Il est possible de fixer le panneau du moniteur sur un mur, un bras pivotant ou un autre dispositif de montage.
Mise en garde : ce moniteur est compatible avec les trous de montage de 100 mm selon les spécifications VESA. Pour fixer un
autre dispositif de montage au moniteur, utilisez 4 vis de 8 mm de long, d’un pas de 0,7 mm et de 4 mm. N’utilisez pas de vis plus
longues, elles risqueraient d’endommager le moniteur. Vérifiez que le dispositif de montage du fabricant réponde aux
spécifications VESA et qu’il est capable de supporter le poids du panneau écran du moniteur. Pour des performances optimales,
il est important d’utiliser le câble d’alimentation et le câble vidéo fournis avec le moniteur.
1

Français
Première Installation
Félicitations avec votre achat de ce moniteur de haute performance! Ce moniteur est
fourni avec les accessoires suivants:
Cordon d’Alimentation
Câble VGA (15 broches)
Documents de garantie
Installation Rapide
1. Connectez le cordon d’alimentation
Connectez le cordon d’alimentation au dos du moniteur. Branchez le cordon
d’alimentation dans une prise de courant proche.
2. Connecter le câble Analogique vidéo (Câble VGA)
Assurez-vous qu’à la fois le moniteur et l’ordinateur sont bien SOUS tension. Connectez
le câble vidéo de la sortie D-Sub sur l’ordinateur sur l’entrée D-Sub sur le moniteur.
3. Ou Connectez le câble DVI
Connectez le câble DVI de la sortie DVI de l’ordinateur sur l’entrée DVI du moniteur.
4. Ou branchez le câble HDMI
Branchez le câble HDMI entre la sortie HDMI de l'ordinateur, ou d'un autre équipement
disposant d'une sortie HDMI, et l'entrée HDMI du moniteur.
Remarque : autre équipement disposant d'une sortie HDMI, comme les lecteurs Blue-Ray,
les lecteurs DVD, les boîtiers câble, les lecteurs VCR/VCD et les ordinateurs portables.
5. Connecter le câble audio
Connectez une extremite du cable audio au dos du moniteur et connectez l’autre
extremite au port de sortie audio de l’ordinateur.
6. Allumez l’ordinateur et le moniteur
Allumez l’ordinateur et ensuite allumez le moniteur.
7. Utilisateurs de Windows :Paramétrer le mode de synchronisation(résolution et vitesse
de rafraîchissement) Exemple:
Résolution Faites un clic droit de la souris sur le bureau de Windows > Propriétés
>Paramètres > “Espace du bureau”. Paramétrer la résolution : Vitesse
de
rafraîchissement(fréquence verticale) Voir le guide utilisateur de votre carte graphique pour
les instructions.
2
23.6”
1920 x 1080 @ 60 Hz

Français
Vue avant du produit
➊ VOYANT DEL
Produit vu de dos
3
➋AUTO RÉGLAGE AUTOMATIQUE
➌+RACCOURCI SÉLECTION DE LA SOURCE
D'ENTRÉE ET BARRE DE DÉFILEMENT
VERS LE HAUT/AUGMENTER
➍MENU MENU À L'ÉCRAN ACTIVÉ
➎- RACCOURCI RÉGLAGE DU VOLUME ET
BARRE DE DÉFILEMENT VERS LE
BAS/DIMINUER
Boutons de
commande
➏ MARCHE/ARRÊT
➐AC IN ENTRÉE D'ALIMENTATION
➑HDMI ENTRÉE HDMI
➒DVI ENTRÉE VGA (15 BROCHES D-SUB)
➓VGA ENTRÉE AUDIO PC
Entrée
AUDIO PC-Audioeingang

Français
Utiliser les fonctions d’affichage d’écran (OSD)
Afficher le menu principal.
MENU Saisissez une sélection
Ajuster automatiquement l’image en dehors du menu OSD.
AUTO
Quitter la sélection. Menu à l'écran désactivé.
Sélectionnez l’élément désiré quand vous êtes dans le menu OSD.
+En dehors du menu à l'écran, affichage de la source d'entrée.
Appuyez sur - ou sur + pour modifier la source d'entrée.
Sélectionnez l’élément désiré quand vous êtes dans le menu OSD.
-En dehors du menu à l'écran, affichage de la barre de réglage du
volume. Appuyez sur - ou sur + pour diminuer ou augmenter le
volume.
Menu principal
Si vous appuyez sur la touche MENU, l'écran affiche la page du menu
principal. Appuyez sur la touche + ou - (voir l'illustration 1) pour sélectionner la
fonctionvoulue.
La résolution et la fréquence de travail s'affichent en fin de page.
l'illustration 1
4

EnglishEnglish
Français
Luminance
Ce mode vous fait accéder à la sous-page permettant de régler la
luminance de l'image à l'écran (voir l'illustration 2).
Luminosité : pour régler la luminance de la vidéo.
+
:augmenter la luminosité,
-
: diminuer la luminosité.
Contraste : pour régler le niveau du premier-plan de l'image à l'écran.
+
: augmenter le contraste,
-
: diminuer le contraste.
Image (UNIQUEMENT VGA)
Ce mode vous fait accéder à la sous-page permettant de régler la
fonction d'affichage de l'image (voir l'illustration 3).
Phase : Pour régler la qualité de l'image.
Horloge : Pour régler la qualité de l'image.
Position h./v. : Pour ajuster la position horizontale et verticale de la vidéo.
Position h.:
+
: déplacer l'écran vers la droite;
-
: déplacer l'écran vers
la gauche.
Position v.:
+
:déplacer l'écran vers le haut ;
-
: déplacer l'écran vers le
bas.
l'illustration 2
l'illustration 3
5

Français
Couleur
Cette fonction vous fait accéder à la sous-page permettant d’ajuster la
couleur d'affichage de l'image (voir l'illustration 4).
Température des couleurs :
Pour choisir la couleur et optimiser la luminosité et la saturation des
couleurs entre 9300 K, 7500 K, 6500 K, couleur utilisateur et sRGB (voir
l'illustration 5).
sRGB :
est en train de devenir rapidement le standard de l’industrie pour la
gestion des couleurs, et la plupart des applications récentes sont
compatibles avec ce format. L’activation de ce paramètre permet à
l’écran LCD d’afficher des couleurs plus fidèles à l’original. L’activation du
paramètre sRGB entraîne la désactive les réglages du contraste.
Couleur utilisateur :
Réglage individuel pour le rouge(R), vert (V), bleu (B).
1. Appuyez sur le bouton Menu pour ajuster et sélectionner la couleur.
Suivante à ajuster.
2. Appuyez sur le bouton
+
ou
-
pour ajuster la couleur sélectionnée
l'illustration 4 l'illustration 5
6

Français
OSD Settings
Cette fonction vous fait accéder à la sous-page (voir l'illustration 6)
permettant d'ajuster la fonction d'affichage du menu à l'écran.
Position OSD: Appuyez sur + ou - pour choisir le réglage de la position
horizontale ou verticale du menu à l'écran.
Horizontal : pour ajuster la position horizontale du menu OSD.
+
: déplace le menu OSD vers la droite,
-
:
déplace le menu OSD vers la gauche.
Vertical : pour ajuster la position verticale du menu OSD.
+
: déplace le menu OSD vers le haut,
-
:
déplace le menu OSD vers le bas.
Transparence : Pour régler la transparence de l'image du menu à l'écran.
OSD Time Out : Pour désactiver automatiquement l'affichage d'écran
(OSD) après une durée prédéfinie.
Configuration
Cette fonction vous fait accéder à la sous-page (voir l'illustration 7)
permettant d'ajuster la fonction d'affichage du menu à l'écran.
Langue : Permet à l’utilisateur de choisir parmi les langues disponibles.
Audio:Pour régler le volume de la sortie haut-parleur.
Entrée: Lorsque vous appuyez sur Sélection Entrée, le signal d'entrée
passe en VGA ou DVI et HDMI.
Sélection Audio-HDMI : Le réglage par défaut est Audio numérique.
Lorsque vous branchez un câble DVI/HDMI dans le connecteur HDMI,
vous devez régler l'audio sur Audio analogique.
DCR: Pour activer ou désactiver la fonction DCR (Dynamic Contrast
Ratio ou étendue du contraste dynamique).
Réinitialiser: Pour restaurer les valeurs par défaut.
l'illustration 6
l'illustration 7
7
Table of contents
Languages:
Other Auria Monitor manuals


