07En
Charging: D-3
The D-3 can be charged in two ways; via the wall mounted
‘Charging dock’ or by plugging the unit in directly.
Charging dock
• Find a suitable place to mount the ‘Charging dock’.
• Mount the ‘Charging dock’ using appropriate screws and wall
plugs.
• Plug the power adaptor into the side of the ‘Charging dock’.
• To charge the D-3 clip it into the ‘Charging dock’.
• The ‘Battery indicator’ will flash to show the charge level.
• To remove the vacuum cleaner from the dock, press the ‘Charger
release’ and the vacuum cleaner will unlock.
Direct charge
• Plug the power adaptor into the ‘Charging port’.
• The ‘Battery indicator’ will flash to show the charge level.
Battery
• To remove the battery, press the ‘Battery release’.
• Slide the battery up to remove it from the main body.
• To re-install the battery, slide the battery down the guides and
press into place until it clicks.
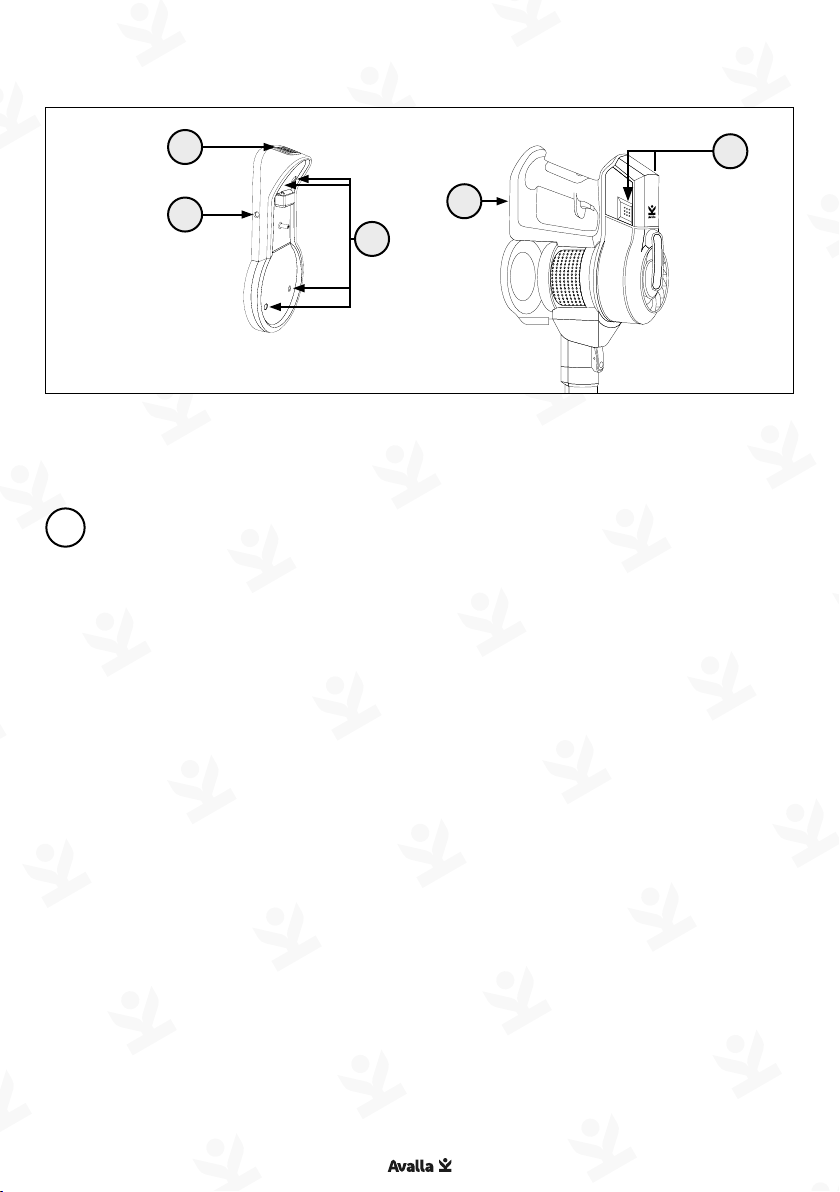
13. Charger release
14. Power in
15. Mounting holes (x4)
16. Charging port (base of unit)
17. Battery release
(one on each side of battery)
13
14
15
16
17
i