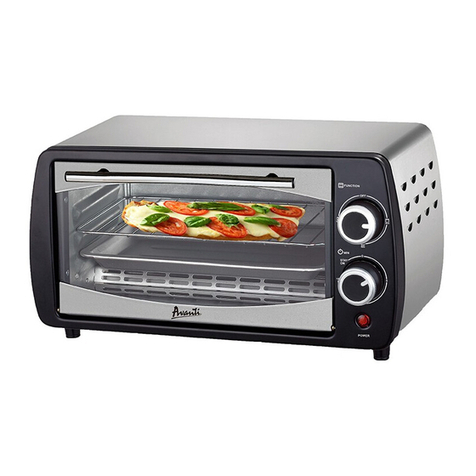
Avanti POA8K3S User manual

DIGITAL OVEN / BROILER / AIR FRYER
HORNO CON CONVECCION-ASADOR DIGITAL
FOUR COMPACTE NUMERIQUE
INSTRUCTION MANUAL
MANUAL DE INSTRUCCIONES
MANUEL D’INSTRUCTIONS
Model Number / No. de Modelo / Nos de Modèle:
MODEL / MODELO / MODELÉ: POA8K3S / POA8K3S-IS
BEFORE USE, PLEASE READ AND FOLLOW ALL SAFETY RULES AND OPERATING
INSTRUCTIONS.
Avanti has a policy of continuous improvement on its products and reserves the right to change materials and specifications without
notice.
Avanti Products LLC
P.O. Box 520604 - Miami, Florida 33152
www.avantiproducts.com

2
TABLE OF CONTENTS
Important Safety Instructions
3
Help Us Help You
4
Parts and Features
5
Installation Instructions
6
Before Using Your Appliance
6
Installation of Your Appliance
6
Electrical Connection
6
Operating Your Appliance
7 – 10
Control Panel
7
Using Your Oven
8 – 10
Care and Maintenance
10
Cleaning Your Appliance
10
Storing Your Appliance
10
Troubleshooting Guide
11
Service for Your Appliance
11
Your Avanti Products Warranty
12
Instrucciones en Español
13 – 20
Instructions en Français
21 – 30
Registration Information
Last

3
Page

4
IMPORTANT SAFETY INSTRUCTIONS
~WARNING~
To reduce the risk of fire, electrical shock, or injury when using your
appliance, follow these basic precautions:

5
When using electrical appliances, basic safety precautions should always be followed including
the following:
READ ALL INSTRUCTIONS, PRODUCT LABELS AND WARNINGS BEFORE USING THE
APPLIANCE.
•Do not touch hot surfaces, use handles or knobs. Always use oven mitts when handling hot materials
and allow metal parts to cool before cleaning. Allow the unit to cool thoroughly before putting in or
taking off parts.
•When the unit is not in use and before cleaning, unplug the appliance from the wall outlet. Make sure
the appliance is turned off before unplugging.
•To protect against risk of electrical shock, do not immerse the appliance in water or any other liquids.
•Don’t leave children alone or unattended where the appliance is hot or in operation. This appliance is
not designed to be used by children.
•Never use your appliance for heating the room. Your oven is not designed to heat your kitchen.
•Do not operate this or any appliance with a frayed or damaged cord or plug, after the appliance
malfunctions, is dropped or has been damaged in any manner.
•Do not use attachments not recommended by the manufacturer; they may cause fire, electric shock
or personal injury.
•Do not use outdoors or for commercial purposes.
•Do not use this appliance for other than its intended use.
•Do not let the cord dangle over the edge of a tabletop, countertop or to touch hot surfaces.
•Do not place the appliance near a hot gas, electric burner or in a heated oven.
•Extreme caution should be used when using containers constructed of other than metal or glass.
•A fire may occur if the appliance is covered or touching flammable materials, including curtains,
draperies, walls, etc., when in operation. Do not store any items on top of the appliance when in
operation.
•Do not store any materials, other than manufacturer’s recommended accessories in this unit when
not in use.
•Do not place any flammable materials in the appliance, such as paper, cardboard, plastic or any
materials that may catch fire or melt.
•Never clean the appliance with flammable liquids. The fumes can create a fire hazard or explosion.
•Do not cover the appliance with metal foil. This will cause overheating of the appliance.
•Oversized foods or metal utensils must not be inserted in the appliance as they may create a fire or
risk of electrical shock.
•Do not clean with metal scouring pads. Pieces can break off the pad and touch electrical parts
involving a risk of electrical shock.
•When broiling, use extreme caution when removing tray or disposing of hot grease.
•To turn this appliance off, return all controls to the “0” / “OFF” position, then remove the plug from
wall outlet.
•Cooked food can be very hot, especially pastry filling. Handle with care.
•Never pick up a flaming pan. Turns the controls off. Smother a flaming pan on a surface unit by
covering the pan completely with a well-fitting lid.
•Do not use water on grease fires. Flaming grease outside a pan can be put out by covering it with
baking soda, multipurpose dry chemical, or fire extinguisher. Flame in the oven can be smothered
completely by closing the oven door and turning the oven off or by using baking soda, multipurpose
dry chemical, or fire extinguisher.
This Unit Is For Household Use Only
- SAVE THESE INSTRUCTIONS -
6
HELP US HELP YOU...
Read this guide carefully.
It is intended to help you operate and maintain
your new appliance properly.
Keep it handy to answer your questions.
If you don't understand something or you need
more assistance, please call:
Avanti Customer Service
800-220-5570
Keep proof of original purchase date (such as
your sales slip) with this guide to establish the
warranty period.
Write down the model and serial numbers.
You'll find them on a label located on the back
side of the unit.
Please write these numbers here:
____________________________________
Date of Purchase
____________________________________
Model Number
____________________________________
Serial Number
Use these numbers in any correspondence or
service calls concerning your appliance.
If you received a damaged appliance,
immediately contact the dealer (or builder) that
sold you the appliance.
Save time and money. Before you call for
service, check the Problem Solver Guide. It lists
causes of minor operating problems that you
can correct yourself.
IF YOU NEED SERVICE
We're proud of our service and want you to be
pleased. If for some reason you are not happy
with the service you receive, here are some steps
to follow for further assistance.
FIRST, contact the people who serviced your
appliance. Explain why you are not pleased. In
most cases, this will solve the problem.
NEXT, if you are still not pleased, write all the
details, including your telephone number, and
send it to:
Customer Service
Avanti Products
10880 NW 30 Street
Miami, FL 33172 USA

7

8
PARTS AND FEATURES
a
Digital Display
b
Control Panel
c
Heating Element
d
Glass Door
e
Handle
f
Air Fryer Rack
g
Oven Rack
h
Baking Tray
i
Crumb Tray
j
Pan Removal Tool

9
INSTALLATION INSTRUCTIONS
ØBefore Using Your Appliance
•Remove the exterior and interior packing.
•Check to be sure you have all of the following parts:
1
Bake / Broil / Drip Pan
1
Air Fry Rack
1
Oven Rack
1
Crumb Tray
1
Tray Removal Tool
1
Instruction Manual
•Remove all the items inside your oven and clean the interior surface with lukewarm water using a soft
cloth.
•Do not attempt to repair or replace any part of your oven unless it is specially recommended in this
manual.
•This appliance requires 1800W and should be the only appliance operating on the circuit.
Installation of Your Appliance
Select a location for the appliance. The location should be in an open area on a flat counter where the
plug will reach an outlet.
•When positioning the appliance, it should be set on a flat, steady surface.
•Do not block air vents. If they are blocked during operation, the oven may overheat and eventually
cause the appliance failure.
•Keep the appliance away from hot air, steam or splashing liquids when choosing a place to locate it,
otherwise, the unit’s operation may be adversely affected, causing it to break down.
•Direct sunlight may affect the acrylic coating and heat sources may increase electrical consumption.
•Plug the appliance into an exclusive properly installed grounded wall outlet. Any questions
concerning power should be directed toward a certified electrician or an authorized Avanti Products
service center.
•Do not place anything on the top of the broiler oven and automatic toaster.
•Keep the appliance at least 5 inches away from rear wall to ensure the proper ventilation.
ØElectrical Connection
•The appliance has a polarized plug (One blade is wider than the other), to reduce the risk of electric
shock, this plug is intended to fit into the polarized outlet only one way. If the plug does not fit fully
into the outlet, reserve the plug. If it still does not fit, contact a qualified electrician. Do not attempt to
modify the plug in any way.
•A short power cord is provided to reduce the hazards resulting from entanglement or tripping over a
longer cord. An extension cord may be used with care, however, be sure the marked electrical rating
is at least as great as the rating of this appliance. The extension cord should be positioned such that
it does not drape over the counter or tabletop where it can be pulled on by children or tripped over.
The electrical rating of this appliance is listed on the bottom panel of the appliance.
NOTICE
BEFORE YOU USE THIS OVEN FOR THE FIRST TIME: THE HEATING ELEMENTS HAVE A
PROTECTIVE COATING, WHICH MUST BE BURNED OFF BEFORE USE. TO DO THIS, OPEN
THE OVEN DOOR, PRESS THE FUNCTION BUTTON, SELECT THE BAKE SETTING, THEN SET
THE TEMPERATURE TO 450ºF. LEAVE THE APPLIANCE SWITCHED ON FOR
APPROXIMATELY 15 MINUTES. IT IS IMPORTANT TO ENSURE ADEQUATE VENTILATION
DURING PERIOD AS A BURNING SMELL IS NORMAL DURING THIS PROCESS.

10
OPERATING YOUR APPLIANCE
ØControl Panel

11
COOKING FUNCTION SELECTIONS
Select the appropriate function for your use.
There are EIGHT (8) Pre-programmed functions:
Program
Default
time
(Minutes)
Default
temp. ºF
Time
adjustment
Temp.
adjustment Default function mode
TOAST \ 480
6 Shade Settings
1 – Lightest
6 – Darkest
NO Upper / Lower Elements
Air Fry 20 400ºF
Adjustable to
90 Minutes
Adjustable
150º - 400ºF
Upper / Lower Elements
Convection Fan
BAKE 30 350ºF
Adjustable to
90 Minutes
Adjustable
150º - 450ºF Upper / Lower Elements
COOKIE 18 350ºF
Adjustable to
90 Minutes
Adjustable
150º - 450ºF Upper / Lower Elements
BROIL 30 450ºF
Adjustable to
90 Minutes NO Upper / Lower Elements
PIZZA 20 400ºF
Adjustable to
90 Minutes
Adjustable
150º - 450ºF Upper / Lower Elements
DEHYD
DEHYDRATE 12 Hours 150ºF
Adjustable up to
12 hours NO Upper Element
WARM 30 180ºF
Adjustable to
90 minutes 130º - 180ºF Lower Element
NOTE:
Heating elements will cycle on and off during the selected function to maintain the
appropriate temperature.

12
OPERATING YOUR OVEN / AIR FRYER
Press the FUNCTION button to activate the control panel to select any of the cooking functions below:
(When the cooking cycle is completed, open door fully and remove food carefully.)
TOAST
•Press the function button.
•Turn the selector knob until the TOAST function is flashing on the display.
•Press the Time / Darkness or Temp / Darkness button and turn the knob to select the desired
toast shade (1 is the lightest – 6 is the darkest).
•Press the Start / Cancel button to either start or stop the cooking cycle.
Different types of bread require different toasting times. Lighter breads and waffles require a shorter
toasting time. Darker breads, muffins, and English muffins require a longer toasting time.
AIR FRY
•Press the Air Fry Button
•The Air Fry program will flash on the display.
•Press the Start / Cancel button to start the pre-heating cycle, “PRE” will be shown in the LED
display. After 5 minutes of pre-heating, the unit will beep to advise the oven is pre-heated.
•Open the door, place the food on the tray / air-fry rack, insert the tray / rack on the middle rack
position and close the door.
•Press the Temp button and turn the knob to select the desired cooking temperature.
•Press the time button and turn the knob to select the desired cook time.
Press the Start / Cancel button to either start or stop the cooking cycle.
BAKE
•Press the function button.
•Turn the selector knob until the BAKE function is flashing on the display.
•Press the Temp button and turn the knob to select the desired cooking temperature.
•Press the time button and turn the knob to select the desired cook time.
Press the Start / Cancel button to either start or stop the cooking cycle.
COOKIE
•Press the function button.
•Turn the selector knob until the COOKIE function is flashing on the display.
•Press the Temp button and turn the knob to select the desired cooking temperature.
•Press the time button and turn the knob to select the desired cook time.
Press the Start / Cancel button to either start or stop the cooking cycle.
BROIL
•Press the function button.
•Turn the selector knob until the BROIL function is flashing on the display.
•Press the time button and turn the knob to select the desired cook time.
Press the Start / Cancel button to either start or stop the cooking cycle.
PIZZA
•Press the function button.
•Turn the selector knob until the PIZZA function is flashing on the display.
•Press the Temp button and turn the knob to select the desired cooking temperature.

13
•Press the time button and turn the knob to select the desired cook time.
Press the Start / Cancel button to either start or stop the cooking cycle.
DEHYD - DEHYDRATE
•Press the function button.
•Turn the selector knob until the DEHYD function is flashing on the display.
•Press the time button and turn the knob to select the desired cook time.
Press the Start / Cancel button to either start or stop the cooking cycle.
WARM
•Press the function button.
•Turn the selector knob until the WARM function is flashing on the display.
•Press the time button and turn the knob to select the desired cook time.
Press the Start / Cancel button to either start or stop the cooking cycle.
CARE AND MAINTENANCE
ØCleaning Your Appliance
Before cleaning your appliance, unplug it and allow it to cool.
Remove the crumb tray, wire rack and drip/baking pan.
Use a damp cloth to wash the inside with warm water and a mild detergent. Do not Immerse in Water!
Abrasive cleaners, scrubbing brushes and chemical cleaners may damage the continuous clean coating
on this unit.
Wash the crumb tray, wire rack, drip/baking pan and metal handling tool with a mild detergent solution.
The glass oven door should be cleaned regularly with a non-abrasive liquid cleaner.
Rinse with a damp cloth and then a dry one.
The outside of the appliance should be cleaned with mild detergent and warm water.
CAUTION
Failure to unplug the appliance could result in electrical shock or personal injury.
ØStoring Your Appliance
Allow the appliance to cool completely before storing. If storing the appliance for long periods of time,
make certain that the appliance is clean and free of food particles. Store the appliance in a dry location
such as on a table or countertop or in a cupboard shelf. Other than the recommended cleaning, no
further user maintenance should be necessary.

14
PROBLEMS WITH YOUR APPLIANCE?
You can solve many common appliance problems easily, saving you the cost of a possible service call. Try
the suggestions below to see if you can solve the problem before calling the servicer.
TROUBLESHOOTING GUIDE
PROBLEMS
POSSIBLE CAUSES/SOLUTIONS
•Appliance does not operate.
•Unit not plugged in. Plug the unit into a 120V AC
electrical outlet.
•The circuit breaker tripped or a blown fuse.
•Be sure that the temperature, function and timer
selectors are set.
•Only one heating element is heating up.
•Function setting selection determines which heating
element will operate.
•When toasting, make sure the oven is not set to
BROIL setting.
•Heating elements are not heating up.
•Heating elements will cycle ON and OFF to maintain
proper heat. Make sure function selector is
positioned to the desired cooking setting.
•Overcooked/undercooked Foods
•Rack placement. Rack may need to be adjusted to
accommodate different foods.
•Burnt Smell
•Food build-up inside appliance, on heating elements
or in drip/baking pan. Refer to “Cleaning Your
Appliance”
SERVICE FOR YOUR APPLIANCE
We are proud of our customer service organization and the network of professional service technicians
that provide service on your Avanti appliances. With the purchase of your Avanti appliance, you can be
confident that if you ever need additional information or assistance, the Avanti Products Customer
Service team will be here for you. Just call us toll-free.
AVANTI PRODUCTS CUSTOMER SERVICES
Product Information
800-323-5029
Whatever your questions are about our products,
help is available.
Part Orders
800-220-5570 You may order parts and accessories that will be
delivered directly to your home by personal check,
money order, Master Card, or Visa.
In-Home Repair Service
800-220-5570 An Avanti Products authorized service center will
provide expert repair service, scheduled at a time
that is convenient for you. Our trained servicers
know your appliance inside and out.

15
YOUR AVANTI PRODUCTS
WARRANTY
Staple your sales receipt here. Proof of original purchase date
is needed to obtain service under warranty.
WHAT IS COVERED – LIMITED ONE-YEAR WARRANTY
Avanti Products warrants that the product is free from defects in materials and/or workmanship for a period of twelve (12) months
from the date of purchase by the original owner. The foregoing timeline begins to run upon the date of purchase, and shall not
be stalled, tolled, extended, or suspended for any reason whatsoever unless described in detail in the warranty document. For
one year from the date of purchase by the original owner, Avanti products will, at its option, repair or replace any part of the
product which proves to be defective in material or workmanship under normal use. Avanti Products will provide you with a
reasonably similar product that is either new or factory refurbished. During this period, Avanti Products will provide all parts and
labor with the exception as detailed below necessary to correct such defects free of charge, so long as the product has been
installed and operated in accordance with the written instructions in this manual. In rental or commercial use, the warranty
period is 90 days.
All Avanti appliances of 4.4 cubic feet capacity or less must be brought/sent to the appliance service center for repair.
FULL ONE YEAR WARRANTY FROM DATE OF PURCHASE ON ALL PARTS EXCEPT GLASS PARTS, AND/OR PARTS
DAMAGED AS A RESULT OF MISUSE OR LACK OF REASONABLE CARE.
REPLACEMENT PARTS AND REPAIR LABOR TO CORRECT DEFECTS IN MATERIALS OR WORKMANSHIP.
SERVICE MUST BE PROVIDED BY AN AUTHORIZED SERVICE COMPANY
FULL 30-DAY WARRANTY FROM DATE OF PURCHASE ON GLASS PARTS AND FINISH OF PORCELAIN ENAMEL,
PAINTED OR BRIGHT METAL FINISHED PARTS.
REPLACEMENT PARTS AND REPAIR LABOR TO CORRECT DEFECTS IN MATERIAL OR WORKMANSHIP.
SERVICE MUST BE PROVIDED BY AN AUTHORIZED SERVICE COMPANY.
WARRANTY EXCLUSIONS / WHAT IS NOT COVERED:
The warranty coverage described herein excludes all defects or damage that are not the direct fault of Avanti Products, including
without limitation, one or more of the following:
•A failure to comply with any applicable state, local, city, or county electrical, plumbing and/or building codes, regulations, or
laws, including failure to install the product in strict conformity with local fire and building codes and regulations.
•Any external, elemental and/or environmental forces and factors, including without limitation, rain, wind, sand, floods, fires,
mud slides, freezing temperatures, excessive moisture or extended exposure to humidity, lightning, power surges, structural
failures surrounding the appliance, and acts of God.
•Content losses of food or other content due to spoilage.
•Incidental or consequential damages
•Parts and labor costs for the following will not be considered
as warranty:
•Inner door panels, door shelves, door rails, and/or door
supports.
•Light bulbs and/or plastic housing.
•Plastic cabinet liners.
•Shipping and handling costs associated with the
replacement of the unit.
•Repairs performed by unauthorized servicers.
•Service calls that are related to external problems, such as
abuse, misuse, inadequate electrical power, accidents, fire,
floods, or any other acts of God.
•Failure of the product if it is used for other than it intended
purpose.
•The warranty does not apply outside the Continental
USA.
•Surcharges including but not limited to, any after hour,
weekend, or holiday service calls, tolls, ferry trip charges,
or mileage expense for service calls to remote areas.
In no event shall Avanti Products have any liability or responsibility whatsoever for damage to surrounding property, including
cabinetry, floors, ceilings, and other structures and/or objects around the product. Also excluded from this warranty are
scratches, nicks, minor dents, and other cosmetic damages on external surfaces and exposed parts; Products on which the
serial numbers have been altered, defaced or removed; service visits for customer education, or visits where there is nothing
wrong with the product; correction of installation problems (you are solely responsible for any structure and setting for the
product, including all electrical, plumbing and/or other connecting facilities, for proper foundation/flooring, and for any alterations
including without limitation cabinetry, walls, floors, shelving etc., as well as the resetting of breakers or fuses.
OUT OF WARRANTY PRODUCT
Avanti Products is under no obligation, at law or otherwise, to provide you with any concessions, including repairs, pro-rates, or
product replacement, once this warranty has expired.
Warranty – Portable Ovens

16
INSTRUCCIONES DE SEGURIDAD IMPORTANTES
~ADVERTENCIA~
Para reducir el riesgo de incendio, choque eléctrico, o lesiones personales al
usar su aparato, siga estas precauciones básicas:

17
Cuando se utilizan aparatos eléctricos, las precauciones básicas deseguridad siempre se deben
seguir incluyendo las siguientes:
Lea todas las instrucciones, etiquetas de productos y advertencias antes de usar el
aparato.
•No toque las superficies calientes, utilice las asas o las perillas. Siempre use guantes de cocina
cuando la manipulación de materiales calientes y permita que las partes metálicas se enfríen antes
de limpiar. Deje que la unidad se enfríe por completo antes de poner o quitar piezas.
•Cuando la unidad no está en uso y antes de la limpieza, desconecte el aparato de la toma de
corriente. Asegúrese de que el aparato está apagado antes de desconectar.
•Para evitar el riesgo de descarga eléctrica, no sumerja el aparato en agua o cualquier otro líquido.
•No deje a los niños solos o sin atención donde el aparato está caliente o en funcionamiento. Este
aparato no está diseñado para ser utilizado por niños.
•Nunca utilice su aparato para calentar la habitación. El horno no está diseñado para calentar su
cocina.
•No opere este o cualquier aparato con un cable o enchufe dañado o desgastado, después de un mal
funcionamiento, se ha caído o ha sido dañado de alguna manera.
•No utilice accesorios no recomendados por el fabricante; que pueden provocar incendios, descargas
eléctricas o lesiones personales.
•No usar en exteriores o con fines comerciales.
•No utilice este aparato para otro uso previsto.
•No deje que el cordón cuelgue sobre el borde de una mesa, mostrador o toque superficies calientes.
•No coloque el aparato cerca de un gas caliente, quemador eléctrico o en un horno caliente.
•precaución extrema se debe utilizar al usar recipientes sean de metal o de vidrio.
•Puede ocurrir un incendio si el electrodoméstico está cubierto o tocando materiales inflamables,
incluyendo cortinas, tapicería, paredes, etc., cuando está en funcionamiento. No almacene ningún
artículo en la parte superior del aparato cuando está en funcionamiento.
•No guarde ningún material, que no sean los accesorios recomendados por el fabricante de esta
unidad cuando no esté en uso.
•No coloque materiales inflamables en el aparato, tales como papel, cartón, plástico o cualquier
material que pueda incendiarse o derretirse.
•Nunca limpie el aparato con líquidos inflamables. Los vapores pueden crear un riesgo de incendio o
explosión.
•No cubra el aparato con papel de aluminio. Esto hará que el sobrecalentamiento del aparato.
•alimentos o utensilios metálicos no deben ser insertados en el aparato, ya que pueden crear un
riesgo de incendio o descarga eléctrica.
•No limpie con esponjas metálicas. Metálicas podrían entrar en el contacto con los componentes
eléctricos que implican un riesgo de descarga eléctrica.
•Cuando asar a la parrilla, tenga mucho cuidado al retirar la bandeja o la eliminación de grasa
caliente.
•Para apagar este aparato, devolver todos los controles a la “0” / Posición “OFF”, a continuación,
quitar el enchufe de toma de corriente.
•Los alimentos cocidos pueden ser muy caliente, especialmente relleno de panes. Tratar con
cuidado.
•Nunca levante una sartén en llamas. Convierte los controles fuera. Sofocar una sartén en llamas en
una unidad de superficie cubriendo la sartén completamente con una tapa bien ajustada.
•No use agua en incendios de grasa. La grasa en llamas fuera de una sartén se puede apagar
cubriéndola con bicarbonato de sodio, polvo químico seco multiuso o extinguidor de fuego. Llama en
el horno puede apagarse por completo al cerrar la puerta del horno y encender el horno apagado o
mediante el uso de bicarbonato de sodio, polvo químico seco multiuso o extinguidor de fuego.
Esta unidad es para uso doméstico solamente

18
- GUARDA ESTAS INSTRUCCIONES -

19
PARTES Y CARACTERÍSTICAS
a
Pantalla digital
b
Panel de control
c
Elemento de calefacción
d
Puerta de cristal
e
Manija
f
Parrilla Air Fryer
g
Rejilla del horno
h
Bandeja de hornear
i
Bandeja para migas
j
Herramienta para remover bandeja

20
INSTRUCCIONES DE INSTALACIÓN
ØAntes de usar su electrodoméstico
•Retire la envoltura interna y externa.
•Compruebe para asegurarse de que tiene todas las siguientes partes:
1
Bandeja para Asar / Hornear
1
Repisa para freír con aire
1
Repisa de horno
1
Bandeja para migajas
1
Herramienta para remover bandeja
1
Manual de instrucciones
•Retire todos los artículos dentro de su horno y limpiar la superficie interior con agua tibia con un
paño suave.
•No intente reparar o reemplazar cualquier parte de su horno a menos que esté especialmente
indicado en este manual.
•Este aparato requiere 1800W y debe ser el único aparato que opera en el circuito.
La instalación de su electrodoméstico
Seleccione una ubicación para el aparato. La ubicación debe ser en un área abierta en un contador
plana donde el tapón llegará a una toma de corriente.
•Cuando coloques del aparato, se debe estar en una superficie plana y estable.
•No bloquee las salidas de aire. Si se bloquean durante el funcionamiento, el horno puede
sobrecalentarse y eventualmente causar la falla del aparato.
•Mantenga el aparato lejos del aire caliente, vapor o salpicaduras de líquidos hora de elegir un lugar
para ubicar, de lo contrario, el funcionamiento de la unidad puede verse afectado negativamente,
haciendo que se descomponga.
•La luz solar directa puede afectar el recubrimiento acrílico y fuentes de calor puede aumentar el
consumo eléctrico.
•Enchufe el aparato a una toma de tierra de la pared exclusivo e instale. Cualquier pregunta
relacionada con la energía debe ser dirigida a un electricista certificado o un centro de servicio de
Avanti Products.
•No coloque nada en la parte superior del horno para asar y tostadora automática.
•Mantenga el aparato al menos 5 pulgadas de distancia de la pared trasera para asegurar la
ventilación adecuada.
ØConexión eléctrica
•El aparato tiene un enchufe polarizado (una hoja es más ancha que la otra), para reducir el riesgo de
descarga eléctrica, este enchufe está diseñado para encajar en la toma de corriente polarizada de
una sola manera. Si el enchufe no encaja completamente en la toma, reservar el enchufe. Si aun así
no encaja, póngase en contacto con un electricista calificado. No intente modificar el enchufe de
ninguna manera.
•Se proporciona un cable de alimentación corto para reducir el peligro resultante del enredo o de
tropezar con un cable más largo. Un cable de extensión puede ser usado con cuidado, sin embargo,
asegúrese de que la clasificación eléctrica marcada es al menos tan grande como la clasificación de
este aparato. El cable de extensión debe ser colocado de tal manera que no cuelgue del mostrador o
AVISO
ANTES DE USAR ESTE HORNO POR PRIMERA VEZ: LOS ELEMENTOS DE CALEFACCIÓN TIENEN UN
RECUBRIMIENTO DE PROTECCIÓN QUE DEBE QUEMARSE ANTES DE USAR. PARA HACER ESTO,
ABRA LA PUERTA DEL HORNO, PRESIONE EL BOTÓN DE FUNCIÓN, SELECCIONE LA
CONFIGURACIÓN DE BAKE Y LUEGO FIJE LA TEMPERATURA A 450ºF. DEJE EL APARATO
ENCENDIDO APROXIMADAMENTE 15 MINUTOS. ES IMPORTANTE ASEGURAR VENTILACIÓN
ADECUADA. UN OLOR DE QUEMADO ES NORMAL DURANTE ESTE PROCESO.
This manual suits for next models
1
Table of contents
Languages:
Other Avanti Oven manuals

Avanti
Avanti OCRB43W User manual

Avanti
Avanti PO3A1B User manual

Avanti
Avanti POW81B User manual

Avanti
Avanti TFL-11 User manual

Avanti
Avanti POW31B User manual

Avanti
Avanti POW61B User manual

Avanti
Avanti T-9 User manual

Avanti
Avanti PO9C3S User manual

Avanti
Avanti T-18 User manual

Avanti
Avanti PO61BA User manual