Avanti Elite ARFSE55R3S User manual

INSTRUCTION MANUAL
MANUAL DE INSTRUCCIONES
MANUEL D’INSTRUCTIONS
ARFSE55R3S
All Refrigerator / Beverage Cooler
Enfriador de bebidas
Refroidisseur de breuvages
BEFORE USE, PLEASE READ AND FOLLOW ALL SAFETY RULES AND OPERATING
INSTRUCTIONS.
Avanti Products has a policy of continuous improvement on its products and reserves the right to change materials and
specifications without notice.
Avanti Products LLC
P.O. Box 520604 -Miami, Florida 33152
www.avantiproducts.com

2
TABLE OF CONTENTS
Appliance Safety
3
Important Safeguides
4
Help Us Help You …
5
Parts and Features
6
Important Safety Instructions
7
Installation Instructions
7
Before Using Your Appliance
7
Installation of Your Appliance
7
Built-In Cabinet Instructions
7
Electrical Connection / Extension Cord / Surge Protector
8
Installing Stainless Steel Handle
9
Operating Your Appliance
10 - 11
ON/OFF Power
Setting the Temperature Control
Interior Light
Sabbath Mode
Door Ajar Alarm
High Temperature Alarm
Door Reversal Instructions
12
Cleaning Your Appliance
13
Power Failure
13
Moving Your Appliance
13
Charcoal Filtration System
13
Troubleshooting Guide
14
Service for Your Appliance
15
Wiring Diagram
15
Your Avanti Products Warranty
16
Instrucciones en Español
17 - 20
Instructions en Français
21 - 36
Registration Information and Registration Card
Last Page

3
APPLIANCE SAFETY
Your safety and the safety of others are very important.
We have provided many important safety messages in this manual and on your appliance. Always
read and obey all safety messages.
This is the Safety Alert Symbol. This symbol alerts you to potential hazards that
can kill or injure you and others. All safety messages will follow the Safety
Alert Symbol and either the words “DANGER”, “WARNING” or “CAUTION”.
Danger means that failure to heed this safety
statement may result in severe personal
injury or death.
Warning means that failure to heed this safety
statement may result in extensive product
damage, serious personal injury, or death.
Caution means that failure to heed this safety
statement may result in minor or moderate
personal injury, or property or equipment
damage.
All safety messages will alert you do what the potential hazard is, tell you how to reduce the chance
of injury, and let you know what can happen if the instructions are not followed.
PROP. 65 WARNING FOR CALIFORNIA RESIDENTS
WARNING:
Cancer And Reproductive Harm
www.p65warnings.ca.gov
REFRIGERANT GAS WARNINGS
FLAMMABLE REFRIGERANT GAS
DANGER - Risk of fire or explosion. Flammable refrigerant used.
DO NOT puncture refrigerant tubing.
DO NOT use mechanical devices to defrost refrigerator.
DANGER -Risk of fire or explosion. Flammable refrigerant used. To be repaired only by trained
service personnel. DO NOT puncture refrigerant tubing.
CAUTION - Risk of fire or explosion. Flammable refrigerant used. Consult repair manual / owner’s
guide before attempting to service this product. All safety precautions must be followed.
CAUTION - Risk of fire or explosion. Dispose of property in accordance with federal or local
regulations. Flammable refrigerant used.
CAUTION - Risk of fire or explosion due to puncture of refrigerant tubing. Follow handling
instructions carefully. Flammable refrigerant used.
CAUTION - To prevent a child from being entrapped, keep out of reach of children and not in the
vicinity of the cooler.
CAUTION – Flammable refrigerant used! When handling, moving and use of the refrigerator,
make sure to avoid either damaging the refrigerant tubing, or increasing the risk of a leak.

4
IMPORTANT SAFEGUIDES
Before the appliance is used, it must be properly positioned and installed as
described in this manual, so read the manual carefully. To reduce the risk of fire,
electrical shock or injury when using the appliance, follow basic precaution,
including the following:
•Plug into a grounded 3-prong outlet, do not remove grounding prong, do not use an adapter, and
do not use an extension cord.
•Replace all panels before operating.
•It is recommended that a separate circuit, serving only your appliance be provided. Use
receptacles that cannot be turned off by a switch or pull chain.
•Never clean appliance parts with flammable fluids. These fumes can create a fire hazard or
explosion. And do not store or use gasoline or other flammable vapors and liquids in the vicinity of
this or any other appliance. The fumes can create a fire hazard or explosion.
•Before proceeding with cleaning and maintenance operations, make sure the power line of the
unit is disconnected.
•Do not connect or disconnect the electric plug when your hands are wet.
•Unplug the appliance or disconnect power before cleaning or servicing. Failure to do so can result
in electrical shock or death.
•Do not attempt to repair or replace any part of your appliance unless it is specifically
recommended in this material. All other servicing should be referred to a qualified technician.
FOLLOW WARNING CALL OUTS BELOW ONLY WHEN APPLICABLE TO YOUR MODEL
•Use two or more people to move and install appliance. Failure to do so can result in back or other
injury.
•To ensure proper ventilation for your appliance, the front of the unit must be completely
unobstructed. Choose a well-ventilated area with temperatures above 60°F (16°C) and below
90°F (32°C). This unit must be installed in an area protected from the element, such as wind, rain,
water spray or drips.
•The appliance should not be located next to ovens, grills or other sources of high heat.
•The appliance must be installed with all electrical connections in accordance with state and local
codes. A standard electrical supply (115 V AC only, 60 Hz), properly grounded in accordance with
the National Electrical Code and local codes and ordinances is required.
•Do not kink or pinch the power supply cord of appliance.
•The fuse (or circuit breaker) size should be 15 amperes.
•It is important for the appliance to be leveled in order to work properly. You may need to make
several adjustments to level it.
•Never allow children to operate, play with or crawl inside the appliance.
•Do not use solvent-based cleaning agents of abrasives on the interior. These cleaners may
damage or discolor the interior.
•Do not use this apparatus for other than its intended purpose.

5
HELP US HELP YOU…
Read this guide carefully.
It is intended to help you operate and maintain
your new appliance properly.
Keep it handy to answer your questions.
If you don't understand something or you
need more assistance, please call:
Avanti Customer Service
800-220-5570
Keep proof of original purchase date (such as
your sales slip) with this guide to establish the
warranty period.
Write down the model and serial numbers.
You'll find them on a plate located on the rear
outside wall of the appliance.
Please write these numbers here:
____________________________________
Date of Purchase
____________________________________
Model Number
____________________________________
Serial Number
Use these numbers in any correspondence or
service calls concerning your appliance.
If you received a damaged appliance,
immediately contact the dealer (or builder) that
sold you the appliance.
Save time and money. Before you call for service,
check the Troubleshooting Guide. It lists causes
of minor operating problems that you can correct
yourself.
IF YOU NEED SERVICE
We're proud of our service and want you to be
pleased. If for some reason you are not happy
with the service you receive, here are some
steps to follow for further assistance.
FIRST, contact the people who serviced your
appliance. Explain why you are not pleased. In
most cases, this will solve the problem.
NEXT, if you are still not pleased, write all the
details, including your telephone number, and
send it to:
Customer Service
Avanti Products
10880 NW 30 Street
Miami, FL 33172 USA
CAUTION:
THIS APPLIANCE IS NOT
DESIGNED FOR THE STORAGE
OF MEDICINE OR OTHER
MEDICAL PRODUCTS.

6
PARTS & FEATURES
MODEL: ARFSE55R3S
1
Top Hinge
2
Stainless Steel Seamless Door Frame
3
Stainless Steel Door Handle
4
Beverage Compartment
5
Control Panel
6
Beverage Shelves
7
Front Grille
8
Bottom Hinge

7
IMPORTANT SAFETY INSTRUCTIONS
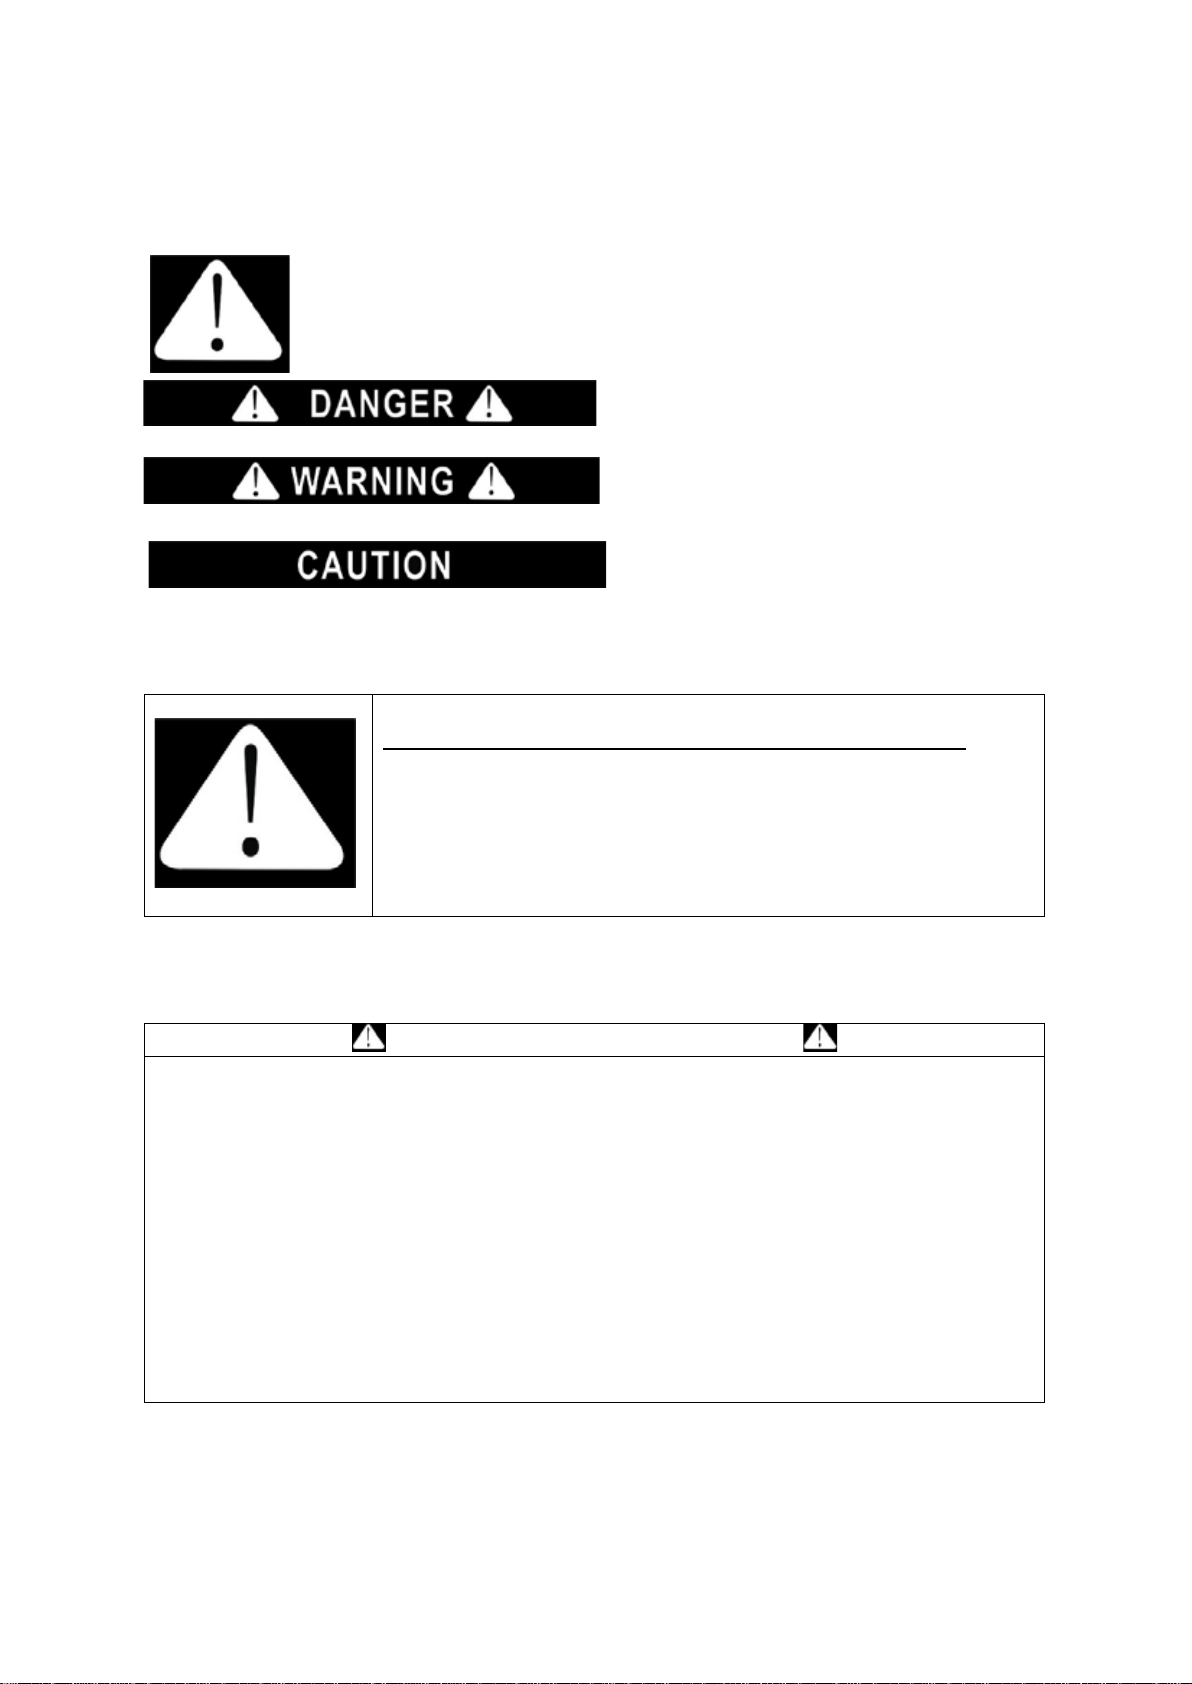
~
WARNING
~
To reduce the risk of fire, electrical shock,
or injury when using your appliance, follow
these basic precautions:
•
Read all instructions before using the appliance.
•DANGER or WARNING: Risk of child entrapment.
Child entrapment and suffocation are not problems of the past. Junked or abandoned
appliances are still dangerous . . . even if they will “just sit in the garage a few days”.
•Before you throw away your old appliance: Take off the door. Leave the shelves
in place so that children may not easily climb inside.
•Never allow children to operate, play with, or crawl inside the appliance.
•Never clean appliance parts with flammable fluids. The fumes can create a fire
hazard or explosion.
•Do not store or use gasoline or any other flammable vapors and liquids in the vicinity
of this or any other appliance. The fumes can create a fire hazard or explosion.
•Follow handling instructions carefully
•This appliance may not be treated as regular household waste, it should be taken to
the appropriate waste collection point for recycling of electrical components. For
information on local waste collection points, contact your local waste removal agency
or governmental office.
-Save these instructions-
INSTALLATION INSTRUCTIONS
Before using your appliance
−Remove the exterior and interior packing.
−Check to be sure you have all of the following parts:
Model ARFSE55R3S
Shelves ( 2 ) Stainless Steel Handle Instruction Manual
−Before connecting the appliance to the power source, let it stand upright for approximately 6 hours.
This will reduce the possibility of a malfunction in the cooling system from handling during
transportation.
−Clean the interior surface with lukewarm water using a soft cloth.
−Install the handle on the left side of the door.
Installation of your appliance
−Two people should be used when moving the appliance
−This appliance is designed to be for free standing installation or built-in (fully recessed).
−Place your appliance on a floor that is strong enough to support it when it is fully loaded. To level
your appliance, adjust the front levelling legs at the bottom of the appliance.
−Locate the appliance away from direct sunlight and sources of heat (stove, heater, radiator, etc.).
Direct sunlight may affect the acrylic coating and heat sources may increase electrical consumption.
Extreme cold ambient temperatures may also cause the unit not to perform properly.
−Avoid locating the unit in moist or wet areas.
−Plug the appliance into an exclusive, properly installed-grounded wall outlet. Do not under any
circumstances cut or remove the third (ground) prong from the power cord. Any questions
concerning power and/or grounding should be directed toward a certified electrician or an authorized
Avanti Products service center.
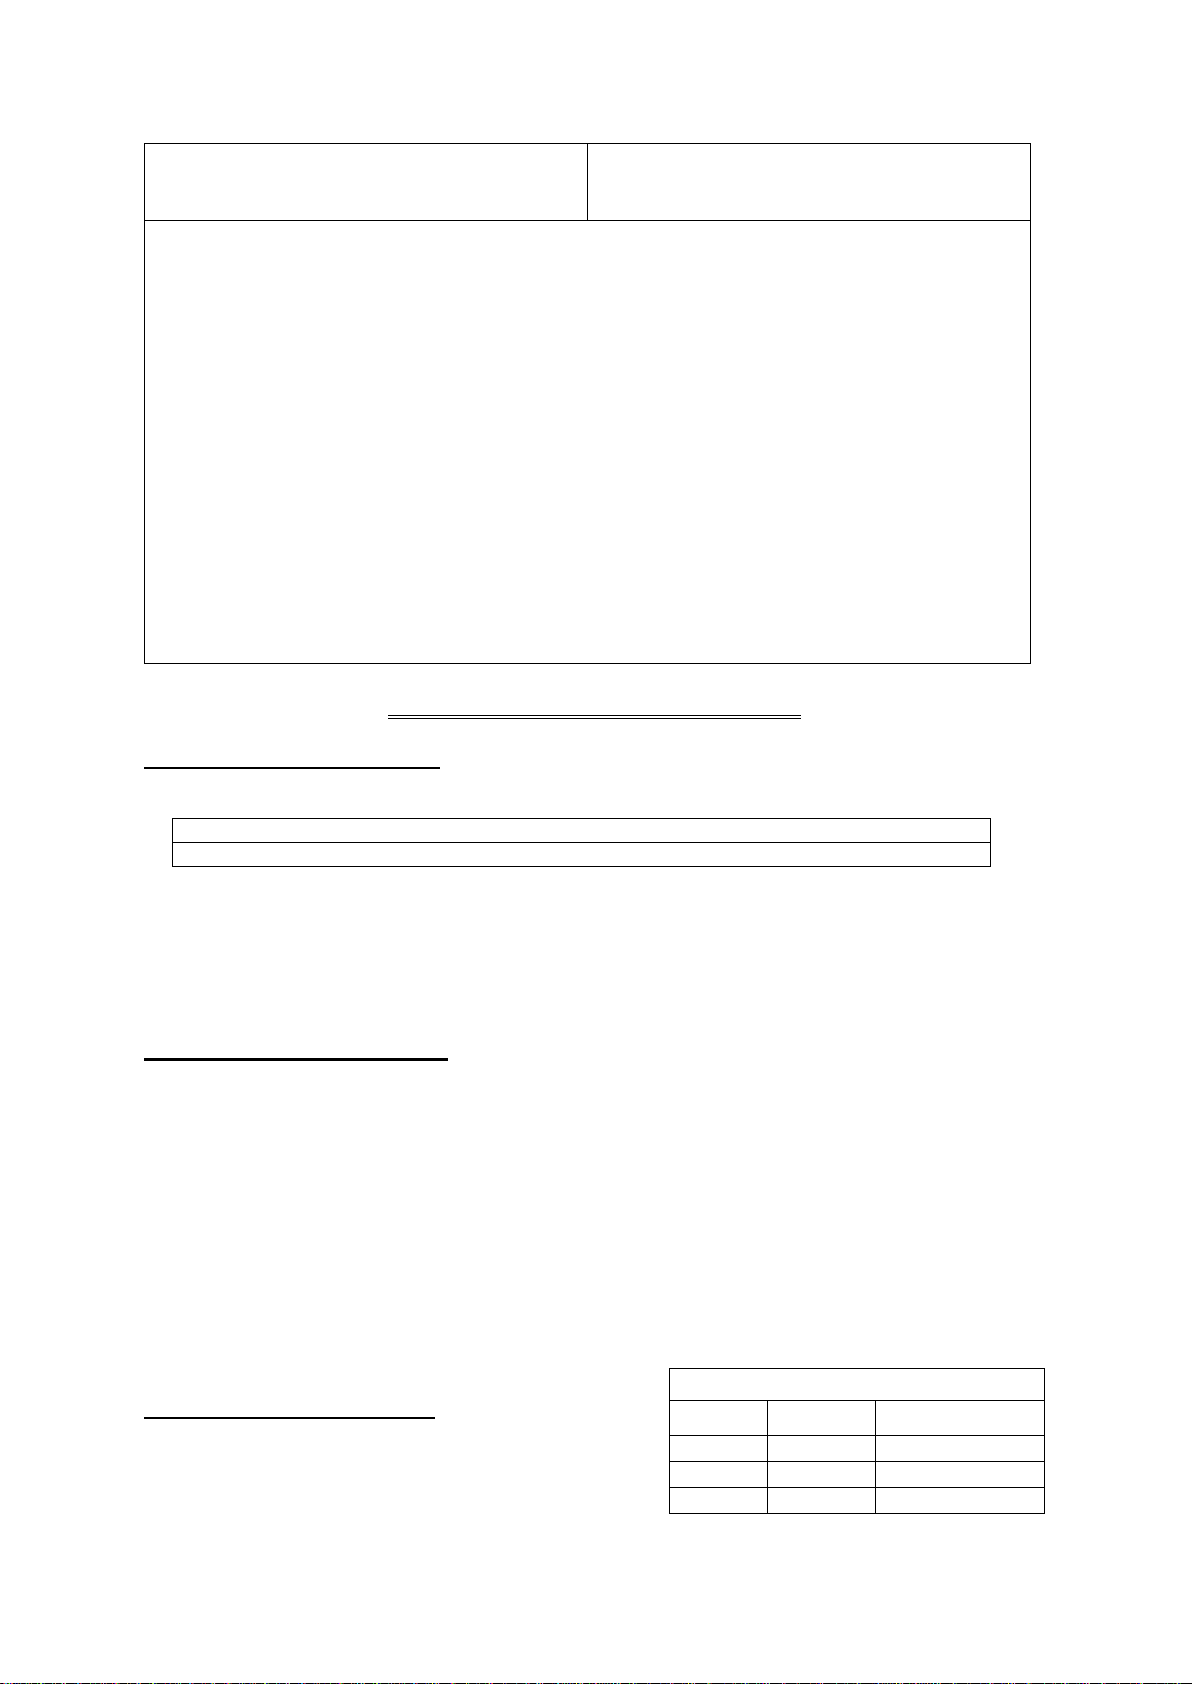
Built-in cabinet instructions
This unit is designed for either built-in or free standing
installation. If you plan to use this unit in a built-in
application please follow the requirements shown to the
right.
Cabinet Opening Dimensions
Inches Centimeters
Width
24
61
Depth
26
66
Height
35
89

8
Electrical connection
~Warning~: Improper use of the grounded plug can result in the risk of electrical shock. If the power
cord is damaged, have it replaced by an authorized Avanti service center.
This appliance should be properly grounded for your safety. The power cord of this appliance is
equipped with a three-prong plug which mates with standard three prong wall outlets to minimize the
possibility of electrical shock.
Do not under any circumstances cut or remove the third ground prong from the power cord supplied.
For personal safety, this appliance must be properly grounded.
This appliance requires a standard 115/120 Volt AC ~/60Hz electrical ground outlet with three-prong.
Have the wall outlet and circuit checked by a qualified electrician to make sure the outlet is properly
grounded. When a standard 2-prong wall outlet is encountered, it is your responsibility and obligation
to have it replaced with a properly grounded 3-prong wall outlet. The cord should be secured behind
the appliance and not left exposed or dangling to prevent accidental injury.
The appliance should always be plugged into its own individual electrical outlet which has a voltage
rating that matches the rating label on the appliance. This provides the best performance and also
prevent overloading house wiring circuits that could cause a fire hazard from overheated. Never unplug
the appliance by pulling the power cord. Always grip the plug firmly and pull straight out from the
receptacle. If the power cord is damaged, it must be replaced by the manufacturer, service agent or
similarly qualified persons in order to avoid hazard. Repair or replace immediately all power cords that
have become frayed or otherwise damaged. Do not use a cord that shows cracks or abrasion damage
along its length or at either end. When moving the appliance, be careful not to damage the power cord.
Extension cord
Because of potential safety hazards under certain conditions, it is strongly recommended that you do
not use an extension cord with this appliance. However, if you must use an extension cord it is
absolutely necessary that it be a UL/CUL-Listed, 3-wire grounding type appliance extension cord having
a grounding type plug and outlet and that the electrical rating of the cord be 115 volts and at least 10
amperes.
Power bar with surge protection
Most electrical appliances use a series of electric control boards to operate. These boards are very
susceptible to power surges and could be damaged or destroyed.
If the appliance is going to be used in an area or if your city / country is prone to power surges / outages;
it is suggested that you use a power surge protector for all electrical devices / appliances you use. The
surge protector that you select must have a surge block high enough to protect the appliance it is
connected to. If you have any questions regarding the type and size of surge protector needed contact
a licensed electrician in your area.
Damages due to power surges are not considered a manufacturer covered defect and will void your
product warranty.

9
Installing the stainless steel handle
This appliance includes a stainless steel handle. To install the handle please follow the below
instructions:
1. Pull away the door gasket in the area where the handle is to be installed on the left side as shown
below in Illustration # 1. The gasket is easily displaced by hand, no tools are necessary.
2. Align the handle with the screws installed. Tighten the screws using a Phillips head screwdriver
until the handle sets both flush and secured tightly against the door frame. (DO NOT over tighten
as this will cause damage to the handle assembly).
3. Replace the door gasket to its original position.
4. If you choose not to use the handle supplied, simply follow step 1 to access the installation screws
and remove them and then place the two decorative plugs into the two holes separately. Continue
on to step 3 to replace the door gasket to its original position.
Illustration # 1 Illustration # 2
1.
Gasket
3.
Phillips Head Screw Driver
2.
Phillips Head Screw
4.
Handle

10
OPERATING YOUR APPLIANCE
MODEL: ARFSE55R3S
It is recommended you install the beverage cooler in a place where the ambient temperature is between
19ºC-24ºC (66ºF-75ºF). If the ambient temperature is above or below recommended temperatures, the
performance of the unit may be affected. For example, placing your unit in extreme cold or hot
conditions may cause interior temperatures to fluctuate. The range of 1ºC-6ºC (34ºF-43ºF) may not be
reached.
Unit Temperature Range:
34º F – 50º F
1º C - 10º C
ON/OFF Power
To turn OFF the appliance, press the button and hold 2 seconds.
Setting the temperature control
You can select temperature display setting from Fahrenheit to Celsius degree by touching the button.
Fahrenheit or Celsius degrees indicator will appear in blue color in the temperature display window.
If you desire to change the temperature, set the temperature as you desire by touching the or
button. The temperature that you desire to set will increase 1ºF or 1ºC if you touch the button once;
on the contrary the temperature will decrease 1ºF or 1ºC if you touch the button once.
NOTE: If the unit is unplugged, if the power is lost, or turned off, you must wait 3 to 5 minutes before
restarting the unit. If you attempt to restart before this time delay, the beverage cooler will not start.
When you use the beverage cooler for the first time or restart the beverage cooler after having been
shut off for a long time, there could be a few degrees variance between the temperature you select and
the one indicated on the LED readout. This is normal and it is due to the length of the activation time.
Once the beverage cooler is running for a few hours everything will be back to normal.
Interior light
Your unit is equipped with progressive lighting that will progress from off to bright when the door is
opened and darken from bright to OFF when the door is closed.
If you prefer to have the light ON at all times, simply press and hold the light ON/OFF button for
approximately 3 seconds to activate the ON mode.
The lights will remain on even if the door is opened and closed.
If you want to return to the progressive mode, simply press and hold the light ON/OFF button again for
approximately 3 seconds and the unit will return to progressive mode.
Your unit is equipped with a selectable color lighting system which will allow you to select the interior
lighting color from the standard White to Cool Blue to Warm Amber.
To change the interior lighting color simply press and release the light ON/Off button. The light color
will change from White then to Cool Blue then to Warm Amber.

11
Sabbath Mode
Sabbath mode will disable all system responses including the interior lighting, digital display and any
audible alarms. In Sabbath mode the unit will continue to cool and maintain the set temperature without
any visible lighting until the feature is disabled.
To enable the Sabbath mode feature press and hold the Sabbath button until you hear (2) two beeps
and the interior lighting turns off.
To disable the Sabbath mode feature press and hold the Sabbath button until the interior lighting and
display turn on.
Note: If the unit is in Sabbath mode before a power outage or being unplugged, when the power returns
or plugged back in to a power source the system will continue in Sabbath mode until the mode is turned
off.
Door Ajar Alarm
Your unit is equipped with an audible alarm to alert you when the door has been left open.
If at any time the door has been left open for more than 5 minutes at a time, the alarm will sound and
then will continue to sound until the door is closed completely or the unit is powered off.
HIGH Temperature Alarm
Your unit is equipped with an additional warning system that will alert you if the inside temperature of
the unit raises above 72º F / 22º C.
Once the unit has been connected and running for over 10 hours, if the inside temperature of the unit
raises above 72ºF / 22ºC, the display will flash continuously the word “HI”, if the temperature does not
lower and the display flashes “HI” for over 10 hours, then compressor will stop automatically. This
indicates there is an issue with the unit and you should turn it off and find the cause of the temperature
issue.
Defrost Function
This unit is equipped with an automatic defrost function and does not require manual defrosting. Defrost
water from the appliance is channeled into a drip tray located above the compressor. Heat transfer
from the compressor causes the defrost water to evaporate.
ØSHELVES
The beverage center is equipped with the two (2) wire shelves. You can move the shelves out and in
smoothly.
•To prevent damaging the door gasket, make sure to have the door all the way opened when
pulling the shelves outward.
•For easy access to the storage content, you can pull the shelves outward to gain access to the
items on the rear portion of the shelf, however this unit was designed with a plastic post on each
sides of the shelf track to prevent the shelves from falling.
•When removing the shelf out of the inner rail, make sure to remove all items first. Then move the
shelf to the position where the notch of shelf is exactly under the plastic post and lift the shelf. In
order to replace the shelf, repeat steps described above in reverse.

12
ØDOOR REVERSAL INSTRUCTIONS
Open the door and remove the two screws under the
right bottom corner of the door that are used to hold the
right lower hinge to the door.
Be careful to hold the door with both hands to avoid
dropping it after removing the screws.
Pull the door downward to remove and place it on a
padded surface to prevent scratching it.
Remove the door shaft from the right upper hinge
。
Install the left upper hinge from the plastic bag that
includes the instruction manual.
Remove the right lower hinge supporter with the adjusting
washer.
Install the left lower hinge supporter from the plastic bag
that includes the instruction manual.
Make sure to put the adjusting washers at the designated
position.
Rotate the door 180 degrees.
Remove the 2 screws at the bottom of the door and also
the light switch, then install the light switch at the
opposite side of the door frame.
Insert the lower door hinge into the door frame.
Carefully insert the upper door hinge into the door.
Slide the door on top of the lower hinge and secure the
door by installing the lower screws.

13
Cleaning your appliance
Turn off the power, unplug the appliance, and remove all items including shelves. Wash the inside
surfaces with a warm water and baking soda solution. The solution should be about 2 tablespoons of
baking soda to 1 cup of water.
Wash the shelves with a mild detergent solution. Wring excess water out of the sponge or cloth when
cleaning area of the controls, or any electrical parts.
Wash the outside cabinet with warm water and mild liquid detergent. Rinse well and wipe dry with a
clean soft cloth. Do not use steel wool or steel brush on the stainless steel. These will contaminate the
stainless steel with steel particles and rusting may occur.
Do not use cleaners containing ammonia or alcohol on the appliance. Ammonia or alcohol can damage
the appearance of the appliance. Never use any commercial or abrasive cleaners or sharp objects on
any part of the appliance
Power failure
Most power failures are corrected within a few hours and should not affect the temperature of your
appliance if you minimize the number of times the door is opened. If the power is going to be off for a
longer period of time, you need to take the proper steps to protect your contents.
Note: Wait 3 to 5 minutes before attempting to restart the appliance if operation has been interrupted.
Moving your appliance
−Remove all items
−Tape down securely all loose items (shelves) inside your appliance.
−Turn the adjustable leg up to the base to avoid damage.
−Tape the door shut.
−Be sure the appliance stays secure in the upright position during transportation. If you absolutely
need to transport the unit horizontally, transport the unit on its back (door on top). Also protect
outside of appliance with a blanket, or similar item.
Vacation Time
Short vacations: Leave the appliance operating during vacations of less than three weeks.
Long vacations: If the appliance will not be used for several months, remove all items and turn off the
appliance. Clean and dry the interior thoroughly. To prevent odor and mold growth, leave the door
open slightly, blocking it open if necessary.
Charcoal Filtration System
Your wine is a living object that breathes through the cork of its bottle. In order to preserve the quality
and taste of your fine wines, they must be stored at the ideal temperature and ambient conditions.
Your appliance is equipped with an active charcoal filtration system to ensure air purity and to maintain
an odor free cabinet for the storage of your wines. The filter is located at the bottom of the rear panel
inside your appliance. Keep in mind, that this filter must be changed every 12 months.
−Remove the bottles of wine stored on the two (2) shelves in front of the filter.
−Remove the shelves and set aside to be replaced once you have changed the filter
−Hold the filter and turn it at 45 degrees in the counter-clockwise direction and then pull it out.
−Remove the existing filter and replace with a new one.
−Put the new filter into the hole and then turn the filter at 45 degrees in clockwise direction.
To purchase a new filter or filter assembly
call Avanti 1-800-220-5570

14
TROUBLESHOOTING GUIDE
You can solve many common appliance problems easily, saving you the cost of a possible service
call. Try the suggestions below to see if you can solve the problem before calling the servicer.
PROBLEM POSSIBLE CAUSE SOLUTION
Unit does not
operate.
Not plugged in.
The appliance is turned off.
The circuit breaker tripped or a blown
fuse.
Plug the unit.
Press to turn on the unit.
Check the breaker and/or fuses.
Unit is not cold
enough.
External environment may require a
higher setting.
The door is opened too often.
The door is not closed completely.
The door gasket does not seal properly.
Check the temperature control setting.
Close the door properly.
Check the door gasket.
The compressor
turns on and off
frequently.
The room temperature is hotter than
normal.
A large amount of contents has been
added to the unit.
The door is opened too often.
The door is not closed completely.
The temperature control is not set
correctly.
The door gasket does not seal properly.
Close the door properly.
Check the door gasket.
The fans turn on
and off frequently.
In order to circulate the air and maintain the set temperature inside the cabinet the
fans must cycle on and off even when the compressor is off. The fans will cycle ON
and OFF while the compressor is off approximately every 10 seconds, this is called
“Semi-speed status”. This cycle is normal and meant both to circulate the air as well
as ensure the continued operational status of the fans. If the fan stops completely
and does not complete this cycle the fan is non-operational.
The light does not
work.
Not plugged in.
The circuit breaker tripped or a blown
fuse.
The light button is “OFF”.
Plug the unit.
Check the breaker and/or fuses.
Vibrations. The unit is not levelled
The bottles are vibrating.
There is an object under the Unit.
Check to assure that the Unit is level.
Make sure the bottles don’t touch each
other.
Remove the object.
The unit seems to
make too much
noise. The Unit is not level.
Level the unit.
The rattling noise may come from the
flow of the refrigerant, which is normal.
As each cycle ends, you
may hear
gurgling sounds caused by the flow of
refrigerant in your unit. Contraction and
expansion of the inside walls may cause
popping and crackling noises.
The door will not
close properly.
The Unit is not level.
The door was reversed and not properly
installed.
The gasket is dirty.
The shelves are out of position.
Level the unit.
Close the door properly.
Clean the door gasket.
Place the shelves properly.
Error Code:
E1-E2-E3-
E4-E7-E8 A sensor has failed. Contact us for a service call.

15
SERVICE FOR YOUR APPLIANCE
We are proud of our customer service organization and the network of professional service technicians
that provide service on your Avanti appliances. With the purchase of your Avanti appliance, you can
have the confidence that if you ever need additional information or assistance, the Avanti Products
Customer Service team will be here for you. Just call us toll-free.
AVANTI PRODUCTS CUSTOMER SERVICES
Product Information
800-323-5029
Whatever your questions are about our products,
help is available.
Part Orders
800-220-5570 You may order parts and accessories that will be
delivered directly to your home by personal
check, money order, Master Card, or Visa.
In-Home Repair Service
800-220-5570 An Avanti Products authorized service center will
provide expert repair service, scheduled at a time
that is convenient for you. Our trained servicers
know your appliance inside and out.
WIRING DIAGRAM

16
YOUR AVANTI PRODUCTS
WARRANTY
Staple your sales receipt here. Proof of original
purchase date is needed to obtain service
under warranty.
WHAT IS COVERED – LIMITED ONE-YEAR WARRANTY
Avanti Products warrants that the product is free from defects in materials and/or workmanship for a period of
twelve (12) months from the date of purchase by the original owner. The foregoing timeline begins to run
upon the date of purchase, and shall not be stalled, tolled, extended, or suspended for any reason
whatsoever unless described in detail in the warranty document. For one year from the date of purchase by
the original owner, Avanti products will, at its option, repair or replace any part of the product which proves to
be defective in material or workmanship under normal use. Avanti Products will provide you with a
reasonably similar product that is either new or factory refurbished. During this period Avanti Products will
provide all parts and labor necessary to correct such defects free of charge, so long as the product has been
installed and operated in accordance with the written instructions in this manual. In rental or commercial use,
the warranty period is 90 days. All Avanti appliances of 4.2 cubic feet capacity or less must be brought/sent
to the appliance service center for repair.
LIMITED SECOND THROUGH FIFTH YEAR WARRANTY
For the second through the fifth year from the date of original purchase, Avanti Products will provide a
replacement compressor free of charge due to a failure. You are responsible for the service labor and freight
charges. In rental or commercial use, the limited compressor warranty is one year and nine months. Costs
involved to move the product to the service center and back to the user’s home, as maybe required, are the
user’s responsibility.
WARRANTY EXCLUSIONS / WHAT IS NOT COVERED:
The warranty coverage described herein excludes all defects or damage that are not the direct fault of Avanti
Products, including without limitation, one or more of the following:
•
A failure to comply with any applicable state, local, city, or county electrical, plumbing and/or building codes,
regulations, or laws, including failure to install the product in strict conformity with local fire and building
codes and regulations.
•Any external, elemental and/or environmental forces and factors, including without limitation, rain, wind,
sand, floods, fires, mud slides, freezing temperatures, excessive moisture or extended exposure to
humidity, lightning, power surges, structural failures surrounding the appliance, and acts of God.
•
Content losses of food or other content due to
spoilage.
•Incidental or consequential damages
•Parts and labor costs for the following will not be
considered as warranty:
•Inner door panels, door shelves, door rails,
and/or door supports.
•Light bulbs and/or plastic housing.
•Plastic cabinet liners.
•Punctured evaporator that voids the warranty
on the complete sealed system.
•Shipping and handling costs associated with the
replacement of the unit.
•Repairs performed by unauthorized servicers.
•Service calls that are related to external problems,
such as abuse, misuse, inadequate electrical
power, accidents, fire, floods, or any other acts of
God.
•Failure of the product if it is used for other than it
intended purpose.
•The warranty does not apply outside the
Continental USA.
•Surcharges including but not limited to, any after
hour, weekend, or holiday service calls, tolls, ferry
trip charges, or mileage expense for service calls
to remote areas.
In no event shall Avanti Products have any liability or responsibility whatsoever for damage to surrounding
property, including cabinetry, floors, ceilings, and other structures and/or objects around the product. Also
excluded from this warranty are scratches, nicks, minor dents, and other cosmetic damages on external
surfaces and exposed parts; Products on which the serial numbers have been altered, defaced or removed;
service visits for customer education, or visits where there is nothing wrong with the product; correction of
installation problems (you are solely responsible for any structure and setting for the product, including all
electrical, plumbing and/or other connecting facilities, for proper foundation/flooring, and for any alterations
including without limitation cabinetry, walls, floors, shelving etc., as well as the resetting of breakers or fuses.
OUT OF WARRANTY PRODUCT
Avanti Products is under no obligation, at law or otherwise, to provide you with any concessions, including
repairs, pro-rates, or product replacement, once this warranty has expired.
WARRANTY – REFRIGERATION - COMPRESSOR

17
INSTRUCCIONES DE SEGURIDAD
Su seguridad y la seguridad de los demás son muy importantes.
Hemos incluido muchos mensajes importantes de seguridad en este manual y en su
electrodoméstico. Lea y obedezca siempre todos los mensajes de seguridad.
Éste es el símbolo de alerta de
seguridad. Este símbolo le avisa de
los peligros potenciales que pueden
matar o lesionar a usted y otros.
Toda la seguridad mensajes seguirá
a la Seguridad Símbolo de alerta y
cualquiera de los pabellones"
PELIGRO","ADVERTENCIA" o
"PRECAUCIÓN".
Peligro significa que el
incumplimiento de la medida de
seguridad podría causar lesiones
graves o la muerte.
Advertencia significa que si no se
respeta esta medida de seguridad
podría resultar en graves daños al
producto, lesiones personales
graves o la muerte.
Advertencia significa que si no se
respeta esta medida de seguridad
podría resultar en graves daños al
producto, lesiones personales
graves o la muerte.
Todo mensaje de seguridad le avisará a cuál es el peligro potencial, le dirán cómo
reducir el riesgo de lesiones, y le hará saber lo que puede suceder si no se siguen las
instrucciones.
GAS REFRIGERANTE INFLAMABLE
PELIGRO -Riesgos de incendio o explosión. Refrigerante inflamable usado.
NO use dispositivos mecánicos para descongelar el refrigerador. No pinche tubería refrigerante.
PELIGRO -Riesgos de incendio o explosión. Refrigerante inflamable usado. Para ser reparado sólo por
personal de servicio técnico cualificado. No pinche tubería refrigerante.
PRECAUCIÓN -Riesgo de incendio o explosión. Refrigerante inflamable usado. Consulte el manual de
reparación / manual del propietario antes de intentar reparar este producto. Todas las precauciones de
seguridad que se deben seguir.
PRECAUCIÓN -Riesgo de incendio o explosión. Deshágase de los bienes de acuerdo con las
regulaciones federales o locales. Refrigerante inflamable usado.
PRECAUCIÓN -Riesgo de incendio o explosión debido a la perforación de la tubería de refrigerante.
Siga las instrucciones de manejo cuidadosamente. Refrigerante inflamable usado.
PRECAUCIÓN -Para evitar que un niño está atrapado, mantener fuera del alcance de los niños y no en
las proximidades de la nevera.
PRECAUCIÓN - refrigerante inflamable usado! Al manejar, el movimiento y el uso del refrigerador,
asegúrese de evitar tanto daños en el tubo de enfriamiento, o aumentando el riesgo de una fuga.

18
INSTRUCCIONES DE SEGURIDAD
ATENCION
INSTRUCCIONES PARA LA CONEXION A TIERRA
Este aparato electrodoméstico debe estar conectado a tierra. En caso de un cortocircuito eléctrico, la
conexión a tierra reduce el riesgo de choque eléctrico proporcionando un cable a tierra con un
enchufe de conexión a tierra. Este enchufe debe estar conectado en un tomacorriente instalado
correctamente y conectado a tierra.
ADVERTENCIA – El uso inadecuado del enchufe de conexión a tierra puede resultar en un riesgo de
choque eléctrico. Consulte con un electricista o persona de reparaciones competente si no
comprenden bien las instrucciones de conexión a tierra o si existe alguna duda sobre si el aparato
está conectado a tierra correctamente.
NO USE UN CORDON DE PROLONGACION ELECTRICA
Use un tomacorriente de pared exclusivo. No conecte su vinera a cordones de prolongación eléctrica
o junto a cualquier otro electrodoméstico en el mismo tomacorriente de pared.
ADVERTENCIA IMPORTANTE:
Una vinera vacía es una atracción muy peligrosa para los niños. Saque todas las juntas,
pestillos, tapas o puerta de todo electrodoméstico que no esté en uso, o tome alguna
medida para asegurar que no presente peligro.
INSTRUCCIONES DE INSTALACION
Saque los embalajes exteriores, limpie bien el exterior con un paño suave seco, y el interior con un
paño húmedo y tibio. Evite colocar la vinera cerca de una fuente de calor, luz de sol directa, o lugar
húmedo.
Ubicación
1. Seleccione un lugar con su piso fuerte y nivelado.
2. Evite la luz directa del sol o calor. La luz directa del sol puede afectar la capa de acrílico.
Las fuentes de calor en su proximidad provocarán un consumo mayor de electricidad.
OPERACION
Para evitar vibraciones, el compartimiento interior debe estar bien nivelado. La temperatura variará
dependiendo de la cantidad de botellas almacenadas y la frecuencia con que se abre la puerta.
Cuando el electrodoméstico no se use por un período largo, desconecte el enchufe y deje la puerta
entreabierta.
Nota: Espere entre 3 a 5 minutos antes de volver a encender si el funcionamiento ha sido
interrumpido.
Se recomienda que Ud. coloque su electrodoméstico en un lugar donde la temperatura ambiental se
mantenga entre 23-25 grados centígrados.
Si la temperatura ambiental oscila afuera de esos límites, pueda afectar la temperatura de la caja.
Por ejemplo, si su unidad está situada en lugares donde hay temperaturas muy frías o calientes
también puede afectar la temperatura de la caja.
ENCENDIDO/APAGADO
Para apagar el electrodoméstico, presione el botón ( ) y manténgalo oprimido por un mínimo de 3
segundos.
Ud. puede seleccionar los grados centígrados o Fahrenheit presionando él botón marcado .
En la pantalla digital aparecerá el F o C indicador en color azul.

19
Modelo: ARFSE55R3S
El rango de temperatura de su enfriador de bebidas es de 34º a 50ºF (1º a 10ºC).
Oprima el botón marcado ( ) una vez y la temperatura aumentará un grado. Si Ud. oprime el
botón marcado ( ) una vez la temperatura bajará un grado.
Modo Sabbat (Reposo)
El modo sabático deshabilitará todas las respuestas del sistema, incluida la iluminación interior, la
pantalla digital y cualquier alarma audible. En el modo sabático, la unidad continuará enfriándose y
mantendrá la temperatura establecida sin ninguna iluminación visible hasta que se desactive la
función.
Para habilitar la función del modo sabático, mantenga presionado el botón Sabbath hasta que
escuche (2) dos pitidos y se apague la iluminación interior.
Para desactivar la función del modo sabático, presione y mantenga presionado el botón Sabbath
hasta que se enciendan la iluminación interior y la pantalla.
Nota: Si la unidad está en modo sabático antes de un corte de energía o se desconecta, cuando la
energía regresa o se vuelve a enchufar a una fuente de energía, el sistema continuará en modo
sabático hasta que se apague el modo.
Alarma de puerta entreabierta
Su unidad está equipada con una alarma audible para avisarle cuando la puerta se ha dejado
abierta. Si en cualquier momento la puerta se ha dejado abierta por más de 5 minutos a la vez, la
alarma sonará y luego continuará sonando hasta que la puerta esté cerrada por completo o la unidad
está apagada.
Alarma de temperatura alta
Su unidad está equipada con un sistema de advertencia que le avisará si la temperatura interior de la
unidad se eleva por encima de 72º F / 22º C.
Una vez que la unidad ha sido conectada y funcionando durante más de 10 horas, si la temperatura
interior de la unidad se eleva por encima de 72ºF / 22ºC, la pantalla parpadeará continuamente la
palabra "HI", si la temperatura interior no se baja; y la pantalla parpadea "HI" durante más de 10
horas, el compresor se detendrá automáticamente. Esto indica que hay un problema con la unidad y
debe apagarla y encontrar la causa del problema relacionado con la temperatura.
Luz interior
La luz interior se controla manualmente y no funciona al abrir ni cerrar la puerta. Para prender o apagar
la luz, presione el botón marcado ( ) de la luz ubicado en el panel de control. Si la luz está
prendida, por más de 10 minutos, se apagará automáticamente.
Descongelación
Su vinera ha sido diseñada con un sistema de descongelación de “ciclo automático”.
Las superficies refrigeradas del compartimiento se descongelan automáticamente, durante el ciclo
“apagado” del control de enfriamiento (termostato). El agua descongelada del compartimiento es
eliminada automáticamente, encauzándola hacia una bandeja de goteo ubicado en el área del
compresor. La transferencia de calor del compresor evapora el agua.
ADVERTENCIA
Asegúrese de tener la puerta abierta completamente se Ud desea remover las repisas o moverlas
hacia adelante para extraer una botella.

20
NOTA:
Para remover las repisas corredizas, vacíe las repisas antes de sacarlas. Hálelas aproximadamente
un tercio hacia afuera hasta que la marca en el raíl se alínee con el poste plástico en ambos lados.
Levante cada repisa y sáquela suavemente de la unidad. Para reemplazar de nuevo la repisa, repita
los pasos anteriores en dirección opuesta.
CUIDADO Y MANTENIMIENTO
Limpieza
Para limpiar el interior, use un paño suave con una solución de una cucharada de bicarbonato de
sodio por cada cuarto de agua, o una solución de espuma de jabón suave, o un detergente suave.
Para lavar las rejillas, sáquelas deslizándolas con cuidado, y use una solución de detergente suave;
luego séquelas con un paño suave. Limpie el exterior con un paño húmedo suave y un poco de
detergente suave o productos de limpieza para electrodomésticos.
Corte de corriente
La mayoría de los cortes de corriente se corrigen en una o dos horas y no afectarán las temperaturas
de su electrodoméstico. Sin embargo, Ud. deberá reducir la cantidad de veces que abra la puerta
cuando la corriente esté apagada.
Si Ud. se muda
Saque o asegure todos los artículos dentro de su electrodoméstico. Para evitar que los tornillos
nivelantes se averíen, gírelos completamente hacia la base.
Table of contents
Languages:
Other Avanti Refrigerator manuals

Avanti
Avanti RMX45B0W User manual

Avanti
Avanti OR2700SS User manual

Avanti
Avanti PDR75L34G User manual

Avanti
Avanti BCA1800W User manual

Avanti
Avanti BCA184BG User manual

Avanti
Avanti 31YWT User manual

Avanti
Avanti FF881W User manual

Avanti
Avanti 1133YW User manual

Avanti
Avanti BCA3281B User manual

Avanti
Avanti ARBC17T2PG User manual

Avanti
Avanti RM4551B User manual

Avanti
Avanti CK36-1 User manual

Avanti
Avanti FF1008W User manual

Avanti
Avanti OR1533U3S User manual

Avanti
Avanti 18DYW User manual

Avanti
Avanti SHP1700W User manual

Avanti
Avanti SHP2500W User manual

Avanti
Avanti 19SYW User manual

Avanti
Avanti RA756WT User manual

Avanti
Avanti VFR14PS-IS User manual