9
User Manual
AvaValleyRefrigeration.com
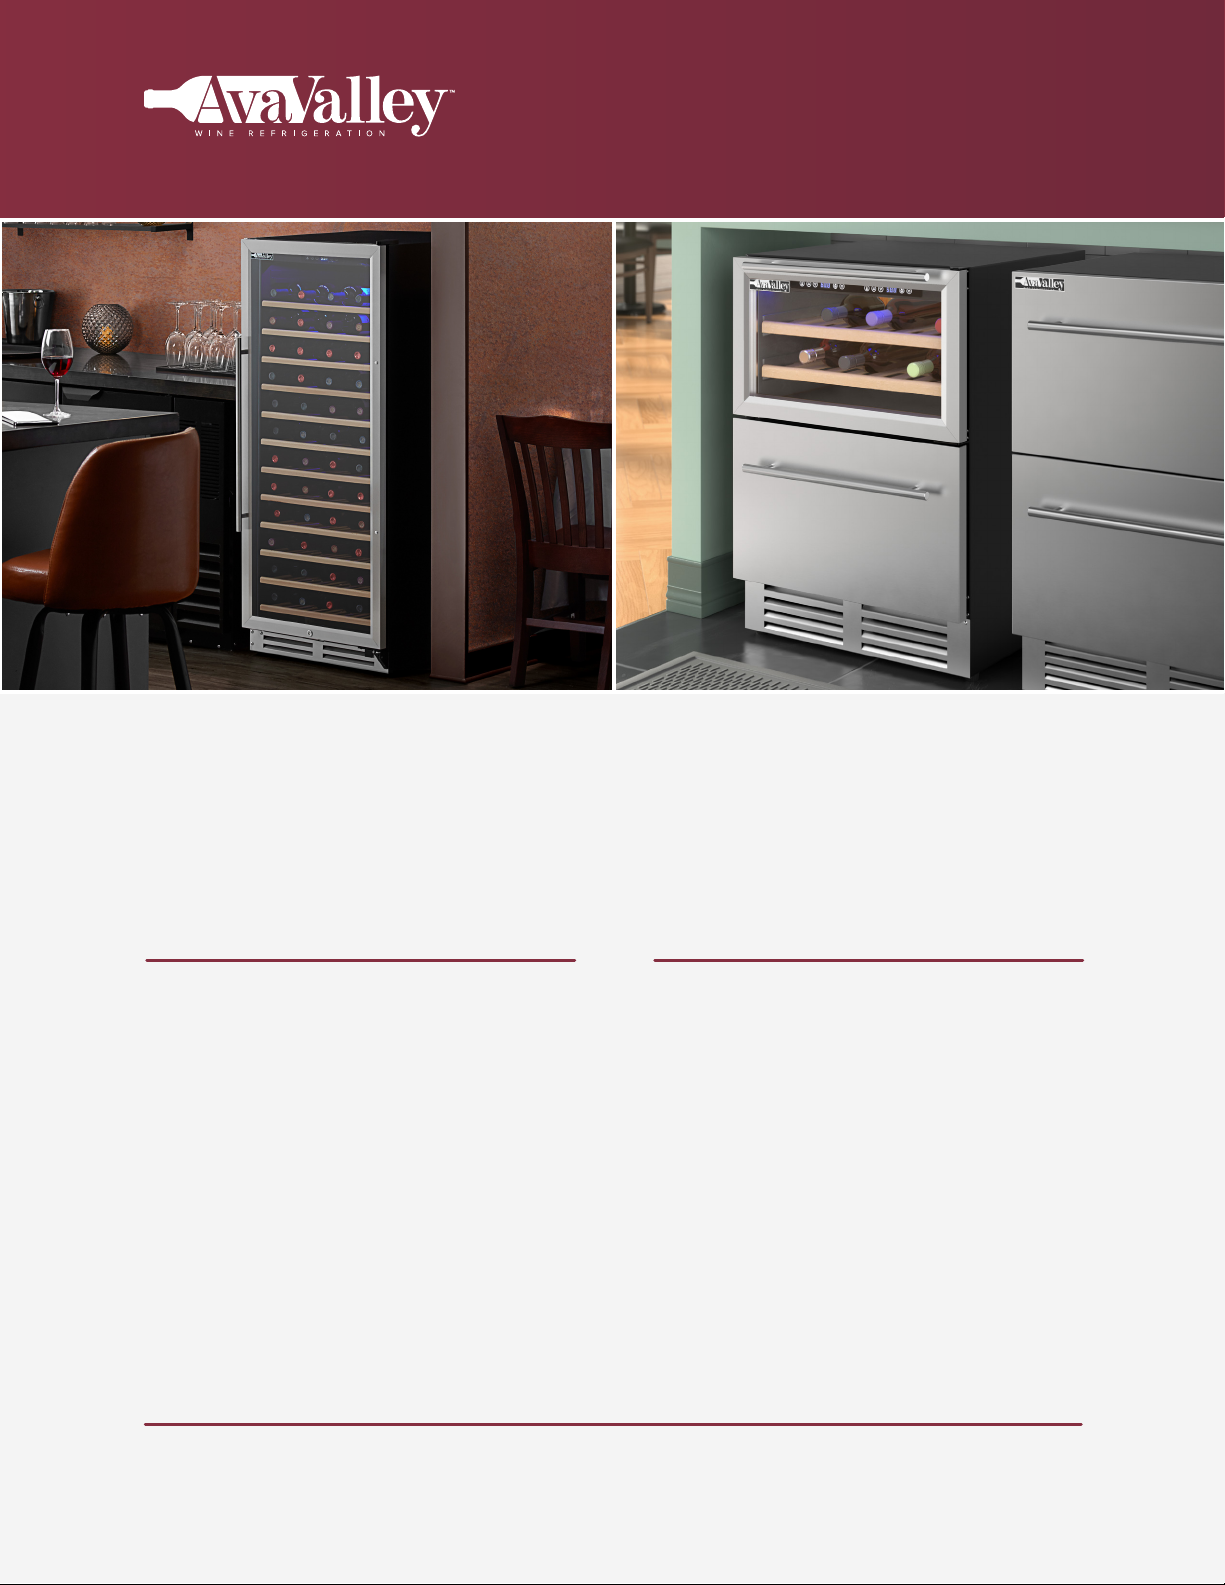
Wine Refrigerators Wine Refrigerators
Single Zone
Dual Zone
Dual Zone Side By Side
Adjusting the Temperature
Operation
•
The controller will lock after 10 seconds of no use. To unlock controller, hold the unlock button for 5 seconds
until there is a beep. If this does not work, unplug the unit and plug it back in. If the controller still does not
allow you to adjust temperature, the digital controller is the problem.
1.
To turn the appliance on or o, press and hold
the Power button for 3 seconds.
NOTE: If the unit is unplugged, loses power, or is
turned o, you must wait 3 to 5 minutes before
restarting the unit. If you do not wait 3 to 5
minutes, the wine cooler will not start.
1.
Press the ▲ or ▼ button to set the temperature.
When you press the two buttons for the first time,
the LED readout will show the original temperature
set at factory settings (41°F (5°C)).
2.
The temperature will increase or decrease by 1°F or
1°C for each button press.
3.
Each cooling compartment of the wine cooler is
independently controlled. In the event of a power
interruption, all previous temperature settings are
automatically saved and each compartment will
keep the previous temperature setting.
1.
To switch the temperature display from Celsius to
Fahrenheit or vice versa, press the °F/°C button.
1.
To turn the internal LED lighting on or o, press
the Light button.
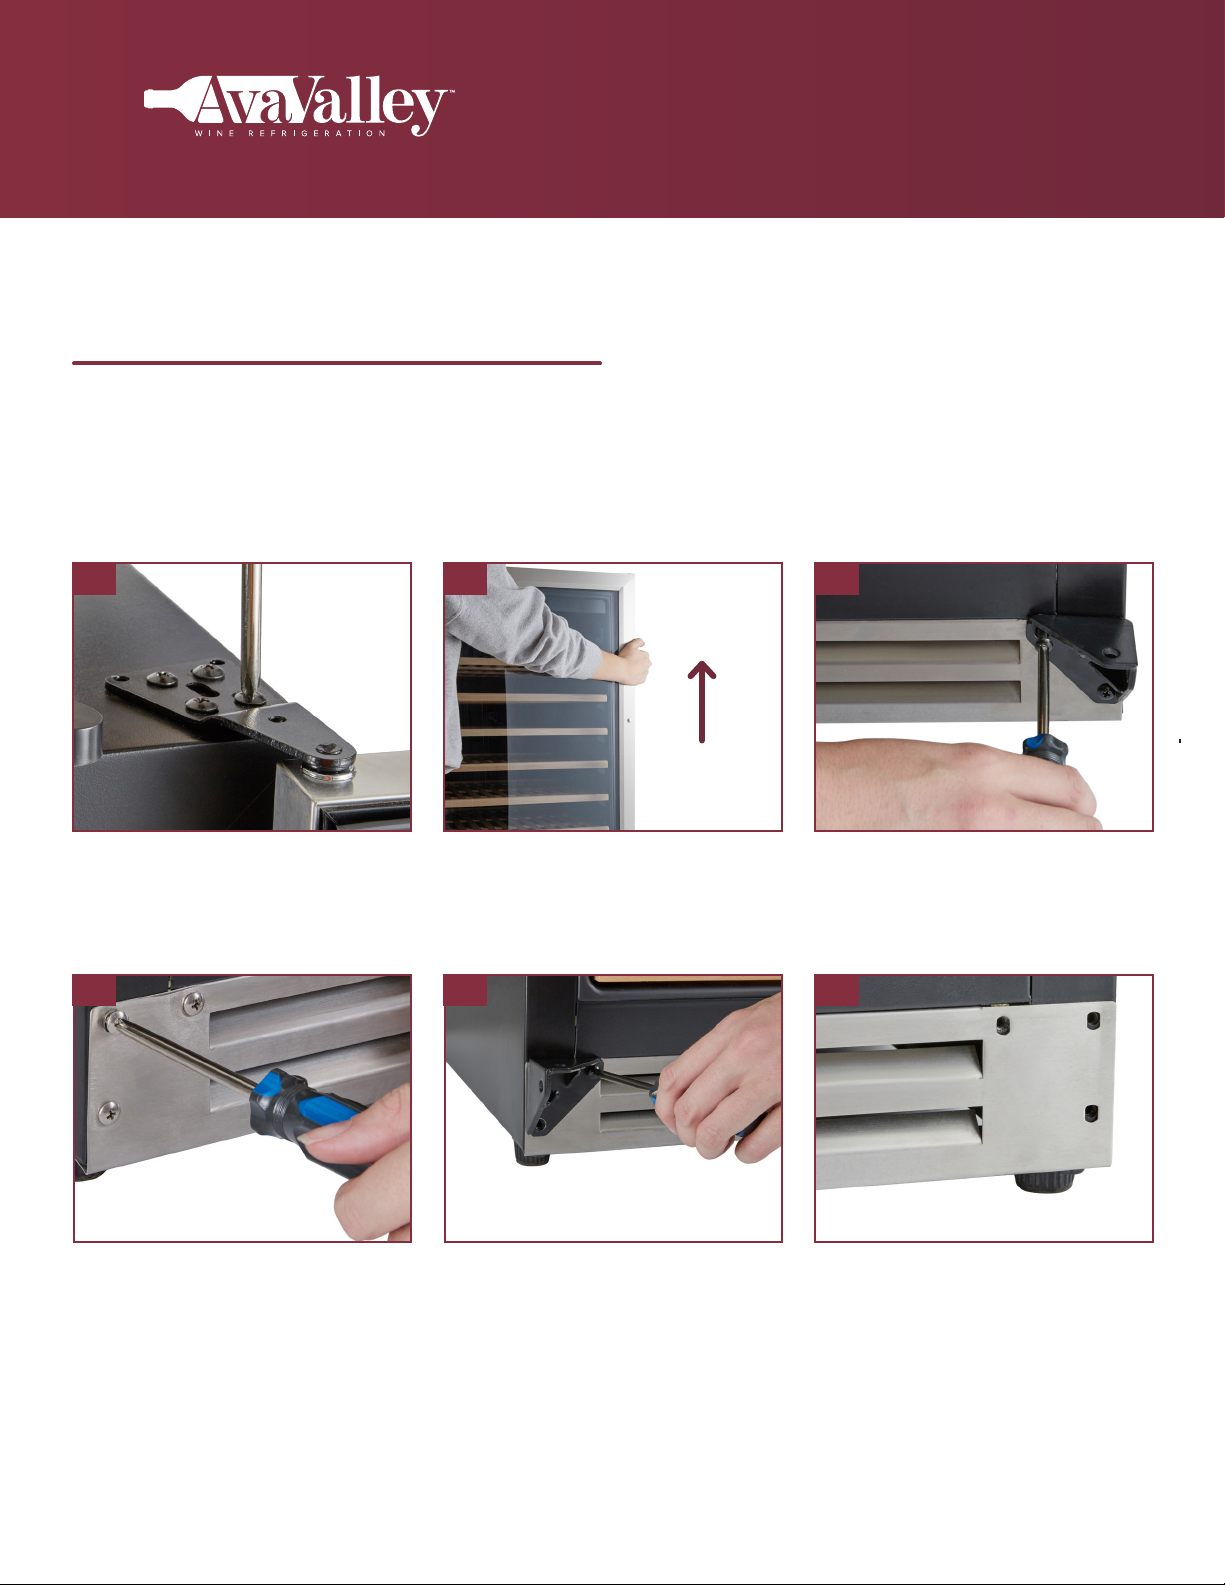
•
The keys to the door lock are located inside the
plastic bag that contains the User Manual.
•
Remove the key and place it in a secure place for
safekeeping.
•
Coils are kept below the freezing point (32°F).
•
During compressor downtime, the evaporator fan
continues to circulate air through the evaporator coil.
This air circulation raises the coil temperature above
the freezing point, melting any accumulated frost.
•
Run-o water is drained into the evaporator pan and
evaporated.
1.
The temperature display window will show the
actual temperature inside the machine.
NOTE: Actual temperatures of product may fluctuate
depending on a number of factors:
• If the interior light is on or o.
• The location of the product in the upper/middle
lower section.
• The amount of times the door is opened.
NOTE: When you use the wine cooler for the first
time or restart the unit after having been shut o
for a long time, there could be a few degrees of
variance between the temperature you select and
the one indicated on the LED readout. This is normal
and it is due to the length of the activation time.
Once the wine cooler is running for a few hours,
everything will be back to normal.
Turning the Power On or Off
Setting the Temperature Control
Celsius & Fahrenheit Switch
Interior Light
Door Lock
Defrost System
Temperature Display
UNLOCK UPPER ZONE LOWER ZONELIGHT °F/°C LIGHT ON/OFF
UNLOCK LIGHT°F/°C ON/OFF UNLOCK LIGHT °F/°C LIGHT ON/OFF