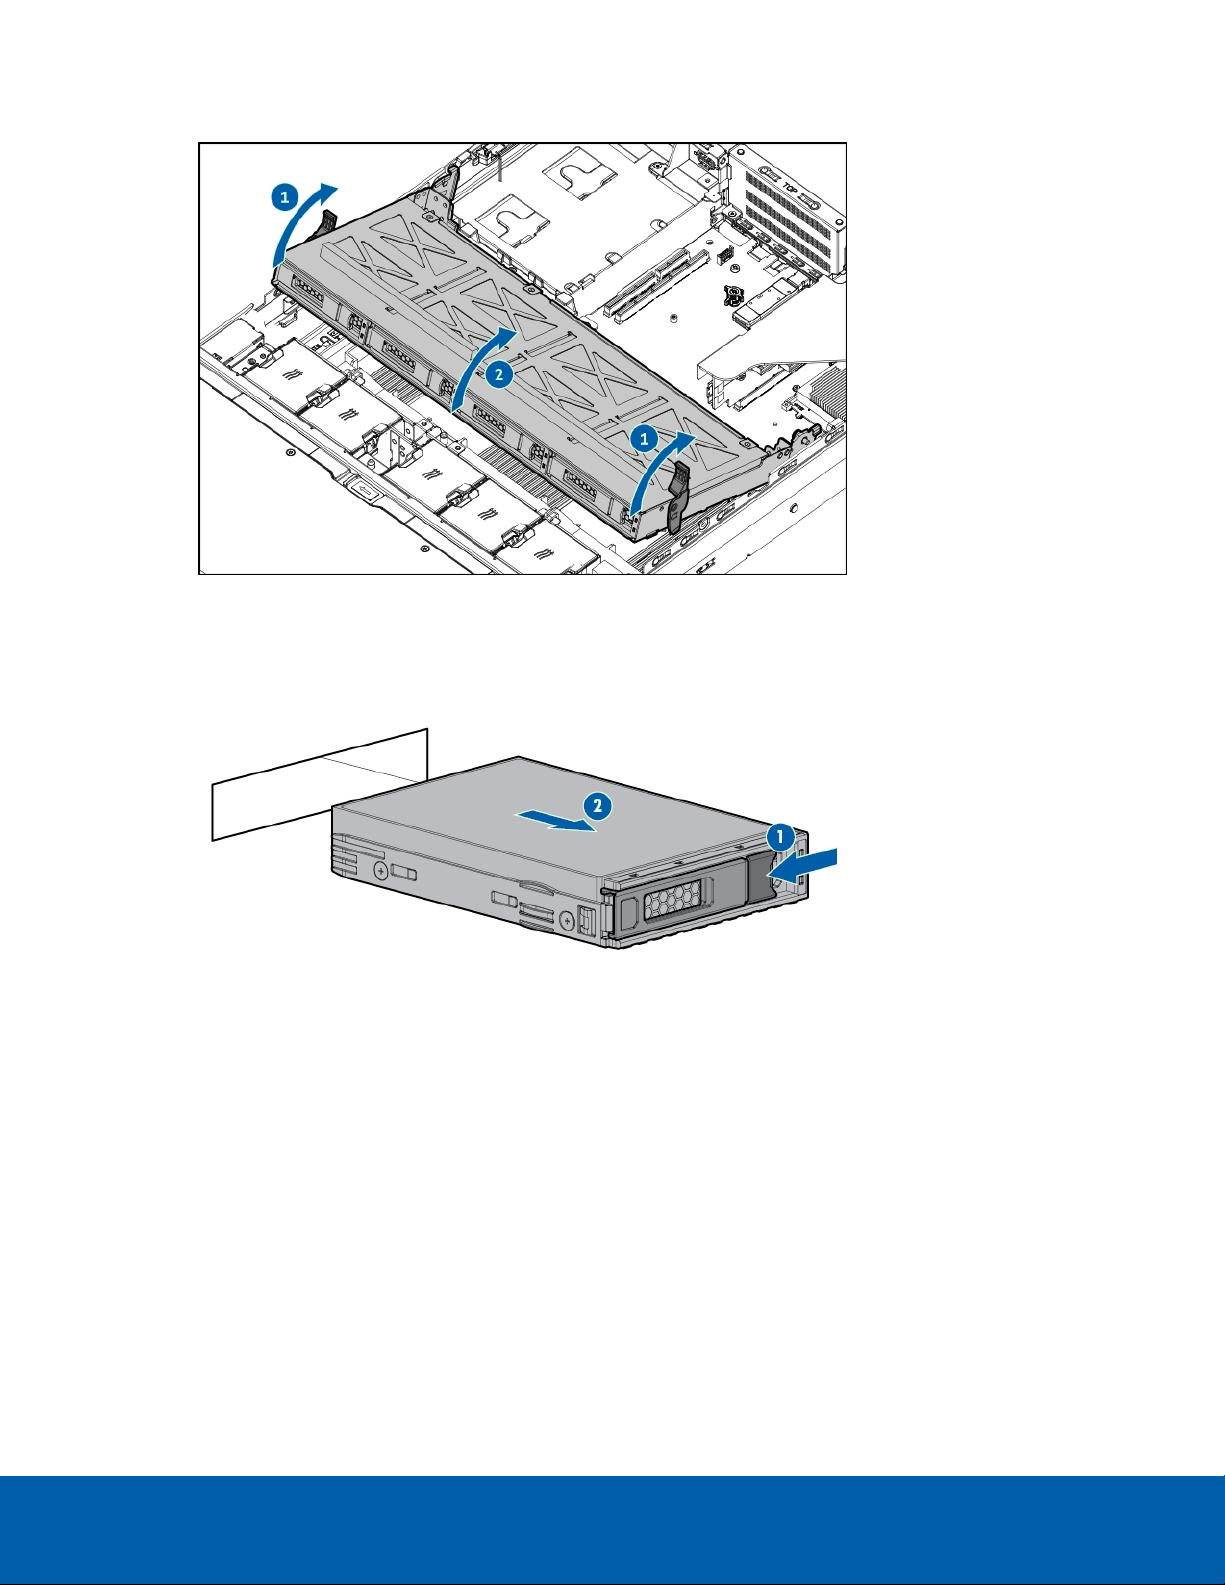
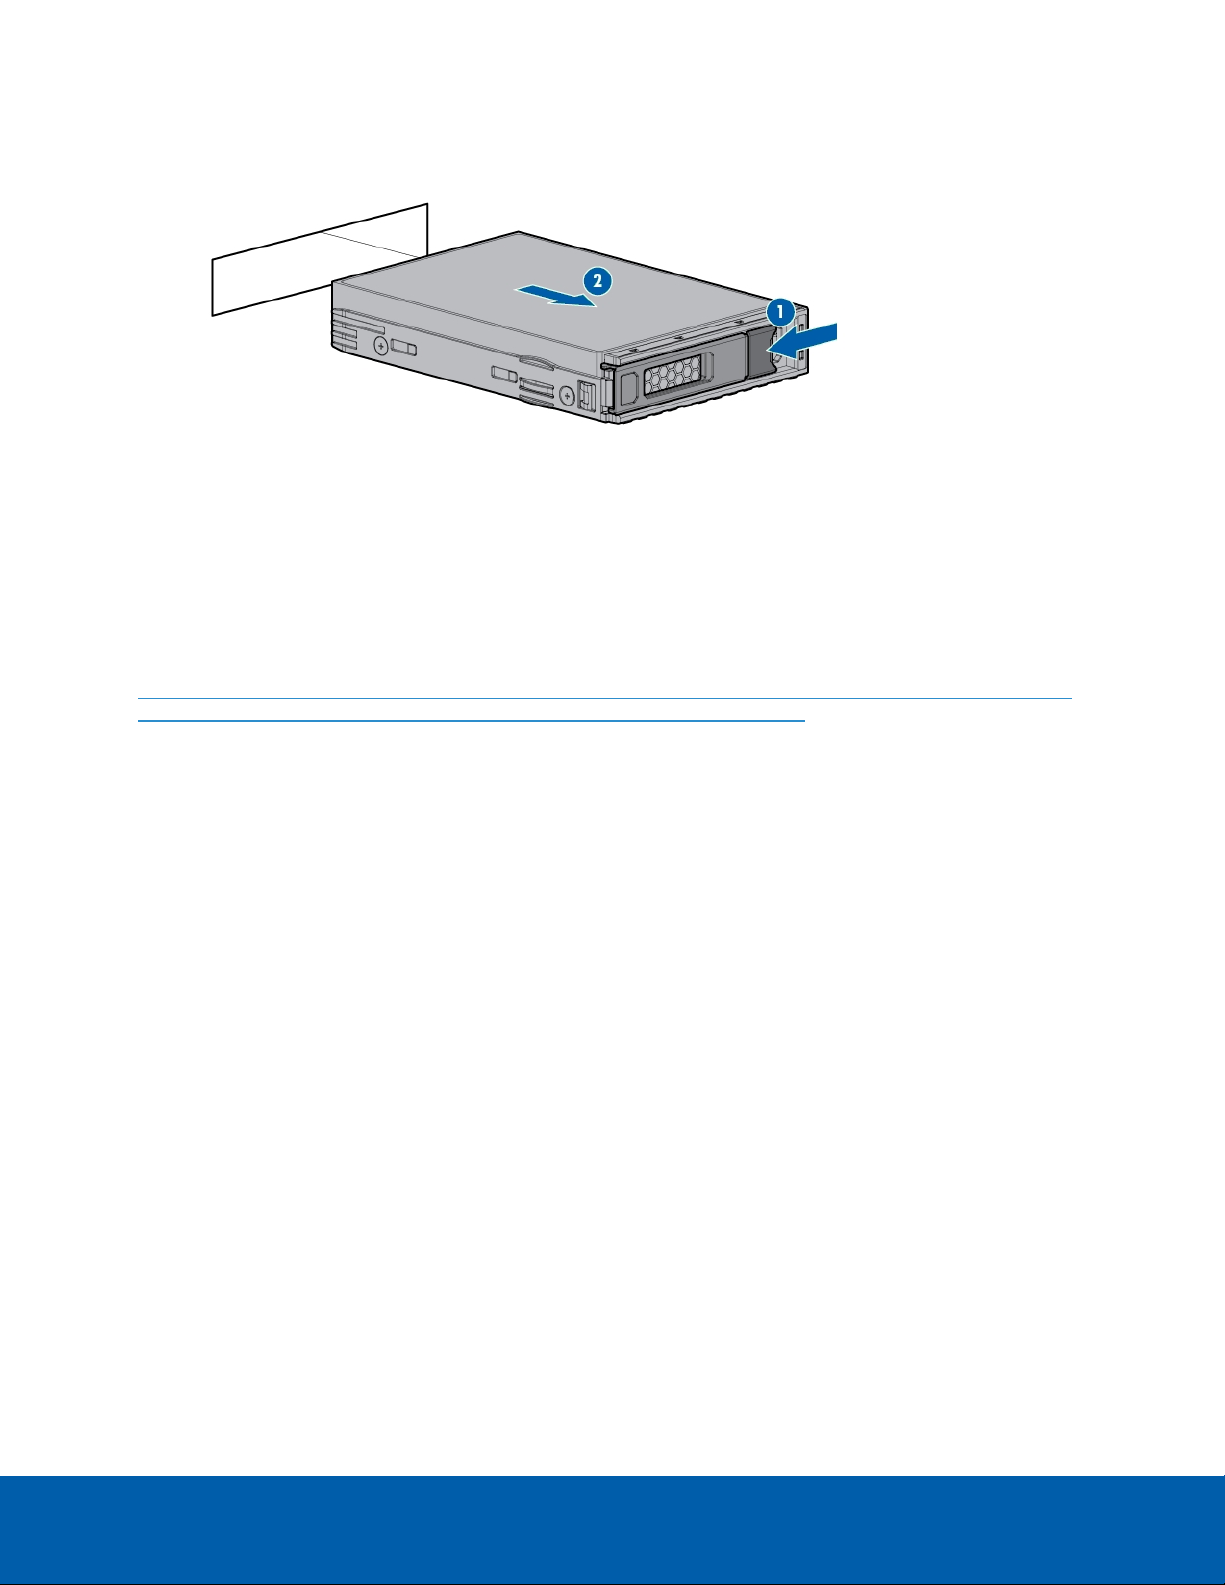
4. Pull the release lever to disengage the drive blank from the backplane, and then slide the drive out of
the bay.
5. To install the hard drive, reverse the above steps.
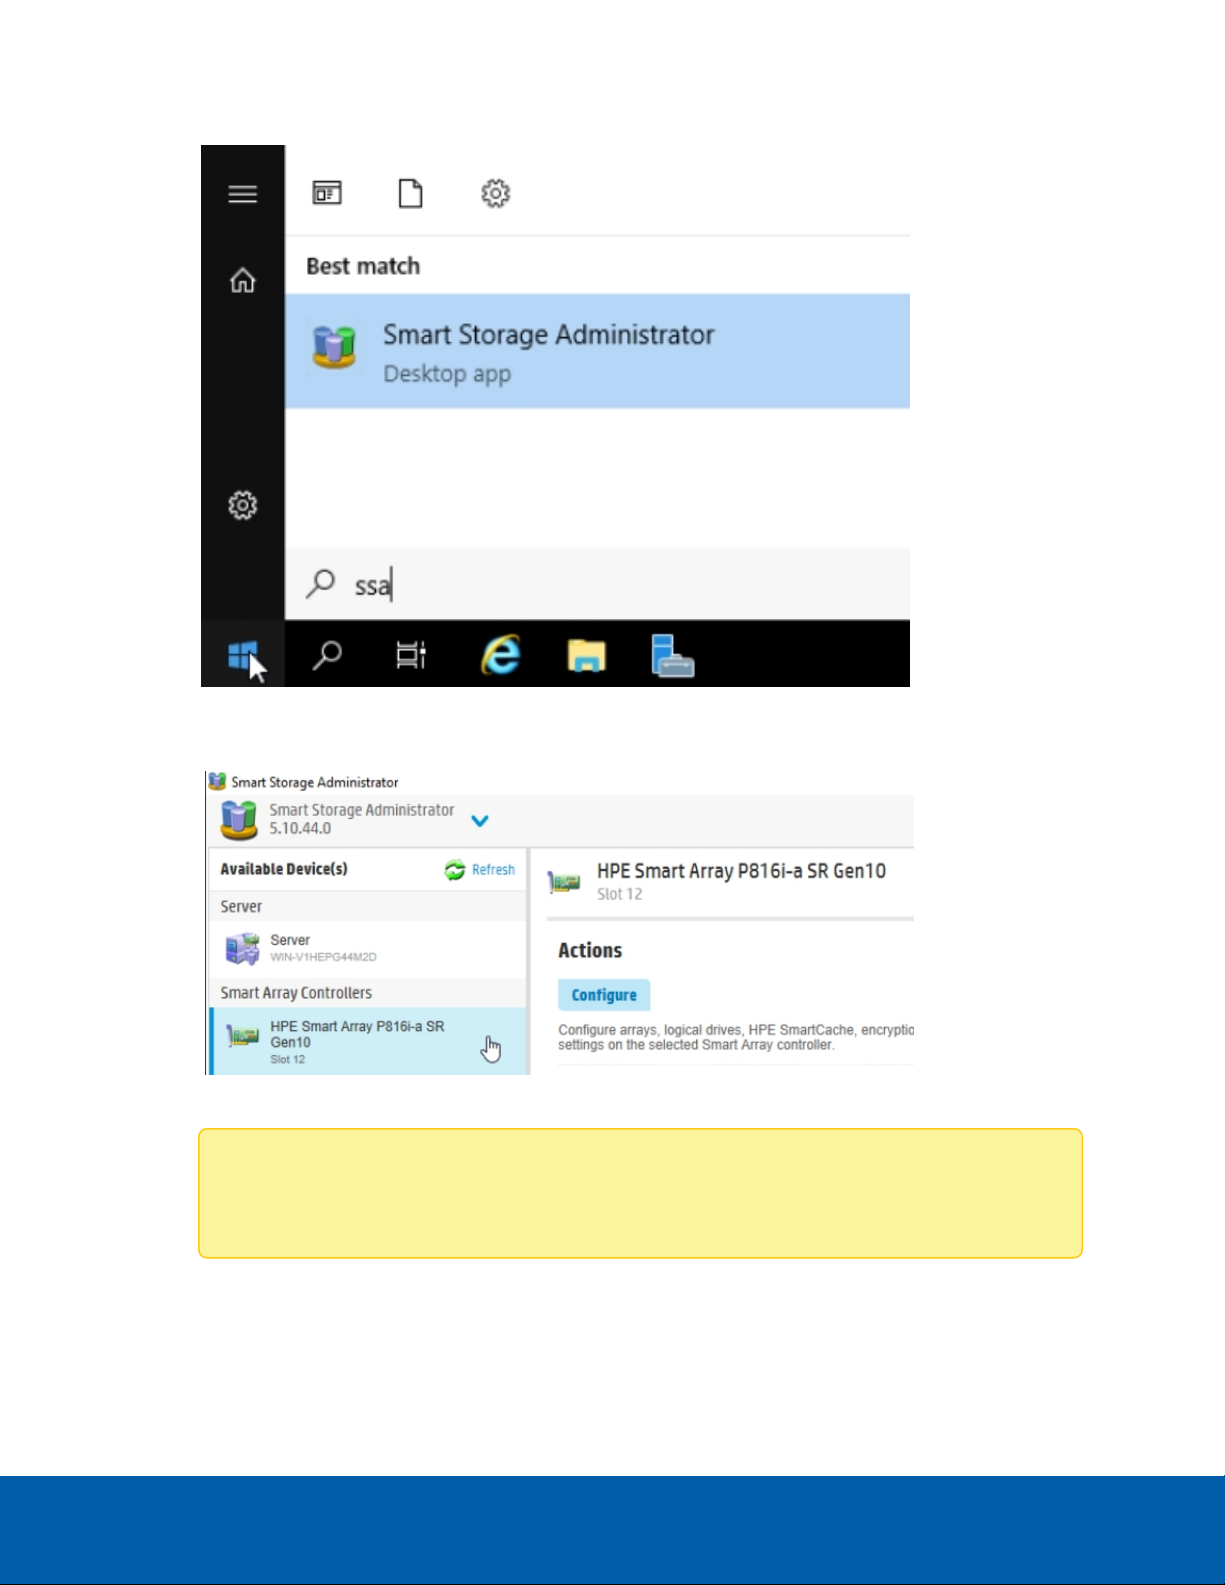
Configuring Extended Storage
You must configure the extended storage using HPESmart Storage Administrator (SSA) after you have
installed all the drives. If this has not already been installed on the NVR5 as part of the Avigilon image,
download the HPE Smart Storage Administrator .zip file, from the following page:
https://buy.hpe.com/ca/en/software/server-management-software/server-management-software/smart-
array-management-software/hpe-smart-storage-administrator/p/5409020
After you have downloaded the zip file:
1. Extract the contents to a convenient location on the NVR system.
2. Open the extracted files and open the the README file.
3. Follow the instructions in the README file to install SSA.
Once SSAhas been installed, follow these steps to configure the extended storage:
Configuring Extended Storage 9