lNVR5 PRM 252/288/360/432 TB: AVA-HED1-NVR5-CONNECT-B
lNVR5 STD and NVR5 PRM 96/128/160/192/224 TB: AVA-HED1-NVR5-CONNECT-A
Note: The NVR5 Premium 192/224 TB models support connections to the Avigilon Video Archive out
of the box and does not require installation of a CNA or SAN card. However, the Connectivity Kit is
still required for the transceivers and optical cables used to make the connections.
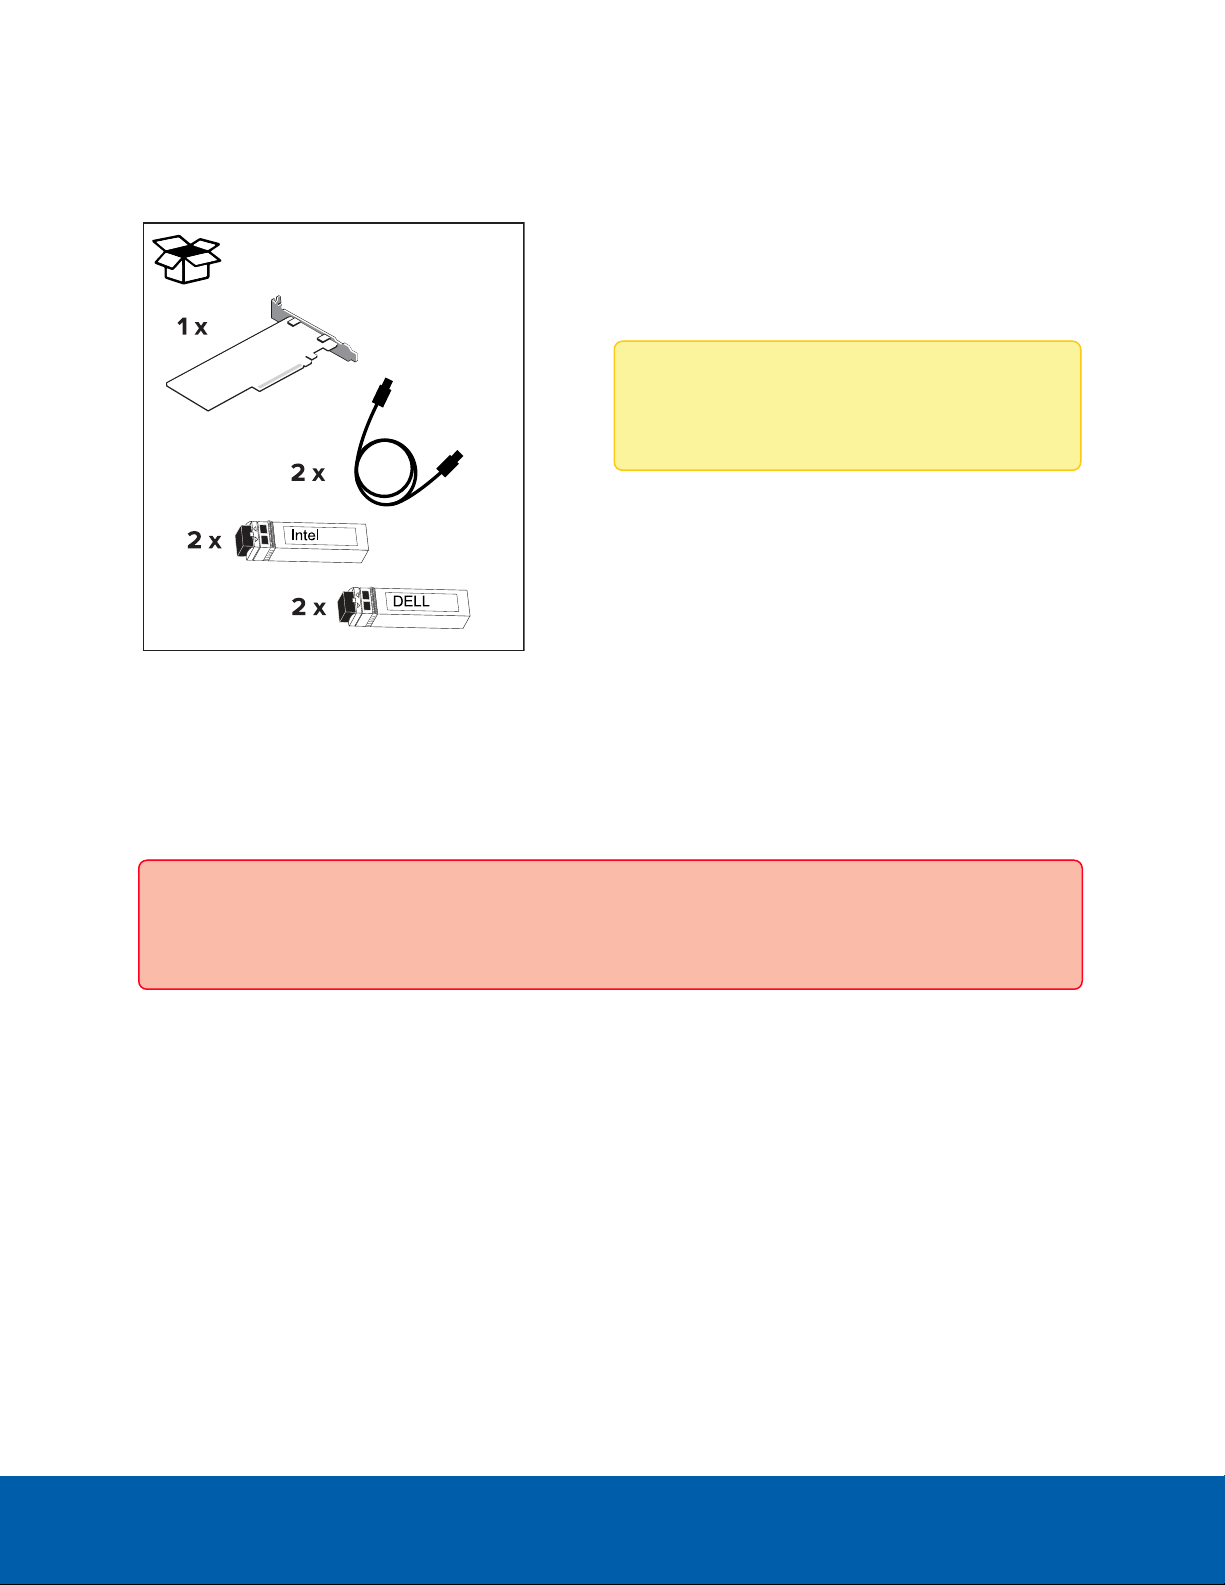
Storage Area Network (SAN) Connectivity Kits
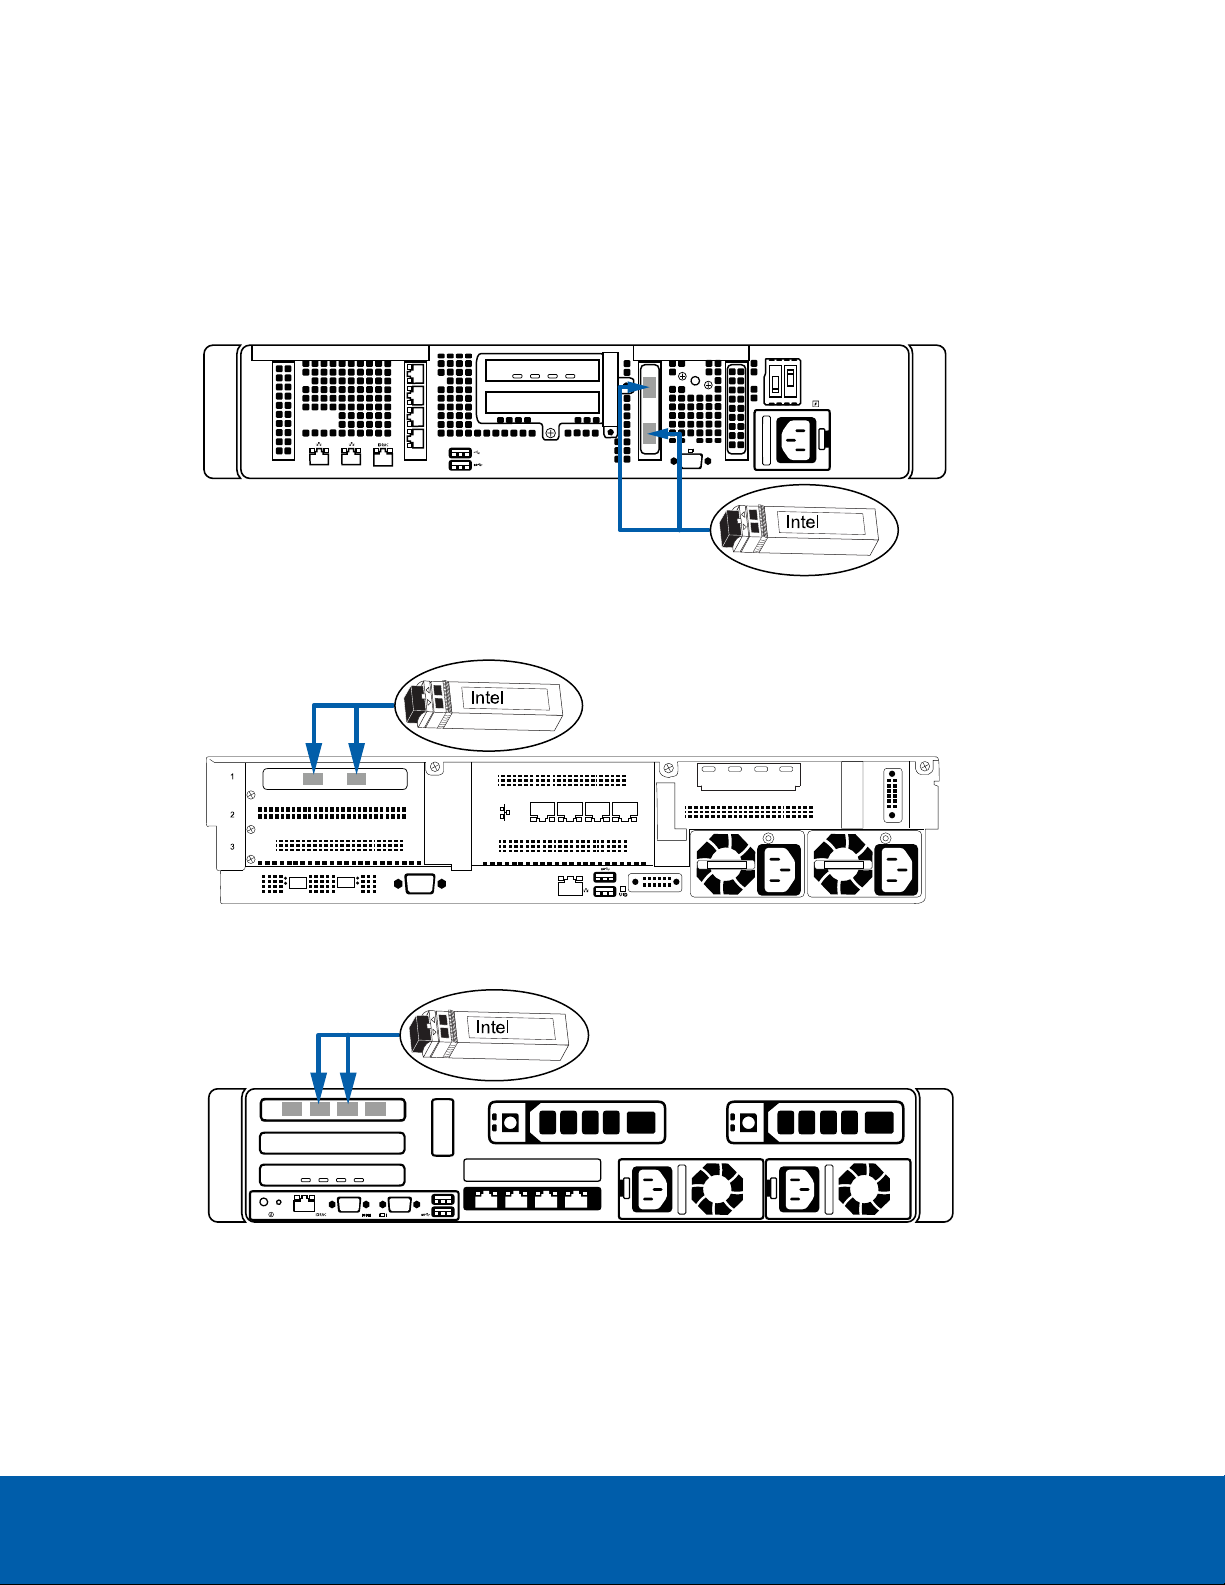
lNVR5 PRM 252/288/360/432 TB: NVR5-AVA-SAN-CONNECT-B for a CNA card and a set of 2
transceivers with optical cables for connecting the NVR with SANnetworking through network
switches.
lNVR5 STD and NVR5 PRM 96/128/160/192/224 TB: NVR5-AVA-SAN-CONNECT-A for a CNA card
and a set of 2 transceivers with optical cables for connecting the NVR with SANnetworking through
network switches.
lAvigilon Video Archive: AVA-SAN-CONNECT-1 or AVA-SAN-CONNECT-8 for a set of 1 or 8
transceivers with optical cables for connecting the Avigilon Video Archive with SAN networking
through network switches.
NVR4X
Direct Attach or Storage Area Network Connectivity Kits
lNVR4X PRM 64/96/128/157 TB: AVA-HED1-NVR4X-PRM1-CONNECT
lNVR4X PRM 192/217 TB: AVA-HED1-NVR4X-PRM2-CONNECT
lNVR4X STD: AVA-HED1-NVR4X-STD-CONNECT
NVR4
Direct Attach or Storage Area Network Connectivity Kits
lNVR4 PRM and NVR4 STD: AVA-HED1-NVR4-CONNECT
Overview
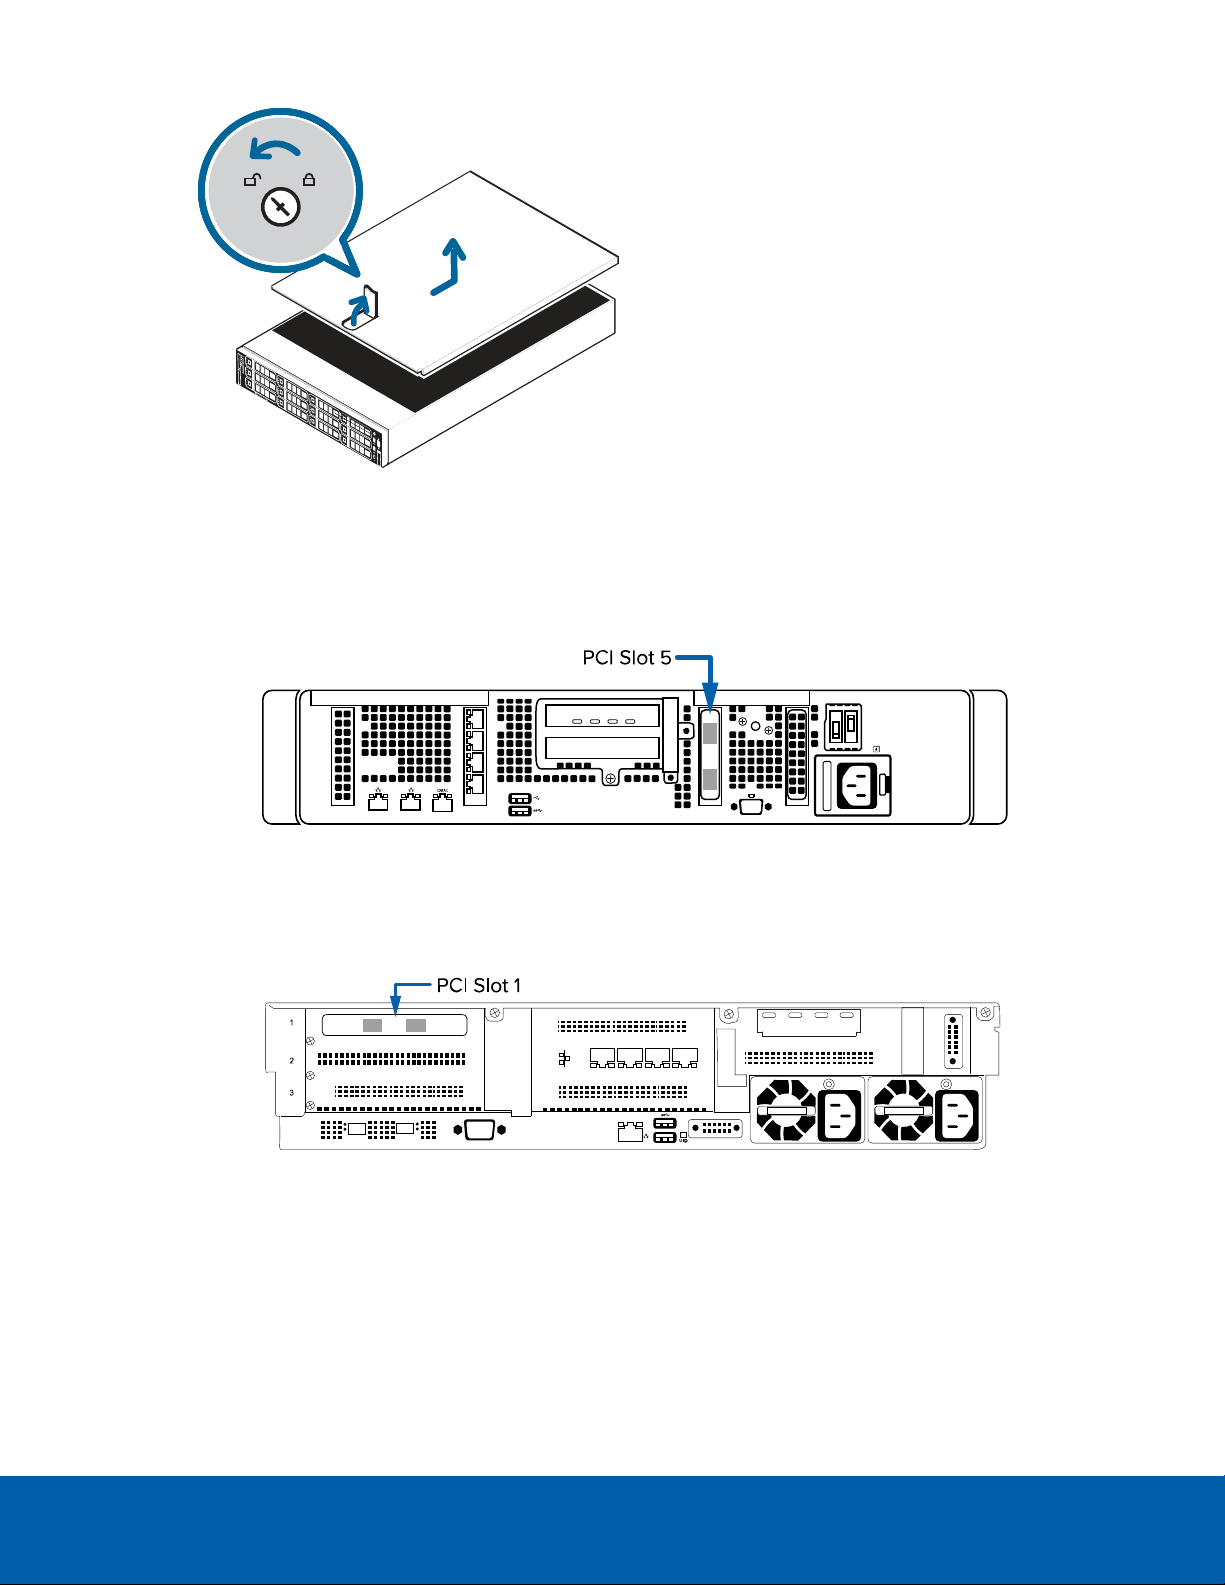
You must install the converged network adapter (CNA) card or storage area network (SAN) card provided in
the connectivity kit in an NVR before you can connect it to an Avigilon Video Archive. The installation of the
CNA/SANcard is similar for all recorders, but should be installed in the specific PCI slot defined for each
recorder. Differences between the recorders are noted in the steps of the installation procedure. For more
information, see Install the CNA/SAN Card on page5.
Storage Area Network (SAN) Connectivity Kits 2