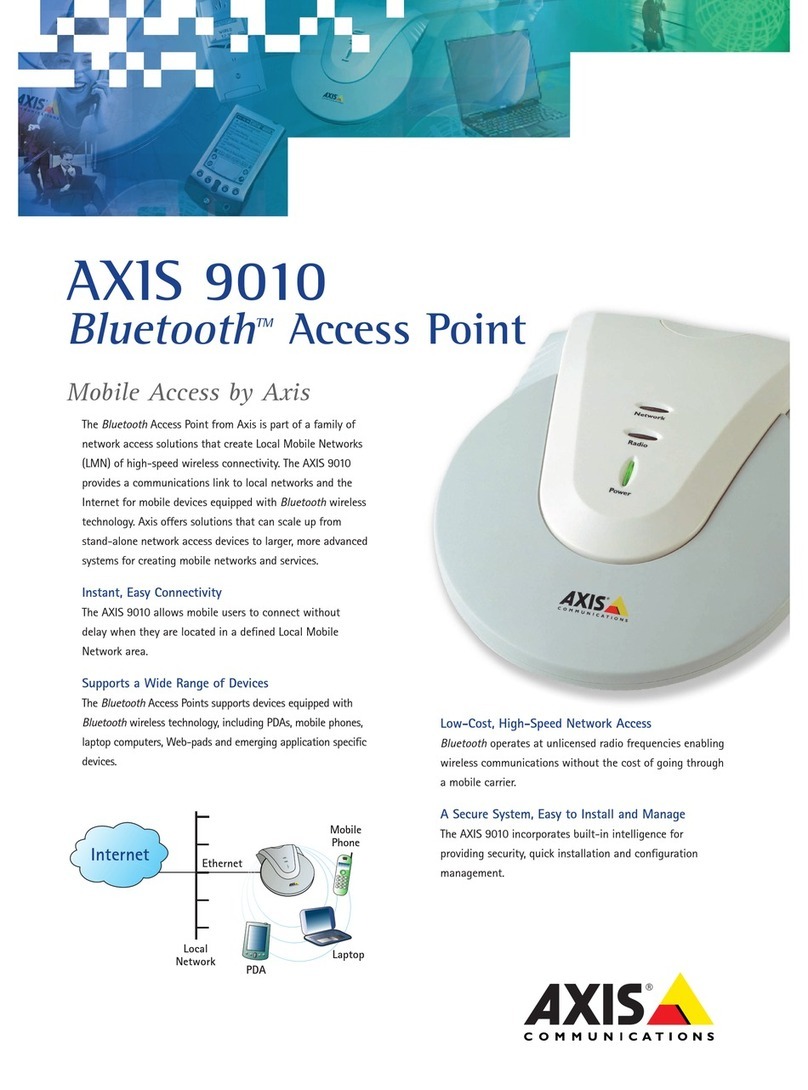
Axis 9010 User manual

Table of Contents 1
Table of Contents
Table of Contents . . . . . . . . . . . . . . . . . . . . . . . . . . . . . . . . . . . . . . . . . . . . . . . . . . . . . . 1
Legal Notices . . . . . . . . . . . . . . . . . . . . . . . . . . . . . . . . . . . . . . . . . . . . . . . . . . . . . . . . . 3
Quick Installation Procedure . . . . . . . . . . . . . . . . . . . . . . . . . . . . . . . . . . . . . . . . . . . . . . 6
Installing your AXIS 9010 . . . . . . . . . . . . . . . . . . . . . . . . . . . . . . . . . . . . . . . . . . . . . . 6
Using your AXIS 9010 . . . . . . . . . . . . . . . . . . . . . . . . . . . . . . . . . . . . . . . . . . . . . . . . . 7
Accessing AXIS 9010 Web Interface . . . . . . . . . . . . . . . . . . . . . . . . . . . . . . . . . . . . . . 7
Preface . . . . . . . . . . . . . . . . . . . . . . . . . . . . . . . . . . . . . . . . . . . . . . . . . . . . . . . . . . . . . . 8
About Axis Communications . . . . . . . . . . . . . . . . . . . . . . . . . . . . . . . . . . . . . . . . . . . . 8
About this User’s guide . . . . . . . . . . . . . . . . . . . . . . . . . . . . . . . . . . . . . . . . . . . . . . . . 8
Product Overview . . . . . . . . . . . . . . . . . . . . . . . . . . . . . . . . . . . . . . . . . . . . . . . . . . . . . . 9
Package Contents . . . . . . . . . . . . . . . . . . . . . . . . . . . . . . . . . . . . . . . . . . . . . . . . . . . . 9
Physical Description . . . . . . . . . . . . . . . . . . . . . . . . . . . . . . . . . . . . . . . . . . . . . . . . . 10
Indicators . . . . . . . . . . . . . . . . . . . . . . . . . . . . . . . . . . . . . . . . . . . . . . . . . . . . . . . . . . 11
Placing the AXIS 9010 . . . . . . . . . . . . . . . . . . . . . . . . . . . . . . . . . . . . . . . . . . . . . . . 12
Bluetooth Wireless Technology . . . . . . . . . . . . . . . . . . . . . . . . . . . . . . . . . . . . . . . . . 13
AXIS 9010 . . . . . . . . . . . . . . . . . . . . . . . . . . . . . . . . . . . . . . . . . . . . . . . . . . . . . . . . . 14
AXIS 9010 IP Setting . . . . . . . . . . . . . . . . . . . . . . . . . . . . . . . . . . . . . . . . . . . . . . . . . . 15
AXIS 9010 Automatic IP Setting . . . . . . . . . . . . . . . . . . . . . . . . . . . . . . . . . . . . . . . 15
AXIS 9010 Manual IP Setting . . . . . . . . . . . . . . . . . . . . . . . . . . . . . . . . . . . . . . . . . . 15
Bluetooth Client IP Setting . . . . . . . . . . . . . . . . . . . . . . . . . . . . . . . . . . . . . . . . . . . . . . 18
PAN Profile . . . . . . . . . . . . . . . . . . . . . . . . . . . . . . . . . . . . . . . . . . . . . . . . . . . . . . . . 18
LAN Access Profile . . . . . . . . . . . . . . . . . . . . . . . . . . . . . . . . . . . . . . . . . . . . . . . . . . . 19
IP setting methods . . . . . . . . . . . . . . . . . . . . . . . . . . . . . . . . . . . . . . . . . . . . . . . . . . 19
Security . . . . . . . . . . . . . . . . . . . . . . . . . . . . . . . . . . . . . . . . . . . . . . . . . . . . . . . . . . . . 22
Web Interface and FTP Security . . . . . . . . . . . . . . . . . . . . . . . . . . . . . . . . . . . . . . . . 22
Bluetooth Radio Link Security . . . . . . . . . . . . . . . . . . . . . . . . . . . . . . . . . . . . . . . . . 22
Authentication for the LAN Access Profile . . . . . . . . . . . . . . . . . . . . . . . . . . . . . . . . . . 23
Monitoring . . . . . . . . . . . . . . . . . . . . . . . . . . . . . . . . . . . . . . . . . . . . . . . . . . . . . . . . . . 24
AXIS MIB . . . . . . . . . . . . . . . . . . . . . . . . . . . . . . . . . . . . . . . . . . . . . . . . . . . . . . . . . . 24

Table of Contents
2
Default Settings . . . . . . . . . . . . . . . . . . . . . . . . . . . . . . . . . . . . . . . . . . . . . . . . . . . . . . 25
AXIS 9010 Web Interface . . . . . . . . . . . . . . . . . . . . . . . . . . . . . . . . . . . . . . . . . . . . . . . 29
Accessing the AXIS 9010 Web Interface . . . . . . . . . . . . . . . . . . . . . . . . . . . . . . . . . . 29
Start Page . . . . . . . . . . . . . . . . . . . . . . . . . . . . . . . . . . . . . . . . . . . . . . . . . . . . . . . . . 30
Configuration Wizard . . . . . . . . . . . . . . . . . . . . . . . . . . . . . . . . . . . . . . . . . . . . . . . . 30
System Information . . . . . . . . . . . . . . . . . . . . . . . . . . . . . . . . . . . . . . . . . . . . . . . . . . 30
Settings . . . . . . . . . . . . . . . . . . . . . . . . . . . . . . . . . . . . . . . . . . . . . . . . . . . . . . . . . . . 30
Support . . . . . . . . . . . . . . . . . . . . . . . . . . . . . . . . . . . . . . . . . . . . . . . . . . . . . . . . . . . 32
Installing New Software . . . . . . . . . . . . . . . . . . . . . . . . . . . . . . . . . . . . . . . . . . . . . . . . 33
Obtaining New Software . . . . . . . . . . . . . . . . . . . . . . . . . . . . . . . . . . . . . . . . . . . . . . 33
Installing Updated Software . . . . . . . . . . . . . . . . . . . . . . . . . . . . . . . . . . . . . . . . . . . 33
Software installation failure . . . . . . . . . . . . . . . . . . . . . . . . . . . . . . . . . . . . . . . . . . . 34
RFL . . . . . . . . . . . . . . . . . . . . . . . . . . . . . . . . . . . . . . . . . . . . . . . . . . . . . . . . . . . . . . . 34
Restart Options . . . . . . . . . . . . . . . . . . . . . . . . . . . . . . . . . . . . . . . . . . . . . . . . . . . . . . . 36
Restart . . . . . . . . . . . . . . . . . . . . . . . . . . . . . . . . . . . . . . . . . . . . . . . . . . . . . . . . . . . . 36
Restore Settings . . . . . . . . . . . . . . . . . . . . . . . . . . . . . . . . . . . . . . . . . . . . . . . . . . . . . 36
Reset to Factory Default Settings . . . . . . . . . . . . . . . . . . . . . . . . . . . . . . . . . . . . . . . 37
Bluetooth Client Installation . . . . . . . . . . . . . . . . . . . . . . . . . . . . . . . . . . . . . . . . . . . . . 38
Appendix A - Technical specification . . . . . . . . . . . . . . . . . . . . . . . . . . . . . . . . . . . . . . 39
Appendix B - Troubleshooting . . . . . . . . . . . . . . . . . . . . . . . . . . . . . . . . . . . . . . . . . . . 42
Appendix C - Definition of Terms and Abbreviations . . . . . . . . . . . . . . . . . . . . . . . . . . 49
Appendix D - Software Disclaimer . . . . . . . . . . . . . . . . . . . . . . . . . . . . . . . . . . . . . . . . 53
Index . . . . . . . . . . . . . . . . . . . . . . . . . . . . . . . . . . . . . . . . . . . . . . . . . . . . . . . . . . . . . . 59

Legal Notices 3
1. Legal Notices
About this Document
This document provides introductory instructions on how to set up and manage the AXIS 9010 within your
networking environment. Should you require more information, please refer to the Axis website at
http://www.axis.com.
Safety Markings
Please observe all safety markings in this user’s guide when using the product.
Caution! - Potential hazard that can damage the product.
Important! - Potential hazard that can seriously impair operation.
Do not proceed beyond any of the above notices until you fully understand the implications.
Maintenance
It is recommended that you use a moist cloth to clean the unit. Do not use petroleum based substances as this may
cause damage to the casing.
Trademark Acknowledgements
The Bluetooth trademarks are owned by their proprietor and used by Axis Communications AB under license. DOS,
Ethernet, Macintosh, Microsoft, OS/2, UNIX and Windows, are registered trademarks of their respective holders.
Copyright Information
The unauthorized copying of materials that are covered by copyright and other international proprietary or
intellectual property rights is prohibited in most countries. Axis Communications AB recommends that the users
of this equipment seek the necessary authorizations for copying material. The instructions for use in the user’s
guide shall not be considered as an inducement to make illicit duplications of material. Any duplication will be
made at the user's own risk.
Software Disclaimer
Part of the AXIS 9010 is based on a free SNMP package.
Copyright 1989, 1991, 1992 by Carnegie Mellon University. Derivative Work - Copyright 1996, 1998, 1999, 2000
The Regents of the University of California.
All Rights Reserved: Permission to use, copy, modify and distribute this software and its documentation for any
purpose and without fee is hereby granted, provided that the above copyright notice appears in all copies and that
both that copyright notice and this permission notice appear in supporting documentation, and that the name of
CMU and The Regents of the University of California not be used in advertising or publicity pertaining to
distribution of the software without specific written permission.
CMU AND THE REGENTS OF THE UNIVERSITY OF CALIFORNIA DISCLAIM ALL WARRANTIES WITH REGARD
TO THIS SOFTWARE, INCLUDING ALL IMPLIED WARRANTIES OF MERCHANTABILITY AND FITNESS. IN NO
EVENT SHALL CMU OR THE REGENTS OF THE UNIVERSITY OF CALIFORNIA BE LIABLE FOR ANY SPECIAL,
INDIRECT OR CONSEQUENTIAL DAMAGES OR ANY DAMAGES WHATSOEVER RESULTING FROM THE LOSS OF
USE, DATA OR PROFITS, WHETHER IN AN ACTION OF CONTRACT, NEGLIGENCE OR OTHER TORTIOUS ACTION,
ARISING OUT OF OR IN CONNECTION WITH THE USE OR PERFORMANCE OF THIS SOFTWARE.
Disclaimer of Liability
Every care has been taken in the preparation of this user’s guide; if you detect any inaccuracies or omissions,

Legal Notices
4
please inform us by contacting your local Axis office.
Axis Communications AB cannot be held responsible for any technical or typographical errors and reserves the
right to make changes to the product and manuals without prior notice.
AXIS COMMUNICATIONS AB MAKES NO WARRANTY OF ANY KIND WITH REGARD TO THE MATERIAL
CONTAINED WITHIN THIS DOCUMENT, INCLUDING, BUT NOT LIMITED TO, THE IMPLIED WARRANTIES OF
MERCHANTABILITY AND FITNESS FOR A PARTICULAR PURPOSE.
AXIS COMMUNICATIONS AB SHALL NOT BE LIABLE NOR RESPONSIBLE FOR INCIDENTAL OR
CONSEQUENTIAL DAMAGES IN CONNECTION WITH THE FURNISHING, PERFORMANCE OR USE OF THIS
MATERIAL.
Regulatory Statement
This device must be installed and used in accordance with the user’s guide. This device complies with the
following radio frequency and safety standards.
USA & Canada - This device complies with part 15 of the Federal Communications Commission (FCC) rules and
with RSS-210 of the Industry Canada (IC). Operation is subject to the following conditions:
(1) This device may not cause harmful interference, and
(2) this device must accept any interference received, including interference that may cause undesired operation.
Europe - This device complies with the requirements of the R&TTE Directive 1999/5/EC with the test suites as per
standards:
* EN 60950 Safety of Information Technology equipment
* ETS 300 328 Technical requirements for radio equipment
* ETS 300 826 General EMC requirements for radio equipment
Limited Hardware Warranty
AXIS 9010
Axis Communications AB warrants the original owner that the product delivered will be free from defects in
material and workmanship for 90 days following the date of purchase. This warranty does not cover any damage
attributable to erroneous installation of the product.
THIS WARRANTY IS THE SOLE WARRANTY AND IS IN LIEU OF ANY OTHER WARRANTY, WHETHER
EXPRESSED, IMPLIED OR STATUTORY, INCLUDING, BUT NOT LIMITED TO, ANY WARRANTY OF
MERCHANTABILITY, FITNESS FOR A PARTICULAR PURPOSE, OR NONINFRINGEMENT, OR ANY WARRANTY
ARISING OUT OF ANY PROPOSAL, SPECIFICATION OR SAMPLE. NOTWITHSTANDING THE FOREGOING AXIS
SHALL HAVE NO LIABILITY FOR ANY INDIRECT OR SPECULATIVE DAMAGES (INCLUDING, WITHOUT
LIMITING THE FOREGOING, CONSEQUENTIAL, INCIDENTAL AND SPECIAL DAMAGES) ARISING FROM THE USE
OF OR INABILITY TO USE THIS PRODUCT, WHETHER ARISING OUT OF CONTRACT, NEGLIGENCE, TORT, OR
UNDER ANY WARRANTY, IRRESPECTIVE OF WHETHER AXIS HAS ADVANCE NOTICE OF THE POSSIBILITY OF
ANY SUCH DAMAGES, INCLUDING, BUT NOT LIMITED TO LOSS OF USE, BUSINESS INTERRUPTIONS, AND
LOSS OF PROFITS, NOTWITHSTANDING THE FOREGOING, AXIS' TOTAL LIABILITY FOR ALL CLAIMS UNDER
THIS AGREEMENT SHALL NOT EXCEED THE PRICE PAID FOR THE PRODUCT. THESE LIMITATIONS ON
POTENTIAL LIABILITIES WERE AN ESSENTIAL ELEMENT IN SETTING THE PRODUCT PRICE. AXIS NEITHER
ASSUMES NOR AUTHORIZES ANYONE TO ASSUME FOR IT ANY OTHER LIABILITIES.
This warranty does not cover replacement of products damaged by abuse, accident, misuse, neglect, alteration,
repair, disaster, improper installation or improper testing.
Support Service
Should you require any technical assistance, please go to the Axis’ website, contact your local dealer or use the
support addresses at the back of this user’s guide. If you are connected to the Internet, you can obtain on-line
user’s guides, technical support, software updates, application software and general corporate information from
Axis’ website.
0682

Legal Notices 5
Axis Official Home Page
All applicable software and information are available from the Axis’ website at http://www.axis.com. This site
enables you to access corporate and support information, and learn more about other Axis products.
www.axis.com
AXIS 9010 User’s guide
Revision 2.0
Part No: 19966
Dated: February 2003
Copyright © Axis Communications AB, 2003

Quick Installation Procedure
6
2. Quick Installation Procedure
2.1 Installing your AXIS 9010
Follow the instructions below to quickly install the AXIS 9010 on an Ethernet
network, which must be a TCP/IP-based system.
The AXIS 9010 supports DHCP server management and client IP address
management. By default, the IP address of the AXIS 9010, as well as the IP
addresses for the Bluetooth clients, are set automatically. No configuration is
therefore necessary and you can follow the instructions below.
If you do not have a DHCP server, IP address for the AXIS 9010 must be assigned
manually. Please go through the instructions 1-2 below and then refer to the
installation instructions in section 5. AXIS 9010 IP Setting, on page 15.
1. Connect your AXIS 9010 - first to the network with an Ethernet cable and then
to the mains supply with the power supply (AXIS type PS-B):
2. Check the following after about 30 seconds:
• The Power indicator displays a steady green light.
• The Network indicator displays a steady or a flashing orange or green light.
Your AXIS 9010 is now ready for use.
Power Cable
Network Cable
2.
1.

Quick Installation Procedure 7
2.2 Using your AXIS 9010
Make sure that the Bluetooth client, such as a laptop or a PDA, operates with
Bluetooth wireless technology and supports the LAN access profile or the PAN
profile.
1. Start the Bluetooth application in your client.
2. Start an inquiry and scan for Bluetooth devices.
3. Choose your AXIS 9010 from the list of alternatives and set up a Bluetooth
radio link.
4. By default, the Bluetooth Passkey is set to a default value for your AXIS 9010.
This means that if a login window appears in your client before you have
established a Bluetooth radio link, the default PIN code which is printed on the
product label on the underside of your unit, should be entered in the Bluetooth
Passkey entry field.
2.3 Accessing AXIS 9010 Web Interface
To access the internal Web interface, you enter the IP address of your AXIS 9010
in the location field of your Web browser. By default, the Bluetooth Device Name
of the AXIS 9010 is: “AXIS 9010 (<IP address>)”. This makes it easy to find the IP
address of the AXIS 9010. The AXIS 9010 user ID is root and the default password
is pass.

Preface
8
3. Preface
Thank you for purchasing the AXIS 9010 which uses Bluetooth wireless
technology in order to connect to traditional networks.
3.1 About Axis Communications
Axis develops solutions for user-friendly and secure communication over wired
and wireless networks. The company is a worldwide market leader in network
connectivity, with products for the office, facility and industrial environments.
Axis was founded in 1984 and is listed on Stockholmsborsen (XSSE:AXIS). With
more than 300 employees, and offices in 14 countries, Axis operates globally in
cooperation with distributors and OEM partners in 70 countries. Approximately 95
percent of production is exported out of Sweden. Information about Axis can be
found at http://www.axis.com/.
3.2 About this User’s guide
This user’s guide provides introductory information as well as detailed instructions
on how to set up and manage the AXIS 9010 in wireless network environments. It
is intended for everyone involved in installing and managing the AXIS 9010.
To fully benefit from the user’s guide, you should be familiar with basic
networking principles.
This user’s guide is applicable for the AXIS 9010 with software version release 2.0.

Product Overview 9
4. Product Overview
4.1 Package Contents
Verify that the AXIS 9010 package is complete by using the checklist below.
Please contact your dealer if anything should be missing or damaged. All packing
materials are recyclable.
Note:
Hardware Quantity Model Variants Part Numbers
AXIS 9010 19010 E3 0128-001-04
The AXIS 9010 User’s
Guide
1rev. 2.0 19966
Power Supply (AXIS
PS-B)
1Australia 13269
Europe 13267
Japan 13936
UK 13268
USA 13270
Mounting Bracket 19010 E1 17662
Screws 2ST4.2x25 RXS-Z FZB 17645
If you need to mount your AXIS 9010 on a wall or ceiling, the AXIS 9010
comes with a mounting bracket.

Product Overview
10
4.2 Physical Description
Front Panel
Underside

Product Overview 11
Rear Panel
4.3 Indicators
Indicator Color/Behavior Explanation
Power Green OK
Not lit No power/Error
Network Green OK - 100 Mbps network connected
Green flashing Activity on 100 Mbps network
Orange OK - 10 Mbps network connected
Orange flashing Activity on 10 Mbps network
Red No physical connection to the network
Radio Green
Bluetooth
Radio link connected
Green flashing Activity on a
Bluetooth
Radio link
Not lit No
Bluetooth
Radio link connected
Red (during upstart) Settings are being restored/upgraded
Red flashing Error/Flash upgrading defective
Orange flashing
Bluetooth
module firmware upgrading

Product Overview
12
4.4 Placing the AXIS 9010
The AXIS 9010 can be placed horizontally on a flat surface, e.g. on your office
desk, or with the mounting bracket on a wall or a ceiling. Place the AXIS 9010
close to power outlet and network connection.
When placing the AXIS 9010, consider that it uses radio waves for transmission.
Because the surrounding environment affects the range of the Bluetooth radio
signal, try to avoid placing the AXIS 9010 where the radio signal can be shadowed
by nearby obstacles.
The Bluetooth radio signal and its transmission quality can also be interfered with
by other devices, such as microwave ovens, that use the same or adjacent
frequencies. Do not place the AXIS 9010 close to any such devices.
To mount the AXIS 9010 on a wall, screw the mounting bracket into a wall using
the two screws, and carefully attach the AXIS 9010 to the mounting bracket.

Product Overview 13
4.5
Bluetooth
Wireless Technology
A revolution taking shape today is fundamentally changing the way people work,
communicate and access information. The Internet is going wireless with an
emerging world of new devices that bring mobile freedom to everyone.
Bluetooth wireless technology allows users to make effortless, wireless and instant
connections between various communication devices, such as notebook computers
and PDAs. Data can be sent at a speed of up to 723 kbps and for as many as seven
simultaneous data users. The sophisticated mode of transmission adopted in the
Bluetooth specification ensures protection from interference and security of data.
The Bluetooth radio operates in an unlicensed frequency band ensuring
communication compatibility worldwide. This makes it easier for anyone to set up
a local network and provide tailored wireless services based on Bluetooth wireless
technology.
Local
network
Operator
network
and
Internet
Bluetooth
network

Product Overview
14
4.6 AXIS 9010
The AXIS 9010 provides the "missing link" between devices powered by Bluetooth
wireless technology and the Internet. Wireless devices within range have a simple,
high-speed way to access network resources. The AXIS 9010 also provides a firm,
flexible foundation for access control, security and other management and
administration functions. Furthermore, the AXIS 9010, like other newly developed
Axis products, has been designed around Axis’ Linux-based ThinServer
technology. It utilizes the latest version of the highly recognized ETRAX "system
on a chip" technology developed by Axis and runs an embedded Linux operating
system and built-in Web-server.
The Bluetooth protocol stack developed by Axis, the OpenBT, is available for
download at http://developer.axis.com/.
The AXIS 9010 includes a Linux operating system, which is freely distributed
under the GNU General Public License as published by the Free Software
Foundation. This software provides a stable and reliable platform.

AXIS 9010 IP Setting 15
5. AXIS 9010 IP Setting
When connecting to the network, your AXIS 9010 needs an IP address in order to
be identified in the network. For the AXIS 9010, you can either set the IP address
automatically or manually.
5.1 AXIS 9010 Automatic IP Setting
If you have access to a DHCP server, you can choose to let it assign an IP address
to your AXIS 9010. All parameters needed for connection between the network,
the AXIS 9010 and the Bluetooth clients are preset. Assignment through
masquerading is the default setting.
Please follow the instructions in section 2. Quick Installation Procedure, on page 6.
If you use DHCP to automatically assign a dynamic IP address to your AXIS 9010,
the IP address is not known. You can locate the IP address by making an inquiry
from a Bluetooth client to find the AXIS 9010, which will be shown in a list of
devices. By default the Bluetooth Device Name of the AXIS 9010 is: AXIS 9010 (<IP
address>). If the above method is not possible, check the IP address in the DHCP
server or contact your network administrator.
5.2 AXIS 9010 Manual IP Setting
If you do not have access to a DHCP server, you must set the IP address for your
AXIS 9010 manually. Start by installing the AXIS 9010 according to the
instructions steps 1-2 in section 2.1 Installing your AXIS 9010, on page 6.
To assign the IP address manually, map the AXIS 9010 physical address (also
called MAC address) to the IP address. The physical address of your AXIS 9010 is
the same number as the serial number. The serial number is located on the label
placed on the underside of the unit.
You can easily assign a unique IP address to your AXIS 9010 from a computer on
your network with the ARP command. The ARP commands will show and change
the address conversion table for IP addresses and the physical addresses.
Important!
Do NOT use the IP addresses used in the following examples when installing
your AXIS 9010. Always consult your network administrator before assigning
an IP address to your AXIS 9010.

AXIS 9010 IP Setting
16
Follow the instructions below to set the IP address manually with ARP:
1. Note the serial number found on the underside label of the AXIS 9010. You
need to know this to assign the IP address.
2. Acquire an unused IP address (external or internal) for your AXIS 9010 from
your network administrator or Internet Service Provider (ISP).
3. Use a Windows- or a UNIX-based computer on your network to assign the new
IP address to your AXIS 9010. You must set the IP address for the AXIS 9010
from a workstation within the same subnet.
4. If the AXIS 9010 is already connected to the network, restart it by removing
and replacing the power cable. If you do not set the new IP address within 2
minutes you have to reset the AXIS 9010 again.
5. Map the physical address (equivalent to the serial number) of your AXIS 9010
to the IP address using the ARP command.
Then ping your IP address by sending a packet with 408 bytes of data to the
specified address and wait for a reply.
Windows 98/ME & NT/2000/XP:
Start a command prompt window and type these commands:
Syntax:
Example:
The following message will be displayed in the command prompt window.
arp -s <IP address> <Serial number>
ping -t -l 408 <IP address>
arp -s 192.168.0.91 00-40-8C-18-10-D0
ping -t -l 408 192.168.0.91
C:\WINDOWS>arp -s 192.168.0.91 00-40-8C-18-10-D2
C:\WINDOWS>ping -t -l 408 192.168.0.91
Pinging 192.168.0.91 with 408 bytes of data
Request timed out.
Request timed out.
Request timed out.
Request timed out.
Request timed out.
Reply from 192.168.0.91: bytes=408 time=3ms TTL=64
Reply from 192.168.0.91: bytes=408 time=2ms TTL=64

AXIS 9010 IP Setting 17
Important!
UNIX:
Type these commands at your command line:
Syntax:
Example:
The following text will be displayed in the command window:
6. Stop pinging the AXIS 9010 by pressing "Ctrl-C".
The IP setting is complete.
If your network has sub-networks or if you want to access the Internet, the subnet
mask and gateway to your AXIS 9010 must also be defined. Please consult your
network administrator or your ISP. You can set these parameters in the AXIS 9010
Web interface. Please refer to section 11. AXIS 9010 Web Interface, on page 29.
In order for the pinging procedure to work correctly, the length must be 408.
arp -s <IP address> <Serial number>
ping -s 408 <IP address>
arp -s 192.168.0.91 00:40:8C:18:10:D0
ping -s 408 192.168.0.91
>arp -s 192.168.0.91 00:40:8C:18:10:D0
>ping -s 408 192.168.0.91
PING 192.168.0.91 (192.168.0.91): 408 data bytes
416 bytes from 192.168.0.91: icmp_seq=12 ttl=64 time=1.7 ms
416 bytes from 192.168.0.91: icmp_seq=13 ttl=64 time=1.3 ms
416 bytes from 192.168.0.91: icmp_seq=14 ttl=64 time=1.3 ms
416 bytes from 192.168.0.91: icmp_seq=15 ttl=64 time=1.2 ms
416 bytes from 192.168.0.91: icmp_seq=16 ttl=64 time=1.3 ms
416 bytes from 192.168.0.91: icmp_seq=17 ttl=64 time=1.2 ms
416 bytes from 192.168.0.91: icmp_seq=18 ttl=64 time=1.2 ms
416 bytes from 192.168.0.91: icmp_seq=19 ttl=64 time=1.2 ms

Bluetooth Client IP Setting
18
6.
Bluetooth
Client IP Setting
When connecting to the AXIS 9010, your Bluetooth client (e.g. laptop) needs an IP
address in order to be identified on the network.
Depending on the client, two network profiles are possible: the Local Area Network
(LAN) access profile or the Personal Area Network (PAN) profile.
6.1 PAN Profile
The PAN profile defines a means of enabling Bluetooth devices to participate in a
personal area network. The AXIS 9010 can be used as a network access point and
acts as a bridge between a Bluetooth network and Ethernet. The AXIS 9010 will
provide network services for each of the connected Bluetooth devices.
• Bridging
An AXIS 9010 which supports Network access point services can provide some of
the features of an Ethernet bridge. The AXIS 9010 will forward Ethernet packets
between each of the connected Bluetooth devices. The AXIS 9010 with the PAN
profile has an additional connection to stationary network in which the Ethernet
packets are exchanged via bridging.
Note
• IP Masquerading
For the PAN profile the AXIS 9010 will assign IP addresses for the Bluetooth
clients through IP Masquerading, within a Private network. If the PAN profile is
used, the client should use DHCP for IP setting.
Note
If a DHCP server is available on the network, the client should be configured to
use DHCP.
If no DHCP server is available, the client could be configured to use manually
assigned IP addresses.
If masquerading is disabled, all network traffic from the client is bridged and
the client will not be assigned an IP address from the AXIS 9010.

Bluetooth Client IP Setting 19
6.2 LAN Access Profile
For the LAN access profile, there are three different ways for the AXIS 9010 to
assign IP addresses for your Bluetooth clients:
•Automatic
• IP Masquerading
•Manual
6.3 IP setting methods
Important!
Bluetooth
Client IP Setting within a Private Network (IP Masquerading)
You can choose to assign the IP addresses for your Bluetooth clients within a range
reserved for Private networks, using IP Masquerading. IP address assignment
through masquerading is the default setting.
Important!
If you use IP Masquerading, the IP addresses for your Bluetooth clients will only
apply between the Bluetooth clients and your AXIS 9010. They will be hidden to
any network on the other side of the AXIS 9010.
Set the dial-up application in your client to - server assigned IP address - in
order to let the AXIS 9010 assign IP addresses to the Bluetooth clients.
You must set the IP address to your AXIS 9010 before you can set the IP
addresses to your clients. Please refer to section 5. AXIS 9010 IP Setting, on page
15 for more information.

Bluetooth Client IP Setting
20
The packets transmitted from the Bluetooth clients will appear as if they were
originated directly from the AXIS 9010. IP Masquerading enables you to use
several clients with unique internal identities through only one "official" IP
address.
IP Masquerading uses almost the same method for IP translation as NAT (Network
Address Translation), except that masquerading also uses the port number in the
translation.
The default IP range for masquerading is 172.16.0.1-172.16.255.254. In addition
the following IP ranges may be used: 192.168.126.1 - 192.168.126.254 and
10.0.0.1 - 10.255.255.254.
You assign the IP addresses for the Bluetooth clients in the AXIS 9010 Web
interface. For more information please refer to section 11. AXIS 9010 Web
Interface, on page 29.
Note:
Bluetooth
Client Automatic IP Setting (LAN Access Profile)
If you have access to a DHCP server, you can choose to let it assign IP addresses to
your clients via the AXIS 9010. All parameters needed for connection between the
network, the AXIS 9010 and the Bluetooth clients are preset.
If you do not have access to more than one IP address on your network, you
should select IP Masquerading for your clients.
192.168.126.3
172.16.253.80
Outside global IP addr
(=AXIS 9010 IP addr)
172.16.253.80 192.168.126.3
Inside local IP addr
Outside
Inside
Internet
Other manuals for 9010
2
Table of contents
Other Axis Wireless Access Point manuals