Axxes Viaxxes Sat User manual

www.axxes.eu
Guide de l’utilisateur
User Guide
Guía del usuario
Document à conserver.
Keep this document.
Documento a conservar.
Copyright Axxès-V8 - Nov 2015

SOMMAIRE CONTENTS ÍNDICE
INTRODUCTION
Chapter 1:
Installing the unit
Chapter 2:
Navigating in the unit
Chapter 3:
Activating the unit
Chapter 4:
Changing the number of
axles
Chapter 5:
Driving
Chapter 6:
Meanings of the LEDs
Chapter 7:
What to do in the event of
a problem
INTRODUCCIÓN
Capítulo 1:
Instalación del aparato
Capítulo 2:
Navegación en el
aparato
Capítulo 3:
Activación del aparato
Capítulo 4:
Modificación del número
de ejes
Capítulo 5:
Circulación
Capítulo 6:
Significado de los LED
Capítulo 7:
¿Qué hacer en caso de
problema?
CHAPITRE 1 INTRODUCTION
3
A. Boîtier
B. Support
C. Câble d’alimentation
D. Pochette aluminisée (à conserver
et à utiliser lors du renvoi du boîtier.)
NB : Pour toute commande de matériel
supplémentaire, contactez votre agence
commerciale.
A
C
D
B
i
Vous avez choisi de vous équiper d’unViaxxès SAT
et nous vous remercions pour votre conance.
Nous vous rappelons que ce boîtier vous permet
selon les options choisies de :
• Régler vos trajets de péages autoroutiers
• Bénécier de nos services de
géolocalisation
AVERTISSEMENTS
Nous vous rappelons que vous devez activer
votre boîtier pour proter de tous les services.
Axxès ne serait être tenu responsable en cas
d’installation inappropriée ou d’utilisation
entraînant une dégradation.
Toute altération partielle ou totale de l’aspect
du boîtier entraînera une pénalité lors de sa
restitution.
INTRODUCTION
Chapitre 1 :
Installation du boîtier
Chapitre 2 :
Navigation dans le
boîtier
Chapitre 3 :
Activation du boîtier
Chapitre 4 :
Modification du nombre
d’essieux
Chapitre 5 :
Circulation
Chapitre 6 :
Signification des LEDs
Chapitre 7 :
Que faire en cas de
problème ?

CHAPITRE 1 CHAPITRE 1
INSTALLATION DU BOîTIER INSTALLATION DU BOîTIER
5
4
.
1. Ecran face au conducteur, le boîtier doit être centré sur le pare-brise, à
hauteur du volant, au dessus des essuie-glaces à l’arrêt.
2. Nettoyez le pare-brise à l’aide d’une lingette pour assurer une bonne
adhérence de l’autocollant du support (Pièce B) à usage unique.
Vue de l’extérieur du véhicule
.
1. Repérez le haut du boîtier (voir
schéma ci-dessus) et assurez-vous
que le support de fixation est bien à
l’arrière du boîtier.
2. Décollez la protection de l’étiquette,
puis fixez le boîtier au pare-brise à
l’emplacement défini précédemment
(un seul essai possible).
Un seul essai est possible.
Veillez à bien déterminer l’emplacement de fixation de votre boîtier car il
vous sera impossible de le repositionner ensuite. Haut
Etiquette
adhésive
à usage
unique
ETAPE 1 - POSITIONNEMENT DU BOîTIER SUR LE
PARE-BRISE
ETAPE 2 - FIXATION DU BOÎTIER SUR LE PARE-BRISE

CHAPITRE 1 CHAPITRE 1
INSTALLATION DU BOîTIER INSTALLATION DU BOîTIER
7
6
ETAPE 3 - BRANCHEMENT SUR L’ALIMENTATION DU
VÉHICULE (MODE RECOMMANDÉ)
ETAPE 3 - BRANCHEMENT SUR LA PRISE
ALLUME-CIGARE
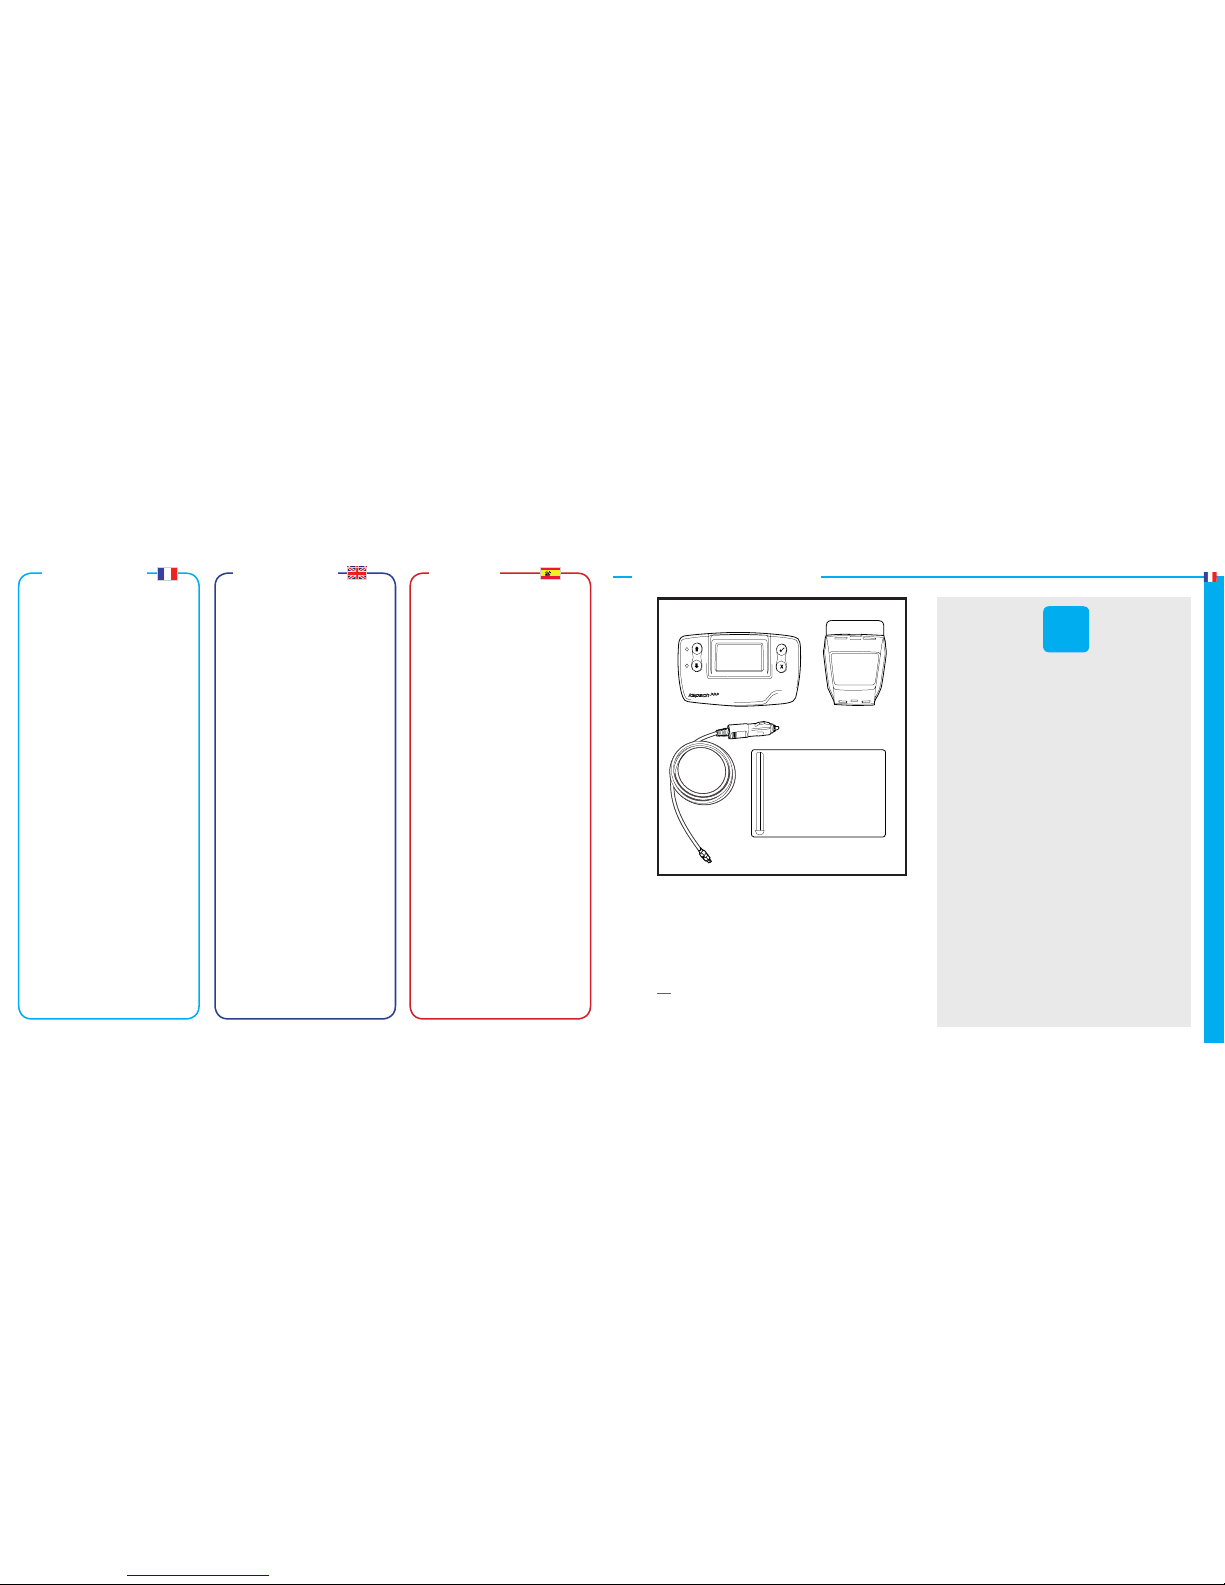
1. Utilisez le câble fourni (Pièce C). Assurez-vous de disposer de la longueur de
câble nécessaire pour vous raccorder à l’alimentation puis coupez la prise allume-
cigare ainsi que l’excédent de câble.
2. Localisez dans le véhicule les points de connexion en vous aidant du schéma
ci-dessous. Le fil noir du signal d’allumage doit être connecté au contact du
véhicule.
ROUGE +12V / +24V Alimentation
NOIR +12V / +24V Contact
BLANC Masse
3. Avant de connecter les câbles au véhicule, installez un fusible (non fourni),
de 5 ampères en série avec les fils d’alimentation (fils rouges et noirs).
Si l’alimentation du véhicule est déjà protégée, cette étape n’est pas nécessaire.
4. Pour finir, connectez chaque fil sur le point de connexion identifié précédemment
(alimentation du véhicule, contact et masse).
Cette installation doit être réalisée par un électricien qualié véhicule. En
cas de dégradation ou d’installation inapropriée Axxès ne serait être tenu
responsable.
Connectez le câble allume-cigare à la prise du véhicule et vérifiez
que :
- La prise allume-cigare est bien enclenchée.
- Le câble ne gêne pas la conduite.
NB : Toutefois, nous vous invitons à opter pour pour un branchement sur
l’alimentation du véhicule (voir page suivante).

CHAPITRE 1 CHAPITRE 2
INSTALLATION DU BOîTIER NAVIGATION DANS LE BOîTIER
98
3. Vérifiez la bonne connexion de votre appareil. Pour cela vous devez visualiser
des informations sur l’écran. Si ce n’est pas le cas, renouvelez l’action 2.
“Clic”
1. Retirez le boîtier de son support fixé au pare-brise en appuyant sur la
languette en plastique du support.
2. Connectez le boîtier au câble d’alimentation et branchez-le. Enfoncez le
jusqu’à entendre le «clic» de branchement. Il est important que cette connexion
soit complètement réalisée pour assurer le bon fonctionnement de l’appareil.
Voici comment naviguer dans les menus de votre boîtier :
Servez-vous des
flèches pour naviguer
dans le menu
Double-cliquez
sur
pour entrer
dans le menu
STOP
Appuyez sur
pour sortir d’un
menu
Pour votre sécurité, toute manipulation du boîtier doit
se faire à l’arrêt. Au dessus d’une vitesse de 10km/h, les boutons
du boîtier sont inactifs.
ETAPE 4 - RACCORDEMENT DU BOîTIER A
L’ ALIMENTATION

CHAPITRE 3 CHAPITRE 3
11
10
ÉTAPE 1 - CHOIX DE LA LANGUE ÉTAPE 2- VÉRIFICATION DE L’IMMATRICULATION
2. Vérifiez que l’immatriculation affichée est identique à celle
du véhicule. Au besoin, appelez votre contact commercial
habituel.
Dans tous les cas, appuyer sur pour passer à l’étape suivante.
Axxès
immat. AAA123AA
OK ?
ACTIVATION DU BOîTIER ACTIVATION DU BOîTIER
1. Choisissez votre langue à l’aide des flèches ou
puis validez en appuyant sur .
Axxès
English
Español
Français
Pour assurer le bon fonctionnement de votre boîtier, vous devez
valider les 3 étapes suivantes :
1. Choix de la langue
2. Vérication de l’immatriculation
3. Sélection des essieux

ÉTAPE 3 – SÉLECTION DU NOMBRE D’ESSIEUX ÉTAPE 4 - FIN DE L’ACTIVATION
CHAPITRE 3 CHAPITRE 3 ACTIVATION DU BOîTIER
13
12
La LED verte allumée indique que le boîtier est activé.
L’activation est alors terminée.
AAA123AA
CO2 : 0
EURO : 2 4
Axxès
En cas d’informations incorrectes, appelez votre contact commercial
habituel.
i
ACTIVATION DU BOîTIER
Sélectionnez ensuite le nombre d’essieux total correspondant à l’ensemble
roulant.
Axxès
0=0 : 2
0=0-0=0 : 4
0=0-0=0 : 3 Validez la sélection et
passez à l’étape suivante
en appuyant sur .
LEGENDE
0
=0 Véhicule principal (configuration pré-paramétrée
selon votre certificat d’immatriculation)
0=0 - 0=0 Véhicule pricipal avec remorque attelée

CHAPITRE 4 CHAPITRE 4
15
14
.
Les nombres d’essieux possibles sont déterminés selon votre
déclaration au moment de l’enregistrement du véhicule.
En cas de changement du nombre d’essieux, se référer au chapitre
“sélection des essieux”.
Axxès
0=0 : 2
0=0-0=0 : 5+
AAA123AA
CO2 : 0
EURO : 2
Axxès
Nombre d’essieux
sélectionné
La sélection du nombre d’essieux doit se faire à chaque changement de
configuration de l’ensemble roulant pour indiquer le nombre total d’essieux
circulants.
Le nombre d’essieux que vous avez sélectionné apparaît alors sur la droite de l’écran
principal.
AAA123AA
CO2 : 0
EURO : 2 4
Axxès
1. Pour cela, double-cliquez sur pour entrer dans le menu principal.
2. Naviguez jusqu’au menu “Modif. Essieux” et cliquez sur pour entrer dans le menu.
3. Naviguez jusqu’à la valeur correcte, puis cliquez sur pour enregistrer votre choix.
4. Cliquez sur pour sortir du menu et revenir à l’écran principal.
i
Une valeur nulle de CO2 indique que le paramètre n’a pas été
renseigné.
Nombre d’essieux
sélectionné
MODIFICATION DU NOMBRE D’ESSIEUX MODIFICATION DU NOMBRE D’ESSIEUX
Ecran du menu
“changement des essieux”
0=0-0=0 : 3
Sur le réseau autoroutier, la classe autoroutière facturée est déterminée
selon le nombre d’essieux détectés lors de votre passage en voie.
i

CHAPITRE 5 CHAPITRE 5
17
16
RÉSEAUX ACTIFS
RÈGLEMENT DU PÉAGE
Si vous souhaitez visualiser les différents réseaux sur lesquels votre boîtier est
actif rendez-vous dans le menu “Réseaux OK”.
Pour sortir du menu, appuyez sur .
Axxès
TIS-PL
Via Verde
(FR)
(PT)
Via-T (ES)
i
En cas d’informations incorrectes, ou si vous souhaitez ajouter des
réseaux supplémentaires, appelez votre contact commercial habituel.
CIRCULATION CIRCULATION
RAPPEL - Ne pas manipuler le boîtier durant le passage automatique en gare de péage.
A l’approche d’une gare de péage pour assurer l’enregistrement de votre passage :
- Ralentissez et respectez la distance minimale de 4m entre chaque véhicule.
- Respectez la signalisation
- Attendez que le feu soit vert avant de repartir (sauf voie )
Selon le réseau activé, les voies à utiliser sont les suivantes:

Boîtier Signication LED Géolocalisation
opérationnelle
Votre boîtier est opérationnel, vous pouvez
circuler.
CHAPITRE 6 CHAPITRE 6
SIGNIFICATION DES LEDS
19
18
SIGNIFICATION DES LEDS
Boîtier Signication LED Géolocalisation
opérationnelle
Si vous venez de démarrer, attendez la
synchronisation du système avant de circuler.
Si le niveau de batterie est faible, branchez votre
câble d’alimentation.
Les conditions extérieures empêchent le
fonctionnement normal du système de géolocal-
isation. Si le problème persiste dans une zone
couverte par les réseaux GPS et GSM, contactez
votre conseiller habituel.
Un problème interne est survenu dans le boîtier.
Appelez votre conseiller commercial habituel.
Une anomalie du dispositif satellitaire n’entrave
pas son fonctionnement en voie de péage.
X4
Axxès
X1
Axxès
X1
Axxès
NON
NON
LEDS D’ALARMES SERVICESLEDS D’INFORMATION UTILISATEUR
BOîTIER OPÉRATIONNEL
MESSAGES
OK
OK
Axxès
Boîtier Signication LED Géolocalisation
opérationnelle
Vous avez recu un message. Pour le consulter,
votre véhicule doit être à l’arrêt, acquittez sa
lecture et validez à l’aide de .
Seul le dernier message est stocké. Rendez-
vous dans le menu « der. message » pour relire
votre message en cas de besoin.
Axxès

Fiche détachable à remettre au chauffeur
21
20
QUE FAIRE EN CAS DE PROBLEME ?
EN VOIE DE PÉAGE
L’étiquette code à barres collée au dos de votre boîtier permet un enregistrement
de votre trajet en voie manuelle. En cas d’échec, si le problème se trouve en :
Prenez un ticket.
Utilisez l’interphone et attendez
l’arrivée de l’assistance.
En cas de dysfonctionnements
fréquents, contactez votre agence
commerciale qui vous remplacera
le boîtier si nécessaire. Puis
retournez le boîtier défectueux
dans sa pochette de protection
contre les ondes (pièce D) par
lettre recommandée avec A/R à :
1
2
3
Sortie de péage, dirigez-vous vers :
Entrée de péage :
CHAPITRE 7
AXXÈS - ATELIER CGAS
GARE DE PÉAGE AUTOROUTIERE ASF
RN 113
13310 SAINT MARTIN DE CRAU
FRANCE
Sortie
Exit
Salida
Uscita
Ausfahrt
Sortie
Exit
Salida
Uscita
Ausfahrt
TICKET
TIQUET
BIGLIETTO
Sortie
Exit
Salida
Uscita
Ausfahrt
TICKET
TIQUET
BIGLIETTO =
=
Sortie
Exit
Salida
Uscita
Ausfahrt
Herrentunnel
Liefkenshoek
Sortie
Exit
Salida
Uscita
Ausfahrt

Fiche détachable à remettre au chauffeur
22
CHAPTER 1 INTRODUCTION
23
A. Unit
B. Support
C. Power cable
D. Aluminium bag (to be kept and
reused when returning the unit)
NB: To order any additional equipment, contact
your sales office.
A
C
D
B
i
Thank you for choosing Viaxxès SAT. We
appreciate your trust.
Depending on the options you choose, the
unit enables you to:
• Pay your motorway tolls
• Benet from our geolocation services
WARNING
We remind you that you need to activate your
unit in order to benet the entire services.
Axxès cannot be held liable if the unit is installed
incorrectly or damaged through improper use.
Altering the unit's appearance partially or
totally will lead to a penalty when it is returned.

CHAPTER 1 CHAPTER 1
INSTALLING THE UNIT INSTALLING THE UNIT
25
24
.
1. The unit must be located centrally on the windscreen, at steering wheel
height just above the windscreen wipers, with the screen facing the driver.
2. Clean the windscreen with a cloth wipe to ensure the support's single-
use sticker (part B) can adhere to the surface.
View from the exterior of the vehicle
.
1. Identify the top of the unit (see
diagram above) and make sure the
fixing support is properly attached to
the back of the unit.
2. Remove the protective film from the
adhesive label and stick the unit to the
windscreen in the location specified
above (this can only be done once).
Single-use adhesive.
Take care when deciding on the location of your unit, as it cannot be moved
once fixed.
Top
Single-
use
adhesive
label
STEP 1 - POSITIONING THE UNIT ON THE WINDSCREEN STEP 2 - FIXING THE UNIT TO THE WINDSCREEN

CHAPTER 1 CHAPTER 1
INSTALLING THE UNIT INSTALLING THE UNIT
27
26
STEP 3 - CONNECTING TO THE VEHICLE'S POWER
SUPPLY (RECOMMENDED METHOD)
STEP 3 - CONNECTION TO THE CIGARETTE
LIGHTER SOCKET
1. Use the cable supplied (part C). Make sure the cable is long enough to reach the
power supply, then remove the lighter plug and any excess cable.
2. Locate the connection points in the vehicle using the diagram below. The black
ignition signal wire should be connected to the vehicle ignition.
RED +12V / +24V Power
BLACK +12V / +24V Ignition
WHITE Earth
3. Before connecting the cables to the vehicle, install a 5-amp fuse
(not supplied) in series with the power wires (red and black wires).
If the vehicle's power supply is already protected, this step is not necessary.
4. Finally, connect each wire to the connection points you have identified (vehicle
power, ignition and earth).
This installation should be carried out by a qualied vehicle electrician.
Axxès cannot be held liable in the event of any damage or an incorrect
installation.
Connect the cigarette lighter cable to the vehicle socket and make
sure:
- The plug is securely connected.
- The cable will not get in the driver's way.
NB: However, we recommend a connection to the vehicle power supply (see
next page).

CHAPTER 1 CHAPTER 2
INSTALLING THE UNIT NAVIGATING IN THE UNIT
2928
3. Check that the device is connected correctly. You should see information on the
screen. If not, repeat step 2.
"Click"
1. Remove the unit from its support fixed to the windscreen by pressing the
plastic tab on the support.
2. Plug the power cable into the unit. Push it in until you hear a click. This
connection must be made fully for the device to operate correctly.
To navigate through the unit's menus:
Use the arrows to
navigate within the
menu
Double-click
on
to enter the
menu
STOP
Press
to leave a menu
For your safety, only interact with the unit when the vehicle
is stopped. Above a speed of 10 km/h, the buttons no longer
operate.
STEP 4 - CONNECTING THE UNIT TO THE POWER
SUPPLY

CHAPTER 3 CHAPTER 3
31
30
STEP 1 - CHOOSING THE LANGUAGE STEP 2 - CHECKING THE REGISTRATION
2. Make sure the registration displayed matches that of the
vehicle. If not, contact your usual sales advisor.
In any case, press to move to the next step.
Axxès
Reg. No. AAA123AA
OK?
ACTIVATING THE UNIT ACTIVATING THE UNIT
1. Choose your language using the and
arrows and confirm by pressing .
Axxès
English
Español
Français
To ensure the unit works correctly, you must conrm the following
3 steps:
1. Choosing the language
2. Checking the registration
3. Selecting the axles

STEP 3 - CHOOSING THE NUMBER OF AXLES STEP 4 - ACTIVATION COMPLETE
CHAPTER 3 CHAPTER 3 ACTIVATING THE UNIT
33
32
When the green LED is lit, the unit has been activated.
Activation is now complete.
AAA123AA
CO2 : 0
EURO : 2 4
Axxès
If the information is not correct, contact your usual sales advisor.
i
ACTIVATING THE UNIT
Now select the total number of axles of the tractor and trailer.
Axxès
0=0 : 2
0=0-0=0 : 4
0=0-0=0 : 3
Confirm the selection
and move to the next
step by pressing .
KEY
0
=0 Traitor (preconfigured according
to your declaration)
0
=0 - 0=0 Tractor with trailer

CHAPTER 4 CHAPTER 4
35
34
.
The available numbers of axles are determined according to your
declaration when the vehicle is registered.
If the number of axles has changed, see the "Choosing the number
of axles" chapter.
Axxès
0=0 : 2
0=0-0=0 : 5+
AAA123AA
CO2 : 0
EURO : 2
Axxès Number of axles selected
The number of axles needs to be selected whenever the configuration of tractor
and trailer changes to indicate the total number of axles in use. The number of axles you have selected is displayed to the right of the main screen.
AAA123AA
CO2 : 0
EURO : 2 4
Axxès
1. Double-click on to enter the main menu.
2. Navigate to the "Change axles" menu and press to enter the menu.
3. Navigate to the correct value then press to record your choice.
4. Press to leave the menu and return to the main screen.
i
A zero CO2 value indicates that the parameter has not been entered.
Number of axles
selected
CHANGING THE NUMBER OF AXLES CHANGING THE NUMBER OF AXLES
Screen showing the
"Change axles" menu
0=0-0=0 : 3
On the motorway network, the motorway class invoicedis based on the
number of axles detected when you pass through the toll lane.
i

CHAPTER 5 CHAPTER 5
37
36
ACTIVE NETWORKS
PAYING TOLL CHARGES
If you wish to view the networks on which your unit is active, use the "Networks
OK" menu option.
To leave the menu, press .
Axxès
TIS-PL
Via Verde
(FR)
(PT)
Via-T (ES)
i
If the information is not correct, contact your usual sales advisor.
DRIVING DRIVING
REMINDER - Do not interact with the unit while passing through an automated toll lane.
When approaching a toll plaza, to ensure your vehicle is recorded:
- Slow down and respect the minimum distance of 4 m between vehicles.
- Follow the signs
- Wait for the green light before starting (except in lanes)
Depending on the active network, use the following lanes:

CHAPTER 6 CHAPTER 6
MEANINGS OF THE LEDS
39
38
MEANINGS OF THE LEDS
Unit LED meaning Geolocation
activated
Your unit is operational and you can drive.
Axxès OK
OK
Unit LED meaning Geolocation
activated
You have received a message. To view it, your
vehicle must be stopped. Confirm that you have
read it by pressing .
Only the last message is stored. Use the "last
message" menu option to re-read your message
if necessary.
Axxès
Unit LED meaning Geolocation
activated
If you have just started the engine, wait for the
system to synchronise before driving.
If the battery level is low, plug in your power
cable.
Exterior conditions are preventing normal opera-
tion. If the problem persists in an area covered
by GPS and GSM networks, contact yor usual
sales advisor. NO
An internal problem has occurred in the unit.
Call your usual sales advisor to declare the fault
and resolve the problem. NO
X4
Axxès
X1
Axxès
X1
Axxès
SERVICE ALARM LEDSUSER INFORMATION LEDS
UNIT OPERATIONAL
MESSAGES
Other manuals for Viaxxes Sat
2
Table of contents
Languages: