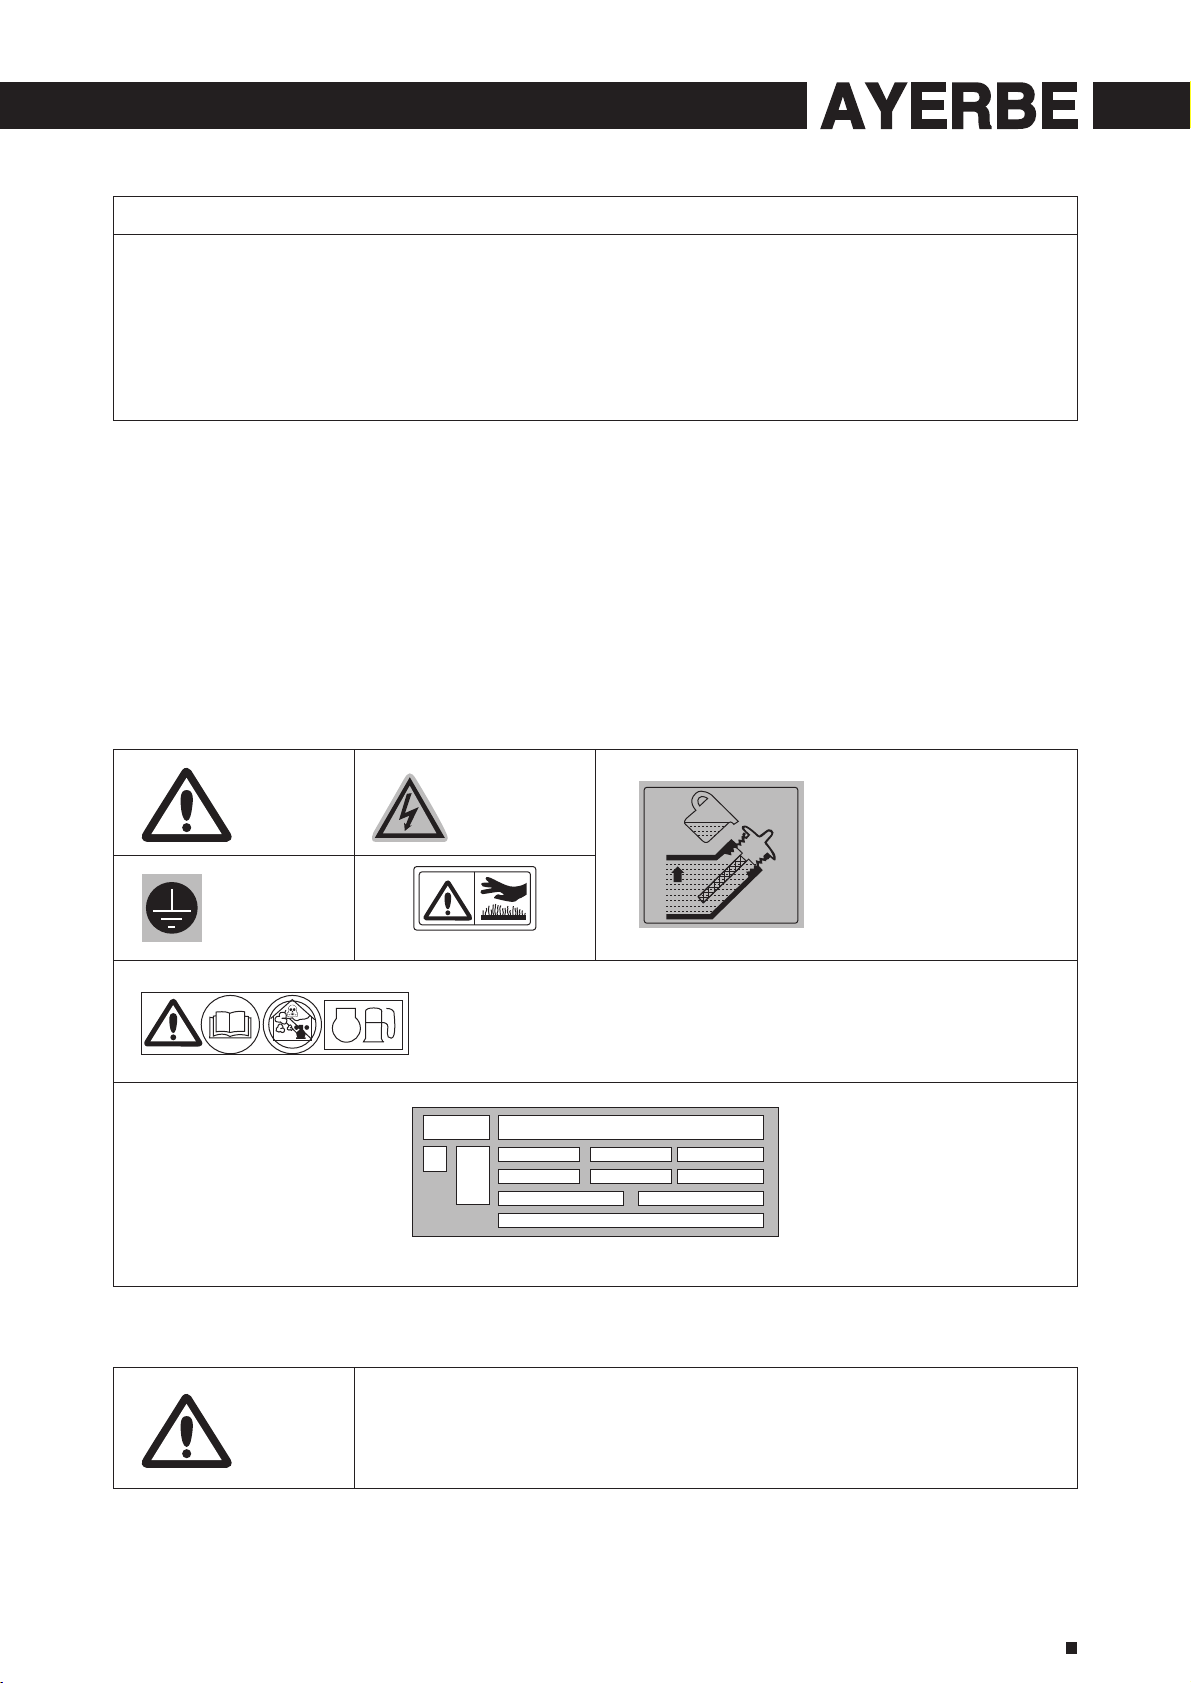
ayerbe AY-1000 KT User manual

GRUPO ELECTROGENO AY-1000 INS
GENERATING SET AY-1000 INS
GROUPE ELECTROGENE AY-1000 INS
GERADORES AY-1000 INS
AYERBE INDUSTRIAL DE MOTORES, S.A.
Apdo. de correos 5.028
01080 Vitoria-Spain

1. Preámbulo
1.1 Recomendaciones
Queremos darle nuestro más sincero agradecimiento por la compra de nuestros grupos electógenos. Le
recomendamos que lea atentamente este manual y que respete escrupulosamente las normas relativas a la seguridad,
el uso y mantenimiento de su grupo electrógeno.
La información contenida en este manual proviene de los datos técnicos disponibles en el momento de su
impresión. Debido al afán de mejora permanente de la calidad de nuestros productos, estos datos son susceptibles de
ser modificados sin previo aviso.
1. Preámbulo
2. Descripción general
3. Preparación antes de la puesta en marcha
4. Utilización del grupo
5. Protecciones (si las lleva, véase tabla de características)
6. Programa de mantenimiento
7. Metodología de mantenimiento
8. Almacenado del grupo
9. Localización de averías menores
10. Características
11. Sección de cables
12. Cláusulas de la garantía
13. Declaración de la conformidad “C.E.”
ÍNDICE
1
1.2 Pictogramas y placas que figuran en los grupos y su significado
1.3 Instrucciones y normas de seguridad
Peligro
Tierra
Atención, riesgo de quemaduras
Atención, riesgo de
descarga eléctrica Atención, el grupo electrógeno
se entrega sin aceite. Verifique
el nivel de aceite antes de
poner en marcha el grupo.
1.- Atención, consulte la documentación entregada junto con el grupo electrógeno
2.- Atención, emisión de gas de escape tóxico. No lo utilice en espacios cerrados o mal
ventilados
3.- Pare el motor antes de proceder al llenado de carburante
A = Modelo del grupo
B = Potencia del grupo
C = Tensión de corriente
D = Amperaje
E = Frecuencia de corriente
F = Factor de potencia
G = Clase de protección
H = Potencia acústica del grupo
I = Masa del grupo
J = Norma de referencia
K = Número de serie
Ejemplo de placa de identificación
CE Lwa
99,IB
(H)
KW: (B) Wolt: (C) Amp: (D)
Hz: (E) Cos Phi: (F) IP: (G)
Masse (Weight): (I) ISO 8528 - 8 Classe (J)
Nº: 10/2004-----001 (K)
STOP
No haga funcionar nunca al grupo electrógeno sin haber colocado las cubiertas de
protección y sin haber cerrado todas las puertas de acceso.
No levante nunca las cubiertas de protección ni abar las puertas de acceso si el grupo
electrógeno está en funcionamiento.
Peligro
ESPAÑOL
1 2 3

1.3.1 Avisos
En este manual pueden aparecer representados varios signos de aviso.
2
ESPAÑOL
1.3.2 Consejos generales
Uno de los factores elementales de seguridad es respetar la periocidad de mantenimiento (véase la tabla de
mantenimiento). Por otro lado, nunca intente hacer reparaciones u operaciones de mantenimiento si le falta experiencia
o si carece de las herramientas necesarias.
En el momento de la recepción de su grupo electrógeno, compruebe el buen estado del material y de la totalidad
de su pedido. La manipulación de un grupo debe realizarse sin movimientos bruscos ni sacudidas y habiendo tomado
la precaución de preparar con antelación el lugar de almacenamiento o de uso.
No deje nunca otras personas utilizar el grupo electrógeno sin haberles dado antes las instrucciones necesarias.
No deje nunca a un niño tocar el grupo electrógeno, aunque esté parado. Evite poner en marcha el grupo
electrógeno en presencia de animales (pueden ponerse nerviosos, sentir miedo, etc.).
No ponga nunca en marcha el motor sin filtro de aire o sin escape.
No intercambie nunca los bornes positivo y negativo de las baterías (si el equipo las lleva) durante su montaje.
Una inversión puede acarrear daños graves en el equipo eléctrico.
No cubra nunca el grupo electrógeno con ningún material durante su funcionamiento o justo después de su
parada (espere a que se enfríe el motor).
No cubra nunca el grupo electrógeno con una fina capa de aceite para protegerlo de la corrosión. Algunos aceites
de conservación son inflamables. Además, otros son peligrosos en caso de inhalación.
En cualquier caso, respete los reglamentos locales vigentes sobre el uso de grupos electrógenos.
1.3.3 Precauciones sobre la electrocución
No toque nunca los cables pelados o las conexiones desenchufadas. No manipule nunca un grupo electrógeno con
las manos o los pies húmedos. No exponga nunca el material a proyecciones de líquido o a la intemperie, ni lo deje sobre
suelo mojado. Mantenga siempre los cables eléctricos y las conexiones en buen estado. No utilice material en mal estado
que pueda provocar electrocuciones o dañar el equipo. Coloque un dispositivo de protección diferencial entre el grupo
electrógeno y el equipo si la longitud de los cable sde uso es superior a un metro. Utilice cables blandos y resistentes, con
recubrimiento de goma, según la norma IEC 60245-4 o cables equivalentes. No conecte el grupo electrógeno a otras fuentes
de potencia, como la red de distribución pública. En los casos concretos en los que se cuente con una conexión de reserva
con las redes eléctricas existentes, sólo debe utilizarla un electricista cualificado, que debe tener en cuenta las diferencias
de funcionamiento del equipo según se utilice la red de distribución pública o el grupo electrógeno.
La protección contra las descargas eléctricas se ha realizado con disyuntores especialmente diseñados para el grupo
electrógeno. Si estos últimos se deben sustituir, deben utilizarse disyuntores con valores nominales y cacacterísticas idénticos.
Este símbolo indica un peligro inminente para la vida o la salud de las personas expuestas. Si no
se respeta la norma correspondiente, se pueden producir consecuencias graves para la salud y
la vida de las personas expuestas.
Peligro
Este símbolo centra su atención sobre los riesgos para la vida y la salud de las personas expuestas.
Si no se respeta la norma correspondiente, se pueden producir consecuencias graves para la salud
y la vida de las personas expuestas.
Este símbolo indica una situación peligrosa cuando el caso así lo requiere.
Si no se respeta la norma correspondiente, se corre el riesgo de provocar heridas leves a las
personas expuestas o deteriorar cualquier otro elemento.
Los grupos electrógenos, durante su uso, desprenden corriente eléctrica.
Conecte el grupo electrógeno a tierra cada vez que lo uitlice para protegerse de una posible
electrocución.
Es necesario antes de cualquier uso, saber parar inmediatamente el grupo y entender a la perfección
todos los comandos y maniobras.
Aviso
Atención
Aviso
Aviso

3
ESPAÑOL
1.3.9 Protección del medio ambiente
No vacíe nunca o tire el aceite del motor directamente al suelo, hágalo en un recipiente previsto para tal fin. Evite,
en la medida de lo posible, la reverberación de sonidos en las paredes u otras construcciones, ya que el volumen se vería
amplificado. Si el silenciador de escape de su grupo electrógeno no lleva incorporado un parachispas y debe utilizarlo
en zonas boscosas, de monte o campos de hierba no cultivados, tenga cuidado de que las chispas no provoquen incendios
(desbroce una zona lo suficientemente amplia para colocar el grupo electrógeno).
1.3.8 Precauciones de uso en las baterías
El electrolito que contienen las baterías es tóxico y peligroso. Las baterías contienen ácido sulfúrico que puede
provocar corrosiones o calentamientos. Evite cualquier contacto del ácido con la piel, los ojos y la ropa.
La recarga de la batería debe realizarse en un lugar ventilado.
No coloque nunca la batería cerca de una llama o del fuego.
Utilice sólo herramientas aisladas.
No utilice nunca ácido sulfúrico o agua acidificada para completar el nivel de electrolito.
Peligro
1.3.7 Precauciones contra las quemaduras
El aceite caliente produce quemaduras, evite el contacto directo con la piel. Asegúrese de que el sistema no
está bajo presión antes de cualquier intervención. No arranque ni haga girar nunca el motor con el tapón de llanado
quitado, ya que existe el riesgo de que salga despedido aceite.
No toque nunca el motor ni el silenciador de escape durante el funcionamiento del grupo
electrógeno o justo después de pararse.
Peligro
1.3.6 Llenado del depósito de carburante
El carburante es extremadamente inflamable y sus vapores son explosivos.
Está prohibido fumar, acercar una llama o producir chispas durante el llenado del depósito.
El llenado debe realizarse con el motor parado. Elimine cualquier resto de carburante con
un trapo limpio.
Peligro
Coloque siempre el grupo electrógeno sobre un suelo bien nivelado, plano horizontal para evitar que el carburante
del depósito no se vierta sobre el motor. El almacenamiento y manipulación de los productos derivados del petróleo se
hará de acuerdo con la ley. Cierre el grifo de carburante (si existe) después de cada llenado. Llene el depósito con la
ayuda de un embudo con cuidado de no derramar el carburante, y vuelva a enroscar el tapón del depósito de carburante
tras la operación de llenado. Nunca añada carburante mientras el grupo electrógeno esté en funcionamiento o aún caliente.
1.3.5 Precauciones contra los gases de escape
Los gases de escape contienen una sustancia muy tóxica: el óxido de carbono. Esta
sustancia puede provocar la muerte si el nivel de concentración en el aire es muy alto.
Por ello, utilice siempre su grupo electrógeno en lugares bien ventilados donde no se
acumulen gases.
Peligro
Es necesaria una buena ventilación para el correcto funcionamiento de su grupo electrógeno. En caso contrario,
el motor funcionaría muy rápido a una temperatura excesiva que podría provocar accidentes o dañar el material y los bienes
cercanos. No obstante, si es necesaria una operación dentro de un edificio, hay que prever una ventilación apropiada de
manera que las personas o animales presentes no resulten afectados. Es obligatorio evacuar los gases de escape al exterior.
1.3.4 Precauciones contra incendios
Aleje los productos inflamables o explosivos (gasolina, aceite, trapos, etc.) durante el funcionamiento
del grupo. El motor no debe funcionar en entornos en los que haya productos explosivos; si los
componentes eléctricos y mecánicos no están blindados pueden producirse chispas.
No cubra nunca el grupo electrógeno con ningún tipo de material durante su funcionamiento o
justo después de la parada (espere a que el motor se enfríe).
Peligro

1.3.10 Peligro de las piezas giratorias
4
ESPAÑOL
No se acerque nunca a una pieza giratoria en funcionamiento con ropa suelta o pelo largo sin red
de protección en la cabeza. No intente parar, ralentizar o bloquear una pieza giratoria en
funcionamiento.
Aviso
1.3.11 Capacidad del grupo electrógeno (sobrecarga)
Nunca exceda la capacidad ( en amperios y/o watios) de la potencia nominal del grupo electrógeno durante el
funcionamiento en servicio continuo.
Antes de conectar y de hacer funcionar el grupo electrógeno, calcule la potencia eléctrica solicitada por los
aparatos eléctricos (expresada en watios). Esta potencia eléctrica generalmente viene indicada en la placa del fabricante
de las bombillas, de los aparatos eléctricos, motores, etc. El total de todas las potencias de los aparatos utilizados no
deberá exceder al mismo tiempo la potencia nominal del grupo.
1.3.12 Condiciones de uso
Las prestaciones mencionadas de los grupos electrógenos se obtienen en las condiciones de referencia estipuladas
por la norma ISO 3046-1:
+ 27ºC, 100 m sobre el nivel del mar, grado de humedad relativa igual al 60%, o
+ 20ºC, 300 m sobre el nivel del mar, grado de humedad relativa igual al 60%.
Las prestaciones de los grupos electrógenos se reducen en un 4% aprox. por cada 10ºC de aumento de
temperatura y/o alrededor del 1% por cada 100 m de elevación.
2. Descripción general
2.1 Descripción del grupo
Tapón de depósito de carburante Tomas de tierra Contacto del arranque/parada
Cursor de ventilación del tapón del
depósito de carburante
Interruptor de alimentación/interrupción
del disyuntor continuo CC
Tornillo dedesmontaje de la cubierta
de acceso para llenado/vaciado del
aceite
Empuñadura arranque Interruptor de rearme del disyuntor
alternativo CA
Cubierta de acceso para llenado/vaciado
del aceite
Grifo de carburante Tomas eléctricas CA Cubierta de acceso a la bujía
Starter Tomas eléctricas CC
Accesorios: Cable de alimentación de la batería, llave para las bujías, destornillador de berbiquí, mango de destornillador ,
llave de desmontaje.
3. Preparación antes de la puesta en marcha
3.1 Verificación del nivel de aceite
Verifique antes de cada arranque el nivel de aceite del motor.
La verificación, así como el nivelado de aceite, se realizarán con el grupo colocado en una superficie horizontal.
• Extraiga la cubierta de protección desenroscando el tornillo de sujeción.
• Desenrosque y extraiga el tapón-indicador para verificar visualmente el nivel y añada aceite si es necesario.
• Llene el cárter de aceite con un embudo hasta que desborde.
• Vuelva a enroscar el tapón en el tubo de rellenado hasta el tope y compruebe que no existe ninguna fuga.
• Elimine el exceso de aceite con un trapo limpio.
• Fije la cubi

5
ESPAÑOL
3.2 Precauciones contra incendios
Pare el motor antes de proceder al llenado de carburante y llene el depósito en un lugar ventilado.
No fume ni acerque llamas o chispas cerca del lugar de llenado ni cerca del lugar de almacenamieno
del carburante.
Utilice solamente carburante limpio sin presencia de agua.
No llene demasiado el depósito (no debe haber carburante en el cuello de llenado).
Tenga cuidado de no derramar carburante durante el llenado del depósito.
Antes de poner en marcha el grupo electrógeno, si se ha derramado carburante, asegúrese de que
éste se ha secado y de que los vapores se han disipado.
Peligro
Compruebe el nivel de carburante y llene el depósito en caso necesario.
• Desenrosque el tapón del depósito de carburante.
• Llene el depósito con un embudo, con cuidado de no derramar el carburante.
• Vuelva a enroscar el tapón del depósito de carburante y compruebe que no existe ninguna fuga de aceite.
3.3 Toma de tierra del grupo
Para hacer la conexión a tierra del grupo, utilice un hilo de cobre de 10 mm2 fijado a la toma de tierra del grupo
y a un piquete de tierra de acero galvanizado hundido 1 metro en el suelo. Esta toma de tierra disipa también la electricidad
estática generada por las máquinas eléctricas.
4. Utilización del grupo
4.1 Procedimiento de puesta en marcha
• Abra el grifo de carburante y coloque el contactor de arranque/parada en la posición “ON”.
• Extraiga el comando del starter.
Nota: no utilice el starter cuando el motor esté caliente o cuando la temperatura atmosférica sea elevada.
• Agarre el mango de arranque de manera adecuada y tire lentemante hasta que sienta una cierta resistencia. A
continuación, estire con fuerza de la cuerda. Repita la acción si es necesario.
• Presione progresivamente el comando del starter.
3.4 Emplazamiento de uso
Coloque el grupo electrógeno sobre una superficie plana y horizontal y lo suficientemente resistente para que
el grupo no se hunda (la inclinación del grupo en cualquier dirección no debe superar los 10º).
Elija un lugar limpio, aireado y protegido de la intemperie y tenga previsto el abastecimiento de aceite y de
carburante cerca del lugar de uso del grupo respetendo una cierta distancia de seguridad.
4.2 Funcionamiento
4.2.1 Funcionamiento corriente alterna
Cuando la velocidad del grupo se haya estabilizado (unos 3 min.):
• Enchufe la toma macho del cable de alimentación en la toma hembra de CA del grupo.
• Rearme el circuito de protección pulsando el botón negro.

4.3. Parada
6
ESPAÑOL
Tras la parada del grupo, el motor apagado sigue desprendiendo calor.
Una vez parado, el grupo elect´rgeno debe ventilarse adevuadamente.
Para parar el grupo electrógeno rápidamente, coloque el contacto de arranque/parada en posición
parada “O”.
• Desenchufe las tomas para girar el motor en vacío durante 1 ó 2 min.
• Cierre el grifo de carburante.
• Ponga el contacto de arranque/parada en posición de parada “OFF”; el grupo se parará.
• Gire el cursor de ventilación del tapón del depósito de carburante a la posición “OFF” (sentido contrario al de las
agujas del reloj).
Aviso
5. Protecciones (si las lleva véase tabla de características)
5.1 Seguridad aceite
Este mecanismo de seguridad ha sido diseñado para prevenir daños en el motor a causa de una falta de aceite
en el cárter del motor. El mecanismo para el motor automaticamente. Si el motor se para y no se arranca, verifique el nivel
de aceite del motor antes de buscar cualquier otra causa de avería.
5.2 Disyuntor
El circuito eléctrico del grupo está protegido por varios interruptores magnetotérmicos, diferenciales o térmicos.
Posibles sobrecargas y/o cortocircuitos interrumpen la distribución de enrgía eléctrica.
6. Programa de mantenomiento
6.1 Recordatorio de la utilidad
La frecuencia del mantenimiento y las operaciones a realizar vienen en el programa de mantenimiento.
No obstante, cabe señalar que el entorno en el que funciona el grupo electrógeno es el que determina este
programa. Además, si el grupo electrógeno se utiliza en condiciones severas, sería necesario adoptar intervalos entre
operaciones más cortos.
Estos períodos de mantenimiento son de aplicación solamente a los grupos que funcionan con carburante y
aceite según las especificaciones que se facilitan en este manual.
6.2 Tabla de mantenimiento
Elemento
Realice las operaciones de mantenimiento a
principios de cada vencimiento
alzado.
En cada uso Transcurridas
las 20 primeras
horas
3 meses ó 50
horas
6 meses ó
100 horas
12 meses ó
300 horas
Aceite motor
Filto de aire
Bujía de encendido
Grifo de carburante
Ventilación de
refrigeración
Válvulas
Verificar el nivel
Renovar
Limpiar
Comprobar-limpiar
Verificar
Verificar
Comprobar-ajustar
Comprobar el conjunto de las fijaciones
•
•
(1)*
•
•
•
*
*
*
Nota: *esta operación debe realizarla uno de nuestros agentes / (1) 50 horas.

7
ESPAÑOL
Pare el motor antes de realizar cualquier operación de mantenimiento.
Para evitar cualquier arranque accidental, interrumpa el contacto del motor y desconecte la o las
cazleta(s) de la o las bujía(s) de encendido. Utilice únicamente piezas originales o equivalentes.
El uso de piezas de recambio de distinta calidad puede provocar el deterioro del grupo electrógeno.
7. Metodología de mantenimiento
7.1 Renovación del aceite del motor
Vacíe el aceite cuando el motor está aún caliente para conseguir un vaciado completo y rápido.
• Coloque el grupo sobre los calces soporte y ponga un recipiente adecuado debajo del grupo.
• Extrsiga la cubierta de protección desenroscando el tornillo de sujeción.
• Extraiga el tapón-indicador de llenado.
• Incline con cuidado el grupo para vaciar el aceite en el recipiente.
• Llene el depósito del cárter de aceite del motor con el aceite recomendado.
• Seguidamente vuelva a enroscar erl tapón-indicador de llenado y compruebe que no existen fugas de aceite después
del llenado.
• Elimine los restos de aceite con un trapo limpio.
• Ajuste la cubierta de protección enroscando el tornillo de sujeción, los calces y el recipiente.
Aviso
7.2 Control de la bujía de encendido
• Extraiga la cubierta de protección presionando sobre la parte superior de la misma.
• Retire la caperuza de la bujía de encendido y utilice la llave para bujías para sacar la bujía.
• Revise la bujía y sustitúyala por una nueva si los electrodos están gastados o si el aislante está agrietado o pelado.
En caso de reutilización, limpie las bujías con un cepillo metálico.
• Mida la separación entre los electrodos con la ayuda de un aclibre de espesor. La separación debe ser de entre 0,7
y 0,8 mm. Compruebe que la arandela de la bujía de encendido está en buen estado y apriete la bujía para evitar alisar
la rosca.
• Una vez colocada la bujía en su sitio, apriétela con una llave para bujías para ajustar la arandela.
Nota: para montar una bujía nueva, una vez asentada apriétela 1/2 vuelta para la arandela. Para montar una bujía
usada, una vez asentada apriétela 1/8-1/4 de vuelta para ajustar la arandela.
• Vuelva a colocar la caperuza de la bujía de encendido y seguidamente coloque la cubierta de protección.
7.3 Control de pernos, tuercas y tornillos
Un control diario y minucioso del grupo de toda la tornillería es necesario para prevenir cualquier incidente o avería.
• Inspeccione el conjunto del grupo electrógeno antes de cada arranque y después de cada uso.
• Apriete todos los tornillos que tengan juego.
Nota: el ajuste de los pernos de la culata lo deberá hacer un especialista. Consulte a su agenet de la zona.
7.4 Limpieza del grupo
• Retire el polvo y los restos acumulados alrededor del tubo de escape y limpie el grupo con un trapo y un cepillo (se
desaconseja el lavado con chorro de agua; está prohibido además efectuar la limpieza con un limpiador de alta presión).
• Limpie cuidadosamente las entradas y salidas de aire del motor y del alternador.
• Compruebe el estado general del grupo y cambie las piezas defectuosas en caso necesario.

8
ESPAÑOL
8. Almacenado del grupo
Los grupos electrógenos que tengan que permanecer parados durante mucho tiempo deben someterse a
determinadas operaciones para garantizar su correcta conservación. Asegúrese de que la zona de almacenamiento no
esté polvorienta o húmeda. Limpie el exterior del grupo electrógeno y aplique un producto anticorrosión.
• Cierre el grifo de carburante.
• Renueve el aceite del motor.
• Retire la bujía y vierta unos 15 ml de aceite en el cilindro y vuelva a colocar la bujía.
• Coja de manera adecuada la empeñadura de arranque, tire de ella lentamente y hasta el final varias veces para hacer
girar el motor y repartir el aceite en el cilindro.
• Limpie el grupo electrógeno, tápelo para protegerlo del polvo y guárdelo en un lugar limpio y seco.
9. Localización de averías menores
El motor no arranca
Grupo electrógeno cargado durante el arranque
Nivel de carburante insuficiente
Gifo de carburante cerrado
Alimentación de carburante obturado o con escapes
Foltro de aire obstruido
Comando en “O”
Bujía defectuosa
Aberturas de ventilación obturadas
Posible sobrecarga
Disyuntor desconectado
Disyuntor defectuoso
Toma hembra defectuosa
Cable de alimentación de los aparatos defectuoso
Alternador defectuoso
Equipamiento o cable defectuoso
CAUSAS PROBABLES ACCIONES CORRECTIVAS
Quite la carga
Realice el llenado de carburante
Abra el grifo
Vuelva a poner el sistema en funcionamiento
Limpie el filtro del aire
Coloque el comando en “I”
Sustituya la bujía
Limpie los protectores de aspiración y de descarga
Controle la carga
Ponga el disyuntor en marcha
Revíselo, repárelo o sustitúyalo
Revísela, repárela o sustitúyala
Cambie el cable
Revíselo, repárelo o sustitúyalo
El motor se para
No hay corriente
eléctrica
Desconexión del disyuntor
10. Características
Tipo de motor
Potencia máx: 50 Hz (watt)
Corriente alternativa
Corriente continua
Tipo de toma de corriente alternativa
Tipo de toma de corriente continua
Disyuntores
Seguridad aceite
Nivel sonoro C.E.E. (Lwa)
Peso en Kg. (sin carburante)
Dimensiones L x An x Al en cm.
Aceite recomendado
Capacidad del cárter de aceite en litros
Carburante recomendado
Capacidad del depósito de carburante en litros
Bujía
MODELO AY-1000 KT
4 tiempos, refrigeración por aire
800
230 V - 3,9 A
12 V - 5 A
1 x 16 A
1 x 5 A
•
•
93
28
48 x 33 x 42
SAE 15 W 40
0,37
Gasolina sin plomo
5
BPR 6 ES
: serie : opción X: imposible

DECLARACION DE CONFORMIDAD CE
DATOS DEL FABRICANTE
NOMBRE: AYERBE INDUSTRIAL DE MOTORES, S.A.
DIRECCION: C/LERMANDABIDE, 8 - PARC.4-6 - C.T.V. (POLG.IND.JUNDIZ)
01015 - VITORIA (ALAVA)
CIF: A-01109206
DECLARA QUE EL DISEÑO Y FABRICACION DE LA MAQUINA
MARCA: AYERBE
MODELO: AY – 1000 KT
MOTOR:KIOTSU KT 139 1,5 HP
ALTERNADOR: SD 1 KVA
AÑO CONSTRUCCION: 2.005
ES CONFORME A LAS DIRECTIVAS COMUNITARIAS DE MAQUINARIA
89/392/CEE
Y LAS POSTERIORES MODIFICACIONES
91/368CEE, 93/44CEE CEE 93/68 CEE
NORMAS DE REFERENCIA
EN 292-I, EN 292-2
VITORIA, 20 DE MARZO DE 2.005
FDO.: ADRIÁN MARTÍNEZ DE ALBORNOZ
GERENTE
9
ESPAÑOL

1. Preface
1.1 Recommendations
Thank you for buying one of our generating sets. We recommend that yuo read this manual carefully and follow
the safety and maintenance advice and user instructions for our generating set very closely.
The information contained in this manual is taken from technical data available at the time of print. In the intention
of permanently improving the quality of our products, this information may be amended without warning.
1. Preface
2. General description
3. Preparation before starting
4. Using the generator set
5. Safety features (if fitted, see specifications table)
6. Maintenance schedule
7. Maintenance procedures
8. Storing the generating set
9. Fault finding
10. Specifications
11. Cable sizes
12. Conditions of warranty
13. EC Declaration of conformity
CONTENTS
1.2 Pictograms and plates on the generating sets and what they mean
1.3 Instructions and safety regulations
Danger
Earth
Danger, risk of burns
Warning: risk of
electric shock. Warning: the generating set is
supplied without oil. Always
check the oil level before
starting the generating set.
1.- Importanat: refer to the documentation accompanying the generating set
2.- Warning: emission of toxic exhaust gases. Do not use in a confined or poorly
ventilated area
3.- Stop the motor before filling with fuel
A = Generating set model
B = Generating set output
C = Voltege
D = Amperage
E = Current frecuency
F = Power factor
G = Protection rating
H = Generating set noise output
I = Generating set earth
J = Reference Standandard
K = Serial number
Example of an identification plate
CE Lwa
99,IB
(H)
KW: (B) Wolt: (C) Amp: (D)
Hz: (E) Cos Phi: (F) IP: (G)
Masse (Weight): (I) ISO 8528 - 8 Classe (J)
Nº: 10/2004-----001 (K)
STOP
Do not ru the generating set without having put back the protective covers and closed
the access doors.
Never take the protective covers off or open the access doors if the generating set
is running.
Danger
1 2 3
10
ENGLISH

1.3.1 Warnings
You are likely to encounter several warning symbols in this manual.
1.3.2 General advice
One of the fundamental safety considerations is observation of the interval between maintenance procedures
(sse maintenance schedule). Furthermore, never attempt to carry out repairs or maintenance procedures without the
necessary experience and/or tools.
When you take delivery of your generating set, check that it is complete and not damaged in any way. A generating
set should be handled gently, avoiding sudden movements, and the place where it is to be stored or used should be
carefully prepared beforehand.
Never let other people use the generating set without giving them all necesary instructions beforehand.
Never let children touch the generatung set, even when it is not operation. Do not operate the generating set
near animals ( as it could cause them to panic).
Never start the motor without an air filter or exhaust.
Never invert the positive and negative terminals (if fitted) when connecting them. Such an inversion can lead to
severe damage to the elactrical equipment.
Never cover the generation set with any tipe of material while it is in operation or just after it has been turned
off. Wait until the motor is cold.
Never coat the generating set with oil in an attempt to protect it from corrosion. Some preservative oils are
flammable. Also, some are dangerous to inhale.
In all cases, respect the local regulations currently in place concerning the use of generating sets.
1.3.3 Safety guidelines to prevent electrocusion
Never touch stripped cables or disconnected connectors. Never handle a generating set with wet hands or feet.
Never expose the equipment to liquid splashes or rainfall, and do not place it on wet ground. Always keep the
electrical cables and the connections in good condition. Do not use equipment in a poor state of repair which could lead to
electrocution or damage to the equipment. Use a differential protection device between the generating set and the appliances
if the cable or cables used are more than 1 metre in length.
Use flexible, durable cables, with rubber sheating, conforming to the IEC 60245-4 standard or equivalent cables.
Do not connect the generating set to other power sources, such as the mains. In specific cases where there is provision
for a reserve connection to existing electrical networks, this must only be carried out by a qualified electrician, who should take
the operating differences of the equipment into account, according to whether the mains or generating set is being used.
Special circuit breakers designed for use with generating sets are used to prevent electrocution. If these circuit
breakers need t be replaced, circuit breakers with identical nominal rating and specifications must be used.
This symbol indicates a definite risk to the health and life of people. Not following this instruction
may seriously affect the health of people or prove fatal.
Danger
This symbol draws attention to the potential risk to the health and life of people. Not following this
instruction may seriously affect the health of people or prove fatal.
This symbol indicates a dangerous situation if the warning is not heeded.
Not following this instruction could result in non-serious injury or damage.
While they are in operation, generating sets produce electric current.
Connect the generating set to earth each time you use it, in order to prevent electrocutions.
Before use, it is essential that you know how to stop the generating set inmediately and that you
troughly understand all the controls and operations.
Warning
Warning
Warning
Danger
11
ENGLISH

1.3.9 Protecting the environment
Never drain or discard used oil onto the ground, but put it into a designed container. As far as possible, try to
avoid sound reverberating through walls and buildings, as the noise will be amplified. If the exhaust silencer of your
generating set is not fitted with a spark arrester and tou need to use it in wooded, bushy or uncultivated areas, be extremely
careful and make sure that sparks do not cause a fire (clear vegetation from a fairly large area where you wish to place
generating set).
1.3.8 Safety guidelines for handling batteries
The electrolyte contained in the batteries is toxic and dangerous. It contains sulphuric acid which can cause
corrosion or burns, avoid all contact with your skin, eyes and clothes.
Charging the battery should be performed in a well ventilated area.
Never leave the battey close to a flame or fire.
Use only insulated tools.
Never use sulphuric acid or acid water to top up the electrolyte level.
Danger
1.3.7 Safety guidelines against burns
Hot oil burns, avoid contact with the skin. Check that the system is no longer pressurised before carrying out
any procedures. Never start or run the motor when the oil filler cap is off as oil may splash out.
Never touch the motor or the silencer while the generating set is in operation, or when it
has just stopped.
Warning
1.3.6 Filling with fuel
The fuel is highly flammable and its vaporous are combustible.
Smoking, using a naked flame or producing sparks are forbidden while the fuel tank is being filled.
Filling should be carried out with the motor turned off. All traces of fuel should de wiped off whith
a clean cloth.
Danger
Coloque siempre el grupo electrógeno sobre un suelo bien nivelado, plano horizontal para evitar que el carburante
del depósito no se vierta sobre el motor. El almacenamiento y manipulación de los productos derivados del petróleo se
hará de acuerdo con la ley. Cierre el grifo de carburante (si existe) después de cada llenado. Llene el depósito con la
ayuda de un embudo con cuidado de no derramar el carburante, y vuelva a enroscar el tapón del depósito de carburante
tras la operación de llenado. Nunca añada carburante mientras el grupo electrógeno esté en funcionamiento o aún caliente.
1.3.5 Safety guidelines for exhaust gases
Exhaust gases contain carbon monoxide, which is a highly toxic substance. This substance
can cause death if it is present in excessive concentrations in the air inhaled.
For this reason, always use the generating set in a well ventilated area, where gases will
not be able to accumulate.
Danger
Good ventilation is required for your generating set to work properly. Without this, the motor wuold very quickly
run at too high a temperature, which could lead to accidents or damage to the equipment and to surrounding items. However,
if it is necessary to operate it inside a building, adequate ventilation must be provided, so that people and animals are not
affected. It is imperative that exhaust gases are discharged outside.
1.3.4 Safety guidelines to prevent fire
Keep all inflamable materials (e.g.: petrol, oil, fabric, tec.) out of the way when the generating sets
is in operation. The motor should not be operated in areas containing explosive products. There
is a risk of sparks forming where all electrical and mechanical components are not shielded. Never
cover the generating set with any materials while it is operating or just after it has been switched
off (wait for the motor cool down).
Danger
12
ENGLISH

1.3.10 Danger of moving parts
Never go near a moving part that is in operation if you have loose clothing or long hair that is not
enclosed in a protective hair net. Do not try to stop, slow down or impede a mpving part when it
is in operation.
Warning
1.3.11 Capacity of the generating set (overload)
Never exceed the rated load of the generating set (in Amps and/or Watts) when it is running continuosusly.
Before connecting and operating the generating set, calculate the electrical power required by the electric
appliances (in Watts). This electrical power rating is ususlly found on the manufacturer´s plate on bubs, electrical appliances,
motors etc. The sum total of power required by these appliances should not exceed the nominal power rating of the
generating set.
1.3.12 Operating condicions
The stated outputs of the generating sets are obtained in example conditions according to ISO 3046-1:
+ 27ºC, 100 m above sea-level, humidity level equal to 60%, or
+ 20ºC, 300 m above sea-level, humidity level equal to 60%.
Performance is reduced by approximately 4% for every additional 10ºC and/or approximately 1& for every
additional 100 m in altitude.
2. General description
2.1 Description of the generating set
Fuel tank cap Earth socket On/off switch
Fuel tank cap air vent tab DC circuit breaker on/off button Oil fill/drain access cover removal screw
Starter handle AC circuit breaker reset button Oil fill/drain access cover
Fuel tab AC electric socket Spark plug access cover
Starter DC electric socket
Accesoriess: battery supply lead, Spark plug spanner, Screwdriver bit, Screwdriver handle, Removal spanner.
3. Preparation before starting
3.1 Checking the oil level
Always check the engine oil level before starting.
Checking and topping up should be carried out with the generating set on horizontal surface.
• Remove the protective cover by unscrewing retaining bolt.
• Remove the cap/gauge by unscrewing it to check the level. Top it up if necessary.
• Fill the oil sump to the top using a funnel.
• Screw the cap back fully and check there are no leaks.
• Wipe off excess oil with a clean cloth.
• Secure the protective cap by tightening the retaining bolt.
13
ENGLISH

3.2 Checking the fuel level
Check the fuel level and top up if necessary:
• Unscrew fuel tank cap.
• Fill the tank using a funnel, taking care not to spill any fuel.
• Screw the fuel tank cap back on and check there are no leaks.
3.3 Earthing the generating set
To earth generating set, use a 10 mm 2 copper wire attached to the generating set earth connection and to an
earthing rod of galvanised steel set in the ground to a depth of a 1 metre. This also dissipates the static electricity that
builds up in the electrical machines.
4. Using the generator set
4.1 Starting procedure
• Turn fuel tap and turn the on/off switch to “ON”.
• Pull out choke.
Note: Do not use the choke when the motor is warm or when the air temperature is high.
• Hold starter handle correctly and pull it slowly until you can feel some resistence, then pull sharply. Repeat
if necessary.
• Gradually return choke.
3.4 Positioning the generating set for operation
Place the generating set on a flat, horizontal surface which is firm enough to prevent the set skining down (under
no circunstances should the set tilt any direction by more than 10º).
Choose a site that is clean, well-ventilated and sheltered from bad weather, and store the additional of oil and
fuel withing close proximity, although respecting a certain distance for safety.
4.2 Operating
4.2.1 Alternating current operation
When the running speed of the generating set has stabilised (aproximately 3 minutes):
• Connect the supply lead plug to the AC socket on the generating set.
• Reset the protection circuit by pressing black button.
Stop the motor before filling up with fuel and fill up in a well-ventilated area.
Do not smoke, or bring naked flames or sparks near the area where you are filling with fuel or where
the fuel is stored.
Use only clean fuel whitout any water.
Take care no to spill any fuel has been split, make sure that it has dried and that the vapours have
cleared away.
Danger
14
ENGLISH

4.3. Switching off
When the generating set is switched off, the motor continues to give off heat.
Appropiate ventilation should be provided after the generating set is turned off.
To stop the generating set in an emergency, turn the On/Off switch to off “O”.
• Take the plugas out of the socket and allow the motor to run without any load for 1 to 2 minutes.
• Close fuel tap.
• Turn ON/OFF switch to “OFF” and the generating set switches off.
• Turn vent tab on fuel tank cap to the “OFF” position (anti-clockwise direction).
Warning
5. Safety features (if fitted, see specifications table)
5.1 Oil cot-out
This mechanism is designed to prevent any damage to the motor resulting from lack of oil in the motor resulting
from lack of oil in the motor sump. It automatically cuts out the motor. If the motor stops and will not restart, check the
motor oil level before looking for any other cause of the problem.
5.2 Circuit breaker
The electrical circuit of the set protected by several magnetothermal, differential or thermal cut-out switches.
Any overload and/or short cause the supply of electrical energy to be cut.
6. Maintenance schedule
6.1 Reminder of use
The maintenance interval frequency and the operations to be carried out are outlined in the maintenance
programme.
However, it should be added that it is the environment in which the generating set is operating which determines
this programme. Accordingly, if the set is used in extreme conditions, shorter intervals between maintenance procedures
should be adopted.
These maintenance schedules apply only to generating sets running on fuel and oil, that conform to the
specifications given in this booklet.
6.2 Maintenance table
Component
Carry out the maintenance procedures
whichever deadline is reached
first.
Each time
is used
After the first
20 hours of use
Every 3 months
or 50 hours
Every 6 months
or 100 hours
Every 12 months
or 300 hours
Engine oil
Air filter
Spark plug
Fuel tap
Cooling fan
Valves
Check the level
Change
Clean
Check / clean
Check
Check
Check / adjust
Check all the mountings
•
•
(1)*
•
•
•
*
*
*
Note: *This operation should be carried out by one of our agents / (1) 50 hours.
15
ENGLISH

7.3 Checking bolts, nuts and screws
Daily, detailed checks of all nuts, bolts and scwews are essential in order to prevent any accidents or breakdowns.
• Inspect the generating set as a whole before and after each use.
• Tighten any loose nuts or screws.
Note: The tightening of cylinder head bolts should be carried out by a specialist. Contact your local agent.
7.4 Clenaing the generating set
• Remove all dust and debris from around the exhaust and clean the generating set using a cloth and a brush ( cleaning
with a water jet is not recommended, and cleaning with high-pressure cleaning equipment is forbidden).
• Carefully clean the motor air inlets and outlets and the alternator.
• Check the general condition of the generating set and, if necessary, replace any faulty parts.
Stop the motor before carrying out any maintenance procedure.
To make allowances for any accidental spillage, switch off the motor ignition and disconnect the
spark plu cap(s).
Only use original parts or equivalent. The use of spare parts of different quality can damage the
generating set.
7. Maintenance procedures
7.1 Renewing the motor oil
Drain the oil when the motor is still warm, to ensure that drainage is rapid and complete.
• Pleace the generating set on support blocks and place a suitable container underneath the generating set.
• Remove the protective cover by unscrewing retaining bolt.
• Remove the filler cap / gauge.
• Tilt the generating set slightly to drain the oil into a container.
• Fill the oil sump using the recommended oil.
• When this operation is complete, screw the filler cap / gauge back on and check there are no oil leaks.
• Wipe off any traces of oil with a clean cloth.
• Secure the protective cover by tightening the retaining bolt, remove the support blocks and the container.
Warning
7.2 Checking the spark plug
• Remove protective plug by pressing the top of the cap.
• Remove the spark plug cap and use a spark plug spanner to remove the spark plug.
• Inspect the spark plug and discard it if the electrode is worn or the instalation is melted or cracked. If they are to
be re-used, clean the spark plugs with a metallic brush.
• Measure the electrode gap with a feeler gauge. The eectrode gap should be 0,7 to 0,8 mm. Check that the washer
for each spark plug is in good condition and screw in the spark plugs by hand to avoid damaging the threads.
• After fifting the spark plug, tighten it with a spark plug scanner to compress the washer.
Note: when fifting a new spark plug, tighten it by 1/2 turn after it is in position, in order to compress the washer
tightly. To refit an original spark plug, thighten it by a 1/8-1/4 turn when it is in position, in order to compress the washer.
• Refit the spark plug cap then the protective cap.
16
ENGLISH

17
ENGLISH
8. Storing the generating set
Generating sets which remain unused for a long period of time must undergo certain procedures in order to keep
them in good condition. Check that the storage area is not dusty oy humid. Clean the exterior of the generating set and
apply a rustproofing product.
• Close the fuel trap.
• Change the motor oil.
• Remove the spark plug and pour about 15 ml of oil into the cylinder, then refit the spark plug.
• Holding the starter handle correctly, pull it out slowly as far as it will go several times to run the motor and distribute
the oil around the cylinder.
• Clean the generating set, cover it to protect it from dust and store it in a clean and dry place.
9. Fault finding
The motor will not start
The generating set is being charged during start-up
Fuel level is too low
The fuel tap is closed
Fuel supply blocked or leaking
Clogged air filter
Switch on “O”
Faulty spark plug
Blocked ventilation inlets
Possible overload
Circuit breaker tripped out
Faulty circuit breaker
Faulty plug socket
Faulty appliance supply lead
Faulty alternator
Faulty equipment or lead
PROBABLE CAUSES REMEDIAL ACTIONS
Take it off charge
Fill up with fuel
Open the fuel tap
Have the system repaired
Clean the air filter
Move the switch to “I”
Replace the spark plug
Clean the air inlet and outlet guards
Check the load
Reset the circuit breaker
Have it checked, repaired or replaced
Change the lead
Have it checked, repaired or replaced
The motor cuts out
No electric current
Circuit breaker trips out
10. Specifications
Motor type
max 50 Hz (Watt) output
Alternating current
Direct current
Type of alternating current socket
Type of direct current socket
Circuit breakers
Oil failure cut - out
E.C.C. sound
Weight in Kg (without fuel)
Dimensions l x w x h in cm
Recommended oil
Oil sump capacity in L
Recommended fuel
Fuel tank capacity in L
Spark plug
MODEL AY-1000 KT
4 - stroke, air cooled
800
230 V - 3,9 A
12 V - 5 A
1 x 16 A
1 x 5 A
•
•
93
28
48 x 33 x 42
SAE 15 W 40
0,37
Unleaded petrol
5
BPR 6 ES
: standard : optional X: impossible

EC DECLARATION OF CONFORMITY
MAKER INFORMATION
NAME: AYERBE INDUSTRIAL DE MOTORES, S.A.
ADDRESS: C/LERMANDABIDE, 8 - PARC.4-6 - C.T.V. (POLG.IND.JUNDIZ)
01015 - VITORIA (ALAVA)
CIF: A-01109206
DECLARES THAT THE DESIGN AND THE PRODUCTION OF THE MACHINE
BRANDNAME: AYERBE
MODEL:AY – 1000 KT
ENGINE:KIOTSU KT 139 1,5 HP
ALTERNATOR: SD 1 KVA
CONSTRUCTION YEAR: 2.005
COMPLIES WITH THE MACHINERY DIRECTIVE:
89/392/CEE
AND THE FOLLOWING MODIFICACIONS
91/368CEE, 93/44CEE CEE 93/68 CEE
REFERENCE NORMATIVES
EN 292-I, EN 292-2
VITORIA, 20 MARCH OF 2.005
SIGNED: ADRIÁN MARTÍNEZ DE ALBORNOZ
GENERAL MANAGER
18
ENGLISH

1. Préambule
1.1. Recommandations
Nous vous remercions pour l`achat d`un de nos groupes èletrogènes. Nous vous recommandons de lire attentivement
ce manuel el de respecter scrupuleusement les prescriptions de sécurité, d`utilisation et d`entretien de votre groupe
èlectrogène.
Les informations contenues dans ce manuel sont issues des données techniques disponibles au moment de
l`impression. Dans un souci d`amélioration permanente de la qualité de nos produits, ces données sont susceptibles
d´êntre modifiées sans préavis.
1. Péambule
2. Description générale
3. Préparation avant mise en service
4. Utilisation du groupe
5. Protections (si équipé, voir tableau de caractéristiques)
6. Programme d`entrétien
7. Méthode d`entretien
8. Stockage du groupe
9. Recherche de pannes micures
10. Caractéristiques
11. Section des câbles
12. Clauses de garantie
13. Déclaration de conformité “C.E.”
SOMMAIRE
19
1.2. Pictogrammes et plaquettes figurant sur les groupes avec leur signification
1.3. Consignes et règles de sécurité
Ne jamais faire fonctionner le groupe électrogène sans avoir remonté les capots de
protection et fermé toutes les portes d`accés.
Ne jamais enlever les capots de protection ni ouvrir les portes d`acces si le groupe
électrogène est en fonctiomement.
Danger
FRANÇAIS
1.3.1. Avertissements
Plusieurs signes d`avertissement sont susceptibles d`être représentés dans manuel.
Danger
Terre
Attention, risque de brûlure
Attention, risque
de commotion
électrique Attention, le groupe
électrogène est livrè sans huile.
Effectuer la vérification du
niveau d`huile avant tout
démarrage du groupe.
1. Attention, se reporter à la documentation livrée avec le groupe électrogène
2. Attention, èmission de gaz d`échappement toxique. Ne pas utiliser dans un espace
clos ou mal ventilé
3. Arrèter le moteur avant d`effectuer le remplissage de carburant
A = Modèle du groupe
B = Puissance du groupe
C = Tension du courant
D = Ampérage
E = Fréquence du courant
F = Facteur de puissance
G = Classe de protection
H = Puissance acoustique du groupe
I = Masse du groupe
J = Norme de référence
K = Numéro de série
Exemple de plaque d´identification
CE Lwa
99,IB
(H)
KW: (B) Wolt: (C) Amp: (D)
Hz: (E) Cos Phi: (F) IP: (G)
Masse (Weight): (I) ISO 8528 - 8 Classe (J)
Nº: 10/2004-----001 (K)
STOP
1 2 3
Ce symbole signate un danger imminent pour la vie et la santé des personnes exposées. Le non-
respect de cette consigne correspondante peut entraîner des conséquences graves pour la santé
et la vie des personnes exposées.
Danger
Table of contents
Languages:
Other ayerbe Portable Generator manuals
Popular Portable Generator manuals by other brands

Briggs & Stratton
Briggs & Stratton 030248-0 Operator's manual

Onan
Onan K5000 Operator's manual

Stager
Stager YDE6500E manual

Champion Power Equipment
Champion Power Equipment Paralink 100740 Operator's manual

Baldor
Baldor PC32RI Installation & operating manual

Beckhoff
Beckhoff TwinSAFE EL2912 operating instructions