azuga SafetyCam AI User manual

Installation Guide
SafetyCam AI
Auxiliary Camera
© 2022 Azuga, Inc. All rights reserved.

Table of Contents
OVERVIEW _____________________________________________________________ 1
WHAT’S IN THE BOX? _____________________________________________________ 1
REVISION HISTORY _______________________________________________________ 2
INSTALLATION ______________________________________________________ 2
ADJUSTING THE VIEWING ANGLES ________________________________________ 4
RESET BUTTON ______________________________________________________ 6
PAIRING MAIN AND AUXILIARY CAMERA ____________________________________ 7
© 2022 Azuga, Inc. All rights reserved.

Overview
We appreciate your interest in choosing Azuga AI dashcams as your fleet
safety partner. This document covers instructions for a new user on
•How to install the AUX camera on the vehicle.
•How to set up the camera.
•How to pair the main and AUX cameras.
What’s in the box?
In Wrap mount cameras
Auxiliary camera
Silicone pad
Hose clamps -
small
Hose clamps -
large
Hose clamps small
Hose clamps large
© 2022 Azuga, Inc. All rights reserved. 1

In Flush mount cameras
Auxiliary camera
Power Cable
The 1.8 meter power cable comes
attached to the auxiliary camera
and connects it to the vehicle
power. The cable has two wires:
●red for power
●black for ground
Mounting bracket
Revision History
Date
Revision
Comment
Jan 2023
Version 1
Initial Version
Installation
Install upto three auxiliary cameras at different spots per vehicle to
enable live footage of additional angles during the trip.
© 2022 Azuga, Inc. All rights reserved. 2

Important:
*Before installing the Auxiliary cameras, ensure the main camera is
installed and associated with your Azuga Fleet account.
*Refer to Safetycam AI Installation Guide for additional information.
1. Ensure the AUX camera is connected to the ignition power source
(12V or 24V) using the attached power cable via a fuse.
Additionally,
●Each auxiliary camera must be fused at the connection point at 2
amps.
●The red wire is connected to a vehicle ignition circuit.
●The black wire is connected to the vehicle ground/chassis.
2. Associate each auxiliary camera with the main camera through WIFI
Setup-Auxiliary.
3.1 Mount wrap-mount auxiliary cameras
●Place the silicone pad along the top of the camera.
○The silicone pad has ridges that enable you to cushion the camera
when using the hose clamps for installation, provide a better seal, and
prevent scratching.
●Slide the hose clamps through the slots at the top of the camera.
© 2022 Azuga, Inc. All rights reserved. 3

●Place the hose clamps around the desired location on the vehicle.
●Tighten the hose clamps with the attached screws.
●Verify that the camera is secure enough to stay in place.
3.2 Mount flush-mount auxiliary cameras
●Screw the mounting bracket attached to the camera into the vehicle structure
at the desired location. The weight of the camera alone will destroy the skin
panels on the doors.
Important: Refer Adjustment-camera angle section to change video angles.
Adjusting the viewing angles of a wrap-mount camera
1. Loosen the screws on each side of the lens at the bottom of the camera,
using a screwdriver.
© 2022 Azuga, Inc. All rights reserved. 4

2. Adjust the lens.
3. Check the viewing angle of the lens through the dashcam recordings.
4. Tighten the screws.
Adjusting the viewing angles of a flush-mount camera
1. Loosen the screws on each side of the mounting bracket, using a
screwdriver.
2. Loosen the screws on each side of the lens at the bottom of the camera,
using a screwdriver.
3. Adjust the lens.
4. Check the viewing angle of the lens through the dashcam recordings.
5. Tighten the screws.
on Safteycam AI installation procedures.
© 2022 Azuga, Inc. All rights reserved. 5

Camera Cables
Each auxiliary camera comes with individual wiring. A single wire comes
out of the camera, splitting into two wires.
●Red for power
●Black for ground
Reset Button
The auxiliary camera has a reboot button located on the side of the lens ball.
●Reboot the auxiliary camera if it is not operating correctly, with problems such
as recordings or live video not working.
To access the reboot button:
1. Loosen the two screws at the bottom of the camera.
2. Move the lens ball around until you find the reboot button.
Hold the reboot button for:
●Three seconds to reboot the auxiliary camera.
Rebooting the camera turns it off and then back on.
●Twelve seconds to reboot and unpair from the dashcam.
© 2022 Azuga, Inc. All rights reserved. 6

Pairing- Main and Auxiliary Camera
Prerequisites:
●Make sure the auxiliary camera is connected to power.
●Use any device that connects to WiFi, such as a phone or tablet, to check
that the camera can find the available WiFi networks (it appears as
AuxCamera_XXXXXX).
Follow these steps to pair your cameras:
1. Ensure the parking brake is on, the ignition is on, and the main camera is
awake. If the main camera is not awake, just move the vehicle slightly and it
will wake up.
2. Reset the Auxiliary camera by loosening the two screws on the front panel of
the camera and pull out the camera ball from the center, locate the reset
button on the side of the camera and hold for 12 seconds to reset.
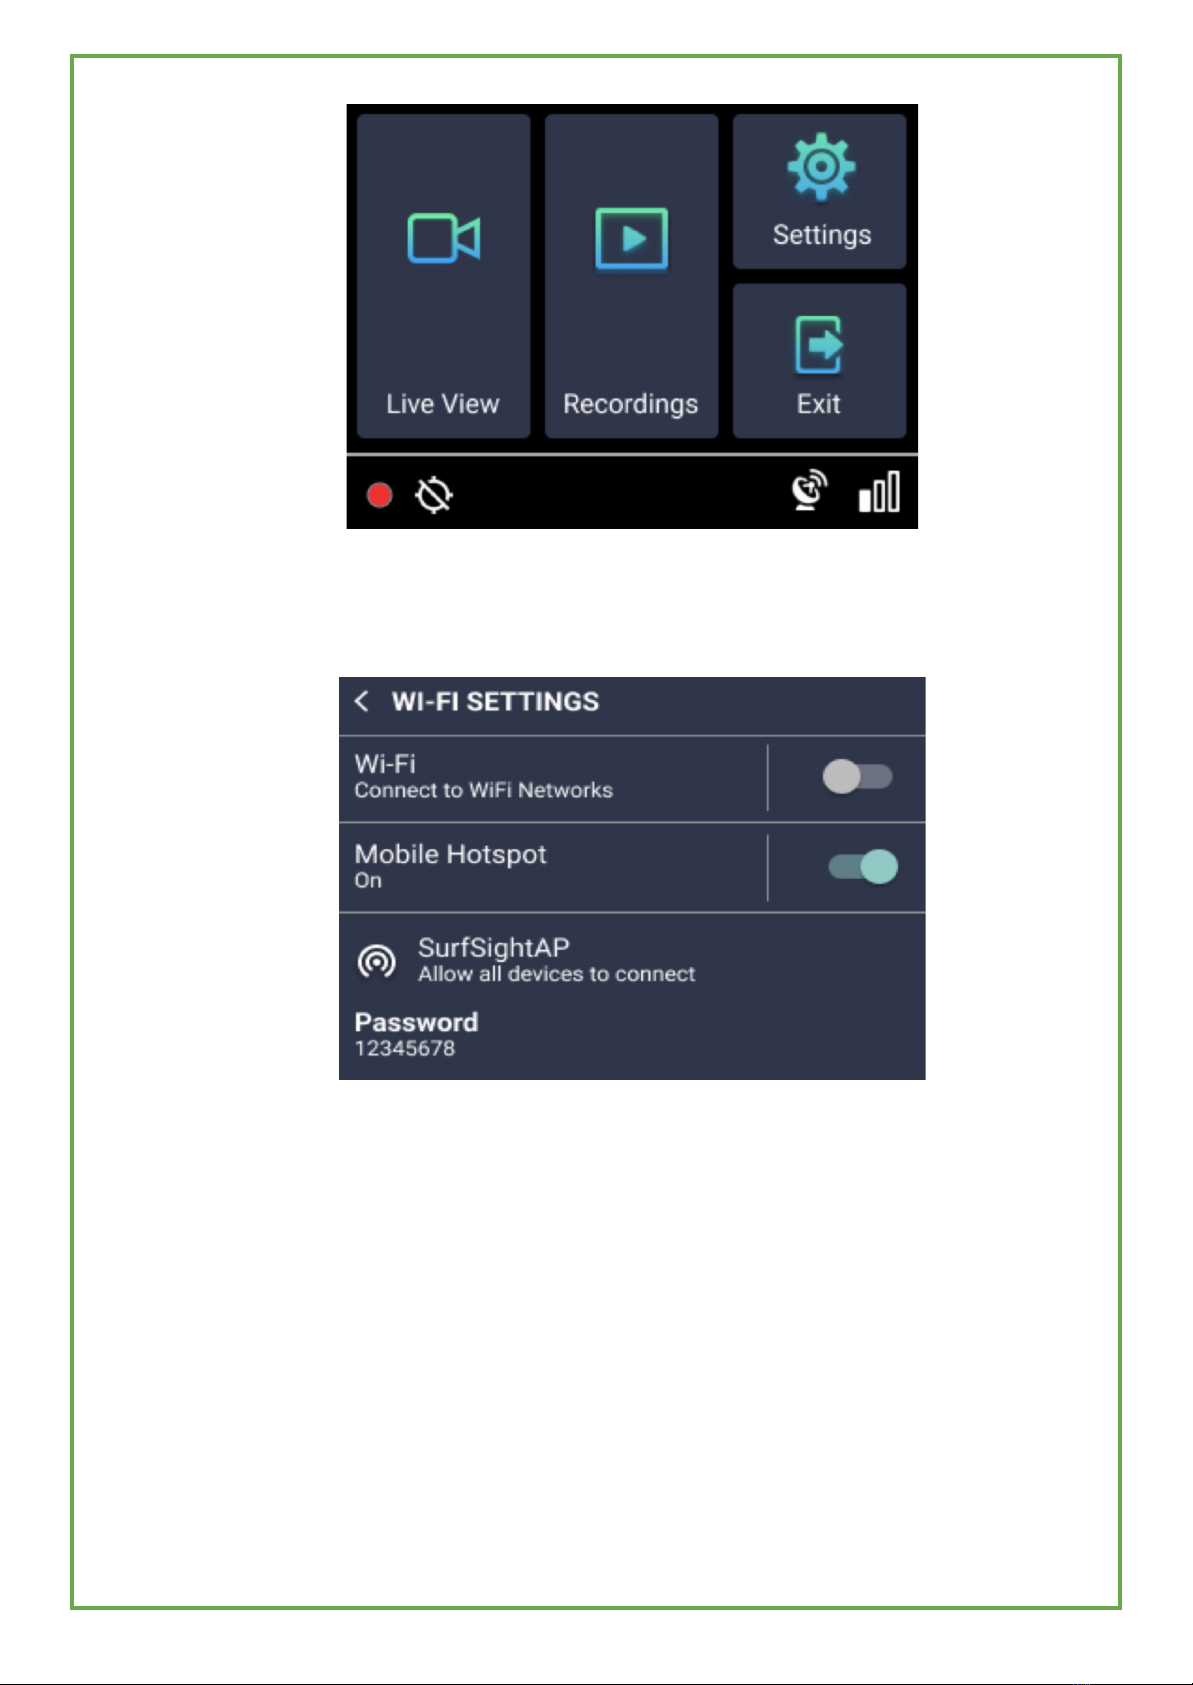
3. On the main camera unit, tap on the screen and enter the default PIN 3333
to unlock the dashcam for the first time.
4. Press Settings.
© 2022 Azuga, Inc. All rights reserved. 7

5. Scroll down and press WiFi.
6. Toggle the button to turn on the Mobile Hotspot.
7. Return to the Settings menu.
8. Scroll down and press Add Cameras.
© 2022 Azuga, Inc. All rights reserved. 8

9. A snapshot from the auxiliary camera appears on the screen. If it is the
auxiliary camera you want to pair with the dashcam, press YES. If it is not the
auxiliary camera you want to pair with, press NO. The dashcam continues to
search for available, unpaired cameras.
© 2022 Azuga, Inc. All rights reserved. 9

10. To confirm that the auxiliary camera is paired successfully, scroll down,
and press More Info.
© 2022 Azuga, Inc. All rights reserved. 10

11. Repeat the steps to pair any additional auxiliary cameras.
12. To reboot and unpair the auxiliary camera, refer to the Reset button
section on page 6.
© 2022 Azuga, Inc. All rights reserved. 11
Other manuals for SafetyCam AI
1
Table of contents
Other azuga Digital Camera manuals