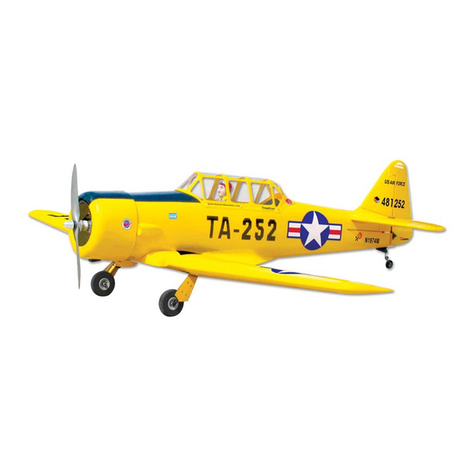
B.C. Air Pilatus PC-12 NG User manual

Every dollar helps!
These manuals are the culmination of more then 10 years of design
and publication and formally sold for $10.00 each. With 54 different
manuals available, that’s a $540.00 value.
Now, due to the worldwide economic collapse, they are my gift to you.
My hope is that you will enjoy these great little airplanes as much as I
have enjoyed designing them for you.
You may build as many planes as you like.
Sell your planes, or give them away.
Tell ALL your airplane loving friends to come to the site and get as
many of the manuals as they like.
If you enjoy these planes, please help to ensure this site stays on-line
and these airplane manuals remain available for all to enjoy. Any
amount you donate is greatly appreciated.
May God bless you and keep you safe.
Thank You & Enjoy!
Wayne

www.bcair.com
Copyright © 2015 B. C. Air Originals
Step By Step Construction Plans.
55 Pages With Over 200 Full Color Photos
showing how to build the
Can be made from most
12 or 16 oz Beverage Cans.
Length: 21”
Wingspan: 22”
Height: 6”
TOP SECRET
Pilatus
PC-12 NG
FROM CANS !

Welcome to the B. C. Air Originals Squadron.
This booklet contains complete step by step instructions for building the B. C. Air
Originals - Pilatus PC-12 NG. Before you start building your first aircraft it is
suggested that you review the entire set of plan directions. Once you have pre-
viewed the construction steps you should start collecting the cans that you want to
use to make your first plane. These plans are designed to be used with most any 12
or 16 oz. beverage can. Always use clean, unscratched and undented cans for the
best looking models.
Since the building of these models requires the cutting of cans and the use of sharp
tools, CHILDREN SHOULD NEVER ATTEMPT THE CONSTRUCTION OF
THESE MODELS WITHOUT ADULT SUPERVISION AND GUIDANCE.
CONSUMER ACCEPTS ALL RESPONSIBILITY FOR ANY INJURY IN-
CURRED IN THE BUILDING OF THESE MODELS.
It is not necessary to follow all the building steps in the order presented. Such as, if
you want to make the Wings first, you can do that and then set them aside until you
need them. However, until you understand the construction of these models, it may
be easier to follow the steps in the order listed. Your very first step should be to
make a copy of all the templates. All templates are drawn to scale. Using a sheet
of mylar (Clear Plastic) will enable you to re-use your templates again and again.
There is no limit to the number of planes you can build with these plans.
We, at B. C. Air Originals, will make every effort to assist you in answering any
questions you may have about the construction of these models. Please feel free to
Thank you for your interest in the B. C. Air Originals and have FUN!
D. P. (Wayne) Mathis

When you print your manuals be sure that your printer is set on it’s MAX
printing area to ensure that all the templates print out to the correct size.
The standard 12 oz Can, here in the US, measures 2 1/2" in diameter. If the
Cans you’re using to make your plane are smaller or larger, then here’s
what you do..... Measure the diameter of your Can and find what percent-
age of 2 1/2" it is.... I.e. If your Can measures only 2 1/4" (in diameter)
then 2 1/4" is = to 90% of 2 1/2" so you would print out all the templates
at 90% instead of at 100%. If your Can measures 3" (in diameter) then 3"
is = to 120% of 2 1/2" so you would print out all of the templates at 120%.
etc.
Some of these models were originally designed in 1984. Since then the
building techniques of these planes has changed over time. I.e. many of the
planes no longer require the use of the wooden former “F-1 & F-2”. We
simply glue the “B-2’s” onto the BACK (BOTTOM) of the Can “B-1” or
use corrugated cardboard in place of the wood. (See http://
www.bcair.com/BT/nwf1.htm and http://www.bcair.com/BT/nf1.htm )
Once you’ve reviewed your manual and you’re ready to start your first
plane, go here > http://www.bcair.com/BT/ < and look over the Builder’s
Tips. These are building tips sent in from builders all over the world. They
will help you to make these planes easier and faster. Bookmark this page as
it is NOT accessible from the main web site.
You can obtain the plastic props used on these planes from your
local Hobby Shop or here’s where I get my props on-line > http://
www3.towerhobbies.com/cgi-bin/wti0091p?&C=QBC&V=MAS <.
Here’s where I get my Wooden Propellers on-line > http://
www3.towerhobbies.com/cgi-bin/
wti0097p?FVSEARCH=PROPELLERS+++&CATEGORY=QB&MANUFACTURER=TOP&submit=Submit+AdvancedSearch
<
Any 5-7" prop, with any pitch, will work on these planes.
http://www3.towerhobbies.com/cgi-bin/wti0097p?
FVSEARCH=PROPELLERS+++&CATEGORY=QB&MANUFACTURER=TOP&submit=Submit+AdvancedSearch

The following is a list of tools and materials I use to build these models.
You may find that you do not need all of the tools that I use.
Use whatever works best for you.
Push Pin.
Hot glue gun.
Awl (old screw driver sharpened to a point).
Wire cutter. Rat-Tail-File
X-acto knife (hobby knife) (box opener).
Scissors
Small Paper Cutter, Ruler (straight edge).
Felt tip pen (any color).
Needle nose pliers.
Materials -
Aluminum Cans (beer, pop, soda, juice, etc) any 12 oz. size will work.
3 different sizes of Electrical Terminals as shown below.
Corrugated Cardboard.
Tape (any kind) & Glue (2-Part Epoxy and Contact Cement).
Mylar (Clear plastic).
Copper Coated Welding Rod, Music Wire or any other straight wire .
(2 sizes - 1/16” & 3/32”)
Twist-On Wire
Connectors. Size #12
22-14 AWG
3 Differect Sizes

Cutting Cans
The building of these models requires that the Tops and/or Bottoms of beverage cans be
cut off. While you can decide for yourself which method you use to accomplish this,
most builders use a Dremal®Tool in a fashion similar to that shown below.
SEE ALL THE BUILDERS TIPS ON-LINE AT > www.bcair.com/BT
What I’ve done here is taken a piece of
board wood (aprox 12” x 15” x 3/4”) and to
it I’ve attached (screw or glue) Two Blocks
of wood (2” x 2” x 5”) and Two Rails of
wood (1” x 1” x 10”)
Using a Hose Clamp, I’ve secured my
Dremal®Tool to the board. The two
guide rails are used to cradle the can.
A cutting wheel is used to cut the
Bottom and the Top off the Cans.
Again, you can use any other method at your disposal to remove the Tops and Bottoms
of the cans. Use whatever means you feel most comfortable with.
ALWAYS USE PROTECTIVE HAND & EYE GEAR WHEN CUTTING CANS!
In ALL cases, cut
the Bottom off the
Can FIRST, then
cut the Top off.
Get as much of the
Can as possable.

Another Way Of Cutting Cans
Once you’ve selected which Cans your model will be made out of, take one Can and hold it firmly at
it’s bottom. Using your wire snips, cut through the ring at the top of the Can.
Now grab the ring with your wire snips and PULL the top off the Can. The top will normally tare off
right where the Can begins to taper inward to the ring.
Continue PULLING until the top of the Can comes off. Then cut down the side of the Can with your
scissors. Next use a smaller scissor to cut the bottom off the Can.
Use a straight edge, or a paper
cutter to trim the edges smooth.
Trim Can to 3 5/8” x 8 1/4”
SEE ALL THE BUILDERS TIPS ON-LINE AT > www.bcair.com/BT
(This is the method I used to make this Model.)
6

www.bcair.com
STEP # 1
Template # 2
<--Corrugation Runs-->
Template # 1
Template # 3
Template # 4
Template # 5
<--Corrugation Runs-->
<--Corrugation Runs-->
<--Corrugation Runs-->
<--Corrugation Runs-->
Cut ONE (1) Template # 1
(F-1), Page 52, from corru-
gated cardboard.
Be sure that the “center”
corrugation is in the Center of
the F-1 as shown.
F-1
Cut TWO (2) Templates
# 2 (F-2),
TWO (2) Templates # 3
(F-3),
TWO (2) Templates # 4
(F-4),
and ONE (1) Template #
5 (F-5), Page 52, from
corrugated cardboard.
Run the corrugation as
shown.
F-2 F-2 F-3 F-3
F-4 F-4 F-5

Template # 1
<-----Corrugation Runs----->
<-----Corrugation Runs----->
<--Corrugation Runs-->
<-----Corrugation Runs----->
<--Corrugation Runs-->
Template # 2
Template # 3
Template # 4
Template # 5
STEP # 2
B-1
This Airplane takes a total of 20 Cans
to make. It is designed to be made
from most 12 oz. beverage Cans but
can easily be made from the larger 16
oz. Cans.
F-1
F-2
F-3
F-4
F-5
Cardboard Formers for the Front of the Plane.
Once you’ve decided which Cans you’ll be making your
plane out of, take a Can and designate it as Can B-1.
B-1
Take Can B-1 and remove the Pull Tab from the
Top of the Can. Put a 3/32” Hole in the little
button in the center of the Can as shown.
3/32” Hole
Make FIVE (5)
3/32” holes in
the Bottom of
Can B-1 as
shown.
Pull Tab

STEP # 3
B-1
B-1 B-1
Take a piece of 3/32” Rod,
10” long, and insert it through
the Bottom center hole and
the hole in the center of the
lettle button in the Top of the
Can as shown above.
Now slide F-1 onto the Rod
as shown.
DO NOT SLIDE ROD
INTO THE CENTER
CORRUGATION.
DO NOT GLUE F-1
ONTO THE CAN.
Center Corrugation
F-1 F-1

STEP # 4
STEP # 5
F-1
F-1
F-1
F-2 F-2
F-2
F-2
F-2
F-3
F-3
F-3
F-2
B-1
B-1
Use your Hot Glue
Gun and glue
BOTH F-2’s onto
F-1 as shown.
DO NOT GLUE
F-2’s ONTO THE
CAN.
Center Corrugation
REMOVE F-1 and F-2’s from the Can and glue
BOTH F-3’s in place where indicated, as shown.

STEP # 6
Glue BOTH F-4’s in place where indicated, as shown.
F-4
F-4
F-4 F-4
F-4
F-3
F-2
F-1
F-3 F-3
F-2 F-2 F-3 F-3
F-2 F-2

STEP # 7
F-4
F-3
F-2
F-1
F-5
Center Corrugation
Take the Rod, from Step # 3, and insert it through the Center
of F-5 as shown above. Then insert the Rod into the Center
Corrugation of F-1 and glue the Rod and F-5 in place as
shown.

STEP # 8
Glue Fourteen (14) Pennies, Seven (7) on each
side of F-1, just in Front of F-4 as shown.
(Also glue Ten (10) additional Pennies, Five (5)
on each side of F-1, just Back of F-4.
See Step # 28)
You will need these as Nose weight to keep
the plane from falling on it’s tail.
F-4
F-1

www.bcair.com
Make Five (5) 3/32” Holes, as shown, in
the bottom of Cans B-2 as shown
B-2
B-2
STEP # 9
Take another Can and designate it as B-2.
B-2
3/32” Holes
Take a piece of paper 8 1/4” long and 2 1/4”
high and wrap it around the Bottom of B-2 as
shown.
Draw a line around B-2, at the top of the
Paper as shown. Then remove the paper.
STEP # 10

B-2
B-2
B-2
B-2
B-1
STEP # 11
First, rough cut the Top off B-2.
Then cut the Bottom off B-2 on the
line that you drew around it in Step #
10.
Be careful to get a nice clean, smooth
cut all the way around the Can.
STEP # 12 Put a beed of glue around the INSIDE of B-2
and glue it to the Bottom of B-1 as shown.
Use tape to hold it in place
until the glue is dry.
6 3/4”

STEP # 14
STEP # 13
Decide where the BOTTOM of your plane will be
and draw a line down the Center of B-1 & B-2 as
shown.
Cut out Template # 6, Page 53, and wrap it around
B-1 & B-2 as shown.
Be sure to line up the Bottom Center Lines on the
Template with the Bottom Center Line you drew on
the Cans.
B-1
B-2

STEP # 15
Use a Push Pin, and make Holes A,B, Cand D where indicated.
Use Template # 6
and mark the Cans
where the TOP
CENTER of the
plane will be.
TOP CENTER of the plane

www.bcair.com
STEP # 16
Now Glue the Front Plane Assembly (From Step # 8)
onto the Front of B-1 as shown.
B-1
TOP CENTER of the plane
TOP CENTER of the plane
Front of Plane Assembly FLUSH with Top and Botton of B-1.
B-1

Can
Cellophane Tape
Double-Sided Tape
STEP # 18
STEP # 17 Remove the Pull Tabs from Eighteen (18) Cans and cut the Tops and Bottoms off.
Then cut them open as shown above. (See Page 6 on “How-To”.)
Take Two (2) Cans, from
Step #17, and Marry them
together as shown here.
Table of contents
Other B.C. Air Toy manuals
Popular Toy manuals by other brands

MRC
MRC XR-20 Assembly instructions
Mega Bloks
Mega Bloks Call of Duty 06878 instructions

MGA Entertainment
MGA Entertainment L.O.L. SURPRISE! O.M.G. Styling Head... quick start guide
venteo
venteo Magic Flash Tube Kit Extra Car Gravity Power... user manual
TWM
TWM AT-6 TEXAN EP instruction manual

Fisher-Price
Fisher-Price FORD F-150 L6348 Owner's manual & assembly instructions
