B.F.C. JUNIOR JV-1P-1E User manual
CAPPUCCINATORE NERO
BLACK CAPPUCCINO MAKER
CAPPUCCINO- SCHÄUMER SCHWARZ
ATTACCO A RETE IDRICA
DIRECT WATER CONNECT
ZUSATZ FÜR DEN DIREKTEN WASSERANSCHLUSS
ADATTATORE CIALDE
POD ADAPTER
ADAPTER FÜR KAFFEEPADS
OPTION
JUNIOR ( JV-1P-1E)
MANUALE DI ISTRUZIONI
INSTRUCTIONS FOR USE
BEDIENUNGSANLEITUNG
1213_Rev000
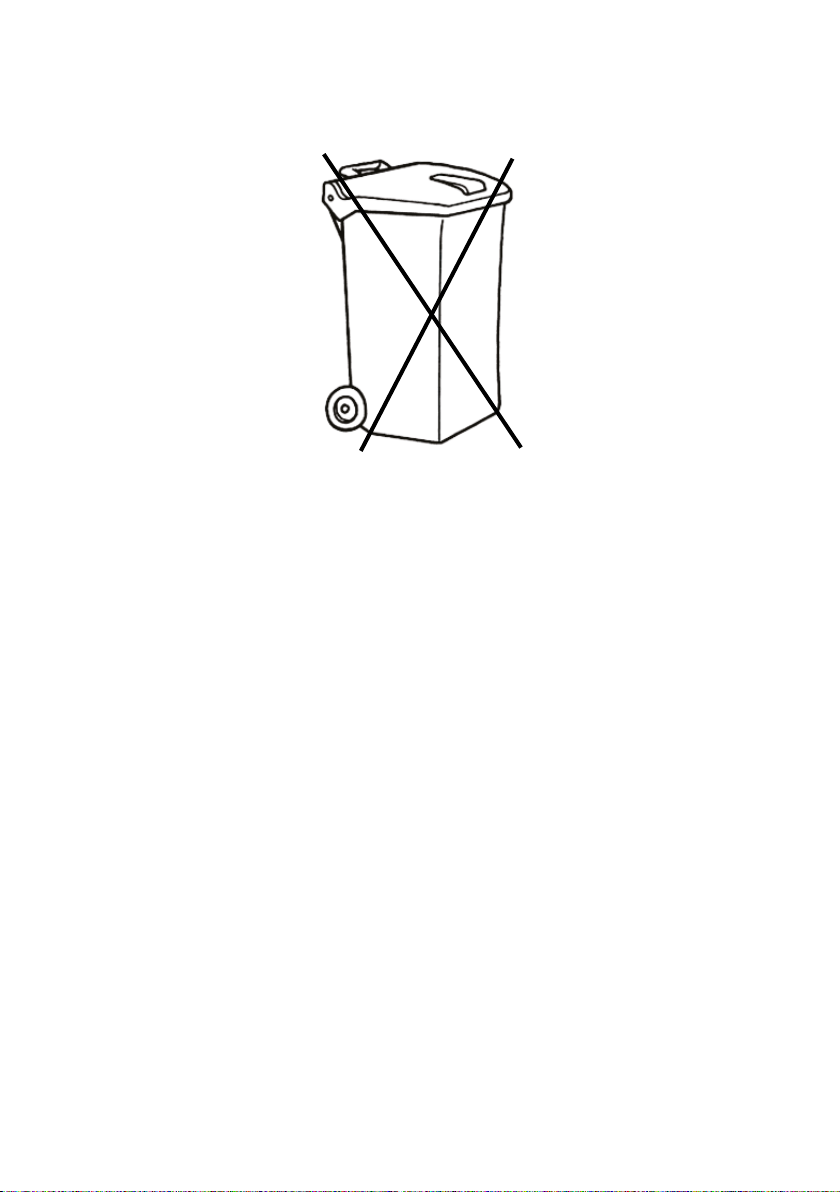
IL PRODOTTO NON PUO’ ESSERE AVVIATO ALLO SMALTI-
MENTO NEL NORMALE CICLO DI RACCOLTA RIFIUTI, MA
SMALTITO NEI CENTRI AUTORIZZATI.
THE PRODUCT CANNOT BE DISPOSED OF AS NORMAL WASTE,
BUT MUST BE TAKEN TO AN AUTHORIZED DISPOSAL CENTRE.
DAS PRODUKT DARF NICHT DEM NORMALEN ABFALLKREIS-
LAUF ZUGEFÜHRT WERDEN, SONDERN IST IN AUTORISIER-
TEN ZENTREN ZU ENTSORGEN.

INDICE /INDEX
ITALIANO ______________________________________________
Avvertenze di sicurezza
Controindicazione d’uso
Presentazione
Accessori in dotazione
Installazione
Macchina con allacciamento a rete idrica
Accensione macchina
Erogazione caffè
Erogazione vapore e acqua calda
Istruzioni dosatura elettronica
Manutenzione
Mini addolcitore a resine
Informazioni pratiche e suggerimenti
Dichiarazione di conformità
ENGLISH ______________________________________________
Safety warnings
Precautionary measures
Introduction
Accessories supplied
Installation
Machine with connection to the mains water supply
Machine ignition
Coffee delivery
Steam and hot water delivery
Instructions for electronic dosing
Maintenance
Mini resin water softener
Practical information and suggestions
Declaration of conformity
DEUTSCH _____________________________________________
Sicherheitshinweise
Unzweckmäßiger Gebrauch
Einleitung
Zubehör mitgelieferte
Installation
Kaffeemaschine mit Zusatz für den direkten Wasseranschluss
Einscahltung der Maschine
Kaffeeausgabe
Dampfausgabe und Wasserausgabe
Anweisungen zur elektronischen Dosierung
Wartung
Mini-Enthärter
Praktische informationen und Anregungen
Konformitätserklärung
1-8
9-16
17-24
1. AVVERTENZE DI SICUREZZA
◆Prima di collegare la macchina accertarsi che i dati di targa siano rispondenti a quelli della rete di
distribuzione elettrica.
◆Collegare l’apparecchio solo a impianto e prese di corrente aventi portata minima di 10 A e dotate
di efciente messa a terra e salvavita.
◆In caso di incompatibilità tra la presa e la spina dell’apparecchio, fare sostituire la presa con un’altra
di tipo adatto da personale professionalmente qualicato.
◆È vietato l’uso di adattatori, prese multiple e/o prolunghe.
◆ In caso di dubbio o di incertezza far controllare da personale qualicato l’impianto di alimentazione
elettrica, che deve rispondere ai requisiti disposti dalle normative di sicurezza vigenti, fra i quali:
- efcace messa a terra;
- sezione dei conduttori sufciente alla potenza di assorbimento;
- dispositivo salvavita efciente.
◆Prima di qualsiasi operazione di manutenzione interna, mettere l’interruttore generale nella posizione
OFF o staccare la spina dalla presa di alimentazione. A macchina elettricamente collegata, non in-
trodurre mai le mani o altri oggetti all’interno della stessa.
◆Non esporre la macchina a intemperie o installarla in ambienti a elevata umidità come locali da
bagno ecc.. Non tirare il cavo di alimentazione o l’apparecchio con mani o piedi bagnati o umidi. Non
lasciare l’apparecchio contenente acqua in ambienti a temperatura inferiore o uguale a 0°C.
◆Durante la pulizia dell’apparecchio non immergerlo in acqua.
Non mettere mai l’apparecchio sotto il rubinetto per aggiungere l’acqua nel serbatoio.
◆Non ostruire le griglie di aspirazione o di dissipazione, in particolare non coprire con panni o altro il
piano scaldatazze.
◆L’apparecchio non deve essere spostato durante il funzionamento.
◆ Utilizzare solo accessori e ricambi autorizzati dal produttore. Questo signica garanzia di sicuro fun-
zionamento privo di inconvenienti.
◆In caso di emergenza, come principio d’incendio, rumorosità anomala, surriscaldamento, ecc... in-
tervenire immediatamente a staccare l’alimentazione elettrica di rete, chiudere i rubinetti del gas e
dell’acqua.
◆In caso di guasto e/o cattivo funzionamento dell’apparecchio, spegnerlo e non manometterlo. Per
eventualiriparazionirivolgersisolamenteaduncentroassistenzaautorizzatodalcostruttoreerichiede-
re l’utilizzo di ricambi originali. Il cavo di alimentazione di questo apparecchio non deve essere sosti-
tuito dall’utente. Se il cavo è danneggiato o deve essere sostituito, rivolgersi ad un centro autorizzato.
◆Conservare con cura questo libretto per ogni ulteriore consultazione. Per operazioni diverse da quelle
descritte in questo manuale, consultare il nostro centro assistenza.
Il mancato rispetto di queste avvertenze può compromettere la sicurezza
dell’apparecchio. Un’errata installazione puó causare danni a persone e
cose per i quali il costruttore non può considerarsi responsabile.
MACCHINE PER CAFFÈ ESPRESSO
MANUALE di ISTRUZIONE
Da chi le macchine le pensa, le progetta e le produce
1
2. CONTROINDICAZIONE D’USO
Le macchine sono destinate ad uso esclusivamente alimentare per cui é vietato l’impiego di liquidi
o materiali di altro genere come ad esempio riscaldare liquidi o inserire macinato nel portaltro che
possano generare pericoli e inquinare gli erogatori.
Il costruttore declina ogni responsabilità per danni a persone o cose dovuti ad uso improprio, errato o
irragionevole e a riparazioni effettuate da personale non qualicato.
3. PRESENTAZIONE
Questo libretto costituisce una guida rapida e semplice alla manutenzione ed uso delle macchine per
caffè. Leggere attentamente quanto riportato nelle sezioni che compongono questo manuale.
La ditta assicura, nel caso vi fossero problemi e mal funzionamenti, la sua più ampia collaborazione
tramite i suoi centri assistenza.
Le macchine sono state progettate e costruite nel rispetto di tutte le caratteristiche che contraddistin-
guono le tradizionali macchine per caffè espresso da bar: materiali nobili quali rame e acciaio e com-
ponenti afdabili, rendono le macchine costruite dalla ditta, sicure, afdabili e funzionali.
L’eventuale diverso utilizzo non contemplato nelle riportate istruzioni, solleva la ditta da qualsiasi
responsabilità per eventuali danni a persone o cose.
2
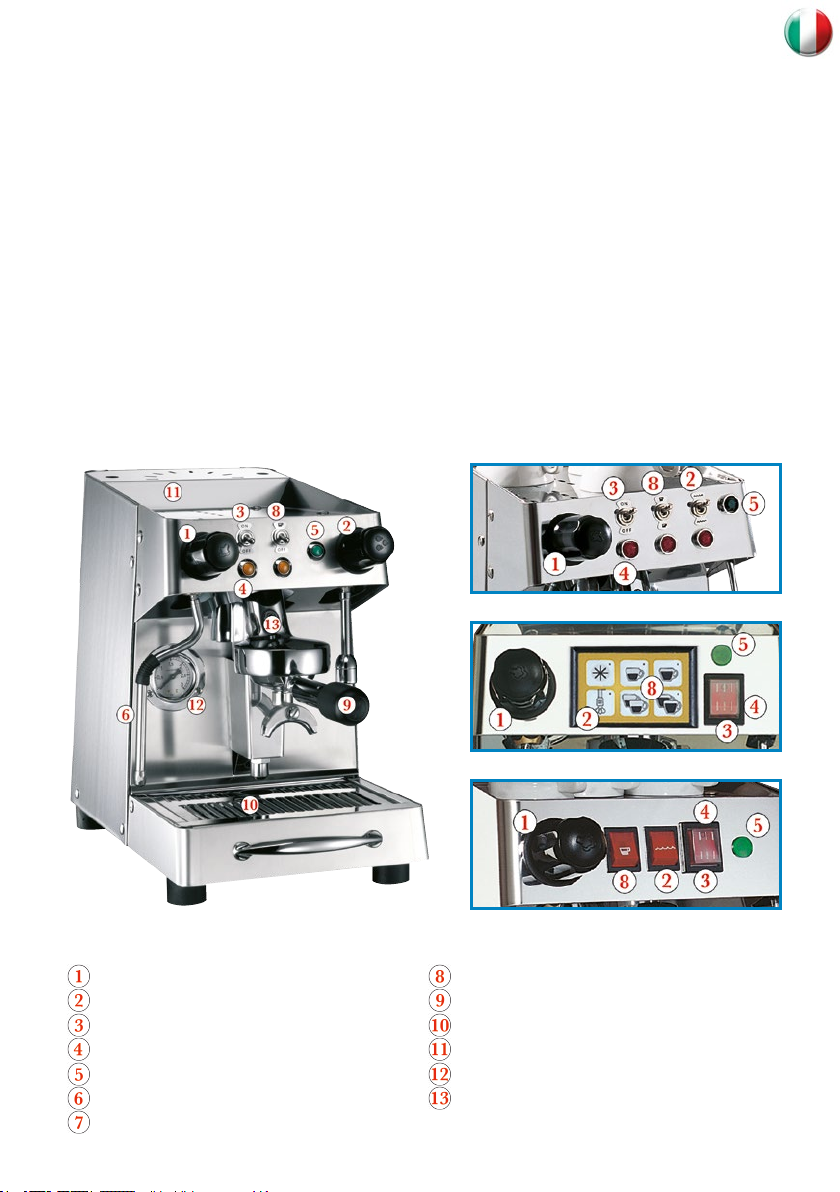
Manopola erogazione vapore
Manopola/Interruttore erogazione acqua
Interruttore generale ON/OFF
Spia rossa alimentazione
Spia verde resistenza
Lancia vapore
Lancia acqua
Interruttore/Pulsantiera erogazione caffè
Portaltro
Vaschetta raccogligocce
Griglia superiore portatazze
Manometro pressione caldaia (0-3 BAR)
Gruppo erogatore caffè
Junior ELA
Junior Plus pulsante
Junior elettronica
Junior pulsante
3
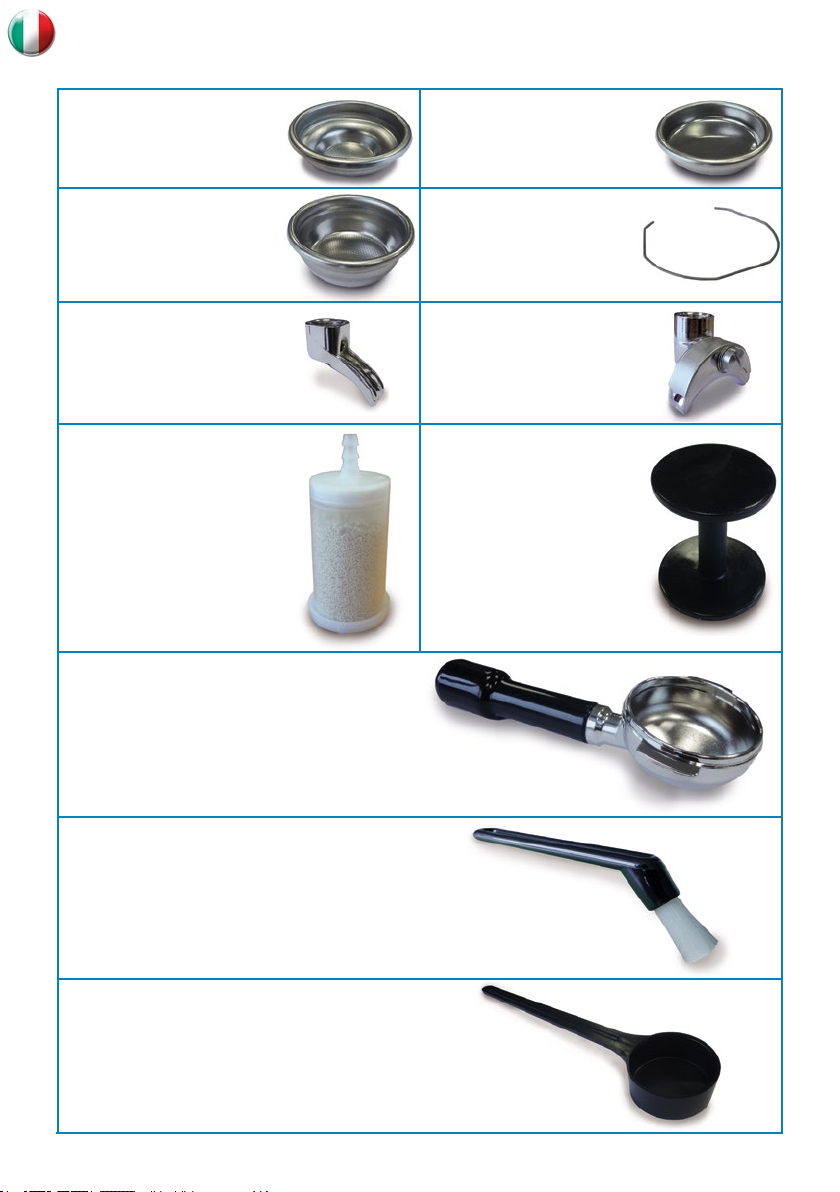
Filtro una tazza Filtro cieco
Filtro due tazze 2 Molle fermaltro
Baccuccio una tazza Beccuccio due tazze
Mini addolcitore Pressino
2 Portaltri
Spazzolino di pulizia
Cucchiaino dosatore
4. ACCESSORI IN DOTAZIONE
5. INSTALLAZIONE
Prima di azionare l’interruttore di accensione generale ON/OFF (3) in posizione ON, si
raccomanda di caricare con acqua la tanica posteriore posta sotto la griglia portatazze (11).
1) Togliere l’imballo esterno, vericando immediatamente l’integrità e che non abbia subito danni.
2) Posizionare l’apparecchio sopra un tavolo o bancone robusto ed in piano, vicino ai punti di colle-
gamento elettrico ed idraulico.
Accertarsi che la tensione della rete elettrica corrisponda a quella indicata nelle caratteristiche tecniche.
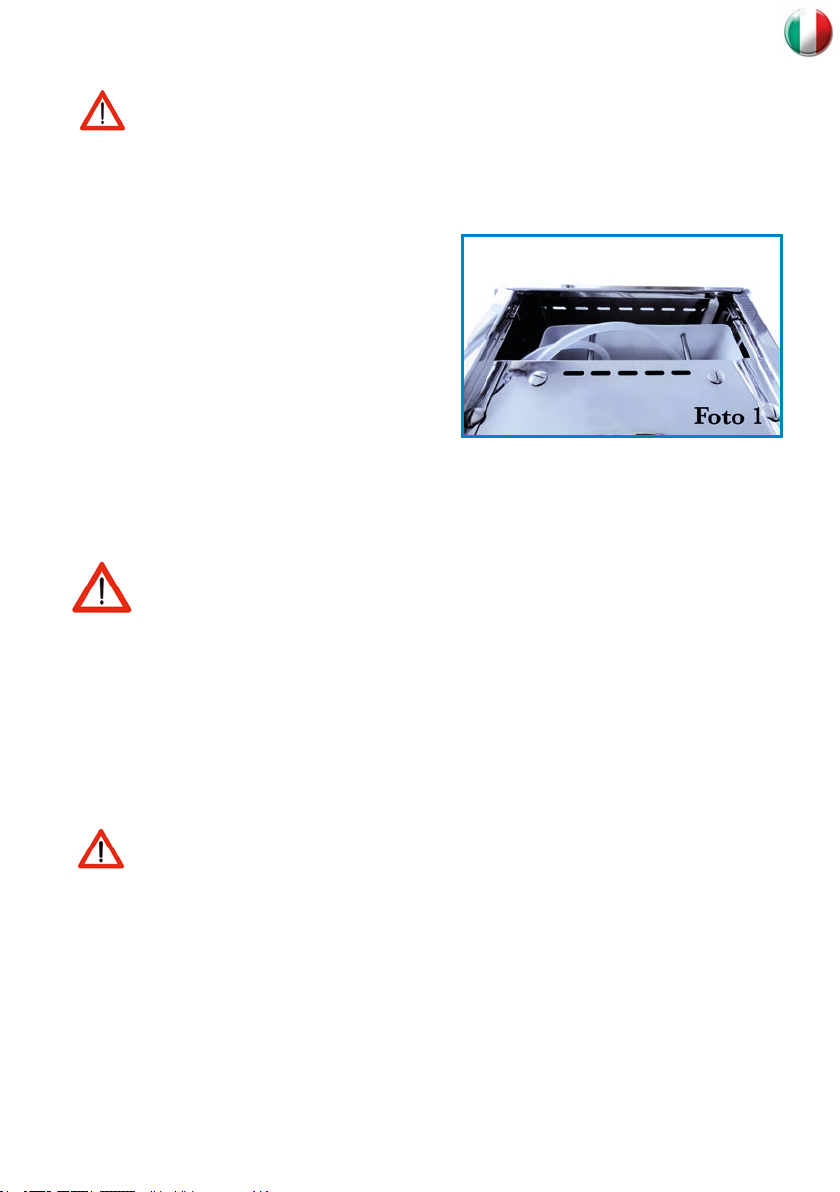
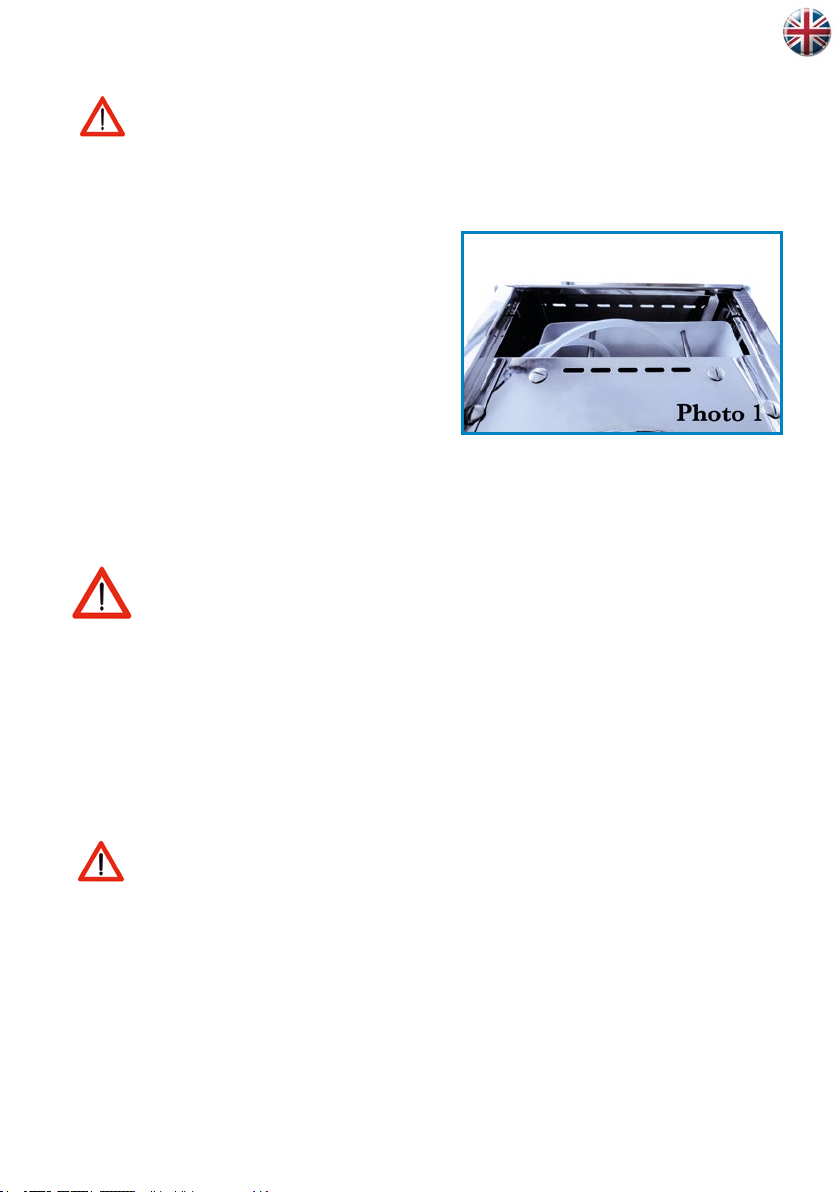
3) Togliere la griglia superiore (11), estrarre il conte-
nitore dell’acqua posto all’interno della macchina e
sciacquarlo (Foto 1).
4) Riempire con circa 3 litri di acqua pulita la tanica,
posizionarla nuovamente nella sua sede e inserirvi i tubi
di silicone con addolcitore collegato. Richiudere la gri-
glia superiore (11) della macchina.
5) Prima della messa in funzione, l’installatore deve
vericare che la macchina sia stata collegata corretta-
mente all’impianto elettrico utilizzatore e all’impianto
di terra, vericando l’efcienza della protezione dai contatti indiretti.
In Europa collegare alla rete elettrica il cavo omologato H05VV-F 3G 1,5 mm con spina Schuco.
In Usa-Canada collegare alla rete elettrica il cavo omologato Type SJTO, rated 3x14 AWG, 300 V,
105°C con SPINA NEMA 5x15P.
È VIETATO UTILIZZARE LA MACCHINA IN ASSENZA DI UN EFFICACE E
SICURO COLLEGAMENTO A TERRA.
A macchina nuova si consiglia di aprire il rubinetto dell’acqua (2) e di erogare in un bricco
almeno 0,5 litri di acqua per consentirne il recircolo.
5a. MACCHINA CON ALLACCIAMENTO A RETE IDRICA
Nel caso la macchina sia stata acquistata con allacciamento a rete idrica, chiamare un tecnico spe-
cializzato. Il tecnico dovrà collegare, tramite tuboflex in dotazione (3/8’’), il raccordo di carico della
macchina al depuratore (non previsto in dotazione). È necessario installare un riduttore di pressione.
Infine mettere l’addolcitore in fase di lavoro e verificare che non ci siano delle perdite.
6. ACCENSIONE MACCHINA
Prima dell’accensione della macchina, si consiglia di controllare la presenza di acqua nella
tanica posteriore posta sotto la griglia portatazze (11).
1) Azionare l’interruttore generale ON/OFF (3) in posizione ON. La spia rossa (4) si accenderà.
2) All’accensione della macchina la scheda elettronica controlla lo stato del livello di acqua in caldaia
e dopo circa 3 secondi avviene il riempimento tramite l’abilitazione della pompa e della elettrovalvola
di carico.
La macchina inizierà a riempirsi di acqua automaticamente sino al raggiungimento del livello impo-
stato (sonda autolivello in caldaia).
NB: Le macchine con tanica interna a innesto rapido incorporano un sistema di sicurezza di livello.
Se entro 180’’ la sonda non rileva l’acqua in caldaia, parte un segnale acustico intermittente con
frequenza di ripetizione elevata. Per resettare l’allarme spegnere e riaccendere la macchina. In caso il
problema persista, verificare eventuali anomalie nella tanica e nei tubi di silicone di entrata dell’acqua.
3) Al raggiungimento del livello, la pompa si ferma. La spia verde resistenza (5) si accende e inizia il
4

5
riscaldamento dell’acqua.
Si consiglia di far uscire acqua dal gruppo di erogazione (13) per 5 secondi in modo da eliminare
eventuali bolle d’aria nel circuito termosifonico e permetterne una migliore termocompensazione.
4) Attendere circa 15-20 minuti per permettere alla macchina di raggiungere la temperatura di lavoro.
5) Lo spegnimento della spia verde (5) segnala che la macchina ha raggiunto la pressione prestabilita.
La spia rossa (4) rimarrà sempre accesa per segnare la tensione di alimentazione.
6) La mancanza di acqua nella tanica posteriore, sarà avvisata da un segnale acustico. La macchina
arresterà tutte le funzioni elettriche e idrauliche pur mantenendo la spia rossa (4) accesa.
Riempiendola di acqua, il micro interruttore o il sensore elettronico di livello della tanica, riattiverà
tutte le funzioni nuovamente.
7) Il manometro (12), posto frontalmente, rileva in ogni momento rispettivamente la pressione interna
della caldaia (0,9-1,1 BAR).
NB: Nelle macchine provviste di un secondo manometro, questo rileva in ogni momento la pressione
di erogazione del caffè (8-10 BAR).
8) Visionare abbastanza frequentemente il manometro (12) per controllare la pressione in caldaia.
La macchina è dotata di dispositivi di sicurezza che intervengono in caso di anomalie alla pressione
interna alla caldaia.
Le operazioni precedentemente descritte sono segnalate tramite l’accensione e lo spegni-
mento dei relativi led luminosi (4) e (5).
7. EROGAZIONE CAFFÈ
1) Per erogare caffè dal gruppo, dosare la giusta quantità di caffè MACINATO BAR (circa 7 grammi
pari ad 1 cucchiaino dosatore), nel portaltro (9) con uscita singola.
2) Pressare il caffè con l’apposito pressino.
3) Inserire il portaltro (9) nel gruppo erogatore caffè (13) ruotandolo da sinistra a destra sino al bloc-
caggio dello stesso.
4) Posizionare una tazza sotto il portaltro (9).
5) Avviare l’erogazione tramite interruttore (8) o tramite pulsantiera
elettronica (vedere cap. 9).
6) Al raggiungimento della quantità di caffè desiderata, fermare l’e-
rogazione azionando l’interruttore (8) verso OFF.
7) Se si desidera fare altri caffè, togliere il portaltro (9) ruotandolo
da destra a sinistra e vuotare i fondi di caffè. Ripetere poi le opera-
zioni sopra elencate.
8) Per ottenere due caffè, utilizzare il portaltro (9) a due uscite con
due dosi del cucchiaino dosatore.
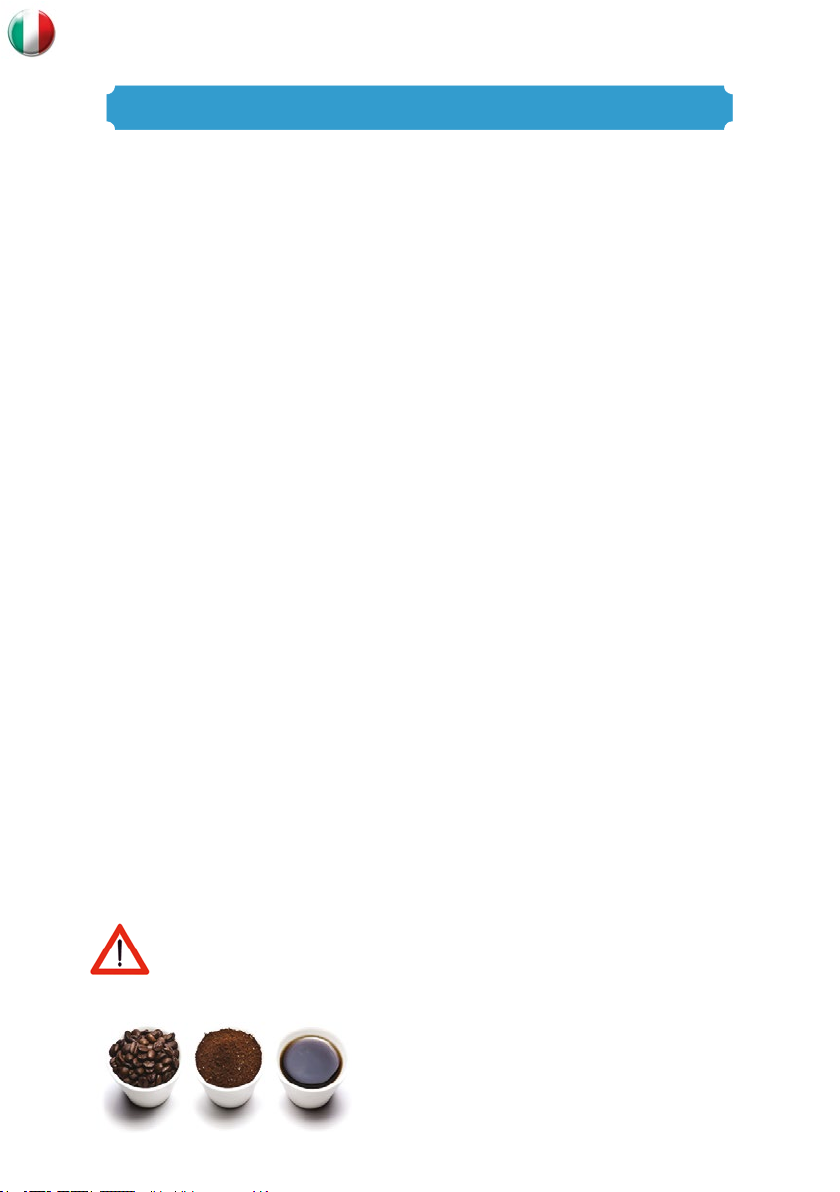
9) Acquistando l’apposito adattatore (option), è possibile utilizzare anche la cialda di caffè preconfezio-
nata da 7 grammi o 14 grammi, rispettivamente per una o due tazze di caffè (Foto 2).
Ricordarsi di pulire sempre accuratamente i ltri nel cambio da macinato a cialda preconfezionata.
Fare attenzione nella messa in funzione della macchina per caffè. Le temperature elevate
del tubo vapore (6), del tubo acqua (7) e del gruppo erogazione cromato (13) possono
provocare scottature.
Non sganciare per nessun motivo il portafiltro dal gruppo, durante l’erogazione del caffè.
PERICOLO SCOTTATURE.
8. EROGAZIONE VAPORE E ACQUA CALDA
1) Per erogare vapore, operare sulla manopola laterale sinistra (1).

6
2) Per erogare acqua calda, operare sula manopola o azionare l’interruttore (2).
Vapore ed acqua calda sono in pressione. PERICOLO USTIONI.
9. ISTRUZIONI DOSATURA ELETTRONICA
Si rimanda al libretto dell’utilizzatore specifico per ogni modello.
10. MANUTENZIONE
◆Pulire la lancia del vapore dopo ogni utilizzo per evitare le incrostazioni e l’otturazione dei fori di
uscita vapore.
◆ Vuotare e pulire i ltri del caffè tutte le sere; togliere il ltro e pulire con l’apposito spazzolino l’in-
terno; immergerli in acqua calda al ne di dissolvere i grassi del caffè.
◆Pulire la vaschetta raccogli gocce da residui del caffè che si vanno depositando sul fondo per evitarne
l’incrostazione.
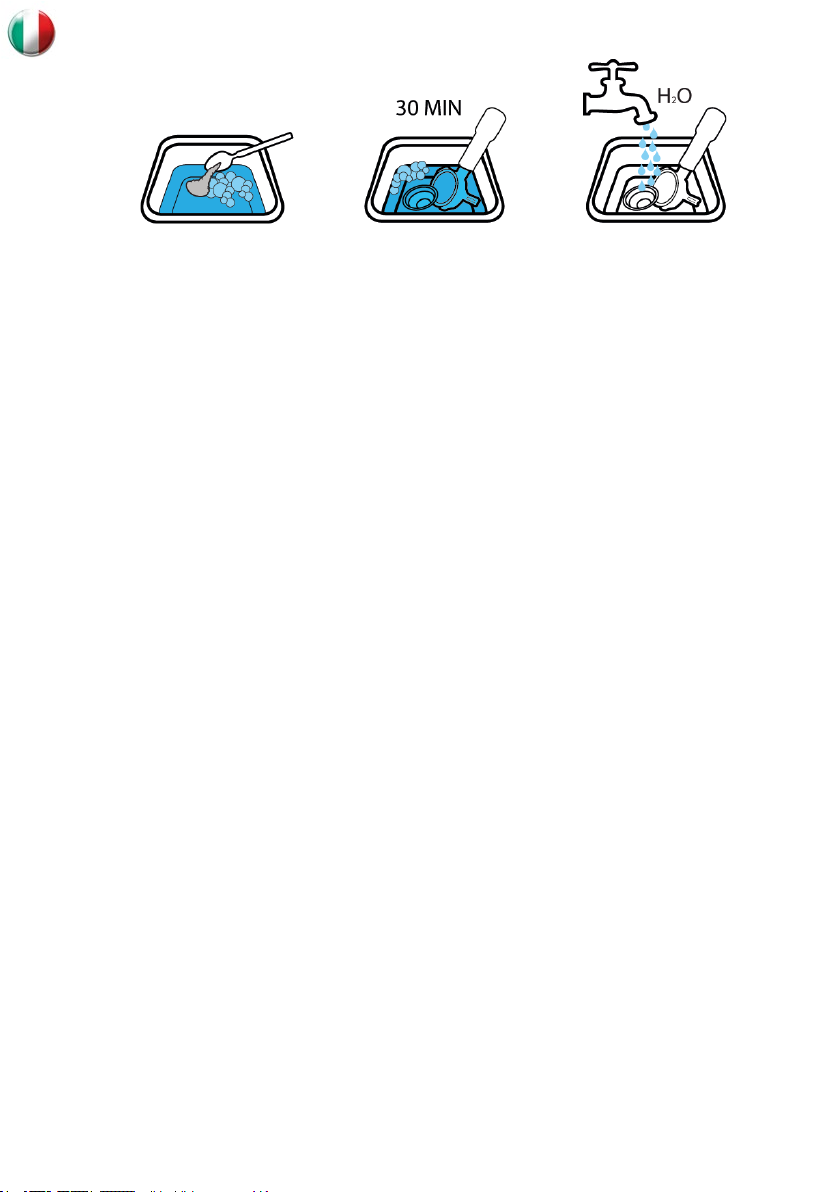
◆ Con l’apposito ltro cieco in dotazione, eseguire il lavaggio del gruppo erogazione utilizzando un
specico detergente (da richiedere ai nostri centri assistenza).
Procedere come segue:
1- Inserire il ltro cieco nel portaltro e aggiungere il detergente secondo le dosi indicate nella con-
fezione.
2- Inserire il portaltro nel gruppo erogatore.
3- Accendere l’erogazione per 10 secondi. Fermare per 10 secondi. Ripetere per 5 volte.
Dell’acqua mista a schiuma uscirà dalla valvola di scarico dentro la vaschetta raccogligocce.
4- Rimuovere il portaltro. Accendere l’erogazione e risciacquare il portaltro con l’acqua calda che
esce dal gruppo erogatore. Fermare l’erogazione.
5- Inserire il portaltro nel gruppo erogatore. Per risciacquare ripetere il punto 3 senza detergente.
6- Sostituire il ltro cieco nel portaltro con il ltro corretto e fare un espresso da eliminare.
◆Le parti esterne della macchina devono essere pulite con un panno umido e non utilizzare mai de-
tersivi o sostanze abrasive. Non pulire la macchina con getti d’acqua.
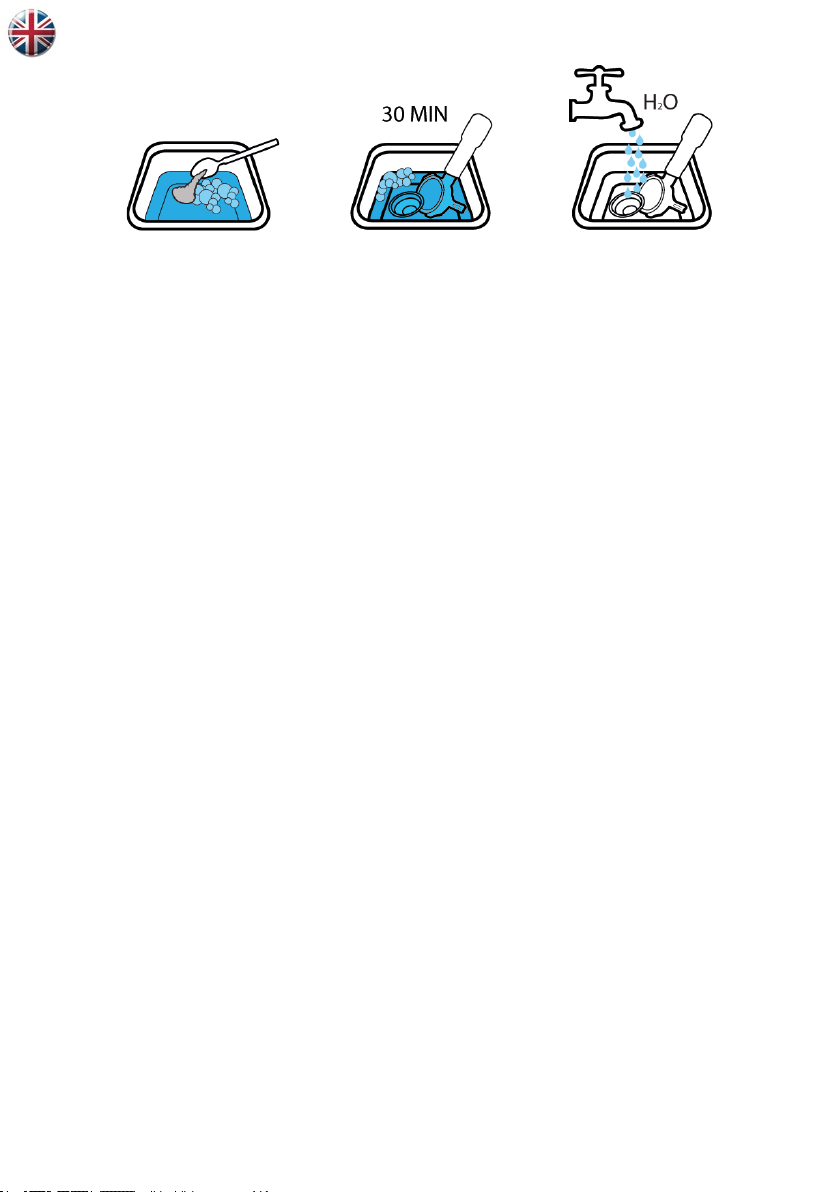
◆ Per pulire il portaltro ed i cestelli del ltro, preparare in un contenitore di plastica o acciaio inox
una soluzione con acqua calda e detergente, ed immergerli nella soluzione per almeno 30 minuti.
Sciacquarli con acqua pulita. Una frequente pulizia consentirà di ottenere un caffè dolce, oltre a pro-
lungare la durata della vostra macchina per caffè.
7
11. MINI ADDOLCITORE A RESINE
◆Calcio e magnesio determinano la durezza dell’acqua e provocano la formazione di quello che
noi chiamiamo semplicemente calcare.
Da 30° a 40° l’acqua è dura; da 40° in su è considerata molto dura. La misurazione avviene tramite
appositi semplici test che si possono acquistare presso qualsiasi centro assistenza.
◆All’interno del serbatoio immerso in acqua, si trova un piccolo addolcitore a resine (uno è anche in
dotazione), che va sostituito o rigenerato ogni 20-30 litri di acqua utilizzata.
◆La rigenerazione avviene immergendo il piccolo addolcitore in una soluzione di acqua e sale da
cucina (un cucchiaio - NaCL Cloruro di sodio) per un tempo di circa 48 ore.
Sciacquare con acqua pulita più volte e riposizionare il piccolo addolcitore collegato al tubo di silico-
ne, all’interno del serbatoio.
12. INFORMAZIONI PRATICHE E SUGGERIMENTI
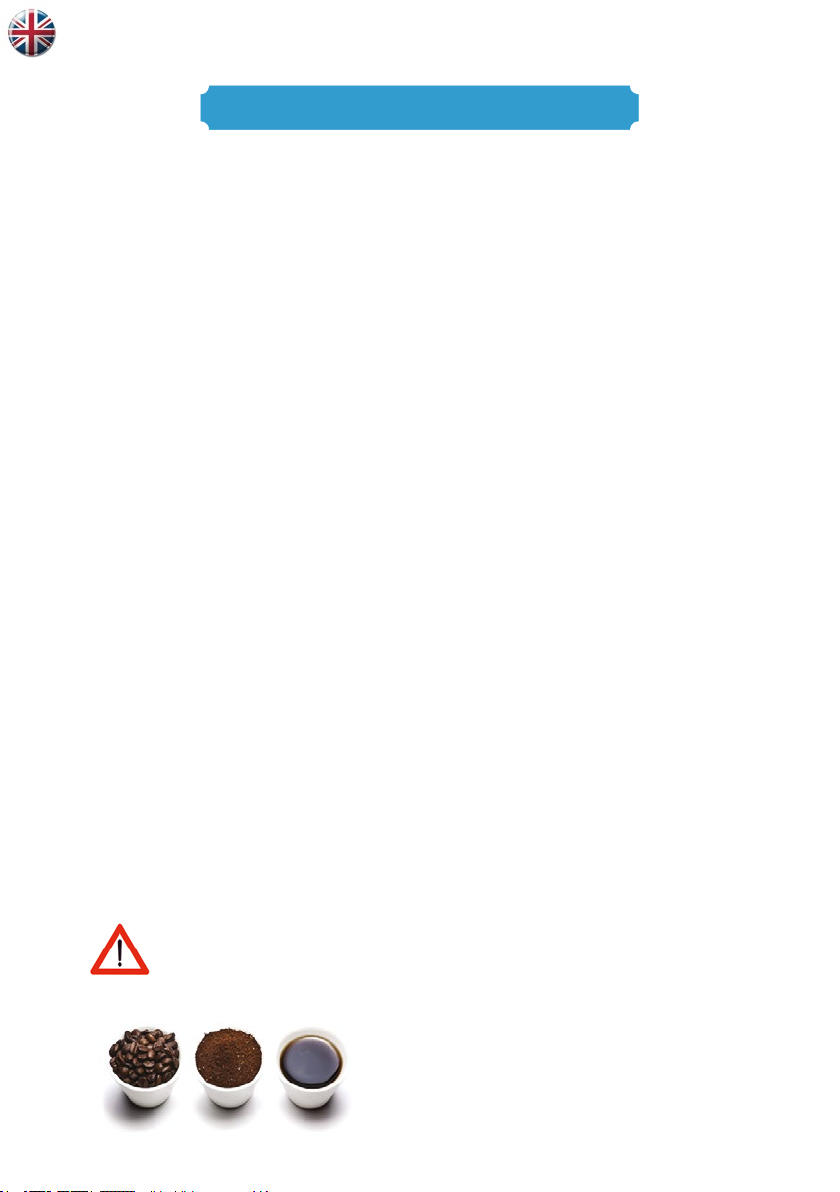
◆Per ottenere il massimo risultato dovete utilizzare caffè macinato ad uso bar, corrispondente ad una
grossezza di macinatura ben denita. Al vostro Torrefattore o negozio pertanto oltre la vostra miscela
preferita darete questa indicazione di macinatura.
◆Acquistando l’apposito adattatore (option), è possibile utilizzare anche la cialda di caffè preconfe-
zionata. L’uso del caffè in cialda offrirà molti vantaggi: la libertà di scelta tra le numerose marche
presenti sul mercato, un espresso costantemente buono indipendentemente dalla esperienza di chi
prepara il caffè, una estrema facilità d’uso, ed infine una minor manutenzione in quanto la macchina
resta costantemente pulita.
◆Per gustare un ottimo caffè:
- acquistare una buona miscela di caffè in grani.
- conservare il caffè in grani in un luogo asciutto.
- macinare il caffè in grani tutte le volte che si desidera un caffè.
- dosare e pressare leggermente la macinatura per renderla più omogenea.
◆Per ottenere un caffè bollente:
- lasciare sempre inserito il portaltro, con relativo ltro vuoto, nel gruppo erogatore caffè.
- sciaquare il portaltro ed il ltro con acqua bollente premendo l’interruttore caffè.
- con la stessa acqua bollente pre-riscaldare le tazze.
◆Per ottenere un buon cappuccino:
- utilizzare un recipiente alto e stretto riempito per circa metà di latte.
- immergere la lancia vapore per 1 cm.
- aprire il rubinetto vapore con la manopola.
◆Per scaldare solamente il latte:
- immergere la lancia vapore sino in fondo al recipiente.
- aprire il rubinetto vapore con la manopola.
- chiudere il rubinetto vapore una volta raggiunta la temperatura desiderata.

DICHIARAZIONE DI CONFORMITà
Prodotto :
◆Macchine per caffè espresso
Modello :
◆1 GR JV-1P-1E
B.F.C. srl dichiara sotto la propria responsabilità, che il prodotto soddisfa per progettazione
e costruzione i requisiti della direttiva:
1) DIRETTIVA BASSA TENSIONE
2006/95/CE (ex 93/68/CEE)
La conformità è stata vericata con l’ausilio delle seguenti norme armonizzate:
CEI EN 60335-1 / CEI EN 60335-2-14 / CEI EN 60335-2-14⁄A1
CEI EN 60335-2-15 / CEI EN 60335-2-15⁄A1 / CEI EN 60335-2-15⁄A2
2) DIRETTIVA COMPATIBILITA’ ELETTROMAGNETICA
2004/108/CE (ex 89/336/CEE 92/31/CEE 93/68/CEE)
La conformità è stata vericata con l’ausilio delle seguenti norme armonizzate:
CEI EN 55014-1 / CEI EN 55022
CEI EN 61000-3-2 / CEI EN 61000-3-3
CEI EN 61000-4-2 / CEI EN 61000-4-4 / CEI EN 61000-4-5
CEI EN 61000-4-6 / CEI EN 61000-4-8 / CEI EN 61000-4-11
3) DIRETTIVA ATTREZZATURE A PRESSIONE (PED)
97/23 (TÜV NORD System certicate No: 07 202 9080 Z) (0618/9/0144 REV01)
Le nostre macchine per caffè, sono conformi ai requisiti della direttiva 97/23 CE - Mo-
dulo A1 - Categoria II - e sono composte dalle seguenti apparecchiature che rientrano
nella direttiva stessa:
Caldaia in rame Marcata CE 0045
Valvola di sicurezza Marcata CE 0045
◆2002/95/CE RoHS
2002/96/CE RoHS
2003/108/CE RoHS
Sulla base delle nostre conoscenze, i nostri fornitori di materiali non utilizzano nella fab-
bricazione dei loro prodotti, le sostanze pericolose che sono elencate nelle Direttive CEE
sopramenzionate.
◆D.M. 21/03/73 D.M. nr. 227 - 4/05/2006
Legge italiana e suoi emendamenti.
◆Regolamento CE: 1935/2004 1895/2005
Relativa al ravvicinamento delle legislazioni degli STATI MEMBRI concernenti i mate-
riali e gli oggetti destinati a venire a contatto con i prodotti alimentari.
8
ESPRESSO COFFEE MACHINES
INSTRUCTIONS for USE
9
1. SAFETY WARNINGS
◆Check that the data on the machine corresponds to that of the electrical supply network, before
connecting the equipment.
◆ Only connect the appliance to an efciently earthed power socket having a minimum capacity of
10A, and tted with an RCD.
◆ If the plug supplied is unsuitable for your power socket, have the plug replaced by a qualied elec-
trician.
◆Adaptors, multiple sockets and /or extensionsmust not be used.
◆ When in doubt, request a detailed diagram of the supplied power from a qualied electrician.
The power supply must be provided with the following safety devices:
- efcient earthing connection;
- section of conductors suitable for absorption capacity;
- efcient earthing leakage protection circuit breaker.
◆Always press the main switch to OFF or disconnect the coffee machine from the mains before any
internal maintenance. Never put your hands or any object into the machine when it is connected
to the mains.
◆Do not leave the machine exposed to environmental elements or place them in damp rooms such
as bathrooms... Do not touch the power cord or the appliances when hands or feet are wet or damp.
Do not leave water inside the appliance in environments where the temperature is equal to or less
than 0°C.
◆Do not immerse the appliance in water when cleaning it.
Never add water to the tank by putting the appliance under the tap.
◆Do not obstruct the suction or dispersion grilles and do not cover with cloths, etc.
◆The appliance must not be moved while in operation.
◆Only use original spare parts in order to avoid compromising the safety and proper functioning of
the machine.
◆ In an emergency, such as re, unusual noise, overheating, etc., take immediate action, disconnect the
power and close gas and water taps.
◆If the appliance does not seem to be working correctly, switch it off and do not tamper with
it. Return it only to an aftersales service centre authorised by the manufacturer for repair and request
original spare parts.
The power cord of this appliance must not be replaced by the user. If the cord is damaged or needs
to be replaced, take it to an authorised after-sales service only.
◆Carefully keep this booklet for future reference. Contact our Repair Service for any maintenance
that is not described in this leaet.
Failure to comply with these warnings could jeopardise the safety of the
appliance. Improper installation can cause damage to people, animals and
things for which the manufacturer cannot be considered responsible.
Devised, designed and produced by us

10
2. PRECAUTIONARY MEASURES
This machine may only be used with foodstuffs. It cannot be used for heating liquids or grinding any
other kind of product that could damage and pollute it.
The manufacturer cannot be held responsible for damage to people or things caused by unsuitable,
erroneous or irrational use and by unauthorised repair.
3. INTRODUCTION
This booklet is a guide to rapid and easy use and maintenance of coffee machines.
Please read these instructions carefully.
The company garantees that should any defect or problem occur, it will provide its support through
its Repair Service points.
Our coffee machines have been designed and manufacured in complicance with all specications that
distinguish traditional espresso coffee machines: noble materials such as copper and steel and reliable
components make alla machines made by the company safe, reliable and funciontal.
No liability can be accepted by the company for any damage to persons or things caused by non-com-
pliance with these instructions.
Steam knob
Water knob/switch
ON/OFF Power switch
Power on red indicator light
Heating element operation green indicator light
Steam nozzle
Hot water nozzle
Coffee dispensing switch/keyboard
Filter holder
Drip tray
Upper cover grid
Boiler pressure gauge (0-3 BAR)
Coffee distribution unit
Junior ELA
Junior Plus pulsante
Junior elettronica
Junior pulsante

11
4. ACCESSORIES SUPPLIED
One - cup lter Blind lter
Two - cups lter 2 Filter -retaining springs
One - cup spout Two - cups spout
Mini water softener Coffee tamper
2 Filter holders
Cleaning brush
Measuring spoon
12
5. INSTALLATION
Before putting the main ON/OFF switch (3) to ON ll the rear water tank under the
cup shelf (11).
1) Remove the coffee machine from its parcking and check that it has not been damaged.
2) Place the appliance on a stable top, close to the mains sockets and water line connections.
Check that the voltage of your mains supply corresponds to that indicated in the technical specica-
tions.
3) Remove the upper cover grid (11), take out the water
tank (located inside the machine) and rinse it (Photo 1).
4) Fill the tank with approx. 3 litres clean water, put it
back, connect the water softener and insert the small
silicone tubes. Close the upper cover grid (11) on the
machine.
5) Before start-up the tter must make sure the ma-
chine has been properly connected to the electrical and
earthing systems involved and check the efciency of
protection from direct contact.
In Europe connect the approved cord H05VV-F 3G 1.5 mm with the Schuko plug to the electricity
supply.
In USA-Canada connect the approved cord Type SJTO, rated 3x14 AWG, 300 V, 105°C with the
NEMA 5x15P plug to the electricity supply.
IT IS STRICTLY FORBIDDEN TO USE THE MACHINE WITHOUT EFFEC-
TIVE SAFE EARTHING.
If the machine is new, it is advisable that you let the water circulate through the system:
turn the water knob (2) and ll a jug with at least 0.5 litres water.
5a. MACHINE WITH CONNECTION TO THE MAINS
WATER SUPPLY
If your machine is to be connected to the mains water supply call a specialized technician, who will
connect the machine inlet pipe to the water softener (not provided) using the hose (3/8’’) provided. A
pressure reducer must be installed. Switch on the water softener and check for any leaks.
6. MACHINE IGNITION
Before turning on the machine it is advisable that you check that there is water inside the
rear tank under the cup shelf (11).
1) Put the ON/OFF power switch (3) to ON.
The red indicator light (4) comes on.
2) When the machine is switched on, the electronic card checks water level inside the boiler. After
approx. 3 seconds, the lling pump and solenoid valve are enabled for lling.
The coffee machine will automatically be filled with water up to the pre-set level (level probe inside
the boiler).
NB: The machines with internal tank quick coupling incorporate a safety system level. If the probe
does not detect water in the boiler within 180”, it starts the sound of a buzzer with high repetition
rate. To reset the alarm turn the machine off then on again. If the problem remains, check for any
abnormalities into the tank or in the water inlet silicon pipes.
3) When the set level is reached, the pump stops. The green warning light (5) comes on and the heating

13
element starts heating the water.
It is advisable that you dispense water (13) for 5 seconds so as to eliminate any air bubbles from the
thermosyphon circuit and for better thermal compensation.
4) Wait approximately 15-20 minutes to allow the machine to reach its operating temperature.
5) When the green warning light (5) goes out the set machine pressure has been reached. The red
indicator light (4) will be always light (tension on the electrical circuit).
6) If there is no water in the rear tank, it will be signaled by a beep. All the electrical and water func-
tions of the machine will stop, while the red indicator light (4) remains on.
Upon filling the tank with water, the micro switch or the electronic lever sensor in the tank, will re-ac-
tivate all the functions.
7) Pressure gauge (12) on the front show internal boiler pressure (0.9-1.1 BAR) at all times.
NB: In the machines that have two pressure gauges, the second constantly measures coffee delivery
pressure (8 - 10 BAR).
8) Look at the pressure gauge (12) fairly frequently to check the boiler pressure. The appliance is fitted
with a safety device, which trips if the pressure inside the boiler is abnormal.
The relative LED indicators (4) and (5) come on and go out to indicate the previously
described steps.
7. COFFEE DELIVERY
1) To make coffee, put the right amount of BAR GROUND coffee (approx. 7 grams equivalent to 1
measuring spoon) into the 1 - cup lter holder (9).
2) Press the coffee with the coffee tamper.
3) Fit the lter holder (9) in the coffee distribution unit (13) and twist from left to right to block it in
place.
4) Place one cup under the lter holder (9).
5) Start the coffee dispensing using the switch (8) or the electronic
keyboard (refer to chapter 9).
6) When the desired quantity of coffee has been dispensed put the
switch (8) to OFF to cut off delivery.
7) If you want to make more coffee remove the lter holder (9) by
turning it from right to left and empty out the used grounds. Repeat
the above operations.
8) To obtain 2 coffees, use the 2-cup lter holder (9) with two meas-
uring spoonfuls.
9) If the optional adapter is tted, you can also use pre-packaged coffee pods (7gr or 14 gr), which
make one cup and two cups of coffee respectively (Photo 2).
Always remember to clean the lters thoroughly when changing from ground to pod coffee.
Take care when using the coffee maker. The high temperatures of the steam nozzle (6), hot
water nozzle (7) and chromed filtering unit (13) could cause burns.
Under no circumstances remove the filter holder from the filtering head during dispensing
of coffee. DANGER OF SCALDING.
8. STEAM AND HOT WATER DELIVERY
1) To dispense steam, use the knob to the side left (1).
2) To dispense hot water, use the knob or the switch (2).
Steam and water are under pressure. SCALD HAZARD.

9. INSTRUCTIONS FOR ELECTRONIC DOSING
See the special user’s manual for each model.
10. MAINTENANCE
◆Clean the steam wand after every use, so as to prevent scale deposits from obstructing the steam
outlet points.
◆Empty and clean the coffee lters every evening; remove the lter and brush the inside with a suita-
ble brush; soak the lters in hot water in order to dissolve coffee greases.
◆Clean the drip tray of residues of coffee on the bottom to prevent encrustation.
◆The power cord of this appliance must not be replaced by the user. If the cord is damaged or needs
to be replaced, take it to an authorised after-sales service only.
Proceed as follows:
1- Insert the blind lter in the lter holder and add the amount of detergent indicated on the pack.
2- Insert the lter holder into the group head.
3- Start brew cycle for 10 seconds and stop for 10 seconds. Repeat this operation for 5 times.
Mixed water and foam will ow out the drain valve into the drip tray.
4- Remove the lter holder from group head. Start brew cycle and rinse the lter holder with the
boiling water from group head. Stop cycle.
5- Insert the lter holder into group head and repeat step 3 to rinse without detergent.
6- Replace the blind lter in the lter holder with the correct lter and make and discard an espresso.
◆Clean the external parts of the machine with a damp cloth. Never use detergents or abrasive sub-
stances. Do not use jets of water to clean the machine.
◆ To clean the lter holder and the lters, leave them to soak for at least 30 minutes in a solution of
hot water and detergent prepared in a plastic or stainless steel container. Rinse them with clean water.
Frequent cleaning allows a smooth coffee to be obtained as well as prolonging the life of your coffee
maker.
14
11. MINI RESIN WATER SOFTENER
◆Calcium and magnesium determine the hardness of the water and cause the formation of what we
simply call scale.
Water is hard from 30° to 40°; it is considered very hard from 40° upwards. The hardness can be
measured by simple test kits, which may be purchased at any service centre.
◆There is a small resin water softener (plus one in the accessories kit) inside the water tank, which
should be replaced or regenerated once every 20-30 litres of water that are used.
◆The small water softener can be regenerated by putting it in salt water ( 0,5 litres and one spoonful
of NaCl, sodium chloride) for approx. 48 hours.
Thoroughly rinse with clean water and put the small water softener connected to the silicone tube
back inside the tank.
12. PRACTICAL INFORMATION AND SUGGESTIONS
◆For best results, use ground coffee for bar use, which has a well-dened coarseness of grinding. Give
this grinding indication to your coffee roaster or shop when asking for your favourite blend.
◆If the optional adapter is tted, you can also use pre-packaged coffee pods. The use of coffee pods
offers many advantages: the freedom to choose from among the many brands on the market, a con-
stantly good espresso irrespective of the experience of whoever is making it, extremely easy to use and
lastly, less maintenance because the appliance remains constantly clean.
◆To enjoy excellent coffee:
- purchase a good brand of coffee in beans.
- keep the coffee in beans in a dry place.
- grind the coffee beans fresh when you make coffee.
- measure and press the ground cofffe slightly to pack it more uniformly.
◆For boiling hot cofffe:
- leave the lter holder with the empty empty lter in the coffee distribution unit at all times.
- rinse the lter holder and lter with boiling hot water by pressing the coffee switch.
- use the same boiling water to pre-heat the cups.
◆For a delicious cappuccino:
- use a tall narrow milk pitcher half full.
- immerse the steam nozzle 1 cm into the milk.
- open the steam tap with the knob.
◆If you just want to heat the milk:
- immerse the steam nozzle all the way into the milk.
- open the steam tap with the knob.
- close the steam tap when the milk is hot enough.
15

DECLARATION OF CONFORMITY
Product :
◆Espresso coffee machines
Types :
◆1 GR JV-1P-1E
B.F.C. srl declare here with on our own responsability that the above - metioned product
meets the requirements of the Directive:
1) LOW VOLTAGE DIRECTIVE
2006/95/CE (ex 93/68/CEE)
Confromity has been controlled with the aid of the following harmonized standards:
CEI EN 60335-1 / CEI EN 60335-2-14 / CEI EN 60335-2-14⁄A1
CEI EN 60335-2-15 / CEI EN 60335-2-15⁄A1 / CEI EN 60335-2-15⁄A2
2) ELECTROMAGNETIC COMPATIBILITY
2004/108/CE (ex 89/336/CEE 92/31/CEE 93/68/CEE)
Confromity has been controlled with the aid of the following harmonized standards:
CEI EN 55014-1 / CEI EN 55022
CEI EN 61000-3-2 / CEI EN 61000-3-3
CEI EN 61000-4-2 / CEI EN 61000-4-4 / CEI EN 61000-4-5
CEI EN 61000-4-6 / CEI EN 61000-4-8 / CEI EN 61000-4-11
3) PRESSURE DEVICE DIRECTIVE (PED)
97/23 (TÜV NORD System certicate No: 07 202 9080 Z) (0618/9/0144 REV01)
Our coffee machines are in compliance with the directive 97/23 CE - Form A1 - Cat-
egory II - and are equipped with the following items which are included in the same
directive:
Copper boiler Mardek CE 0045
Safety valve Mardek CE 0045
◆2002/95/CE RoHS
2002/96/CE RoHS
2003/108/CE RoHS
To the best of our knowledge, our material suppliers do not use in the manufacturer of
their products the hazardous substances which are listed in the above mentioned EU
Directives.
◆D.M. 21/03/73 D.M. nr. 227 - 4/05/2006
Italian law and its amendments.
◆Commision Regulation EC: 1935/2004 1895/2005
On the approximation of the laws of the MEMBER STATES relating to materials and
articles intended to come into contact with foodstuffs.
16

ESPRESSOMASCHINEN
BEDIENUNGSANLEITUNG
17
1. SICHERHEITSHINWEISE
◆Vor Anschluß der Maschine sich davon überzeugen, daß die auf dem Schild angegebenen Daten mit
jenen des am Installationsort vorhandenen Versorgungs-netzes übereinstimmen.
◆Das Gerät nur an eine Anlage und an Steckdosen anschließen, die eine Mindeststromfestigkeit von
10A besitzen und ausgerüstet sind mit einer funktionstüchtigen Erdung und Sicherung.
◆ Bei einer Inkompatibilität von Steckdose und Gerätestecker ist die Steckdose von fachlich quali-
ziertem Personal gegen einen anderen Typ auszutauschen.
◆Vom Einsatz von Adaptern, Vielfachsteckdosen und/oder Verlängerungskabeln wird abgeraten.
◆Im Zweifelsfall die elektrische Anlage von einem Fachmann überprüfen lassen, welche den nachfol-
gend aufgeführten Sicherheitsvorschriften entsprechen muß:
- Sicherheitserdung;
- einen für den Leistungsbedarf angemessenen Kabeldurchmesser;
- Leitungsschutzschalter.
◆Vor beginn jeder inneren Wartungsarbeit den Hauptschalter auf Position OFF stellen oder ausziehen
den Netzstecker. Ist die Maschine an das Stromnetz angeschlossen, nie die Hände oder Gegenstände
ins Maschineninner e bringen.
◆ Die Maschine nicht Witterungseinüssen aussetzen und in feuchten Räumen wie Badezimmer in-
stallieren.. Ziehen Sie nicht das Netzkabel des Geräts mit Händen oder Füssen nassen oder Feuchten.
Das Gerät nicht in Umgebungen mit Temperaturen unter oder gleich 0°C mit Wasser befüllt lassen.
◆Bei der Reinigung das Gerät n icht in Wasser tanchen.
Das Gerät für die Wasserbefüllung des Tanks niemals unter den Wasserhahn stellen.
◆ Die Gitter zur Ansaugung und Verteilung nicht verstopfen und die Oberäche zur Erwärmung der
Kaffeetassen nicht mit Tüchern oder Anderem abdecken.
◆Das Gerät darf während des Betriebs nicht verstellt werden.
◆Zum Austausch von defekten Teilen nur vom Hersteller genehmigte Ersatzteile verwenden. Dies
gewährleistet Funktionstüchtigkeit ohne Störungen.
◆Im Notfall, wenn die Maschine Feuer fangen sollte, merkwürdige Geräusche von sich gibt oder
sich überhitzen sollte, sofort den Netzstecker ziehen und Gas- und Wasserzufuhr abdrehen.
◆Das Gerät im Falle von Defekten und/oder Funktionsstörungen ausschalten und nicht manipulie-
ren. Für eventuelle Reparaturen wenden Sie sich bitte ausschließlich an ein autorisiertes Kunden-
dienstzentrum des Herstellers und verlangen den Einsatz von Originalersatzteilen.
Das Stromversorgungs Kabel des Geräts muss nicht vom Benutzer ersetzt werden. Wenn das Kabel
beschädigt oder ersetzt werden muss, sich an einem autorisierten Service-Center wenden.
◆Diese Bedienungsanleitung für eine zukünftige Einsichtnahme sorgfältig aufbewahren. Sollen an-
dere, als die hier beschriebenen Vorgänge ausgeführt werden, wenden Sie sich an eine unserer
Kundendienstellen.
Die Nichteinhaltung diese Warnungen beeinträchtigt die Gerätesicherheit.
Eine nicht fachgerechte Installation kann zu Personen- und Sachschäden
führen, für die der Hersteller nicht verantwortlich gemacht werden kann.
Von uns, die wir uns die Maschinen ausdenken,
entwicheln und produzieren
Table of contents
Languages:
Other B.F.C. Coffee Maker manuals


