manuals.online logo
Brands
  1. Home
  2. •
  3. Brands
  4. •
  5. Bad Boy
  6. •
  7. Lawn Mower
  8. •
  9. Bad Boy AOS Diesel User manual

Bad Boy AOS Diesel User manual

ZERO-TURN MOWER
OWNER’S, SERVICE & PARTS MANUAL
For additional information, please see us at
www.badboymowers.com
Bad Boy, Inc.
102 Industrial Drive
Batesville, Arkansas 72501
(870) 698-0090
Diesel
AOS & Compact
TABLE OF CONTENTS
Basic Information........................................................................................... Section 1 (pages 4–5)
Bad Boy Safety Guidelines ............................................................................. Section 2 (pages 5–6)
Operation ....................................................................................................... Section 3 (pages 6–7)
Maintenance ........................................................................................................ Section 4 (page 7)
Storage and Transportation ................................................................................. Section 5 (page 8)
Troubleshooting and FAQ............................................................................... Section 6 (pages 8–9)
Controls ............................................................................................................... Section 7 (page 9)
Moving Inoperable Mower ................................................................................ Section 8 (page 10)
Instrumentation ................................................................................................. Section 9 (page 10)
Mower Blade Maintenance................................................................................Section 10 (page 11)
Greasing Bearings........................................................................................... Section 11 (pages 11)
How to choose the right blade ..............................................................................................Page 12
Mowing Tips ........................................................................................................................ Page 21
SERVICE SECTION BEGINS ON PAGE 13
PARTS SECTION BEGINS ON PAGE 22
LIMITED WARRANTY PAGE 50
PAGE 2
This manual applies to the following equipment:
Bad Boy Diesel Series
Diesel Compact 6000 60˝ 28hp 3-Cylinder Diesel
Diesel 6000 60˝ 35hp 4-Cylinder Diesel
Diesel 7200 72˝ 35hp 4-Cylinder Diesel
72˝ Blade Hi-Lift Fusion Gator Blade Wave Blade
038-7230-00 038-5400-00 038-7215-00
60˝ Blade Hi-Lift Fusion Gator Blade Wave Blade
038-6060-00 038-6003-00 038-6015-00
Deck Belt 72˝ 60˝
041-2525-00 041-0236-000
Pump Belt 041-8411-00
CATERPILLAR CAT 28hp
Oil Filter 063-2010-00
Air Filter CAT 28hp Inner CAT 28hp Outer
063-2060-00 063-2050-00
CATERPILLAR CAT 35hp
Oil Filter 063-2010-00
Air Filter CAT 35hp Inner CAT 28hp Outer
063-2060-00 063-2050-00
Motor Oil 10w30 (4 quarts)
Hydro Oil 20w50 (8 quarts)
COMMONLY USED ITEMS AND PART NUMBERS
PAGE 3
SECTION 1: BASIC INFORMATION
Congratulations on the purchase of your new Bad Boy Mower! The purpose of this manual is to assist
operators in maintaining and operating their machine. The information and instructions in this manual can
help you attain years of performance from your new Bad Boy. Also, check out our website to learn more
about the Bad Boy family.
1.1 All Bad Boy engines use 10W30 engine oil. Conventional or Synthetic may be used.
1.2 All Bad Boy hydraulic systems use 20W50 engine oil. Conventional or Synthetic may be used.
1.3 All Bad Boy Mowers use hi-temp multi-purpose grease. NLGI No. 2 for the grease fittings.
1.4 Diesel models have 12 psi in both front and rear tires.
Warranty Registration
The Warranty Registration form must be completed and signed to validate your warranty. As the new
equipment owner, you are expected to see that the form is completed and forwarded to Bad Boy, Inc.,
at time of delivery. Warranty is non transferable.
Model/Serial Number
Your Diesel model serial numbers are found on the SIN plate underneath seat. The serial numbers are
necessary on the warranty registration form. Also, these numbers can assist you in the ordering of new
parts when replacements become necessary.
Parts/Service
Only Bad Boy replacement parts are to be used on your mower.
Replacement parts are available through your local Bad Boy Mower Dealer. Remember to always provide
the following information when ordering parts:
1. Correct part number
2. Correct serial number
All warranty repair and service must be handled through your authorized Bad Boy Mowers dealer.
To locate the nearest dealer, go to our website and click on Locate a Dealer.
PAGE 4
SECTION 2: MOWER SAFETY GUIDELINES
Never allow untrained people to operate this machine. It is the owner’s responsibility to get training and
see to it that anyone who has permission to use your machine receives the proper training.
Do not mow around people. The factory discharge chute is designed to deflect debris downward, but it
could be possible for debris to be thrown in a way that can cause damage to people or property.
Seek additional training when possible to learn more about safety techniques and practices.
SAFETY PRECAUTIONS
2.2 Always remain seated while operating machine.
2.3 Always maintain a safe distance from people and pets while mowing.
2.4 Always disengage blades, place steering controls in neutral, engage parking brake, and remove
ignition key when leaving operators seat.
2.5 Always operate machine in daylight or with adequate working lights.
2.6 Be alert of surroundings. Watch for rocks, stumps, and mounds or depressions while mowing.
2.7 Always wear eye protection while mowing and servicing.
2.8 Always wear ear protection, such as earplugs, while mowing.
2.9 If you strike something with the mower turn the blades and mower off, engage the parking
brake, and inspect the machine for damage before resuming.
2.10 Be aware of low hanging limbs or objects that could potentially be hazardous while mowing.
2.11 Never operate a poorly maintained machine.
2.12 Never carry passengers.
2.13 Always buckle seat belt, if provided one.
2.14 Never attempt high speed maneuvering, especially around people or property.
2.15 Never put hands or feet under the machine while ignition is on.
2.16 Never refuel machine when engine is running.
2.17 Never leave key in ignition, especially around children.
2.18 Never run engine in enclosed area.
2.19 Do not touch hot parts of machine.
2.20 Do not remove deck wheels.
2.21 Conditions that can affect traction resulting in the loss of control of machine: Wet terrain, Hills
or extreme angles, Depressions in the ground, Mounds of dirt, Extremely dry grass, Soil type
(gravel, sand, clay), Tire pressure
2.22 Be aware of what is located at the bottom of slopes. For example, Rocks, Water, Cliffs, Roads
and Highways
PAGE 5
2.23 Safety warning decals are located on the mower and should always be observed and followed.
2.24 Never operate the mower with the discharge chute open.
2.25 Prevent Fires—Remove grass and debris from engine compartment and muffler area, before
and after operating machine, especially after mowing or mulching in dry conditions.
2.26 Do not store machine near open flame or source of ignition, such as a water heater or
furnace.
2.27 Do not attempt to mount a tire without the proper equipment and experience to perform the
job.
2.28 Always maintain the correct tire pressure. Do not inflate the tires above the recommended
pressure. Never weld or heat a wheel and tire assembly. The heat can cause an increase in air
pressure resulting in a tire explosion. Welding can structurally weaken or deform the wheel.
2.29 Never operate machine in a closed area where dangerous carbon monoxide fumes can collect.
2.30 Let engine cool before storing!!!
2.31 Hydraulic hoses and lines can fail due to physical damage, kinks, age, and exposure. Check
hoses and lines regularly. Replace damaged hoses and lines.
2.32 Park machine on level ground. Never allow untrained personnel to service machine.
Understand service procedure before doing work.
SECTION 3: MOWER OPERATION
Never operate the machine with faulty equipment. Always be alert of sudden changes
in landscape, as the mower will react differently on slopes or embankments than it will
on flat surfaces. Never operate the mower with the discharge chute open. Do not cross
terrain, other than grass, with blades turning. This could cause damage to property or
bystanders.
3.1 Place parking brake in up position
3.2 Drive arms must be in the “open˝ position. While sitting on the machine, each arm is
positioned away from the operator, to the right and left. Drive arms will lock into place and
must be in this position to start machine.
3.3 Put PTO switch in the OFF position.
3.4 If your machine has been equipped with a ROPS (Roll Over Protection System) then you
must fasten seatbelt.
3.5 If machine has not been started recently, engage the choke.
3.6 Make sure nothing is under or around machine.
3.7 Place key in ignition and turn.
3.8 Once machine is started, disengage the choke.
PAGE 6
3.9 Increase RPM by sliding the throttle to fast position, toward the rabbit.
3.10 Owners must become familiar with the controls before operating a zero-turn radius vehicle.
3.11 Start slowly and build your skill level. Have ample practice before using the machine at full
capabilities.
3.12 Be comfortable with machine before engaging blades. Know what each component controls
before using machine.
3.13 Your mower will perform differently on an incline /decline. Be cautious, slow down, and do
not make any sudden jerking movements with control arms. The machine could lose traction
on a decline or tip backwards on an incline.
3.14 Once you become comfortable with your Bad Boy Mower you will notice your overall mowing
time will decrease.
Avoid operating your mower on side hills of over 5 degrees, inclines of over 10 degrees,
and declines of over 15 degrees.
SECTION 4: MOWER MAINTENANCE
**Check each and provide maintenance when needed.
DAILY
4.1 Check Engine Oil
4.2 Check Engine Air Filter
4.3 Tire Pressure
4.4 Inspect Blades
Within FIRST five hours of usage, change engine oil and filter
EVERY 30 HOURS OF USAGE
4.5 Grease Machine
EVERY 50 HOURS OF USAGE
4.6 Change Engine Oil and Filters
Check filters once a year if under 50 hours
Check air and fuel filters more often in dry, dusty conditions
Within FIRST 50 hours of usage, change hydraulic oil and filters
EVERY 250 HOURS OF USAGE
4.7 Change Hydraulic Fluid and Filters
4.8 Refer to manufacturer manual for specific information on maintenance schedules.
PAGE 7
SECTION 5: MOWER STORAGE & TRANSPORTATION
5.1 Keep machine from collecting debris by storing in a covered area while not in use.
5.2 Fuel can harm your machine if left for more than 30 days without changing, especially if the
fuel contains ethanol. Never use fuel with more than 10% ethanol by volume. E-15 is not
permitted.
5.3 Disconnect the negative battery cable when machine will be stored for more than 30 days.
5.4 Always secure machine properly when transporting machine.
5.5 Do not load machine on trailer with blades engaged.
5.6 Do not use ramps to load the machine.
5.7 Make sure Parking Brake is in “up” position.
5.8 In wet conditions tires may spin while loading / unloading. If necessary, wait for dry
conditions before loading / unloading.
5.9 Make sure mode of transportation is suitable to bear the weight of mower.
5.10 Deck height should be set at maximum before attempting to load.
5.11 Secure mower with at least two straps capable of securing weight of mower.
SECTION 6: TROUBLESHOOTING
6.1 Q: How do I prevent an uneven cutting pattern and increase the quality of cut?
6.1 A: Check tire pressure, check blade sharpness (replace blades or sharpen at least once
per year or when needed), make sure blades are tightened properly, check spring and belt
tension, check the underside of the deck to ensure the mower deck is free of grass build-up
and debris, make sure your machine is at full throttle, and vary your mowing pattern each
time you cut your grass.
6.2 Q: What should I do if my mower won’t start?
6.2 A: Check battery charge and connection (grounds), check your fuel (make sure fuel is less
than 30 days old and contains no water), make sure your spark plug is in good condition
and spark plug wire is attached, and make sure air filter is clean (a dirty filter makes it more
difficult for the engine to draw air). Check for broken wires or bad connections.
6.3 Q: What should I do if the blades won’t engage?
6.3 A: Make sure the safety switch is plugged in on the bottom of seat. Check the underside of
the PTO engager to ensure the plug is secure at switch.
6.4 Q: What type of fuel is recommended for my mower?
6.4 A: We recommend that you use a name brand diesel fuel to ensure quality.
PAGE 8
6.5 Q: Do you offer touch-up paint for your mowers?
6.5 A: Touch-up paint is available. Contact your local dealer for more information.
6.6 Q: How durable is the electric deck lift?
6.6 A: The actuator which controls the deck height is designed for moving loads of up to 1000
pounds and has a static holding capability which exceeds 3,000 pounds. Our ¼˝ deck weighs
approximately 250 pounds which is only 25% of working capability.
SECTION 7: CONTROLS
7.1 Ignition Switch—Bad Boy Mowers have a three position ignition switch: off, run, and start.
With key inserted, rotate it clockwise to START position and release key when engine starts,
and switch will automatically return to he RUN position.
7.2 Throttle Control—A cable is connected to the engine throttle for controlling engine speed.
Move lever forward to increase engine rpm, move lever backward to decrease engine rpm.
7.3 Choke Control—A cable is linked to manually operate the engine choke. When the lever is
in the down position, the choke is in the off (run) position. When the lever is pulled up, the
choke is in the on (start) position. Do not operate the machine in the on (start) position. The
choke lever is behind the throttle control.
7.4 Control Levers—These levers control the mower’s speed, direction, and neutral lock. These
levers are used to steer, accelerate, decelerate and change direction. (Drive Arms)
7.5 Blade Engage Switch—This switch engages the blades. Pull the switch up to engage the
blades and push the switch down to disengage the blades.
7.6 Deck Lift Control—The deck lift switch is used to raise and lower the deck. Pull the switch
backwards to raise the deck and push the switch forward to lower the deck.
7.5
7.3
7.4
7.1 7.6
7.2
PAGE 9
SECTION 8: MOVING INOPERABLE MOWER
8.1 Do not tow machine. Use a winch to load on a trailer for transporting.
8.2 ATTENTION: RETURN BYPASS VALVES TO OPERATING POSITION BEFORE RUNNING
MOWER FOLLOWING REPAIRS.
8.3 Diesel Models are equipped with two neutral engage/disengage arms, located at the rear
of the mower protruding from the frame and under the muffler. By pulling the arms out the
mower can be put in a neutral position. Return the arms to the “forward position for normal
operation.
8.4 Your Bad Boy Mower Weighs: Diesel SERIES: 1607—1935 lbs
*** Weights fluctuate with the addition of accessories.
8.5 As you can see by the weights of the machines, you shouldn’t ever try to push or pull a Bad
Boy Mower by hand. This could cause serious bodily injury.
8.6 Hopefully, you’ll never need to use this section of the manual. However, if you do, use
extreme caution when moving machine!
SECTION 9: INSTRUMENTATION
9 .1 Electronic Hour Meter—Registers Hour increments up to 9,999.9 total hours. This meter
records the cumulative time the engine is running.
PAGE 10
SECTION 10: MOWER BLADE MAINTENANCE
10.1 Check mower blades after each use. This is essential for maintaining well-groomed turf. Keep
the blades sharp. If a dull blade is used for cutting, the grass will tear rather than cut. This
could damage the grass leaving a brown frayed top on the grass within a few hours. A dull
blade will also require more power from the engine.
10.2 NEVER attempt to straighten a bent blade by heating. NEVER attempt to weld a cracked
blade. The blades can break and cause serious injury or death.
10.3 NEVER work with blades while engine is running or deck clutch is engaged.
10.4 ALWAYS place deck clutch in DISENGAGE position while performing maintenance.
10.5 Use blocks when you MUST work under mower.
10.6 ALWAYS wear thick gloves when handling blades.
10.7 ALWAYS check for blade damage if mower strikes rock, branch, or other objects that could
potentially damage the blade. (REMEMBER: NEVER CHECK BLADE WHILE ENGINE IS ON!
NEVER CHECK BLADES WHILE BLADES ARE ENGAGED!)
SECTION 11: GREASING THE BEARINGS
11.1 Park the machine on a level surface and disengage the blade control switch.
11.2 Move the motion control levers outward to the neutral position, engage parking brake, stop
the engine, remove the key, and wait for all moving parts to stop before leaving the operating
position.
11.3 Grease Type: NGLI grade #2 multi-purpose gun grease. Grease the front cater pivots.
11.4 Clean the grease fittings with a cloth. Scrape any paint off the front of the fitting(s).
11.5 Connect a grease gun to each fitting. Pump grease in fittings until greases begins to seep out
of the bearings. Wipe up excess grease.
11.6 Refer to service manual section for grease fitting locations.
PAGE 11
HOW TO CHOOSE THE RIGHT BLADE
Essentially there are only TWO basic styles of mowing blades used or approved for use on our current
products:
1) The standard style of mowing blade is essentially designed for cutting grass and effectively discharging
the clippings out from the deck to fall onto the lawn or to be captured in a grass collection system.
Standard blades are also referred to as “2-in-1” (discharging & bagging ) or “high-lift” blades (because
they are designed to create a higher-lifting airflow).
2) Mulching blades generally have a more curved style surface and frequently include extra cutting
surfaces along the blade edges. These blades may also come in a “+” design (which is actually two
individual blades arranged in a perpendicular fashion to enhance mulching). The “+” blades are usually
found on older style mowers; newer ones utilize blades with more advanced mulching technology.
Mulching blades may also be referred to as “3-in-1” (mulching, discharging & bagging) or “all-purpose”
blades.
Bear in mind that the re-circulating airflow design of 3/1 blades makes them less efficient at discharging
grass clippings than a standard 2/1 blade. As with most all-purpose tools, there is some give and take as
opposed to using a tool designed for a more specific purpose.
If you’re experiencing less-than-desired cutting or discharging performance with a 3/1 blade, you may want
to check into using a 2/1 blade. Conversely, if you’re using a 2/1 blade and want to mulch clippings, you
should see about the availability of mulching blades or a mulching kit.*
The type of blade installed on a new mower is a decision the retailer makes for each model of mower, based
on the expected needs of most customers. If you’re unsure of which blade is on a particular model, inspect
the blade. Blades have part numbers stamped into them. Then compare these part numbers with the unit’s
Operator’s Manual or Parts List.
It is true there are many other styles of blades available. But since we don’t manufacture or recommend
using these other aftermarket styles, we will leave them out of this discussion. Should you want more
information on special application or aftermarket blades, you should contact the companies that make these
products. NOTE: Customers using non-OEM blades do so at their own risk. The use of unapproved (non-
OEM) blades may void any or all of the mower and engine factory warranties.
* MULCHING KITS – These generally consist of mulching blades and a mulching plug (which closes off
the discharge opening to keep the clippings contained under the deck for re-cutting) plus any necessary
hardware for installation. Please check with your parts distributor regarding the contents of a particular
mulching kit.
PAGE 12
SERVICE SECTION
SECTION 1: HYDROSTATIC SYSTEM
To change hydro oil on Pup, Lightning, AOS, and Diesel
models, remove oil return lines from top of hydro tank
and place them in a disposable oil container. Start and run
mower until oil level is reduced down to about 2” of oil
remaining in the tank. Do not allow air to enter the oil lines
in the bottom of the tank. Keep in mind that only about
75% of the hydro oil can be changed at a time. Use only
20w50 motor oil in the hydro system. (Conventional or
synthetic oil may be used) Bad Boy recommends that the
hydro oil and filters be changed within the first 50 hours
of usage and every 500 hours thereafter or once a year.
(Pup, Lightning, AOS, and Diesel Models)
Change hydro oil filters by unscrewing them from the
filter head. Fill new filters with 20w50 motor oil before
installing. Use only Bad Boy replacement filters. Using any
other filter will result in damage to the hydro system and
void the warranty.
Once the system is refilled with oil, lift rear of mower until
tires are off the ground. Start engine, release parking
brake, stay clear of moving rear tires, loosen bypass bolt
½ to ¾ turns, move drive arms forward and backward 4 to
6 times slowly. This will purge the air from the system.
(the bypass bolt has a hole drilled through the side of the
bolt head). This valve also serves as a neutral for moving
the mower without the engine running.
PAGE 13
SECTION 2: DRIVE BELT
Shown above is a typical pump belt tesioner for Pup and
Lightning models.
Factory setting is about .030” (about the thickness of a
credit card) between coils as shown.
Shown to the right is a typical pump belt layout for most
models.
SECTION 3: ENGINE
When servicing the fuel system on the CAT Diesel, it is
necessary to purge the air from the system by loosening
the 9/16” bolt on top of the fuel filter and pumping the fuel
bulb (located underneath the radiator) until air bubbles are
no longer visible.
PAGE 14
Most models have a drain hose installed on the engine,
for easier oil changes. All gas engines used by Bad Boy
use 10w30 and have an oil capacity of 2 quarts. Bad Boy
recommends that the oil and filter be changed every 50
hours of usage.
The fuel filter is located in the fuel line about 12” from the
carburetor on the side of the engine. Note the direction of
flow on the side of the filter. Replace once a year.
Most all models have a vacuum operated fuel pump
bolted to the side or top of the engine. The pump has a
“fuel in”, a “fuel out”, and a vacuum line coming from the
engine block. Fuel flow can be checked here if the pump is
suspected to be defective.
Remove and inspect air cleaner weekly. (More often in
dusty conditions). Do not blow filter out with air pressure,
this will cause the filter to be filled with tiny holes that
will allow dirt to enter. Instead, tap filter on side to remove
any debris. Replace at least once a year, more often in
dusty conditions.
Torque the clutch bolt to 50 ft. Lbs. on all models.
Retorque at every oil change. (All Models)
Keep radiator screen clean and free of debris on
liquid cooled models. Check screen hourly during dry
conditions. Slide radiator screen up to remove.
PAGE 15
SECTION 4: ELECTRICAL SYSTEM
On most larger commercial engines (27 hp and up), the
25 amp main fuse is located about 3” from the starter on
the engine. (shown in first image on right). On smaller
commercial and light duty commercial mowers, the 25
amp main fuse is located just behind the battery connected
to the starter solenoid. (Shown in second image on right).
Always check the condition of the wiring harness ground
cable. The ground is located just inside of the right side
fuel tank on most models. Ensure that the ground is
connected, clean, and tight. On some models, this wire
may be connected to the negative side of the battery.
Check the condition and connection of the relays located
under the seat. Ensure that they are clean and connected.
Make sure that wire terminal ends have not been pushed
out of the relay block.
On most models, the red wire coming out of the engine is
the charging wire from the alternator. Check for 13.6—14.2
volts DC at this wire with engine at full throttle.
PAGE 16
PAGE 17
SECTION 5: FRAME
For non-suspension models, torque front fork castle nut to
40 ft.lbs. Be sure to spin the fork while torquing the nut to
ensure that no bearing damage is done.
Be sure to reinstall the cotter pin into the castle nut. Always
try to go tighter on the nut to find a castellation for the pin
to fit in. Never back the bearing tension off after torquing the
nut, this will “spring” the bearing cage.
Torque rear wheel lugs to 65-75 ft.lbs.
Re-torque at every oil change.
There is one grease fitting in each front wheel and one in
each front caster bearing housing. Grease at every engine oil
change.
There is one grease fitting on each of the actuator bar pillow
blocks located under the fuel tanks. Grease twice a season.
PAGE 18
The pump belt tensioner is located under the engine and has
a grease fitting at its pivot point. Grease at every engine oil
change.
The deck belt tensioner is located at the rear of the deck and
has a grease fitting on its pivot point. Grease at every engine
oil change.
The control arm blocks have grease fittings located on the
top and bottom of each block. Grease one time a year.
SECTION 6: CUTTING DECK
To remove the deck belt, lift up on the belt while rotating the
pulley to roll the belt up and off of the pulley. (be sure not to
get your fingers between belt and pulley).
To check the level of the deck, start on a flat surface and
set the air pressure in all four tires. Raise the deck up, and
measure all four corners of the deck to see if it is level from
left to right and front to back. All decks should be level from
left to right and have a 1/8” pitch down in the front.
If deck adjustments are necessary, start with the chain
length adjusters. These adjusters affect the overall height of
the deck and the level from left to right.
PAGE 19
The large turn buckles on the front of the deck only affect
the pitch of the deck or the level from front to back.
The deck spring tension is critical. If the tension is too
much, it will cause the spring to break. If too loose, the belt
can jump off or slip on the pulleys and cause a cut quality
issue. With the deck up, the spring coil gap should be about
.025” - .030” (about the thickness of a credit card). Spring
tension adjustments can be made by sliding the bolt shown
above forward or backward in the slot of the deck.
The condition of the blades can drastically affect the cut
quality of the mower deck. Replace as necessary. These
blades were used considerably too long. Resharpening is
recommended by professionals only to determine when
the blade needs to be replaced and because of the need for
rebalancing.
To change blades, it may be easier to use a piece of wood to
keep the blade from turning so that the bolt can be loosened.
Re-torque the blade bolts to 90-110 .lbs.
The blade spindles contain a sealed ball bearing in the top
and bottom of the
spindle. The bearings
are replaceable for a
more cost effective
repair.
PAGE 20

This manual suits for next models

1

Other Bad Boy Lawn Mower manuals

Bad Boy MZ BMZ4219KO User manual

Bad Boy

Bad Boy MZ BMZ4219KO User manual

Bad Boy Diesel Guide

Bad Boy

Bad Boy Diesel Guide

Bad Boy BRN61247PK User manual

Bad Boy

Bad Boy BRN61247PK User manual

Bad Boy Q0378 User manual

Bad Boy

Bad Boy Q0378 User manual

Bad Boy ZT AVENGER BAZ54KT740 User manual

Bad Boy

Bad Boy ZT AVENGER BAZ54KT740 User manual

Bad Boy OUTLAW XP Guide

Bad Boy

Bad Boy OUTLAW XP Guide

Bad Boy 1100cc User manual

Bad Boy

Bad Boy 1100cc User manual

Bad Boy ZT ELITE BZS48KT740 User manual

Bad Boy

Bad Boy ZT ELITE BZS48KT740 User manual

Bad Boy BB21 User manual

Bad Boy

Bad Boy BB21 User manual

Bad Boy BB25 User manual

Bad Boy

Bad Boy BB25 User manual

Bad Boy Outlaw BBS 4800 Guide

Bad Boy

Bad Boy Outlaw BBS 4800 Guide

Bad Boy PUP User manual

Bad Boy

Bad Boy PUP User manual

Bad Boy OUTLAW Guide

Bad Boy

Bad Boy OUTLAW Guide

Bad Boy Outlaw Stand-On BBS 3600 Guide

Bad Boy

Bad Boy Outlaw Stand-On BBS 3600 Guide

Bad Boy ZT 2600 Guide

Bad Boy

Bad Boy ZT 2600 Guide

Bad Boy MZ 42" Guide

Bad Boy

Bad Boy MZ 42" Guide

Bad Boy 2010 6000 Compact User manual

Bad Boy

Bad Boy 2010 6000 Compact User manual

Bad Boy Outlaw 6100 Guide

Bad Boy

Bad Boy Outlaw 6100 Guide

Bad Boy Diesel 7200 Guide

Bad Boy

Bad Boy Diesel 7200 Guide
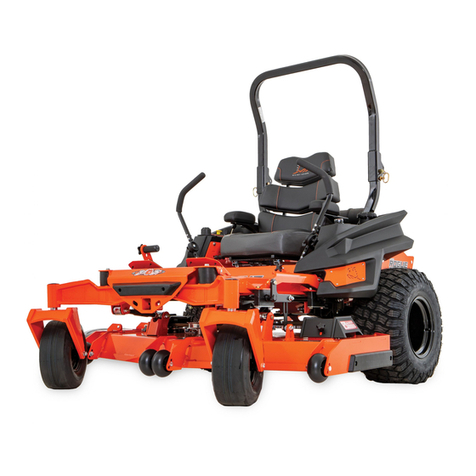
Bad Boy OUTLAW EXTREME Guide

Bad Boy

Bad Boy OUTLAW EXTREME Guide

Bad Boy RENEGADE Series Guide

Bad Boy

Bad Boy RENEGADE Series Guide

Bad Boy 7800670 User manual

Bad Boy

Bad Boy 7800670 User manual

Bad Boy COMPACT OUTLAW Guide

Bad Boy

Bad Boy COMPACT OUTLAW Guide

Bad Boy ZT User manual

Bad Boy

Bad Boy ZT User manual

Popular Lawn Mower manuals by other brands

Husqvarna Automower 305 Technical manual

Husqvarna

Husqvarna Automower 305 Technical manual

Husqvarna RZ5424 parts manual

Husqvarna

Husqvarna RZ5424 parts manual

Toro Master Commercial 3000 Series Operator's manual

Toro

Toro Master Commercial 3000 Series Operator's manual

Toro Super Recycler 21564 Operator's manual

Toro

Toro Super Recycler 21564 Operator's manual

Craftsman 37102 instruction manual

Craftsman

Craftsman 37102 instruction manual

Stiga PARK PRO 23 4WD installation guide

Stiga PARK

Stiga PARK PRO 23 4WD installation guide

Jacobsen Super LF 1880 Fairway 67923 Parts & maintenance manual

Jacobsen

Jacobsen Super LF 1880 Fairway 67923 Parts & maintenance manual

MTD 140-760 14 H.P. owner's guide

MTD

MTD 140-760 14 H.P. owner's guide

Husqvarna Rider 213C Workshop manual

Husqvarna

Husqvarna Rider 213C Workshop manual

Snapper LT12D331B Series Safety instructions & operator's manual

Snapper

Snapper LT12D331B Series Safety instructions & operator's manual

McCulloch MC1236ST owner's manual

McCulloch

McCulloch MC1236ST owner's manual

Toro Z593-D Z Master 74264TE Operator's manual

Toro

Toro Z593-D Z Master 74264TE Operator's manual

Makita HML01 instruction manual

Makita

Makita HML01 instruction manual

EMAK 654 Series Operator instructions

EMAK

EMAK 654 Series Operator instructions

Exmark METRO Operator's manual

Exmark

Exmark METRO Operator's manual

Stihl RMA 2 RV instruction manual

Stihl

Stihl RMA 2 RV instruction manual

Alamo Rhino SM72 Operator's manual

Alamo

Alamo Rhino SM72 Operator's manual

Black & Decker CM2040 instruction manual

Black & Decker

Black & Decker CM2040 instruction manual

manuals.online logo
manuals.online logoBrands
  • About & Mission
  • Contact us
  • Privacy Policy
  • Terms and Conditions

Copyright 2025 Manuals.Online. All Rights Reserved.