7
To adjust menu settings.
p/q
To select a menu item.
OK
Confirm the selection.
14.
15.
16.
17.
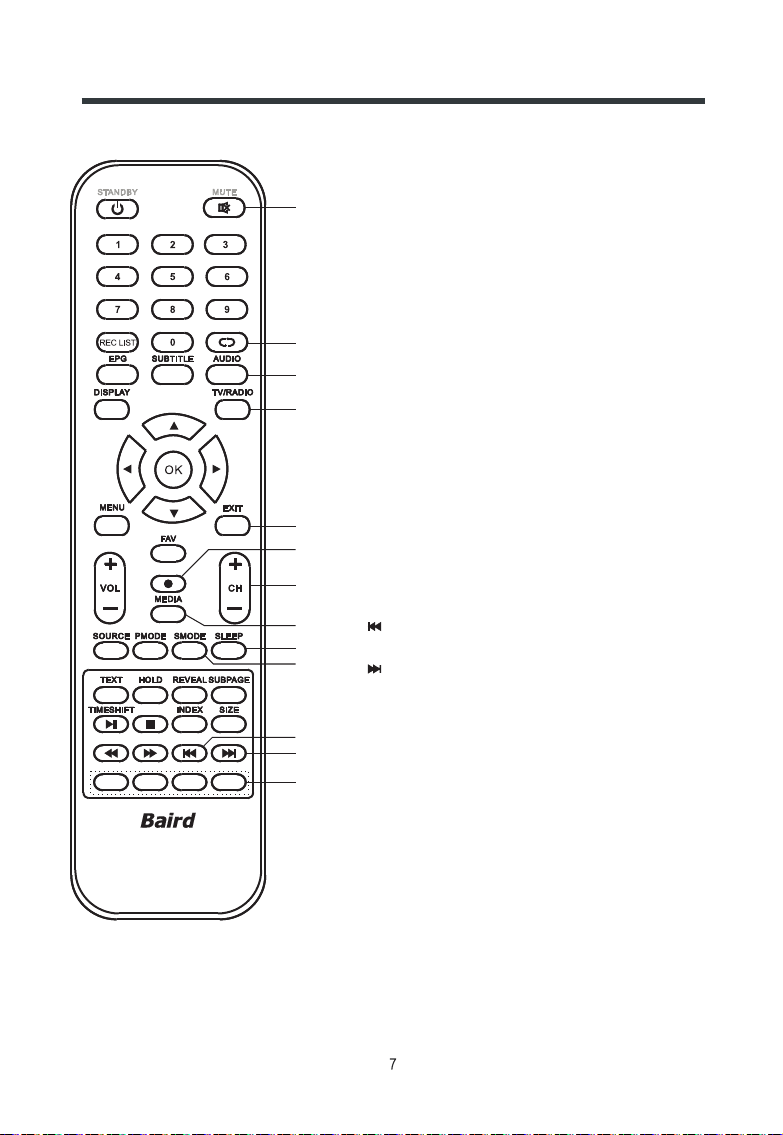
1. STANDBY
To switch on the LED TV/monitor when at standby
mode and vice versa.
2. NUMBER BUTTONS
To directly select the desired programme number.
3. REC LIST
In DTV mode, display PVR Recorded List Programme menu.
4. EPG
In DTV mode, press to display Electronic Program Guide menu.
5. SUBTITLE
In DTV mode, press to display the caption.
6. DISPLAY
To display setup information of channel.
8. MENU
To enter the TV menu, or exit from the TV menu .
9. FAV
This is a hot button for displaying the favourite list
defined by yourself.
10. VOL-/+ (VOLUME UP/DOWN)
To increase or decrease the volume.
11. SOURCE
To select an input source.
12. PMODE
To select the picture mode.
13. TELETEXT BUTTONS
Use for teletext function.
Note: Press the SIZE button to select a display mode except
teletext mode.
TIMESHIFT/
In DTV mode, press to execute time shift function.
In USB mode, press to play or pause.
In USB mode, press to stop.
In USB mode, press to select backwards play.
In USB mode, press to select forwarding play.
. t/u
Controls
OK