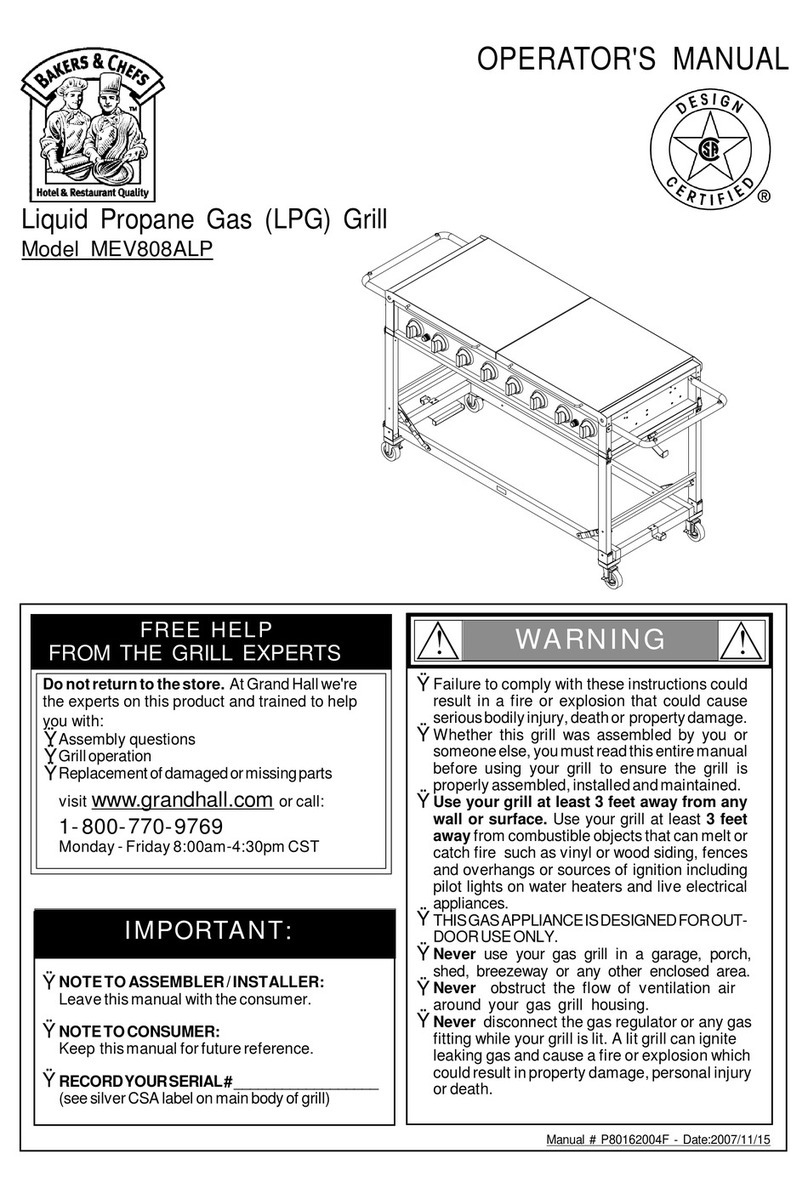
Bakers & Chefs 9905TB Quick reference guide

P4770A
NOTETOINSTALLER:
LEAVE THESE INSTRUCTIONS WITHTHE CONSUMER AFTER INSTALLATION.
NOTETOCONSUMER: RETAIN FOR FUTURE REFERENCE.
THIS OUTDOOR COOKING GASAPPLIANCE IS NOTINTENDED TOBE
INSTALLED IN OR ON RECREATIONALVEHICLES AND/OR BOATS.
READ THE FOLLOWINGINSTRUCTIONS CAREFULLY AND BE SURE YOUR
GRILL IS PROPERLY INSTALLED, ASSEMBLED AND MAINTAINED. FAILURE
TOFOLLOWTHESE INSTRUCTIONS MAYRESULT INSERIOUS BODILY
INJURY AND/ORPROPERTYDAMAGE.IFYOUHAVEQUESTIONS
CONCERNINGASSEMBLYOROPERATION,CALLOUR SERVICECENTER
AT1-800-770-9769, MONDAYTHROUGH FRIDAY8:00AM -4:30 PM,CST.
ASSEMBLY&OPERATING INSTRUCTIONS
DATE:JUNE24,1999
REVISED:
SAFETYINSTRUCTIONS
PARTSLIST
ASSEMBLY INSTRUCTIONS
LIGHTING &OPERATING INSTRUCTIONS
CLEANING &MAINTENANCE INSTRUCTIONS
FREQUENTLYASKED QUESTIONS
INTRODUCTIONTOCOOKING METHODS
BAKERS &CHEFS RECIPES
2
5
8
12
13
15
17
26
TABLE OF CONTENTS PAGE
MODEL
9905TB
LPG

SafetyInstructions
Read carefully before assembling and operating your Gas Grill.
INSTALLATION
This gas grill must be installed in accordance with the
local codes or, ifin an area without local codes, with
the latest edition ofthe National Fuel Gas Code ANSI
Z223.1. In Canada, installation must conformto the
standard CAN/CGA 1-b149.1 and/or .2 (Installation
Code for Gas Burning Appliances and Equipment) and
anylocal codes.
THE LOCATION FOR YOUR GRILL
DO NOTuse your gas grill in garages, porches,
breezeways, sheds or other enclosed areas. Your gas
grillistobeusedOUTDOORSONLY,at least 21" from
the backand side to any combustible surface. The
grill should not be placed under anysurface that will
burn. Do not obstruct the flowofcombustion and
ventilation air around the grill housing.
Thisoutdoorcookinggasappliance isnotintendedtobe
installed in or on recreational vehicles and/or boats.
PROTECTYOUR CHILDREN: Keep themaway
fromahot grill during and after cooking. Do not allow
children to playnear or operate grill.
CHECKING FOR GASLEAKS
NEVER TESTFOR LEAKS WITHAFLAME
Prior to first use and at the beginning ofeach new
season (or whenever LP gas cylinder is changed),
you must checkfor gas leaks. Followthese steps:
1.
2.
3.
4.
Makesoap solution bymixing one part liquid
detergent and one part water.
Turn off heat control valve(s), then turn on gas at
source.
Applythe soap solution to all gas connections.
Bubbles will appear in the soap solution ifconnec-
tions are not properlysealed. Tighten or repair
as necessary.
Ifyou have agas leakthat you cannot repair, turn
off the gas at the source, disconnect fuel line from
grill and immediatelycall your grill dealer or gas
supplier for professional assistance.
LP GASCYLINDER SAFETY
Your gas grill is designed for use with astandard 20
lb. LP gas cylinder (not included). DO NOTCONNECT
YOUR GRILL TO AN LP GAS CYLINDER EXCEEDING
THIS CAPACITY.Atankofapproximately12 inches
in diameter by18-1/2 inches high should be the
Maximumsizetankused. Werecommend buying an
"OPD" gas cylinder -which offers an Overfilling
Prevention Device. This safetyfeature prevents the
tankfrombeing accidentallyoverfilled which can cause
malfunction with your cylinder, regulator and/or grill.
Also be sure that (1) the cylinder is provided with a
shutoff valve terminating in an LP gas supplycylinder
valve outlet compatible with aType I cylinder con-
nection device and asafetyreliefdevice having a
direct communication with the vapor space ofthe
cylinder; (2) the cylinder supplysystemmust be
arranged for vapor withdrawal; and (3) the cylinder
used must include a collar to protect the cylinder valve.
The LP gas cylinder must be constructed and marked
in accordance with specifications ofthe U.S. Depart-
ment ofTransportation (DOT). In Canada, gas
cylinders must meet Canadian Transportation and
Communications(CTC) specifications.
FOR YOUR SAFETY
If you smell gas:
1. Shut off gas to the appliance.
2. Extinguish anyopen flame.
3. Open lid.
4. If odor continues, immediatelycall
your gas supplier or your fire
department.
FOR YOUR SAFETY
Do not store or use gasoline or other
flammable vapors and liquids in the
vicinity of this or any other appliance.
AnLP cylinder not connected for use
shallnotbestoredinthevicinityofthis
or anyother appliance.
(a) Do not store (emptyor full) spare gas
cylinders under or near this or anyother
appliance.
(b) Never fill the cylinder beyond 80 percent
full.
If the information in "(a)" and "(b)" is not
followed exactly,afire causing death or
serious injurymayoccur.
Keep the gas fuel hose awayfrom hot grill
surfaces and dripping grease. Avoid unnec-
essarytwisting of hose. VisuallyInspect
hose prior to each use for cuts, cracks,
excessivewear or other damage.
If damaged -do not use the grill. Contact
your dealer for afactoryauthorized replace-
ment hose.
NEVER light grillwith lid closed or before checking
to insure burner tubes are fullyseated over gas
valveorifices.
NEVER lean over cooking surface while lighting
grill. Use barbecue tools with long wooden
handles and good qualityinsulated oven mitts
when operating grill.
1.
2.
PAGE 2

SafetyInstructions
DANGER: If you smell or hear the hiss of
escaping gas from the LP gas cylinder:
Get awayfrom the LP gas cylinder.
Do not attempt to correct the problem
yourself.
Call your fire department (Do not make the
call from near the LP gas cylinder -your
telephone is an electrical device).
>
>
>
Never connect an unregulated LP gas cylinder to
your grill. Agas regulator adjusted to have an outlet
pressure of11" water column(W.C.) is supplied for
connection to the LP gas cylinder. The pressure
regulator and hose assemblysupplied with the appli-
ance must be used. Replacement pressure regulators
and hose assemblies must be those specified bythe
appliance manufacturer.
SAFETY!
BEWARE
OF
SPIDERS
CAUTION: BURNER TUBES MUSTBE IN-
SPECTED AND CLEANED BEFORE FIRST
USE
Spiders and small insects occasionallyspin
webs or makenests in the burner tubes during
warehousing and transit. These webs can lead
to agas flowobstruction which could result in
afire in and around the burner tubes. This
type offire is knownas "FLASH-BACK" and
can cause serious damage to your grill and
create an unsafeoperating condition for the
user. Although an obstructed burner tube is
not the onlycause of"FLASH-BACK" it is the
most common cause and frequent inspection
and cleaning ofthe burner tubes is necessary.
Have the LP gas cylinder filled byareputable LP gas
dealer, and visuallyinspected and re-qualified at each
filling.
Have your LP gas dealer check the release valve after
everyfilling to assure that it remains free ofdefects.
Alwayskeep cylinder in an upright position. Always
close the cylinder valve when the grill is not in use.
Do not subject LP gas cylinder to excessive heat.
Never store your LP gas cylinder indoors. Ifyou store
your grill indoors, ALWAYS disconnect LPgas
cylinder FIRST,and store LP gas cylinder safely
outside.
When the appliance is not in use, the gas must
be turned off at the supplycylinder.
Storage ofan appliance indoors is permissible only
ifthe cylinder is disconnected and removed fromthe
appliance.
Cylinders must be stored outdoors in awell-ventilated
area out ofthe reach ofchildren. Disconnected
cylinders must not be stored in abuilding, garage or
anyother enclosed area.
HOSE ASSEMBLY SAFETY
Checktankvalve features to ensure it has proper
external matingthreads. (Type 1connection per 10-
94AGARequirement)
Makesure all burner valves are in their off position.
Inspectvalveconnectionsportandregulatorassem-
bly.Lookfor anydamage or debris. Remove any
debris. Inspect hose for damage. Never attempt to
usedamagedorpluggedequipment. See your local
LP gas dealer for repair.
When connecting regulator assemblyto the tank
valve,handtightennutclockwisetoapositivestop.Do
Not use awrench to tighten. Use ofawrench may
damagequickcouplingnutandresultinahazardous
condition.
Open tankvalve fully(counter-clockwise). Use a
soapywater solution to checkall connections for
leaksbeforeattemptingtolightgrill.Ifaleakisfound,
turntankvalveoffanddonotusegrilluntillrepairscan
be made by alocal LP gas dealer.
2.
3.
4.
5.
6.
a) Turn the burner valve off.
b) Turn the tankvalve off fully.( Turn clockwise to stop.)
c) Detach the regulator assemblyfromtankvalve by
turning the quickcoupling nut counter-clockwise.
Todisconnect LP gas cylinder:
Thehoseassemblymustbeinspectedbeforeeachuseof
theappliance. Ifit is evidentthere is excessiveabrasion
orwear;orthehoseiscut,itmustbereplacedpriortothe
appliance being put into operation.
TOCONNECTTHE LP GASSUPPLY CYLINDER,
PLEASE FOLLOW THESE STEPS:
Makesure tankvalve is in its full off position. (Turn
clockwiseto stop)
1.
PAGE 3

SafetyInstructions
BURNER TUBE CLEANING
For cleaning the burner tubes. Followthe procedure
that is most convenient for you.
Remove burner assemblyfromthe grill bowl.
Bend astiff wire, (a light weight coat hanger works
well) into asmall hookas shownbelow,
Run the hookup through each venturi tube and
into the burner several times.
1.
Run the brush up through each venturi tube and
into the burner several times.
SAFETY!
Use abottle brush with aflexible handle.
2.
VERY IMPORTANT:
The location of burner with respect to orifice is vital for safe operation. Check to assure the valve
orifices are inside of the burner tubes before using your gas grill. See drawing below.
If the burner tubes (venturi) do not fit over the valveorifices, lighting the burners maycause explosion
and/or fire.
CARE AND MAINTENANCE
As with all appliances, proper care and maintenance
will keep themin top operating condition and prolong
their life. Your newgas grill is no exception. By
following these cleaning procedures on atimelybasis,
your grill will be kept clean and working properlywith
minimumeffort.
FOLLOWTHEBURNERANDBURNERTUBE
CLEANING PROCEDURE BEFORE ASSEMBLY OF
YOUR GRILL.
Toreduce the chance of"Flash-back", the procedure
belowshould be followed at least once amonth in
late summer or earlyfall when spiders are most active,
or when your grill has not been used for an extended
period oftime.
Wire brush entire outer surface ofburner to
remove loose corrosion.
Clean anyclogged holes with astiff wire (for
example: an open paper clip).
Inspect the burner assemblyfor anyopening
caused bycorrosion.
Ifopenings due to corrosion are found, order a
newburner.
Replace the burner and cotter pin as described
in the assemblyinstructions.
Checkthe burner for proper location after replac-
ing.
Checkto assure the valve orifices are inside of
the burner tubes.
Should "Flash-back"occur, immediatelyturn the con-
trol knobs to "OFF" and carefullyturn the gas supply
off at the gas source.
1.
2.
3.
4.
5.
6.
7.
BURNER CLEANING
Regardless ofwhich venturi cleaning procedure you
used, werecommend that you complete the following
steps to help prolong burner life.
Control Knob Ignitor
Gas Valve Orifice
Spark Electrode
Gas Collector Box
BurnerBurner Port
Burner Tube
section of Manifold
PAGE 4

Remove allcomponentsfromcartonsand placewithin easyreach. Turnthelargestcarton
upside downand it will provide acomfortable height work surface for grill assembly.
9905TB Parts List
PAGE 5

HOW TOORDER REPLACEMENTPARTS
AND ACCESSORIES:
Callourservice center at 1-800-770-9769,
MondaythroughFriday8:00am-4:30 pm,
CST.
To make sure you obtain the correct replace-
ment part(s) for your Baker's &ChefGas
Grill, please refer to the parts list on this
page. The following information is required
to assure getting the correct part:
1. Gas Grill Model Number (see AGA sticker
2. Part Number
3. Description
4. Quantityofparts needed
Please allowsufficient timeto process and
ship.
IMPORTANT: Keep this assemblyand op-
erating instruction manual for convenient
referral and for part replacement.
IMPORTANT: Use onlyfactoryauthorized
parts. The use ofanypart that is not factory
authorized can be dangerous. This will also
void your warranty.
QTY.REF#PART#DESCRIPTION
on grill)
9905TB Parts List
PAGE 6
1a.
1b.
1c.
2.
3.
4.
5.
1
1
1
1
1
3
3
1
1
1
1
1
LIDPLATE-StainlessSteel
LIDSIDEPANEL,RIGHT
LIDSIDEPANEL,LEFT
HEATINDICATOR
ROUNDLIDHANDLE-Stainless Steel
CASTIRONCOOKING GRID
STEELFLAMETAMER
GREASEDRAININGTRAY
BOWLFRONTPANEL
BOWLREAR PANEL
BOWLSIDEPANEL,RIGHT
BOWLSIDEPANEL, LEFT
CASTIRONBURNER
GREASERECEPTACLE
SPARK ELECTRODE W.WIRE
GASVALVEASSEMBLY
GASMANIFOLD
CONTROLPANEL-Stainless Steel
CONTROL KNOB
HEATSHIELDFOR CONTROLPANEL
SIDESHELF-Stainless Steel
SIDESHELFBRACKET
SIDEPANEL
BOTTOMSHELF BRACKET-REAR
BOTTOMSHELF BRACKET-FRONT
BOTTOMSHELF
CARTLEGS-WHEEL SIDE
CARTLEGS-CASTERSIDE
WHEEL
WHEELHUB
CASTER
REARPANEL
TANKHOOK
TANK-HOLDINGSTRAP
REGULATOR
LIGHTINGSTICK
DOOR BRACKET
DOORPANEL-Stainless Steel
DOOR KNOB
TANKHOLDER
HEAT-INSULATINGSPACER-Phenolic
CROSSOVERCHANNEL
NAMEPLATE
U-SHAPEINSERT
CAP FORSIDE SHELF BRACKET
CASTERSEAT
REARWIND SHIELD
BACKBURNER
GASTUBEASSEMBLY
COVER FOR GAS TUBE
SPARK ELECTRODE W.WIRE
COVER FOR BACK BURNER
WINDSHIELD, RIGHT
WINDSHIELD, LEFT
ORIFICE
GASVALVEASSEMBLYFORBACK
BURNER
P0129C
P0146A
P0147A
P0615C
P0234A
P1621C
P1721B
P2726A
P0733A
P0734A
P0729A
P0730A
P1925A
P2717A
P2623A
P3229T
P5029A
P2943A
P3409B
P2943B
P1133B
P1207A
P4318A
P1034D
P1034E
P1034F
P0929B
P0829C
P5106C
P5113A
P5109B
P4317B
P4023C
P4008E
P3632D
P5540A
P4407B
P4329A
P3419A
P4023B
P5573A
P2219A
P0435A
P5574A
P4517A
P4519A
P8089A
P1934A
P3512A
P8084A
P2624A
P8085A
P8086A
P8086B
P5633A
P3229U
6.
7a.
7b.
7c.
7d.
8.
9.
10.
11.
12.
13.
14.
15.
16.
17.
18.
19.
20.
21.
22.
23.
24.
25.
26.
27.
28.
29.
30.
31.
32.
33.
34.
35.
36.
37.
38.
39.
40.
41.
42.
43.
44.
45.
46.
47.
48.
49.
50.
51.
3
1
3
3
1
1
4
1
2
4
2
1
1
1
1
1
2
2
2
1
1
1
1
1
1
2
2
1
2
1
1
4
4
2
1
1
1
2
1
1
1
1
1
1

Parts List
The following table illustrates abreakdownof the screwpack. It highlights what
components are used in the various stagesof assembly.
Actual Sizes:
A. 5/16" WHEEL BOLT x2 J. SPRING
WASHER x2 M. 5/16" NUT
x2
B. 1/4" x21/2" PHILLIPS HEAD SCREWx10
L. 1/4" LOCK
NUT x14
C. 1/4" x21/4" SQUARE BOLT x8
D. 1/4" x1/2" SQUARE
COLLAR SCREWx1
E. 1/4" x1/2" PHILLIPS
HEAD SCREWx2
H. WING NUT x1 I. PLAIN
WASHER x1
F. No.8-36 UNF x1"
PHILLIPS HEAD SCREWx2
G. 3/16" x3/4" PHILLIPS
HEAD SCREWx4
1/4" x21/2" PHILLIPS HEAD SCREW
1/4" x3/4" PHILLIPS HEAD SCREW
1/4" LOCK NUT
1/4" x21/2" PHILLIPS HEAD SCREW
1/4" LOCK NUT
1/4" x1/2" SQUARE COLLAR SCREW
PLAIN WASHER
WING NUT
3/16" x3/4" PHILLIPS HEAD SCREW
5/16" WHEEL BOLT
SPRING WASHER
5/16" NUT
1/4" x1/2" PHILLIPS HEAD SCREW
1/4" x21/4" SQUARE BOLT
1/4" LOCK NUT
No.8-36 UNF x1" PHILLIPS HEAD SCREW
(ALREADY SCREWED INTO DOOR KNOBS)
3/16" x1/2" PHILLIPS HEAD SCREW
B.
N.
L.
B.
L.
D.
I.
H.
G.
A.
J.
M.
E.
C.
L.
F.
K.
COMPONENTS USES
X8
X4
X4
X2
X2
X1
X1
X1
X4
X2
X2
X2
X2
X8
X8
X2
X2
ASSEMBLES 2BOTTOM SHELF BRACKETSTO
THE CARTLEGS
SECURES GRILL BOWLONTOTHE CART
ATTACHES TANK HOLDER TO THECROSS BRACE
OF WHEEL-SIDE CARTLEGS
SECURES TANK HOOK TOTHE LEFTSIDE OF
GRILL BOWL
SECURES REAR PANEL TOTHE CART
SECURES WHEELS ONTOTHE CARTLEGS WITH
AXLE HOLES
ATTACHES DOOR BRACKETTOTHE CART
ATTACHES 2SIDE SHELVES TOTHE CART LEGS
INSTALLS THE KNOBS ONTO THE DOOR PANELS
SECURES REAR WIND SHIELD TOTHE BACK OF
GRILL CART.
REF.
PAGE 7
(found in door knobs)
N. 1/4" x3/4" PHILLIPS
HEAD SCREWx4
K. 3/16" x1/2"
PHILLIPS HEAD
SCREWx2

AssemblyInstructions
1. Before installing the bottomshelfbrackets, make
sure: A) the ledges ofboth bottomshelfbrackets
faceeach other B) thebottomshelf bracketequipped
with door stop must be located in the front C) the
side ofCart Legs having athreaded hole for Door
Bracket must face inwards. Refer to ILL. 1.
Installthebottomshelf bracketsbetweencart legs.
Align the threaded holes on the endsofbottomshelf
bracketwith theholeson cartlegs. Screw loosely
using 8ofthe "B" 1/4"x2-1/2" phillipshead screws.
Insert the screwthrough the Cart Leg, then
match the screwend with the threaded hole on
the Bottom Shelf Bracket.
AttachtheTankHolder to the crossbracebetween
bothWheel-side Cart Legsas showninILL. 1.Align
the holesonTankHolder withholes on the cross brace.
Fix firmlybyusing 2ofthe"B"1/4" x2-1/2" phillips
head screws and2ofthe"L"locknuts.
Install the Wheeltoa Wheel-side CartLegbyinserting
one"A"wheel boltthroughtheWheel and CartLeg
asshownin ILL.2.Thentightensecurelyusing one
"J" spring washerand one "M" 5/16" nutprovided.
SnapWheel Hub inplaceand repeat steps for second
wheel.
Secure the Caster to the bottomofthe Castor-side
Cart Leg byturning the threaded caster stem
clockwise until full stop. Fasten firmlyusing a
wrench.
Attach the rear panel to the cart legs as shownin
ILL. 3. Align the holes on panel with the holes on
cart legs. Fix firmlybyusing 4ofthe "G" 3/16"
x3/4" phillips head screwsprovided.
Tighten the looselyattached screwsin step 2for
fastening both Cart Legs and Bottomshelfbrackets
together.
Secure the Lighting Stickto the top ofthe right side
panel. The tapping screwis alreadyattached to the
lighting stick.
Placethe bottomshelfovertheledgesof bothbottom
shelfbrackets.
Before attempting to assemble your gas grill, checkthat
all the necessaryparts have been included using the
parts lists on page 5, 6and 7. Inspect grill and trolley
parts for damage as you proceed. Contact our service
center regarding replacement ofanydamaged parts.Do
not assemble or operate abarbecue grill that appears
damaged.
While it is possible for an individual to assemble this
gas grill, werecommend asking for the assistance of
another person when maneuvering someofthe larger
or heavier pieces. You mayneed both Adjustable
Wrench and Phillips ScrewDriver (not provided) for
securing the nuts and screws.
HINT:
2.
3.
4.
6.
5.
7.
8.
PAGE 8
TANK
HOLDER
ILL. 1
DOOR
STOP
WHEEL-SIDE
CARTLEG
CASTOR-SIDE
CARTLEG
BOTTOMSHELF
BRACKET
THREADEDHOLEFOR
DOORBRACKET
ILL. 3 BOTTOM
SHELF
SIDE
PANEL
REAR
PANEL
LIGHTING
STICK
ILL. 2 WHEELHUB
CASTER

AssemblyInstructions
10.
9. Attacha(pre-assembled)stainless steelside shelf
to eachside of grill asshowninILL. 4.Align the
squareholesof theside shelfwithholesatupper
sectionofeachcart leg. Screw looselyusing 8
ofthe "C" squarebolts and 8of the"L"locknuts.
Slide the U-shape Insertsinto eachSide Shelf
Bracket.TheInsertscoverthe squarebolts inside
and addsupport.Fix firmlybytighteninglocknuts.
Placethe GrillBowloverthecartasshown in ILL.
5. Align the holeson both sidesofGrillBowl with
the two (2) holesatthebowl supportbracket.
Tighten firmlyusing 4of"N" 1/4" x3/4" phillips
head screwsand4of"L" lock nuts. You may
havetolift upthe GrillBowl slightlytoalign the
holesproperly.
Attachthe TankHookto the leftside ofGrillBowl.
asin ILL. 6. Align theholeonTankHookwith
the hole on the grillBowl and tighten securelyusing
1"H" wing nut,one"D" 1/4" x1/2" squarecollar
screw and one large"I" plain washer.
Slide the Grease Draining Trayin position over
the ledges under Grill Bowlfromthe rear ofGrill.
See ILL. 5.
Grease Receptacleshouldbepositionedcentrally
under Grease Draining Tray.
11.
12.
PAGE 9
ILL. 4
U-SHAPE
INSERT
STAINLESSSTEELSIDESHELF,
PRE-ASSEMBLEDWITHBRACKETS
GREASE
RECEPTACLE
GREASE
DRAININGTRAY
ILL. 5
ILL. 6
TANKHOOK

AssemblyInstructions
Pleasefind the Door Bracket and Doors in the
same box as Grill Head.
Attach the Door Bracket to cart legs (under
Control Panel). Be sure the folded strip ofthe
bracket is closest to the cart legs. Then align
the holes on both ends ofthe bracket with the
threaded holes on the cart legs. Fix the Door
Bracket byscrewing 2ofthe "E" 1/4" x1/2"
phillips head screwsloosely.Refer to ILL. 7.
Locatethehinge holes for thedoorontheBottom
ShelfBracket.Insertthe door hingesinto these
holesand holes on Door Bracket.Pushthe Door
Bracketdowntoan evenlevel and then tighten
it securelyusing ascrew driver.See ILL.7.
Install the door knobs onto the door plates with
the 2"F" No.8-36 UNF x1" phillips head screws
(can be found with the door knobs).
Install the Rear Wind Shield to the backofgrill
cart. Fix securelyusing 2ofthe "K" 3/16" x
1/2" phillips head screws. See ILL. 8
Install the Heat Indicator byinserting it into the
hole on upper leftside ofGrill Lid. Adjust it
to level position, then tighten securelyusing lock
washer and wing nut provided in the Heat
Indicator box. See ILL. 9.
13.
15.
BUILT-IN IGNITOR /ELECTRODE CHECK
Before placing the flametamers or cooking grids,
ensure that the gap between each sparkelec-
trode tip and the collector box is approximately
3/16". Adjust ifnecessary.
Push and turn the Control Knob to HIGH, ablue
sparkshould be produced at the electrode tip.
Ifnot, checkignition wire, the terminal ofwire
to the ceramic electrode could becomeloose in
delivery.Push in the terminal for atight
connection.
Push and turn the Control Knob to HIGH for blue
sparkagain.
1.
2.
16.
17.
14.
PAGE 10
ILL. 8
ILL. 7
DOORKNOB
DOOR
BRACKET
FOLDEDSTRIPUSEDAS
DOORSTOP
ILL. 9
HEATINDICATOR
GRILLLID
REARWINDSHIELD

AssemblyInstructions
COOKING COMPONENTINSTALLATION
Place Steel FlameTamers on the lower ledge of
Grill Bowl. See ILL. 10.
Place Cast Iron Cooking Grids on the ledge of
Grill Bowlabove FlameTamers.
1.
2.
WARNING :
Nowyour gas grill is readyto use. Before
first use and at the beginning ofeach
barbecue season and whenever LP gas
cylinder is changed.
1.
2.
3.
Please read safety,lighting and operating
instructions carefully.
Checkgasvalveorifices, venturitubes and
burner ports for anyobstructions.
Performgas leakcheck(see page 2).
IMPORTANT: The Grill is not designed for use with
lava rockor briquettes and the use ofsuch itemswill
void the warranty.
CONNECTING TOGASSOURCE
1. Insert the Tank-Holding Strap through the two(2)
slots on Side Panel. See ILL. 11. Hang filled
gas tankon the TankHookattached to the Grill
Bowl. The ring foot ofthe gas tankwill rest on
the TankHolder. Fasten the gas tankusing the
Tank-Holding Strap. Makesure tankvalve is in
its full off position (Turn clockwise to stop).
Checktankvalve features to ensure it has proper
external mating threads. (Type 1connection per
10-94 AGA Requirement)
Make sure allburner valves are in their off position.
Inspect valve connection ports and regulator as-
sembly.Lookfor anydamage or debris. Remove
anydebris. Inspect hose for damage. Never
attempt to use damaged or plugged equipment.
See your local LP gas dealer for repair.
When connecting regulator assemblyto the tank
valve, handtighten nut clockwiseto a positive stop.
Do Not use awrench to tighten. Use ofawrench
maydamage quickcoupling nut and result in a
hazardous condition.
Open tankvalve fully(counter-clockwise). Use a
soapywater solution to checkall connections for
leaksbefore attempting to light grill. Ifaleakis
found, turn tankvalve off and do not use grill until
repairs can be made byalocal LP gas dealer.
2.
4.
3.
5.
6.
CAUTION: When the appliance is not in use, the
gas must be turned off at the supplycylinder.
Todisconnect LP gas cylinder:
a) Turn the burner valve off.
b) Turn the tankvalve off fully.( Turn clockwise to stop.)
c) Detach the regulator assemblyfromtankvalve by
turning the quickcoupling nut counter-clockwise.
PAGE 11
Theseholesareforrotisseriemounting bracketuse.
ILL. 10
CASTIRON
COOKINGGRID
STEELFLAME
TAMER
ILL. 11
REGULATOR
COUPLINGNUT
TANK-HOLDING
STRAP
TANKHOOK
TANKHOLDER
SIDEPANEL

Becomefamiliar with safetyguidelines at front of
manual. DONOTSMOKEWHILELIGHTINGGRILL
ORCHECKINGGASSUPPLYCONNECTIONS!
Checkto see that cylinder is filled.
Checkthatendofeachburnertubeisproperlylocated
over each valve orifice.
Makesureallgasconnectionsaresecurelytightened.
TESTFOR LEAKS WITH ASOAPSOLUTION,
NEVERWITHAFLAME. (GasLeak Check
instructions are on page 1).
Alwaysopen lid before lighting.
Set control knobs to "OFF" and open the gas supply
cylindervalve.
Igniteonlythe burnersyou intend touse, using the
samemethod for each:
Adjustcontrolknob(s)todesired temperature.
Lighting &Operating Instructions
LIGHTINGPROCEDURES
1.
2.
3.
4.
5.
6.
7.
Turnoffgasatsource,turncontrolknobto"OFF",and
wait five minutes before trying again.
Checkgas supply/connections.
Repeat lighting procedure and ,ifgrill still fails to
operate properly,TURN "OFF" GAS ATSOURCE,
TURNCONTROL KNOBS TO"OFF",wait for grillto
cool and checkthe following:
1.
Misalignment ofburner tube(s) over orifice(s).
CORRECTION:Repositionburnertube to properly
seat over orifice.
Obstruction in gas line
CORRECTION:Removefuellinefromgrill.DONOT
SMOKE!Opengassupplyforonesecondtoblowany
obstruction fromfuel line. Close off gas supplyat
source and reconnect fuel line to grill.
Plugged orifice
CORRECTION: Remove cooking grids and flame
tamers. Removeburnersfrombottomofgrillbowlby
pulling cotter pin frombeneath burner "foot" using a
screwdriver or needlenose pliers. Carefullylifteach
burnerupandawayfromgasvalveorifice.Unscrewthe
orifice fromeach gas valve and gentlyclear any
obstructionwithafinewire.Re-installeachorifice,re-
installburnersoverorificesandseateachburner"foot"
intomounting bracketatbottomofgrillbowl.Replace
cotter pins and cooking components.
Ifan obstruction is suspected in gas valve(s) or gas
valvebracket,pleasecontactyourlocalLPgasservice
personforassistance.
Misalignmentofignitoronburner
CORRECTION:Checkforproperpositionofelectrode
tip.Thetip ofthe electrode shouldbepointing toward
thetipofthecollectorbox.The gapbetweenthespark
electrode and the tip ofthe gas collector box should
be3/16".Adjustifnecessary.Withgassupplyclosed
andallcontrolknobssetto"OFF"checkeachpositive
ignitorindividuallyfor presence ofsparkatelectrode.
Inturn,pusheachcontrolknobinfullyandrotateabout
1/4 turn to the left(counter-clockwise) until a clickis
heard; the trigger hitting the strike blockshould pro-
duce ablue sparkat the electrode tip. Return control
knob to "OFF" before checking next ignitor.
Ifre-ignitionisnecessarywhilethegasgrillisstillhot,you
mustwaitforaminimumoffiveminutesbeforecommenc-
ing to re-ignite (this allowsaccumulated gas fumes to
clear).
Ifallchecks/correctionshavebeenmadeandgasgrillstill
fails to operate properly,contact the Grand Hall Service
Center, or your local LP gas service person.
FLASH BACK:
Shouldfire occur in and aroundthe burner tubes, imme-
diatelyturn off gas at its source and turn the control
knob(s)to"OFF". Waituntilthegrillhascooled,thenclean
the burner tubes and burner ports as described on page
4.
a.
b.
c.
d.
8.
Openlid.
Push Control knob in and HOLD it downwhile you
turnknob leftabout1/2".Thisallowsgastocollect.
Afterholdingfor2seconds,turnknobleftwardtothe
ignition point (see lightning bolt). You mayneed to
re-clickignitor 3 or 4 times to light.
Ifburner does not light, turn gas off and wait 5
minutesbeforeretrial.Ifunsuccessfulafterretrial,
wait afewminutes and light by match.
a.
b.
c.
d.
NOTE: As long as one ignitor is in working order, other
burnerscanbeignitedfromoperatingburner,insucces-
sion.If,forsomereason,allignitorsfailtoproduceaspark
attheelectrodetip,grillcanbelitwithapaperbookmatch.
NOTE:Tolightgasgrillwithamatch,followsteps1to6above.
Then,insertlitpaperbookmatchwithlightingstick through
thelighting holeonright side ofgrillbowl.Press inright
controlknoband rotate leftto "HI"setting to releasegas.
Burner should light immediately.Ifmoreburners are
needed,pressinandrotatenextcontrolknobtolightburners
insuccession. Turn offburnersnotneeded,andadjustto
desired cooking temperature.See Page 14, ILL. 12.
CAUTION: Do notmove trolleywhile grill is in operation.
If the grill fails to operate properly:
2.
3.
PAGE 12

Lighting &Operating Instructions
CAUTION: Do not attempt to disconnect anygas fitting
while your barbecue is in operation.
Aswith all appliances,propercare and maintenancewill
keepthemintopoperatingconditionandprolongtheirlife.
Yourgasgrillisnoexception.Byfollowingthesecleaning
procedureson atimelybasis, your grill willbe kept clean
and working properly with minimumeffort.
CLEANING&MAINTENANCE
Burn-off:Beforecookingonyourgasgrillforthefirsttime,
burnoff thegrilltoridit ofanyodorsorforeign matter by
ignitingthe burners, closing the lid,and operating at "HI"
settingforaboutfiveminutes.Youmaytheneithersetthe
controls to "OFF" or cookon your grill immediatelyby
turning the control knobs to alower setting.
CAUTION: Operating grill on "HI" setting for longer than
five minutes maydamage certain parts ofyour grill.
DONOTLEAVEGRILLUNATTENDED.
Preheating:Thegrilllidistobeinaclosedpositionduring
thepreheattimeperiod.Itisnecessarytopreheatthegrill
forashort timebefore cookingcertain foods, depending
on the type offood and the cooking temperature. Foods
that require ahigh cooking temperature need apreheat
periodoffiveminutes;foodsthatrequirealowercooking
temperature need only aperiod oftwoto three minutes.
Thereisnoneedtopreheatforcasseroles,roastsorother
foods that require slowcooking.
COOKINGTEMPERATURES
HIGH setting -Use this setting onlyfor fast warm-up, for
searing steaksand chops, and for burning food residue
fromthe cooking grids after the cookout is over. Rarely,
ifever,doyouusetheHIGHsettingforextendedcooking.
MEDIUMsetting-Usethissettingformostgrilling,roasting
or baking, and for cooking hamburgers and vegetables.
LOWsetting -Use this setting for all smokecooking,
rotisseriecooking,and whencookingveryleancutssuch
as fish.
Thesetemperaturesvarywiththeoutsidetemperatureand
the amount ofwind.
Cooking with Indirect Heat: You can cookpoultryand
largecuts ofmeat slowlyto perfection on one side ofthe
grill by indirect heat fromthe next burner. Heat fromthe
lightedburnercirculatesgentlythroughoutthegrill,cook-
ing the meat or poultrywithout anydirect flametouching
it. This method greatlyreduces flare-ups when cooking
extrafattycuts,becausethereisnodirectflametoignite
the fats and juices that drip downduring cooking. Place
adrippanslightlysmallerthanthecutofmeatontheflame
tamersurfaceunderthemeatbeingcooked.Thiswillallow
you to catch meat juices for making gravy.
Flare-Ups: The fats and juices that drip fromthe meat
cause flare-ups. Since flare-ups impart the distinctive
tasteandcolorforfoodcookedoveran open flame, they
should be expected and encouraged within reason.
Nevertheless, uncontrolled flaring can result in aruined
meal.
CAUTION: Ifburners go out during operation, close gas
supplyatsource,andturnallgasvalvesoff.Openlidand
waitfiveminutesbeforeattemptingtore-light(thisallows
accumulated gas fumes to clear).
CAUTION: Should agrease fire occur, close gas
supply at source, turn off all burners and leave lid
closed until fire is out.
OPERATING PROCEDURE
CLEANING THE COOKING GRIDS
Aftercooking,turncontrolknobsto"OFF"andletgrillcool
before attempting to clean your cooking grids.
Before first use and periodicallyit is suggested that you
wash the cooking grids in amild soap and warm water
solution. You can use awash cloth or avegetable brush
tocleanyourcookinggridsifyoudesire.Buttakecarenot
to chip the porcelain coating because it will void your
warranty.
CLEANINGTHEFLAMETAMER
Periodicallyuseawirebrushtoremovestubbornburned
on cooking residue (and anyrust that mayhave devel-
oped), wash in warmsoapywater and dry.Coat with
cooking oil.
Rustingmayappearontheflametamers.Thisisanatural
oxidationprocessanddoesnotaffecttheperformanceof
the flametameror adverselyaffect the taste ofthe food.
Application ofcooking oil to the flametamers between
usescanhelpprolongthelifeoftheflametamers.Grand
Halldoesnotwarranttheflametamersagainstrustunless
the flametamer is completelyrusted through.
CLEANING THE BURNER TUBES AND BURNER
PORTS(to prevent FLASH-BACK)
Toreduce the chance ofFLASH-BACK, the procedure
belowshould be followed at least once amonth in late
summerorearlyfallwhenspidersaremostactive,orwhen
yourgrillhasnotbeenusedforanextendedperiodoftime.
Wesuggestseveraldifferentwaysforcleaningtheburner
tubes.Usetheprocedurethatismostconvenientforyou:
Turn the burner valve off.
Turn gas off at tank.( Turn clockwise to stop.)
Detach the regulator assemblyfromtankvalve by
turning the quickcoupling nut counter-clockwise.
Remove cooking grids, flametamers and grease col-
lectors fromgrill.
Remove burners frombottom ofgrill bowlbypulling
cotter pin from beneath burner "foot" using ascrew-
driver or needlenose pliers.
Carefullylifteach burner up and awayfromgas valve
orifice.
1.
2.
3.
4.
5.
6.
PAGE 13

Regardlessofwhichcleaning procedureyou use,wesug-
gestyoucompletethefollowingstepstoprolongburnerlife.
1.
2.
3.
1.
2.
3.
Wirebrushentireoutersurfaceofburnertoremove
foodresidue anddirt.
Clean any clogged ports with astiff wire such as an
openpaperclip.
Inspecttheburnerfordamage(cracksorholes)andif
suchdamageisfound,orderandinstallanewburner.
After installation, checkto insure that gas valve
orifices are correctlyplaced inside ends ofburner
tubes. Also checkposition ofsparkelectrode.
Bend astiffwire(alightweight coathangerworks well)
into a small hook.Run the hookthrough eachburner
tubeandintothe burner severaltimes.
Usinganarrowbottlebrushwithaflexiblehandle(donot
useabrasswire brush),runthebrushthrough each
burnertubeandintotheburner severaltimes.
Useanairhosetoforceairthroughtheburnertubeand
outthroughtheburnerports. Observeeachportand
makesureaircomesouteveryhole.
CLEANINGTHEGREASETRAY
Periodically,thegreasetrayshouldbeemptiedandwashed
in amilddetergentandwarmwater solution.
Annual Cleaning of Grill Housing
Burning-offthegrillaftereverycookoutwillkeepitreadyfor
instantuse,however,onceayearyoushouldgivetheentire
grillathoroughcleaningtokeepitintopoperatingcondition.
Interior:
2.
3.
1.
4.
Coverthegasvalveorificeswithapieceofaluminumfoil.
Brushthegrillbowlwithastiffwirebrush,thenwashwith
mildsoapandwarmwater.Rinsethoroughlyandletdry.
Removefoilfromorificesandcheckforobstruction.
5.
6.
Turntheburnervalveoff.
Turn gas off at tank.(Turn clockwise to stop.)
Detach the regulator assemblyfromtankvalve by
turning the quickcoupling nut counter-clockwise.
Removeand clean(asexplainedbefore)thecooking
grids,flametamersandburners.
Cleaning &Maintenance Instructions
7.
IMPORTANT:DONOTlinethegrillbowlwithaluminumfoil,
sandoranyabsorbentsubstancethatcouldpreventdrain-
ageto greasecollectortray.Agreasefirecould occur.
Exterior Painted Steel Surfaces:
Muchofyourgrillismadeofheavysteelandshouldprovide
yearsoftrouble-free service.Shouldyoudecide totouch
up anyscratchesin the paint which mayoccur with use,
atouch-uppaintdesignedforusewithhightemperatureis
available. Followthese steps for best paint results:
1.
2.
3.
4.
5.
Shutoffgassupplyatsourceanddisconnectfuelline
fromgasvalve manifold.Protectfuellinefitting.
Removeloosepaintbylightlysandingsurface(s)with
amediumgrit emerycloth or afine grit sandpaper.
Removeanydirtorgreasebywashingthesurface(s)
with amild soap and warmwater solution.
Rinse with clean water and allowsurface to dry
thoroughlyorwipetheareawithvinegar.
Apply touch-up paint, following instructions on can.
Allowpaintto airdrycompletely,andapplyasecond
coat ifnecessary. IMPORTANT:Let paintdryfor 24
hoursbeforeusinggas grill.
6.
Occasionallyobserveburnerflameforcorrectoperation.
See ILL. 12.
VISUALLY CHECKING BURNER FLAMES
ILL. 12
Lighting
Hole
PAGE 14
Checkforproperpositionofelectrodetip.Thetipofthe
electrode should be pointing toward the tip ofthe
collectorbox.The gap between thesparkelectrode
and the tip ofthe gas collector box should be 3/16".
Replaceburnersandadjustsparkelectrodecollector
box.Edgeofcollectorboxshouldoverlapburnerport.
8.
9.
Replaceflametamers,cookinggrids.
Reconnecttogassourceandobserveburnerflamefor
correctoperation.
10.
11.
Exterior Stainless Steel Surfaces:
Dailyweatheringandhighheatassociatedwithgrillcooking
cancauseexteriorstainlesssurfacesto"tan".Followthese
directions for best results,and NEVER clean ahotgrill.
1.
2.
3.
Shutoffgassupplyatsourceanddisconnectfuelline
fromgasvalve manifold.Protectfuellinefitting.
Removedirt or greaseusing asoftcloth, then polish
stainlesssurfaceswithaFoamSpraycleanerdesigned
for stainless steel.Never usean abrasive cleaner or
scrubberthat may scratchyourstainlesssurfaces.
Drywithasoftclothandletairdrybeforerestartinggrill.

FrequentlyAsked Questions
PAGE 15
Our Service Center is available duringbusiness hours to assist you with your newBakers &Chefsgas grill.
We're here to takeyour questions, listen to your input, and we're certainlyopen to newrecipe ideas! For
your convenience we'velisted some ofthe more commonlyasked questions here, but ifyou havemore
questionsor commentsplease callus MondaythroughFriday,8:00 amto4:30pm CST,at 1-800-770-9769.
Q. I am not familiar with Grand Hall. How long have you been in the gas grill business?
A. GrandHall hasbeeninbusinessfor 22years manufacturinggas regulators,valves, burners,grills and
assorted parts and accessoriesforthe grill-related industry. Since 1996 wehave been manufacturing
the top-of-the-line Bakers & Chefs - a private label grilllinecommissioned by Sam's Club.
Q. I want to convert my Bakers & Chefs LPG (liquid propane gas) grill to natural gas. Is this safe?
A. Your Bakers& Chefs gasgrill is manufactured to exact specifications andisapproved by the American
Gas Association (AGA) for usewith anLPGcylinder only.Wethe manufacturer support the U.S.
Government in it's efforts to prevent after-market conversions ofgas appliances. Foryour own safety,
conversion kits are notavailable andattemptsto convert your grillwillvoidyour product warranty.
Q. When I mail myWarrantyRegistration card to theService Center,willIstartgetting a lot ofjunk mail?
A. GrandHall does notsell or offer it'scustomer list toother companies. You'll noticethe cardis quickand
simple tocomplete. We only askfor pertinent information that enablesusto matchyourname withthe
correct model number,date ofpurchaseandserialnumber-allofwhichmustbeon-fileifyoueverneed
replacementparts, accessories or want to place awarranty claim.Your information is held private, and
will be on-file hereatthe ServiceCenter.Youcan mail the card, or faxitdirectly to(214)-553-0090.
Q. MyWarrantyRegistration cardasksfor theserialnumber offmygrill.WherecanIfindthisinformation?
A. Each Bakers& Chefs gasgrill has an individual serial numberwhichmay include fivenumbers
andone letter.However,your serial numbermay bedifferent.You willfindthis serialnumber (andthe
model number) on thesilver AGAlabel, placed on the side of your grillcontrol panel.It is veryimportant
to include your serialnumber onthe warranty registration cardexactly as itappears on your grill.
Q. How long areparts availablefor mycurrent grillmodel?
A. GrandHall maintainsanample inventory ofparts forcurrent gasgrills. In the rareeventa grill parthas
been discontinuedormodified, Grand Hallreservesthe right to substituteasimilarpart at ouroption.
Q. The regulator andhose that came with my Bakers & Chefsgrilldoes notfit my older LPGtank.Why?
A. The U.S.Government regulates gas appliances and LPGcylinderfittings. Increasedregulations have
altered thetankfittings over the lastfew yearsand they continue to changeasthe industry develops
improved technology.We apologizeforany inconvenience, but if your tank does not fitthe current
regulator it means your tankisoutdatedandmust bereplaced.

Q. Ibought my Bakers & Chefs grill years ago and it looks different from the one I saw in the store
recently.What haschanged?
A. Despite outward appearances,the Bakers & Chefsgasgrillremains virtuallyunchanged.Sam's Club
does alter thehood color,cartconstruction and/or accessory optionsperiodically in order to keep the
product line fresh and new.Butrest assured, the Bakers& Chefs grillyou see today offersthe same
superiorperformance, qualityand value as all previousmodels.
Note: Having yourwarrantyregistrationcardwithserial number onfileallowsour ServiceCenterto matchyour
grillmodel with the appropriate parts andaccessory options.
Q. I want to take good care of my investment, so what is the best way to clean my Bakers & Chefs?
A. Aswith allappliances,proper careandmaintenancewill keepthemintop operatingcondition andhelp
prolong theirlife.Your Bakers& Chefsgas grill is no exception. Follow the"Cleaning & Maintenance"
instructionsin this instruction manual ona timelybasis, and your grill willoffer you years ofenjoyment.
Q. Is ittrue that stainless steel grillhoodscan turna"wheat" colorafteruse?
A. Yes, thisisverycommonwithstainless steel hoods becauseofthe intenseheatproducedfromthegrill.
Thiscolorationdoesnot affecttheperformance of the grillhood,but youstillmaywanttoroutinely clean
thestainless steel anyway. On a coldgrill- withno flame nearby,use paint thinner on a clean clothand
rubontostainless steel hood. Allow to drythoroughlybeforecookingongrill.
Q. What cancausegrills to rust, andwhat affectdoes ithave on the materials?
A. Rustingisanaturaloxidation processand may appear onsteelflametamersatanytime.Becauseyour
grillismanufacturedwithheavygaugesteel,rust willnotaffecttheperformanceofyourgrilloraffect the
tasteofyour foods. Grand Hallcannot warrant against rustunlessthe components arecompletely
rustedthrough.
Q. How can I remove rust from my grill? Is there a treatment I can use for rust?
A. Here is a quickandeasy wayto remove annoyingrust: Brush offrusted surfacesandcreateamixture
of1partvinegarand1partwater.Spray thissolutionontorusted areasto dissolverust,thenscrubwith
wire brush ifnecessary. Totreat against rust, keepall cooking surfacesandsteel flame tamerslightly
oiledatall times.Vegetable oil workswell forthis andhelpsto prolongthe life ofyour steel cooking
surfacesandanycast-ironcookingaccessories.
Q. What doestreatingcast-ironmean, andwhat isthe benefit?
A. Treating cast-iron will make foods stick less (which means cooking and clean-up are both
easier) and helps prolong the life of cast-iron accessories. It's easy to do, just wipe the cast-iron
with vegetable oil, olive oil, canola oil, grease, etc., then heat on high in the grill for afew
minutes. After cooking you can wipe agreased cloth along the cast-iron and much of the
residuewillwipe awaysoyoudon't actuallyhave tosoak?theaccessory.Aftercontinueduse,
the cast-iron will retain flavor and memory of previous recipes, which is what they mean by
seasoned pan.?For best results, it is best to treat cast-iron before, and after cooking.
FrequentlyAsked Questions
PAGE 16

Making The Good Life Even Better!
Congratulations! You are nowthe owner ofthe new Bakers & Chefs gas grill, an outdoor kitchen
system that is redefiningthe barbecue. In fact, Bakers &Chefsgrill is well on the wayto rewritingthe art of
cooking;makingit easier, tastier and more accessible to those who enjoygreat food in the great outdoors.
Gone are the dayswhen Dad labored over temperamental charcoal to scorch asteakwhile Mom
raised the temperatures in the kitchen, boilingpotatoes and corn. With this revolutionarycookingsystem,
you're in control. No more side dishes coolingon the table as theyawait the underdone meat. And forget
about drippingsauces and marinades from the stove to the deck!
Whynotstirfryveggiesforyourvegetarianfriends?Orsmokeatrout? Perhapsyou'llevenopttobake
adesert for the sweet tooth in your family.
There's no need for amateur's anxiety. In no time, you'll get a good grip on Bakers & Chefs nearly
limitless capabilities. Stir frying.Steaming.Smoking.Stewing.Sauteing.Searing.Deep frying.Roasting.
Poaching.Panfrying.Baking.Andofcourse,grilling.Justremember,ifyoucandoitinakitchen,youcancook
it on your Bakers &Chefs grill.
Nowreadoverthefollowingcookingmethodsandrecipes.You'llfindplentyofdelicious,nutritiousand
do-able recipes that will embellish your table and haveguests liningup for more.Watching the waistline?
Escapethecycleofover-processedconveniencefoods!Whatbetterwaytoreducefatthanbygrillingmeats
or enhancingyour diet with more vegetables -prepared to mouth wateringperfection?
Whateveryourappetite,nomattertherecipe,yourcreativitywillsoarwiththisgrillthatisalsoanoven,
afryingpan,awok,asmokeranddeepfryer.Bakers&Chefsuniqueflamecontrolsystemensuresperfect
results and pleased customers each and everytime. So tie on your apron and prepare to rewrite your own
culinaryhistory!
Burn-off: Beforecookingonyour gas grillforthe first time,burnoff thegrillto getridofanyodorsorforeign
matterbyignitingtheburners,closingthelid,andoperatingat"HI"settingforaboutfiveminutes.Youmaythen
eithersetthecontrolsto"OFF"orcookonyourgrillimmediatelybyturningthecontrolknobstoalowersetting.
CAUTION: Operating grill on "HI" setting for longer than fiveminutes maydamage certain parts
of your grill. WHILE COOKING, DO NOTLEAVE YOUR GRILL UNATTENDED.
BEFORE FIRSTUSE:
PAGE 17

Outdoorcookinghas takenonanewdimensionwith theintroduction ofBakers&Chefsgrill.Youwill
quicklycometo realizethat itis trulyastoveon wheels that cando everythingfrom frying,poaching,grilling
and smokingto roastingsucculent meats.
THE BASICS:
The two methods ofcookingreferred to frequentlythroughout this section are direct and indirect
cooking.Anexplanationofbothisnecessarybeforeyoulaunchintoyourfirstmeal.Somerecipeswillrequire
usingboth direct and indirect cookingmethods.
DIRECTCOOKING targets heat (flame) directlyunder the food. Use this method when grillingand
searingmeats,poultryorfish. The Bakers&Chefscookinggrids,griddle,cookingpanorwok/sautepancan
beusedfordirectcooking.Sidedishes,deepfryingandsmokingarejustafewexamplesofmealsbestcooked
inthismanner.Unlessotherwisenoted,directcookingrequiresthehoodtobeopen,allowingyoutowatch
as your dinner is prepared.
INDIRECTCOOKING is exactlyas it sounds. Heat is directed around the food from an opposing
burner(s)-nottheburnerdirectlyunderneath.Indirectcookingisalwaysdonewiththehooddown,creating
anatmospheresimilartoyourkitchenoven.ImagineyouwanttoroastapieceofmeatonyourBakers&Chefs
grill. You would select the indirect cookingmethod because it is closest to the way you would roast in your
kitchen.First,removethecentercookinggridandinsertthecookingpanorgriddle,withyourmeatplacedon
top.Then, theleftand/orright burnersareignited andthehood closed.Ifyouare roastingalargequantityof
items that require more space, you mayplace the items on twocookinggrids with the farthest outer burner
ignited. Either way,indirect cookingis onlyeffectivewith the hood down.
PREHEATING YOUR BAKERS &CHEFS GRILL:
The grill lid is to be in aclosed position duringthe preheat time period. It is necessaryto preheat the
grillforashorttimebeforecookingcertainfoods,dependingonthetypeoffoodandthecookingtemperature.
Foods that require ahighcookingtemperature need apreheat period offiveminutes;foods that require a
lower cookingtemperature need only aperiod of twoto three minutes.There is no need to pre heat for
casseroles, roasts or other foods that require slowcooking.
PREPARATION OF THE COOKING SURFACES:
Afterpreheatingyourgrill,coat the cooking grids withcookingoilto preventfood from sticking.
Whenyou'vefinishedcooking,leaveyourgrillrunningfor5minutesonhightoburnofffoodresidue.Then
brushthecookingsurfaces with afiberorbrasswire brush. All cookingsurfaces canbefurthercleaned with
hotsoapywater.To season your grill, keep cookingsurfaces lightlyoiled at all times. Simplywipeanoiled
cloth over the cookingsurfaces after each cookout. Vegetable oil is best for this purpose. The seasoning
process keeps foods from sticking,and helps prolongthe lifeofyour cookingsurfaces as well.
Cooking Methods
Cooking Techniques
YourBakers&Chefsgrilliscapableofpreparingmouthwateringmealsusingmanydifferentcooking
techniques. Becauseeveryfamilyenjoysdifferenttypesofcooking,weofferavarietyofquality-madecooking
accessories that allowyou to customizethe Bakers &Chefgrill to meet your particular needs. The cooking
techniques on the followingpages incorporate these custom-fit accessories. However, you mayuse your
owncookware to accomplish similar results.
Grill -usingthe standard Bakers &Chefscast-iron cookinggrids or the optional griddle/hotplate
Rotisserie Cook - usingthe optional electric rotisserie
Bake, Roast, Smoke and Deep Fry -usingthe optional cast-iron cookingpan with lid, and fry basket
Stir Fry
-usingthe optional wok/saute pan
PAGE 18

For those watchingtheir calories, grillingis a lowfat cookingtechnique that lends itselfto a wide
range offoods. Your Bakers & Chefs grill is a fast heat source that produces the barbecuedappearance
and flavor weall enjoyso much. You can expand dinners for two, to parties for plentybypurchasinglarger
cutsandquantitiesofmeatwhichcookbeautifullyonthegrill.Thistechniquedoesn'trequiremuchexperience
or skill on your part to produce asuperb supper.
It's easy!Prepare to grill by preheating for 5minutes with the burners on highand the hood down.
Beforeplacingthefoodontothegrill,lightlybrushthegrillwithalittlecookingoil.Thisstepisn'tnecessary
when foods havebeen marinatingin an oil-based marinade.
Your Bakers &Chefsis nowreadyto grill.Remember to keep the lid open when cookingdirectly
on the grill. For most foods it's best to start grilling on high.Once the food is seared, reduce the heat to
medium.Foodsmarinatedwithingredientssuchashoneymayburnbecauseofthehighsugarcontent.You
shouldcommencetheircookingonmedium.Afavoriteonthegrillissausages.Alwayscookthemslowlyand
ifthey're particularlyfatty,it maybe best to partiallyboil them first.
GRILLING MEATAND POULTRY
Grilling Techniques
BEEF
Turn burners on high and preheat grill 5
minuteswith thehooddown. Raisehood
and place meat on cooking grid directly
aboveheat source and cookmeat on
both sides until seared. Then reduce
burners to medium and cookuntil done.
Grillingtimes will varyaccordingto meat
thickness, so the followingtimes should
be used onlyas aguide.
HAMBURGER &SAUSAGES
Followdirections forsteakand the times
shownto right. For the juiciest burgers
andsausages,cookthem usingthe indi-
rectmethod. Turnburgers withaspatula
and use tongswith sausages. Do not
puncture meats more than necessary.
POULTRY
Turn burnerson highand preheatgrill 2-
3minutes with the hood down. Raise
hood, reduce burners to medium and
cookuntil done. Ifyou prefer to use the
indirectmethod-placepoultryincenterof
grill with leftand/or right burners on me-
diumheatandlowerhood.Cookingtimes
mayvarybasedonthesizeofyour food.
Poultryskin is fattyand mayflare-up
whencookeddirectly.Sokeepaneyeon
yourgrill.
CUTOF MEAT
T-bonesteak
Sirloinsteak
Beefspare ribs
Porter house steak
NewYorkstrip steak
Hamburger
Sausages
Chicken breast
(cookwithbonedown)
Chicken wings
Drumsticks
Whole bird
(cookwith breast up)
APPROX. COOKING TIME
rare: 4-8 minutes
medium:10-14minutes
well done: 15-20 minutes
rare: 4-6 minutes
medium:8-10 minutes
well done: 10-15 minutes
Direct method:
approximately15minutes
Indirect method:
up to 30 minutes
Indirect method:
approximately1hour
PAGE 19

Grilling Techniques
PORK
Turn burners on high and preheat grill 5
minuteswiththehooddown.Raisehood,
placeporkoncookinggridandcookuntil
seared.Thenreduceheattomediumand
cookuntil done. Grillingtimes will vary
according to meat thickness, so the fol-
lowingtimes should be used onlyas a
guide.
WHOLE FISH AND WHOLE FILLETS
Grill fish on cookinggrid or use the op-
tionalgriddle(groovedsideup).Turnburn-
ers on highandpreheat grill 2-3 minutes
withthehooddown. Raisehood,andturn
burnersto mediumheat. Placefish (skin
down) on griddle and cookover direct
heat until done. Use cookingtime as a
guideoruntilfishisopaquebutstillmoist.
FISH FILLETSAND CUBES
Followsamedirections from above, using
approximatecookingtimesshownatright.
Becausesmallfishpiecescandropthrough
thegridandintothe grillwesuggestusing
thegriddlewhengrillingfish.However,the
cookinggridand asmall, flat piece of
aluminumfoil willalsowork fine.
CUTOF MEAT
Porkspare ribs
Chops
Loins
Cutlets
Whole fish
Whole fish fillets
Fish fillets
Boneless cubes
APPROX. COOKING TIME
rare: 4-8 minutes
medium:10-14minutes
well done: 15-20 minutes
approximately10 -12
minutes per pound or
until fish is opaque
approximately
4 - 5 minutes each side
or until fish is opaque
GRILLING FISH AND SEAFOOD
GRILLING VEGETABLES AND FRUIT
Prepareyourfruitorvegetablesandbrushwithbutterorbastingsauceifdesired.Tocookindirectly,
place your food on the center grid with the leftand/or right burners lit. Or place your food inside the optional
warmingrackthathangsinside the grill lid -and light theouterburners.Eitherway,indirectcookingmust be
done with the hood down.
In some instances,you maywant to grill vegetables and fruit directly over the heat, usingthe
standardcookinggridsoroptionalgriddle.Foodsthatworkbestwithdirectheatarerelativelysoftandrequire
a short cooking time,likemushrooms, zucchini, tomatoes and skewered fruit such as apricots, peaches,
pineapple, strawberries and kiwis. Remember that the hood of the Bakers &Chefs should remain up
when cookingdirectly.
Grillingtimesusingtheindirectmethodwiththehooddownwillbesimilartothoseforyourkitchenoven.
Forveryfirmvegetables -particularlypotatoes and yams -werecommend that you partiallyboil until almost
cooked,beforeplacingthemonthegrill.Cookingtimesforfoodspreparedwiththedirectmethodwillbemuch
shortermainlybecauseofthesoftnessofthefood.Timingwillbecomparabletonormalpanfryingorgrilling.
PAGE 20
Table of contents
Other Bakers & Chefs Grill manuals
Popular Grill manuals by other brands

Aussie
Aussie 4201 SERIES WALK-A-BOUT owner's manual

Weber
Weber GENESIS 55826 owner's guide

Favells
Favells Bronzgrill 1 use and care manual

inventum
inventum GR802 instruction manual

KitchenAid
KitchenAid 810-0021 Installation Instructions and Use & Care Guide

Milantoast
Milantoast UK20000RHH Original user manual