Balance Meteo 955768 User manual

955768
Features:
Radio controlled clock (433 MHz) with manual time setting option.
Manually set the time.
Weather forecast with symbols for sunny, partly cloudy, cloudy, wet and rainy
weather
Calendar
Time display in 12 or 24-hour format
Temperature display in C or F
Alarm function for two alarm times.
Measuring range:
Indoor temperature: 0C - +50C
Humidity: 20% ~ 95%
Outdoor temperature: -40C - +70C
Barometer: 800~1100 HPa
MAX/MIN memory for humidity, indoor and outdoor temperature
Battery status indicator for remote sensor.
Range of remote sensor 30 metres (in open area)
Freezing point warning.
Power save function, by pressing the “SNZ” button once, the screen switches off
without losing values. Press the “SNZ” button to switch on again.
Batteries:
- Base station: 3 AAA batteries (not included) and adapter DC4.5V/200
mA (included)
- Sensor: 2 AAA batteries (not included)
Settings:
Connect the adapter to the base station, then insert the batteries.
After 3 seconds the LCD screen will light up, showing the various symbols.
The base station will display the temperature/humidity and barometric
values.
The base station will automatically start detecting the wireless remote
sensor for 3 minutes.
The base station then starts the DCF signal (to receive the radio controlled
time) for 7 minutes.

Radio controlled clock:
After the device is switched on, the clock will automatically search for a DCF
time signal.
flashes to indicate that the device is searching for a DCF signal.
is continuously visible to indicate that the device has received a DCF
signal and the correct time/date is then being displayed.
The device searches for a DCF signal for approximately 7 minutes. If the
device does not find any DCF signal, it stops searching and will try again after
one hour.
Every day at 03:00 hrs the clock searches for the signal to be able to keep
displaying the time as accurately as possible. If the clock can’t find any signal,
the search is stopped. The clock will try again at 04:00, 05:00 and 06:00 hrs.
You can also force the clock to search for the signal by pressing the “DOWN”
button for 2 seconds.
The buttons do not work if the clock is searching for the DCF signal.

Manually setting the time:
Press the “MODE”button for at least 2 seconds to adjust the clock/calendar
settings.
Press the “UP”or “DOWN”button to adjust the settings and then press the
“MODE”button to confirm each setting.
The settings are being displayed in the following order:
Time zone, 12/24-hour display, hours, minutes, year (2000-2099), month,
day, month/day order and snooze interval.
The time zone is used for countries in which the DCF time signal can be
received, but that are located in another time zone. If the time in the country
is 1 hour ahead on the radio controlled time of the DCF signal (GMT+1), the
time zone has to be set on the value +1. The clock will then automatically
add 1 hour to the value of the received time signal.
If no button is being pressed for 15 seconds, the setting mode will be closed.
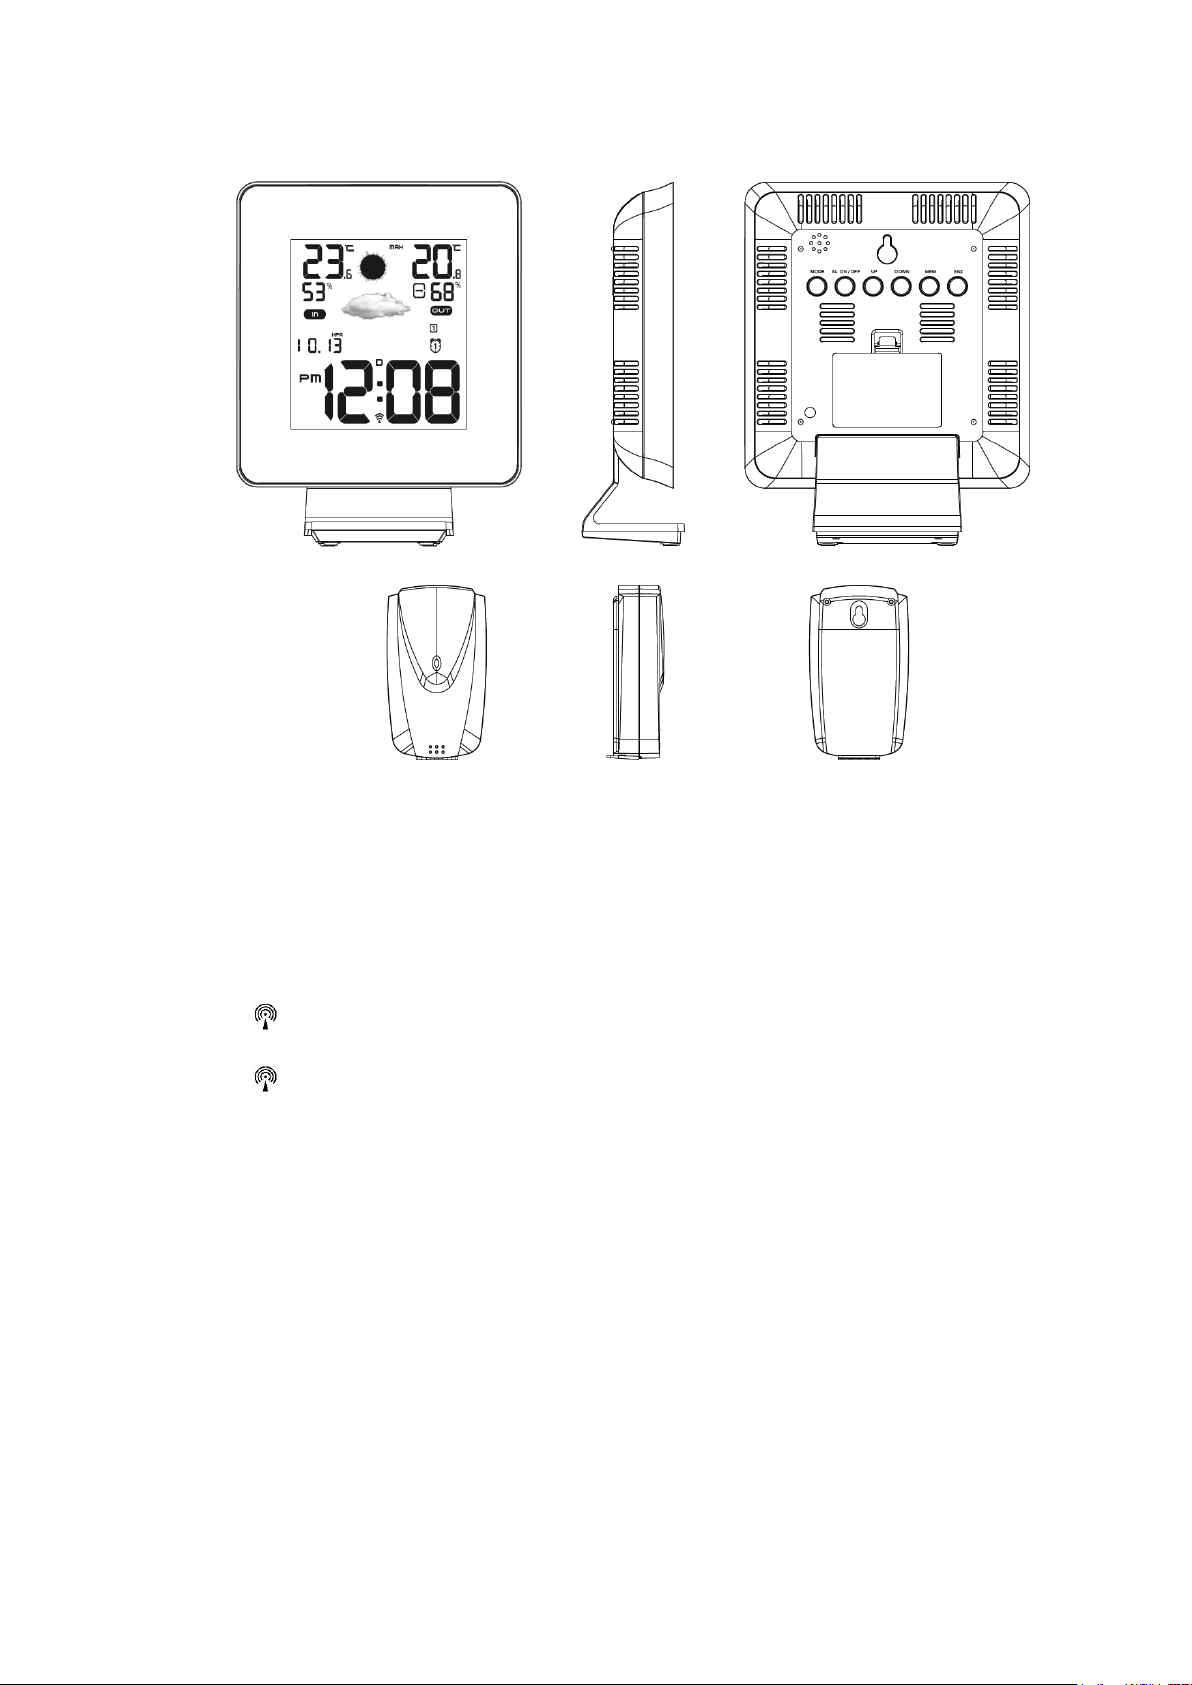
Registering the remote sensor at the weather station:
After connecting the adapter the base station will automatically start to
receive signals from the remote sensor.
Place the batteries in the remote sensor. The sensor will automatically send
the measured temperature/humidity to the base station.
Press the “UP” button for at least 3 seconds per channel to clear the values
and receive new data again.
In case a channel does not receive a signal, “ -- / --“ is displayed.
Alarm function with two alarm times:
Press the “MODE”button to display the alarm settings of respectively (Alarm
time1) A1 and (Alarm time2) A2.
When A1 or A2 is indicated, press the “MODE”button for 3 seconds to adjust
the settings. Press the “UP”or “DOWN”buttons to adjust the time settings.
Press the “MODE”button to confirm the settings.
If no button is being pressed for 15 seconds the setting mode will be closed.
Press “AL ON/OFF”button to switch off A1, A2 or both.
AL OFF
When the alarm sounds, it can be turned off temporarily for 5 minutes by
pressing the “SNZ”button. The alarm icon or remains flashing.
To stop the alarm permanently, push any button. The alarm is repeated the
next day. The alarm icon or remains visible.
To permanently switch off the alarm function you have to press the “AL
ON/OFF” button again to switch off A1, A2 of both. The alarm icon or
is no longer visible.

Temperature and Humidity:
Press the “DOWN”button to switch between C and F
If the outside temperature is out of the measuring range, the display shows
the message LL.L (lower than the minimum temperature) or HH.H (higher
than the maximum temperature).
If the humidity is below 20% or above 95% the display respectively shows LL
or HH.
Display barometric pressure:
Measuring range between 800~1100 hPa
Press the “MEM”button for at least 2 seconds to switch between date and
barometric pressure.
Memory function for the maximum/minimum temperature
and humidity:
Press the “MEM” button to display the highest or lowest indoor/outdoor
temperature/humidity. “MAX” is shown if the maximum
temperature/humidity is being displayed. “MIN” is shown if the minimum
temperature/humidity is being displayed.
While displaying the MAX or MIN values, press the “MEM” button for at least
3 seconds to clear the values stored in the memory.
If no buttons are being pressed, the current temperature/humidity is
automatically indicated after 15 seconds.
Weather forecast function:
For the weather forecast the device uses one of the following 5 symbols:
means sunny .

means partly cloudy.
means cloudy.
means wet.
means rainy.
Freezing point warning:
If the outdoor temperature drops to between -4C and +1C, the icon
will flash on the screen. If the temperature gets below -4C the icon
is permanently visible on the screen.
DISPOSAL AT END OF WORKING LIFE:
Discarded appliances and electronic devices often still contain valuable materials,
therefore do not throw them away, instead hand them in to the store where you buy
a new appliance or to your local council recycling depot.
In accordance with the waste guidelines for electrical and electronic equipment, this
product must be disposed of separately. If you wish to dispose of this product in the

future, do NOT discard it with the household waste, but hand it in at your local
refuse collection depot.
In compliance with the directives on Waste Electrical and Electronic Equipment, this
product must not be discarded with domestic waste but should be disposed of
separately for recycling. If you wish to dispose of this product in the future, do NOT
throw it away with the household rubbish but hand it in at a specially designated
place, such as your municipal domestic chemical waste depot.
Never throw empty batteries away, but deposit them in special battery boxes or
hand them in as domestic chemical waste at your municipal depot.
DECLARATION OF CONFORMITY:
Herewith we declare, that this device does comply with the essentials requirements
of R&TTE Directive 1999/5/EC.
A copy of the signed and dated Declaration of Conformity is available on request via
www.combimex.nl
Table of contents