6
Fig. 1
How to Replace the Vacuum Bag
How to Replace the Vacuum Filters
Fig. 2
Fig. 1
Fig. 3
Fig. 2
Fig. 3
Always operate the vacuum cleaner with a bag installed properly� Change
the vacuum bag when the full bag indicator appears or when suction power
is weak� The bag compartment lid will not close without a bag in the holder
or if the bag is not properly installed�
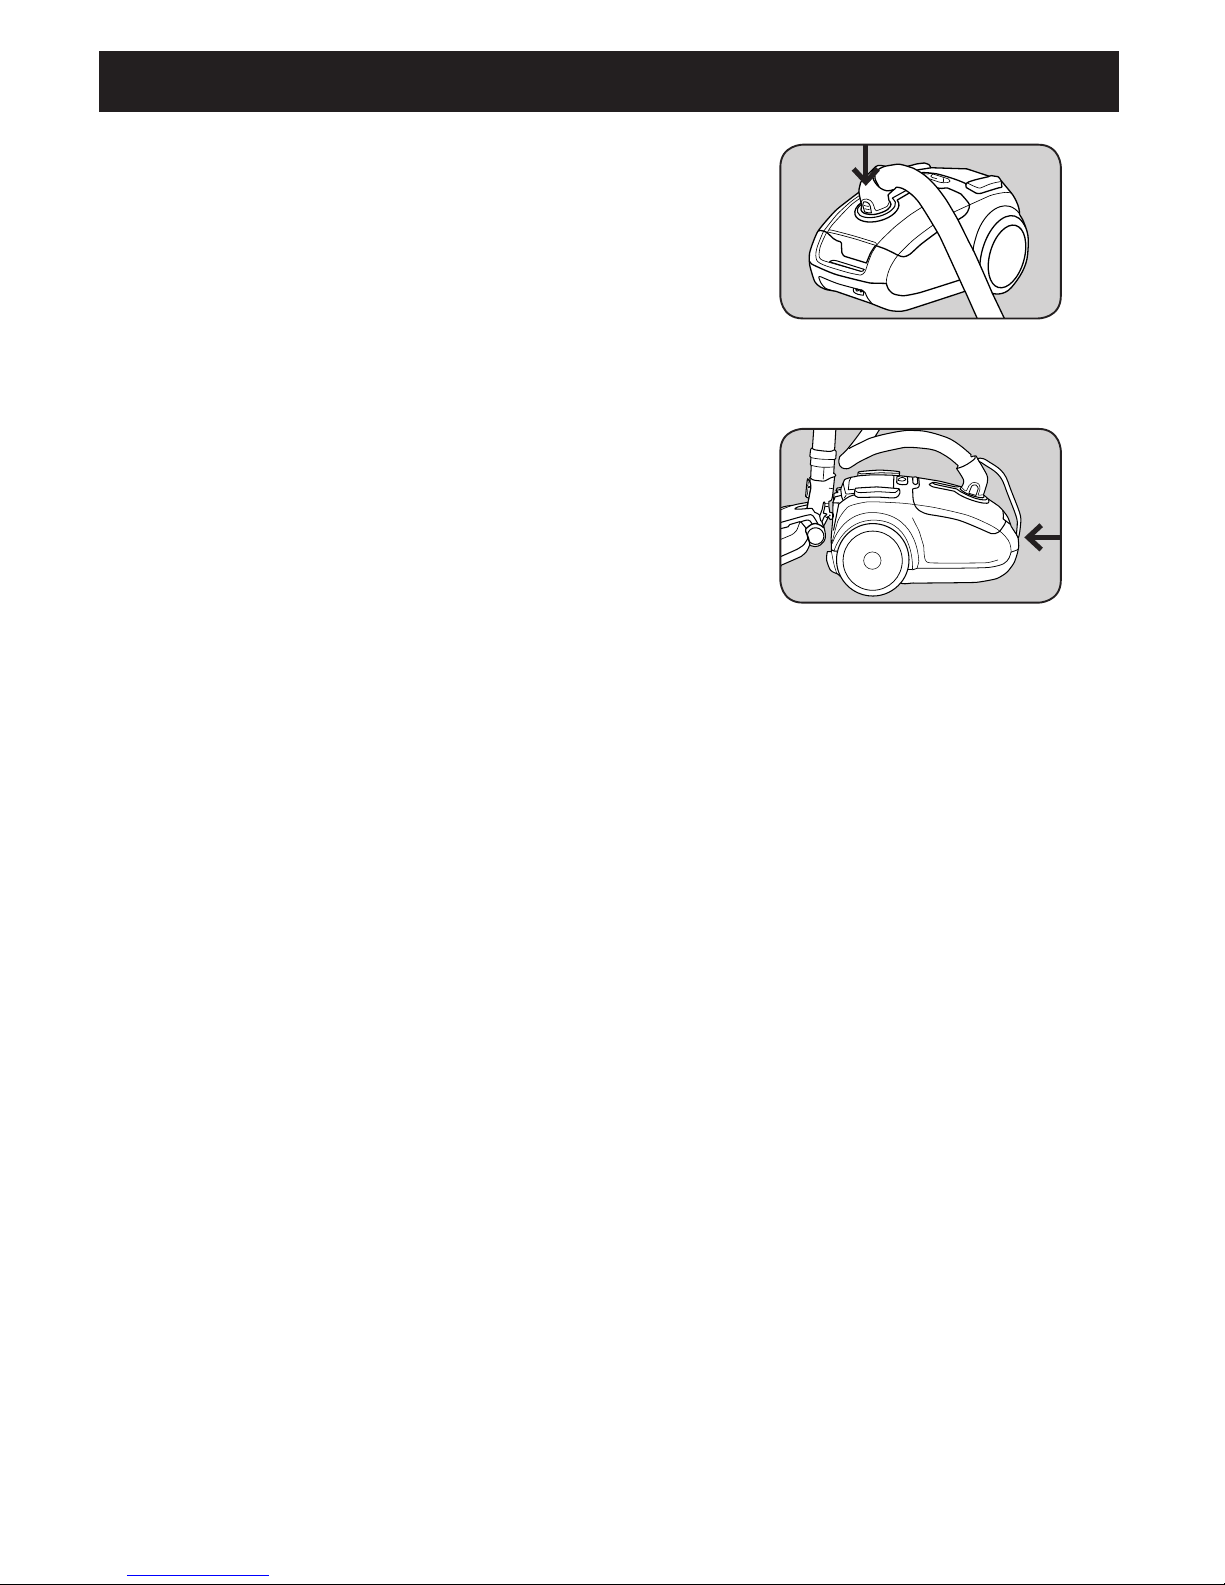
1� Disconnect the hose from the canister by squeezing the two tabs on the
hose cuff and pulling it out of the inlet (Fig 1)�
2� Disconnect the electrical cord on the hose cuff from beneath the carrying
handle�
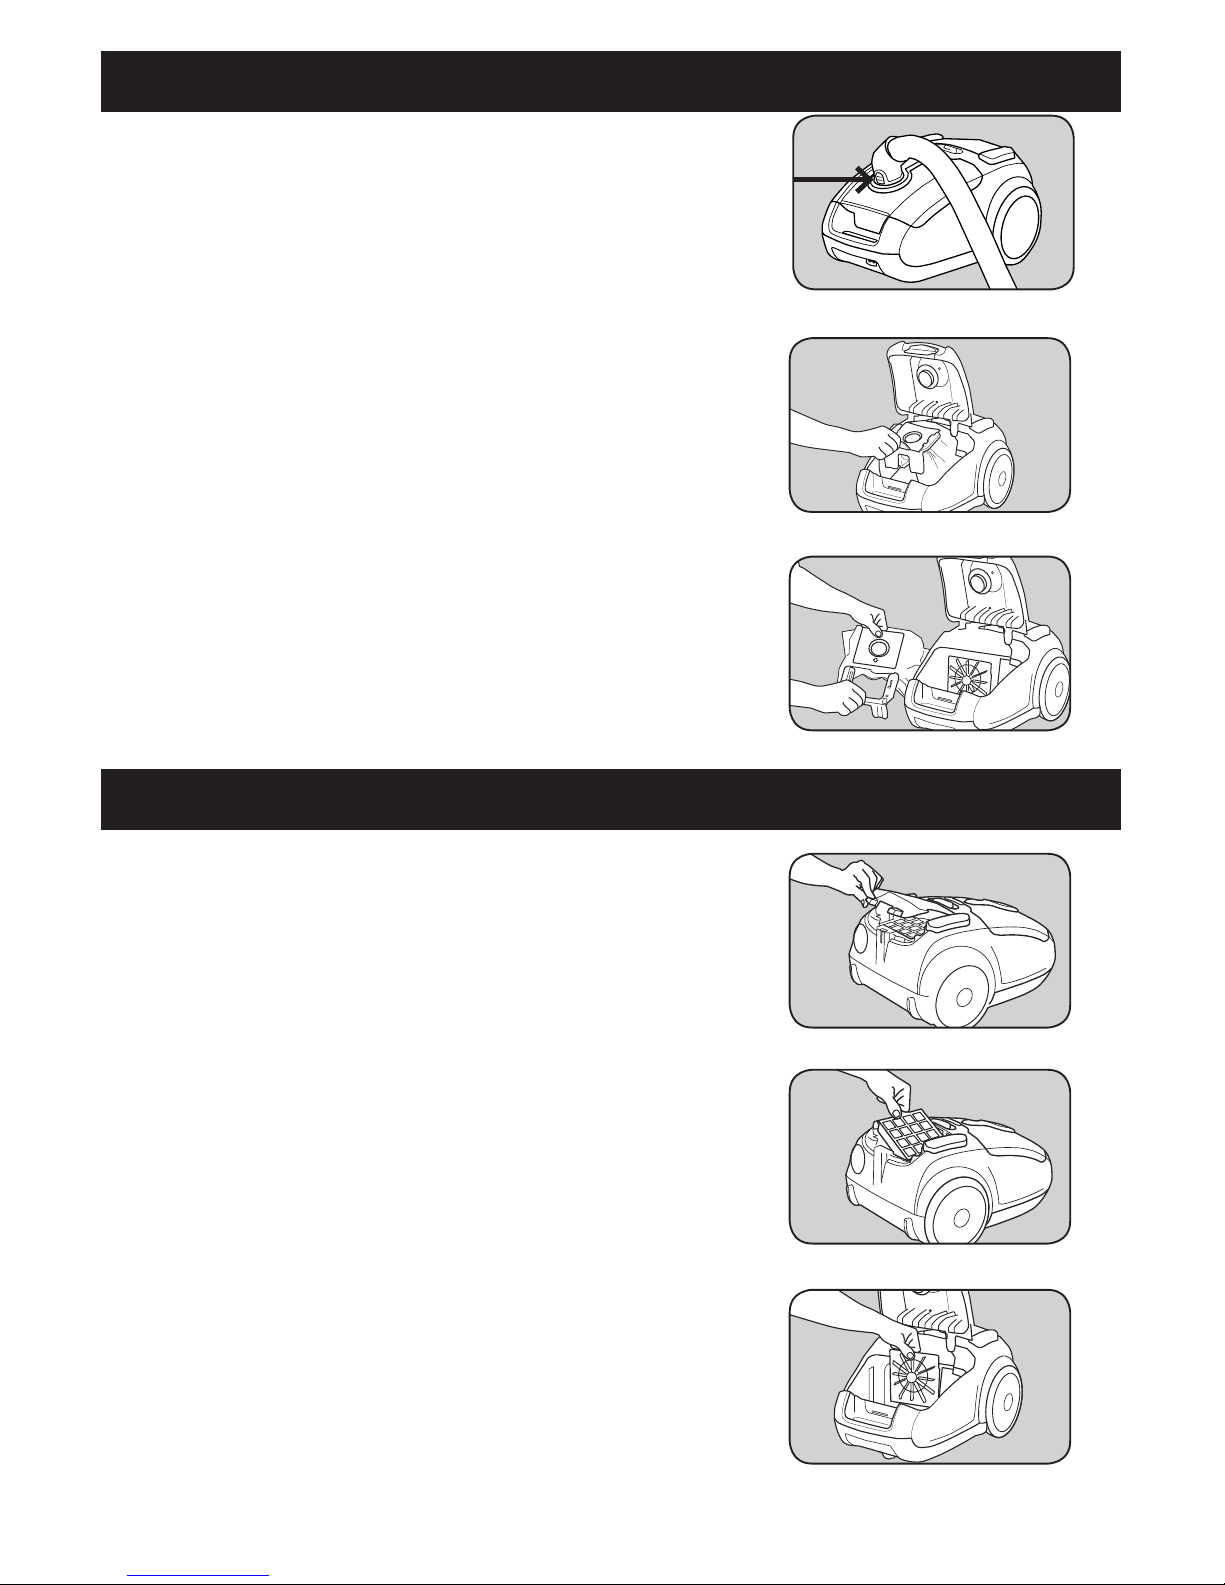
3� Open the bag compartment lid�
4� Remove the bag holder by pulling it up and out of the bag
compartment (Fig 2)�
5� Remove the bag by sliding the cardboard collar out of the bag
holder (Fig 3)�
6� Slide a new bag into the bag holder until it clicks into place�
7� Insert the bag holder back into the bag compartment�
8� Replace the hose� Reconnect the electrical cord�
When to Change the Filters
At a minimum, it’s recommended to replace the HEPA media and secondary
filters after using 12 vacuum bags� If someone in your household is sensitive
to airborne allergens, it is recommended to change the filters after every six
vacuum bags�
How to Replace the HEPA Media Filter
1� Lift up the two tabs of the filter cover to access the HEPA media filter (Fig 1)�
2� Remove the used filter and discard�
3� Insert a new filter and snap the filter cover back into place (Fig 2)�
NOTE: The HEPA media filter cannot be washed and reused�
How to Replace the Secondary Filter
1� Disconnect the hose from the canister by pushing in on the two tabs on the
hose cuff and pulling it out of the inlet�
2� Disconnect the electrical cord on the hose cuff from beneath the carrying
handle�
3� Open the bag compartment lid�
4� Remove the bag holder by pulling it up and out of the bag compartment�
5� Locate the filter behind the vacuum bag�
6� Pull the filter holder up and out of the bag compartment (Fig 3)�
7� Remove the used filter and discard�
8� Insert a new filter into the holder and slide the holder back into place�