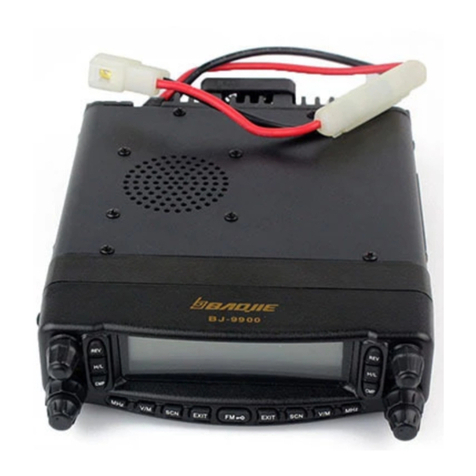
BAOJIE BJ-UV55 User manual

Installation of Transceiver
Select a safe and convenient site in your vehicle so as to reduce possible damage to your
passenger or yourself during vehicle movement. You may install the transceiver blow the
dashboard in front of the front passenger seats so that your knees and legs will not collide the
transceiver in case of emergency brake. It’s best to select a well ventilated location which is
shielded from direct sunlight.
1. Use the supplied self-tapping screws (4X) and flat washers (4X) to install the mounting bracket
in the vehicle as shown in Fig. 1 and Fig. 2.
Fig.1 Fig.2 Fig.3
2. Fix the transceiver, and then insert and tighten the supplied hexagonal screws (4X) as shown in
Fig. 3.
zMake sure all screws are tightened to avoid loosening of the bracket or the transceiver in
vibration of vehicle.
zUse the 3 screw grooves at the side rear side of each bracket to install the main body at a
proper inclined angle as shown in Fig., 4, 5 and 6.
Fig.4 Fig.5 Fig.6
Power Cable Connection
Operation of transceiver
Be sure to use 12V vehicle batteries with sufficient electricity. If the electricity is insufficient,
the display screen may darken or the transmission output power may greatly drop during the
transmission. Do not connect the transceiver to 24V batteries.
Note: If you use the transceiver when the vehicle-use batteries are not sufficiently charged
or the engine is off, battery discharge may lead to insufficient electricity quantity, making it
difficult to start the vehicle. Therefore, try to avoid using the transceiver in such situation.
1. Use the DC power cable supplied with the transceiver to connect the transceiver with the
vehicle battery terminal in a shortest route.
zIt is suggested not to use a cigar lighter outlet as much as possible as some of them
may lead to great voltage drop.
zThe whole power cable must be wrapped up to isolate it from heat and moisture
and from the engine ignition system/connection wiring.
2. When the power cable is installed in place, wind the fuse holder with heat-resistant
adhesive tape to protect it against moisture. It’s better to use heat-resistant adhesive tape to
wrap the whole power cable.
3. To prevent short-circuit, disconnect the other connection wirings at the negative (-) battery
terminal before connecting the transceiver.
4. Please confirm the correct polarity of connections before attaching the power cable to the
battery terminal. Connect the red wire to the positive (+) terminal of battery and the black to
the negative (-).
Vehicle bod
y
Mounting
b
racket
Cone screw
Washe
r
M5

zUse the full length of power cable without cutting off the excess even if it is longer
than needed. Remember not to remove the fuse holder from the cable.
5. Reconnect all connection wirings removed from the negative terminal previously.
6. Connect the DC power cable to the transceiver.
zPlug in the outlet and keep pushing firmly until the locking tab clicks.
Operation of fixed radio station
If you intend to use the transceiver as a fixed radio station, you need to buy an independent
13.8 DC power supply separately with a suggested continuous current capacity of above 12A.
Note:
zDo not connect this DC power supply to the AC power outlet before all connections are
completed. (Do not connect the transceiver when it’s powered on.)
zPlease connect all cables before inserting the DC power supply device into the AC
outlet.
1. Be sure the transceiver and the DC power supply are off.
2. Connect the DC power supply cable to the DC stabilized power supply and make sure
the polarities are correct (red: positive, black: negative).
zDo not directly connect the transceiver to the AC outlet.
zUse the supplied DC power cable to connect the transceiver to a DC stabilized
power supply.
zDo not use a power cable with the specification and parameters lower than the
original power cable.
3. Connect the DC power cable to the transceiver.
Plug in the outlet and keep pushing firmly until the locking tab clicks.
Only use fuses of specified type and rated value. Otherwise, the transceiver may be
damaged at your own risk.
Connecting Antennas
Before operation, install a highly efficient and well-tuned antenna. Successful
installation depends largely on the correct antenna type and installation. If a proper antenna
system is selected and installed correctly, the transceiver will achieve best performance.
Use an antenna with a characteristic impedance of 50Ωand a low loss coaxial feeder
with 50Ωcharacteristic impedance to match the input impedance of the transceiver. Using a
Attention
Red
Black

feeder whose impedance is not 50Ωto connect the antenna with the transceiver will reduce
the performance of the antenna system, and may cause interference to the nearby radio and
TV receivers, radio receivers and other electronic devices and even damage the transceiver.
Transmitting without connecting antenna or other matched load is prohibited.
Otherwise, the transceiver will be damaged. Be sure to connect the antenna to the
transceiver before transmitting, and only when the connection is confirmed can the
transmission be made.
All fixed radio stations must be equipped with a lightning arrester to reduce the
risk of damaging the transceiver by fire or electric shock.
The location and mounting mode of the antenna on the vehicle are shown as follows:
Attention
Table of contents
Other BAOJIE Transceiver manuals