Barazza B Cover 1 KBC1SP6 User manual

1KBC1SP6
1KBC1SP9
1KBC1SP12
B_Cover
IT
EN
FR
DE
Istruzioni per il mont ggio
Inst ll tion instructions
Notice de mont ge
Mont ge nleitung

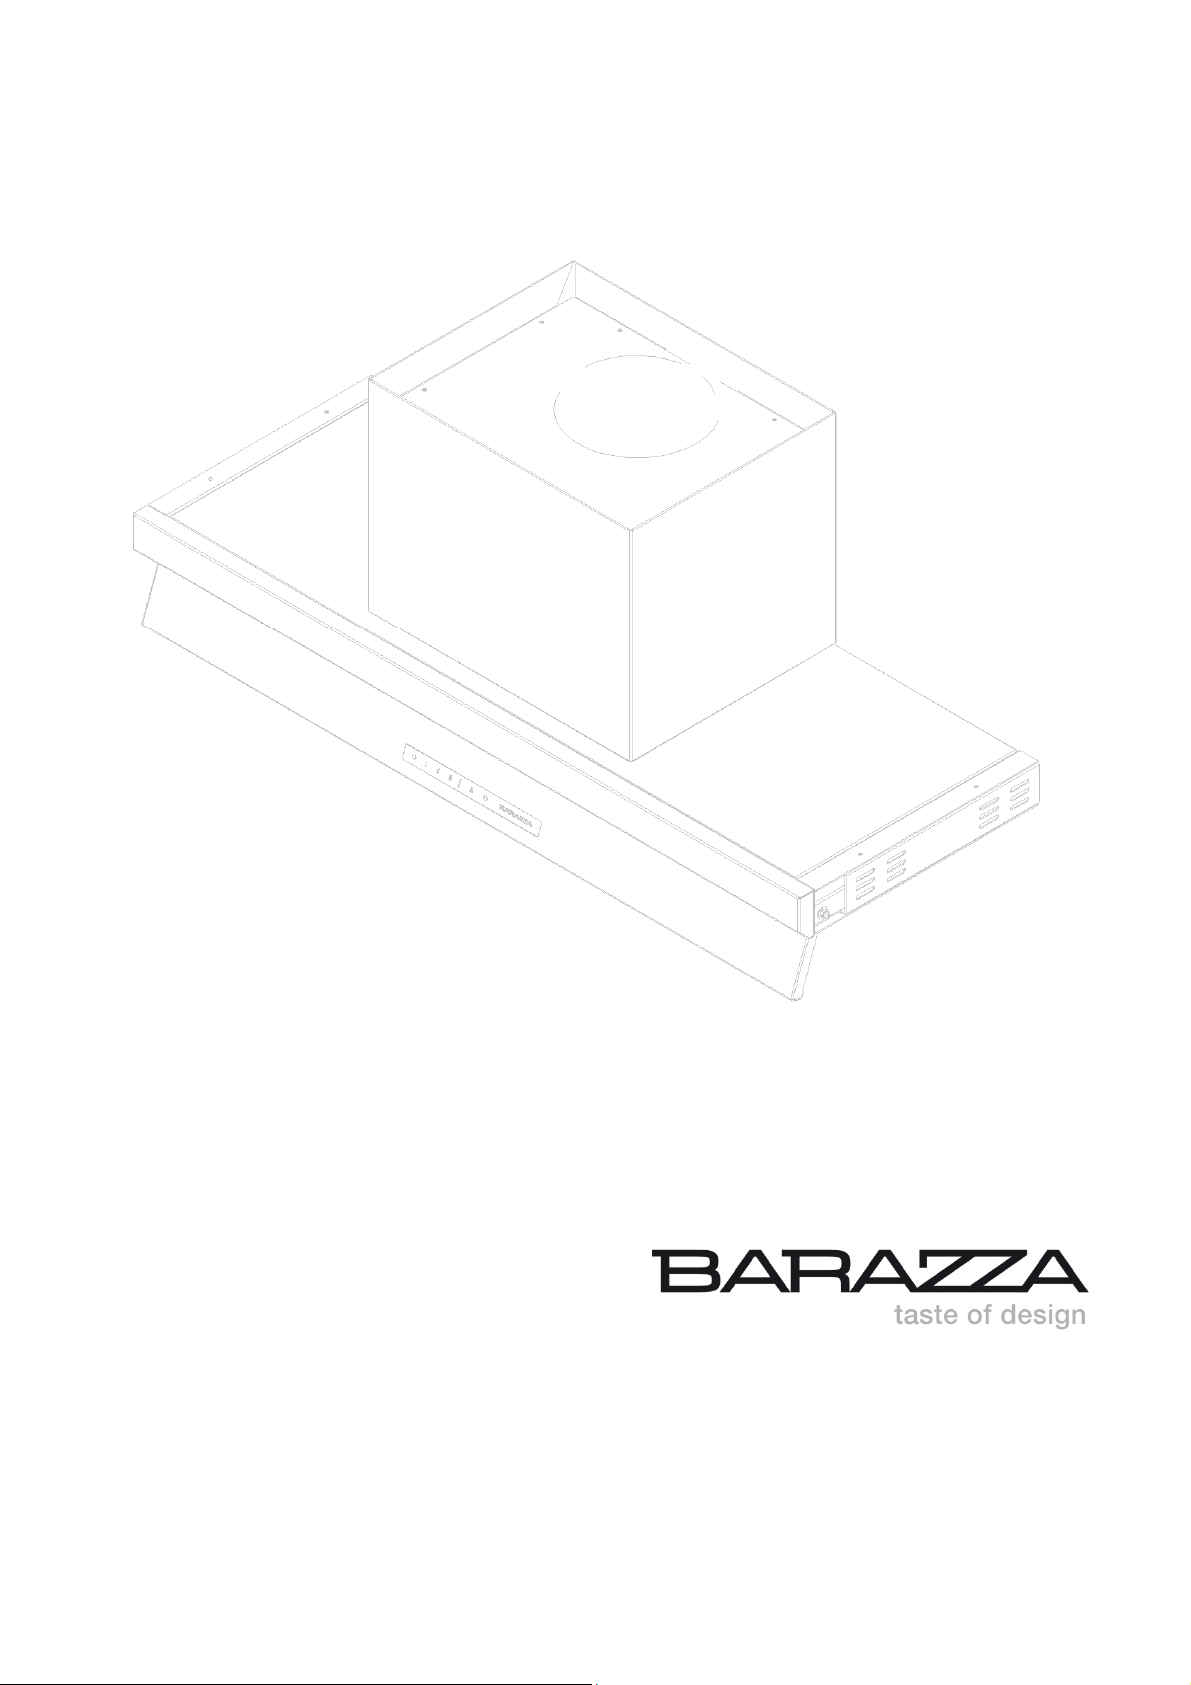
ATTENZIONE! La cappa aspirante è equipaggiata con materiale di
fissaggio standard. Chi esegue l'installazione deve assicurarsi di utilizzare
dispositivi di fissaggio idonei alle pareti e/o soffitti trovati. La ditta
costruttrice declina ogni responsabilità per danni causati da montaggi
non eseguiti correttamente.
WARNING! The hood is equipped with standard fixing material. The
person who is mounting the hood should make sure that the fixing
elements are right and suitable for the walls and ceilings he finds. The
manufacturer declines any responsibility for damages caused by
incorrect mounting.
ATTENTION! La hotte est equipée avec des materiaux standard pour le
montage. Le monteur doit verifier que les elements de fixages sont
appropriés aux parois et aux plafonds trouvés. La maison constructice
decline toute responsabilité pour des endommegements causés par de
montages qui n' on pas été faits de manière correcte.
ACHTUNG! Die Dunstabzugshaube ist mit Standard
Befestigungselementen ausgestattet. Der Monteur muss sicherstellen,
daß die vorhandene Befestigungselementen für die gefundenen Decken
oder Wände geeignet sind. Die Herstellungsfirma lehnt jegliche Haftung
ab, für Schaden die von falscher Montage
verursacht worden sind.

ø150
ø120
min. 550
Ø 120
Ø 150
Ø 120
Ø 150
min. 550
¨ 150
¨ 120

1
22
3
x4

M 8
M 7
5
AB
A
4

3
MODALITÀ D'USO e AVVERTENZE IMPORTANTI
Prima del primo utilizzo rispettare quanto contenuto nel presente manuale.
Le parti accessibili della cappa possono diventare calde con il piano di cottura in funzione.
ŶLa cappa non è idonea per l’uso da parte di bambini o persone con ridotte capacità
fisiche, sensoriali o mentali, a meno che non siano stati specificatamente istruiti dalla
persona responsabile per la loro sicurezza.
ŶI bambini devono essere supervisionati per garantire che non giochino con la cappa.
ŶCon piano di cottura a gas non usare tutti i fornelli contemporaneamente al massimo
carico termico per un periodo prolungato (max. 15 minuti), altrimenti sussiste il
pericolo di scottature se si tocca la superficie dell’involucro o pericolo di danni alla
cappa aspirante. In caso d’utilizzazione contemporanea di tre o più fornelli a gas, la
cappa aspirante deve funzionare alla massima potenza di aspirazione.
ŶNon cucinare piatti “flambé” ossia alla fiamma sotto alla cappa.
ŶEvitare di tenere accesi fornelli che generano forti fiamme libere sotto la cappa.
ŶEvitare che le fiamme fuoriescano lateralmente dalle pentole; durante le fritture non
far uscire né surriscaldare l’olio della padella perché potrebbe infiammarsi.
ŶPrima di qualsiasi operazione di pulizia o manutenzione, scollegate la cappa
dall’alimentazione di rete tramite l’apposito interruttore generale dell’appartamento o
mediante l’interruttore bipolare o togliendo la spina.
ŶSe si usano altri apparecchi a gas, o che consumano l’ossigeno dell’ambiente,
l’aerazione deve essere sufficiente. Per un aerazione sicura la depressione massima
del locale non deve superare i 4 Pa (0.04 mbar) e deve essere praticato un foro sulla
parete che guarda all’esterno (di diametro e posizione opportuni).
ŶNon utilizzare mai la cappa senza i filtri antigrasso in alluminio.
ŶMantenere puliti i filtri antigrasso rispettando gli intervalli di pulizia consigliati.
ŶSostituire i filtri carbone (se la cappa è usata come filtrante) rispettando i tempi
indicati.
ŶAccendere il motore della cappa prima di iniziare a cucinare.
ŶSpegnere il motore della cappa circa 10 minuti dopo aver terminato la cottura.
ŶNon utilizzare la cappa per aspirare gas, fumi, vapori, nebbie o altro che siano diversi
dai normali fumi di cucina.
GENERALITÀ
Una CAPPA ASPIRANTE preleva l'aria, i fumi ed i vapori di cottura dall'ambiente interno e
li riversa all'esterno. Non è necessario l'uso di filtri al carbone per la depurazione.
Una CAPPA FILTRANTE preleva l'aria, i fumi ed i vapori di cottura dall'ambiente interno, li
depura per mezzo dei filtri al carbone e riversa l'aria depurata nello stesso ambiente. In
questo caso l'uso dei filtri carbone è indispensabile.
I filtri carbone sono disponibili separatamente, e possono essere acquistati come accessori
opzionali (vedi ACCESSORI OPZIONALI).

4
PRIMA DEL MONTAGGIO
Il presente manuale è generico. É possibile che siano descritti singoli particolari che non
riguardano il vostro apparecchio.
Prima del montaggio occorre osservare le distanze minime di installazione tra parte inferiore
della cappa e parte superiore del piano cottura indicate nelle specifiche figure di montaggio.
Dove possibile si consiglia una distanza tra 700 e 800 mm.
Qualora l'utente decida di installare la cappa a distanze minori di quelle indicate, la
ditta declina ogni responsabilità circa possibili danneggiamenti subiti dalla cappa per il
forte calore o danni a cose e persone provocati direttamente o indirettamente da
qualsiasi tipo di malfunzionamento, rottura o possibile incendio.
Predisporre un punto presa o un collegamento alla rete elettrica a norma; se si usa la
cappa come aspirante, occorre praticare un foro verso l’esterno (cioè in aria libera) per
l’evacuazione dei fumi.
La ditta costruttrice vieta all’utente di collegare l’eventuale scarico d’aria della cappa,
usata come aspirante, a camini di caldaie di evacuazione gas, fumi o vapori od a
qualsiasi altra conduttura, anche solo di aerazione, che è stata, o sarà usata per altri
scopi o per altri apparecchi a combustione di gas o altri combustibili.
Vieta altresì di collegare il tubo di evacuazione fumi in locali adiacenti o pozzi, o tubi
per impianti antincendio.
In ogni caso è obbligatorio rispettare tutte le normative in vigore relative allo scarico
dell’aria. L’utente che contravviene a queste disposizioni mette a rischio la sua vita e
quella degli altri: in tal caso la ditta costruttrice declina ogni responsabilità.
Se la cappa viene usata come aspirante occorre garantire un sufficiente ricambio d’aria
per esempio praticando un foro di aerazione a norma sulla parete esterna dal personale
qualificato.
Nel caso in cui il piano di cottura sia a gas, non è consigliato l’uso contemporaneo della
cappa con focolari o caminetti, stufe a gas o ad altri combustibili o scaldacqua che
bruciano l’ossigeno dell’ambiente per funzionare e comunque la depressione nell’area del
piano di cottura deve essere inferiore a 4 Pa (0.04 mbar) ed il locale deve disporre di
sufficiente ventilazione.
In caso di dubbio le normative nazionali ed internazionali indicano con precisione le regole
per l’installazione a regola d’arte di impianti a gas, e ricambio dell’aria ambiente, per
evitare che si producano combustioni incomplete con rischio di esalazioni venefiche.
Se la cappa viene usata come filtrante, occorre acquistare i filtri carbone (vedi
ACCESSORI OPZIONALI).
ISTRUZIONI PER IL MONTAGGIO
Montare il prodotto come indicato nelle figure serie M se la cappa è aspirante, serie C se
viene usata come filtrante.
La cappa aspirante è equipaggiata con materiale di fissaggio standard. Chi esegue
l’installazione deve assicurarsi di utilizzare dispositivi di fissaggio idonei alle pareti e/o
soffitti trovati. La ditta costruttrice declina ogni responsabilità per danni causati da
montaggi non eseguiti correttamente.
L’apparecchio è pesante e per spostarlo occorrono 2 persone.

5
Il materiale dell’imballaggio è pericoloso per i bambini. Non lasciare mai che i bambini
giochino con il materiale di imballaggio.
Durante l’installazione del prodotto usare sempre guanti protettivi per prevenire ferite.
SMONTAGGIO E RIMONTAGGIO DEI FILTRI ANTIGRASSO
ŶSpegnere le lampade ed attendere che siano raffreddate.
ŶSeguire le fasi indicate nelle figure.
ŶPer smontare i filtri antigrasso premere le maniglie, ribaltare e togliere i filtri.
ŶPer montare i filtri antigrasso inserire il lato posteriore dei filtri antigrasso nell’apposita
sede, premere le maniglie, inserire la parte anteriore del filtro e rilasciare le maniglie.
MONTAGGIO E SMONTAGGIO DI EVENTUALI FILTRI CARBONE
Se volete usare la cappa come cappa filtrante è necessario montare i filtri carbone il cui
montaggio è indicato nelle figure serie C. I filtri carbone sono OPZIONALI ed acquistabili
separatamente.
Esistono filtri carbone che dopo l’utilizzo vanno sostituiti, oppure rigenerati. Nel caso di
utilizzo di filtri carbone rigenerabili attenersi alle istruzioni allegate ai filtri stessi.
AVVERTENZE GENERALI
Il materiale del tubo deve essere resistente al calore alla fiamma ed alla corrosione. La
ditta produttrice sconsiglia l’uso di riduttori e di tubi con diametro piu’ piccolo di quello di
uscita della cappa. Anche tubi di alluminio flessibili non sono consigliati in quanto
diminuiscono fortemente le prestazioni dell’ apparecchio.
La parte terminale del tubo, quella all’esterno del foro parete, deve avere forma
appropriata per evitare che piogga, vento o corpi estranei entrino all’interno.
In caso di dubbio rivolgersi al personale competente per impianti gas e areazione.
INSTALLAZIONE ELETTRICA
AVVERTENZE
L'installazione elettrica può essere fatta solo da personale professionale esperto,
qualificato e abilitato dalle leggi vigenti a svolgere tale mansione usando materiali a norma
e modalità di installazione a regola d’arte. L'azienda declina ogni responsabilità per
installazioni effettuate da personale non competente e per installazioni che non rispettino
le norme vigenti in materia di sicurezza elettrica (sia per modalità che per materiali).
DATI TECNICI ELETTRICI
I dati tecnici elettrici sono visibili all’interno della cappa dopo aver asportato i filtri
antigrasso.
ALLACCIAMENTO ALLA RETE ELETTRICA
Il cavo flessibile di alimentazione fornito è già collegato internamente e fuoriesce dalla
cappa in prossimità del condotto di uscita dell’aria.
E’ possibile eseguire due tipi di installazione elettrica:
Ŷinstallazione fissa;
Ŷinstallazione con spina su una presa.

6
PRIMA DELL’INSTALLAZIONE ELETTRICA
Prima di collegare l’apparecchio occorre:
Ŷverificare che i dati elettrici indicati siano corrispondenti ai valori di tensione e
frequenza di rete dell’appartamento dove si installa la cappa.
Ŷverificare che il locale sia dotato di sistemi di protezione elettrica contro cortocircuiti e
scosse elettriche secondo le norme vigenti.
Ŷfar installare una presa di corrente (o punto di collegamento) con a monte un
interruttore bipolare a norma, con apertura dei contatti di almeno 3 mm.
Ŷse si intende installare la cappa mediante la spina occorre che la spina sia accessibile.
Ŷescludere sempre la tensione di rete con l’interruttore bipolare prima delle operazioni
di collegamento e ripristinare l’alimentazione per il normale uso solo a collegamento
completato, provato e sicuro.
Se le luci rimangono debolmente accese quando la cappa è in stand-by, invertire le
fasi della spina/presa di alimentazione.
ATTENZIONI DA SEGUIRE IN CASO DI RIPARAZIONE
Le riparazioni, inclusa l’eventuale sostituzione del cavo di alimentazione, vanno effettuate
solo da personale qualificato ed abilitato con modalità, strumenti e materiali a norma.
Riparazioni fatte da altri possono essere pericolose e dar luogo a folgorazioni e rischi
d’incendio.

7
FUNZIONAMENTO ED UTILIZZO
TIPOLOGIE DI COMANDO
COMANDO TOUCH CONTROL
Imposta la velocità 1 / Tasto premuto 5 secondi spegnimento.
Imposta la velocità 2.
Imposta la velocità 4, con funzione boost di 7 minuti.
Attivazione funzione timer auto-off nella velocità 1 - 2 - 3 (durata 15 minuti)
Imposta la velocità 3.
Accende/spegne le lampade.
GESTIONE FILTRI ANTIGRASSO
Il comando permette un controllo automatico della gestione dei filtri antigrasso in modo
che l’utente non debba preoccuparsi di considerare il tempo trascorso dall’ultima
manutenzione effettuata.
Quando i filtri metallici antigrasso sono da pulire (200 ore), viene emesso un segnale acustico con il
ventilatore in moto, mentre a motore spento il secondo led del display
Reset allarme filtri antigrasso premere il tasto
lampeggia con luce blu.
GESTIONE FILTRO CARBONE
Il comando permette un controllo automatico della gestione dei filtri carbone in modo
che l’utente non debba preoccuparsi di considerare il tempo trascorso dall’ultima
sostituzione effettuata (allarme attivo dopo 100 ore reali di funzionamento).
Quando i filtri carbone sono da sostituire, il terzo led del display lampeggia con luce blu.
Reset allarme filtri carbone premere il tasto

16
MANUTENZIONE
FILTRI ANTIGRASSO
I filtri metallici antigrasso, servono per trattenere i grassi che nell’uso normale sono in
sospensione nei fumi di cottura, impedendo che si deteriori il motore; possono essere
lavati a mano od in lavastoviglie.
Per il lavaggio a mano è sufficiente adoperare acqua calda e sapone, spazzolando con
forza molte volte e poi risciacquando sotto acqua corrente.
Alla fine del lavaggio i filtri antigrasso devono essere asciugati e rimontati correttamente.
E’ possibile che dopo il lavaggio il filtro subisca una lieve alterazione del colore
Si consiglia di lavare i filtri antigrasso dopo circa 50-100 ore di utilizzo del piano
cottura.
Se i filtri antigrasso sono molto sporchi il motore riesce ad aspirare poca quantità d’aria, con
diminuzione delle prestazioni.
I grassi che si accumulano sui filtri antigrasso, se non rimossi con un lavaggio periodico, sono
facilmente infiammabili e possono causare incendi.
La ditta costruttrice declina ogni responsabilità per incendi causati da cattiva manutenzione dei
filtri antigrasso.
FILTRI CARBONE
I filtri carbone posti all’ingresso dell’aspirazione del motore, servono per trattenere gli
odori dei fumi di cucina.
L’uso dei filtri carbone è necessario se si usa la cappa come filtrante.
Esistono due tipi di filtri carbone: filtri carbone che sono rigenerabili e filtri carbone che
non sono rigenerabili.
Filtri carbone rigenerabili:
Attenersi alla documentazione inclusa nel filtro carbone rigenerabile acquistato per quanto
riguarda il montaggio, l’utilizzo e le modalità di rigenerazione.
Filtri carbone non rigenerabili:
Si consiglia di sostituire i filtri carbone dopo circa 200-300 ore di utilizzo del piano cottura.
I filtri carbone non rigenerabili non possono essere lavati né rigenerati, ma devono essere
sostituiti quando si esauriscono.
I filtri carbone non garantiscono il ricambio di ossigeno dell’aria.
Per assicurare la corretta ventilazione e il ricambio d’aria nei locali cucina esistono delle norme
nazionali ed internazionali che vanno assolutamente rispettate.
La ditta costruttrice declina ogni responsabilità per incendi causati dalla mancata sostituzione
dei filtri carbone.
SOSTITUZIONE DELLE LAMPADE
Sostituite sempre le lampade con altre aventi le stesse caratteristiche elettriche. Prima
di sostituire le lampade assicuratevi che siano FREDDE e sia esclusa completamente
l’alimentazione elettrica.
Seguire le fasi indicate nelle figure serie L.
Ripristinare l’alimentazione elettrica.

17
Se l’illuminazione non funzionasse, controllare che le lampade siano inserite
correttamente.
PULIZIA
Per conservare in buono stato la cappa, pulirla periodicamente seguendo le avvertenze
riportate di seguito.
Assicuratevi che sia esclusa l’alimentazione elettrica.
La sostanza detergente raccomandata è una soluzione di ACQUA e SAPONE LIQUIDO
NEUTRO. E’ molto importante che il sapone liquido sia privo di granuli che possono graffiare la
superficie.
La soluzione deve essere prima applicata su un panno morbido e poi a mano si strofina il
panno sul mantello seguendo necessariamente col panno il senso della satinatura.
E’ fatto assoluto divieto di versare liquidi direttamente sulla cappa.
Il panno deve essere privo di bottoni, chiusure lampo, automatici o altro che possa graffiare la
superficie.
Si vieta l’uso di prodotti aggressivi, granulosi o abrasivi o similari che potrebbero
compromettere l’aspetto superficiale del materiale.
La ditta costruttrice non risponde di danni sia funzionali che estetici causati da una pulizia non
adeguata ai materiali utilizzati od eseguita in modo non corretto.
ACCESSORI OPZIONALI
Sono disponibili, venduti separatamente, questi accessori opzionali:
ŶFILTRI CARBONE MONO-USO;
ŶFILTRI CARBONE RIGENERABILI;
ŶKIT FILTRANTE;
ŶVALVOLA DI RITENUTA.
GUASTI
Se la cappa aspirante non risponde correttamente al comando togliere tensione alla cappa
per circa 1 minuto estraendo la spina di alimentazione o disinserendo l’interruttore di
sicurezza e successivamente ripristinare il collegamento.
Se il comportamento della cappa sembra anomalo, consultare la procedura di azzeramento
filtri relativa al comando che equipaggia il prodotto (vedi capitolo FUNZIONAMENTO ED
UTILIZZO).
Se le luci rimangono debolmente accese quando la cappa è in stand-by, invertire le fasi
della spina/presa di alimentazione.

18
CONTRASSEGNO PER DIRETTIVA CEE
Questo apparecchio dispone di contrassegno ai sensi della direttiva
europea 2002/96/CE in materia di apparecchi elettrici ed elettronici
(waste electrical and electronic equipment WEEE).
Questa direttiva definisce le norme per la raccolta ed il riciclaggio degli
apparecchi dismessi valide su tutto il territorio dell’ Unione Europea.
Il simbolo a lato sul prodotto o sulla confezione indica che il prodotto
non deve essere considerato come un normale rifiuto domestico, ma
deve essere portato nel punto di raccolta appropriato per il riciclaggio di
apparecchiature elettriche ed elettroniche. Provvedendo a smaltire
questo prodotto in questo modo appropriato, si contribuisce a evitare potenziali
conseguenze negative per l’ambiente e per la salute, che potrebbero derivare da uno
smaltimento inadeguato del prodotto. Per informazioni piu’ dettagliate sul riciclaggio di
questo prodotto, contattare l’ufficio comunale, il servizio locale di smaltimento rifiuti, o il
negozio in cui è stato acquistato il prodotto.

19
INSTRUCTIONS FOR USE and PRECAUTIONS
Before the fist use pay attention to what has been written in the attached manual.
The accessibile parts of the hoods can become hot if the hob is working.
ŶThe hood is not intented for the use of children or people with reduced physical,
mental or sensorial capacities, unless they have been instructed on purpose from the
person responsible for their security. The children must be supervised to guarantee
that they do not play with the hood.
ŶNot to cook “flambé” dishes, avoid flames directly underneath the hood.
ŶIf you use a gas hob, do not use all the burners at the same time and at the highest
termical load for a long period (max 15 minutes), otherwise you have the risk of
getting burned if you touch the surface of the casing, or the risk of damages to the
cooker hood. In case of use at the same time of 3 or more burners, the cooker hood
must work at the highest speed.
ŶTo avoid leaving on any hot plates which generate strong free flames underneath the
hood.
ŶTo avoid any strong flames being issued from under saucepans at the sides; when
frying, not to allow oil to splash or overheat in the pan, as this is a fire risk.
ŶBefore any cleaning or maintenance operation, disconnect the hood from the main
supply, by means of the main switch or the bipolar switch or by removing the plug.
ŶIf other gas equipment or equipment which consumes oxygen from the environment is
used, ventilation must be sufficient. For safe ventilation, maximum depression in the
room should not exceed 4 Pa (0,04 mbar) and there must be a hole on the outside
facing wall (suitably positioned and dimensioned).
ŶNever use the hood without the grease filters.
ŶKeep the grease filters clean, taking into account the recommended cleaning
suggestions.
ŶReplace the carbon filters (if the hood is used as a filtering hood), as indicated.
ŶTurn on the hood motor before you start cooking.
ŶTurn off the hood motor about 10 minutes after you have finished cooking.
ŶDo not use the hood to suction gas, fumes, vapours or other substances different
from the normal fumes in the kitchen.
GENERAL
A SUCTION HOOD extracts air, fumes and vapours from the inside environment and then
expels them outside. It is not necessary to use carbon filters for purifying.
A FILTERING HOOD extracts air, fumes and vapours from the inside environment, purifies
them by means of carbon filters and then emits the purified air into the same
environment. In this case the use of carbon filters is absolutely necessary.
Carbon filters are available separately and can be purchased as optional accessories (see
OPTIONAL ACCESSORIES).

20
BEFORE MOUNTING
The instruction manual apply to several versions of the appliance. Accordingly you may find
descriptions of individual features that do not apply to your specific appliance.
Before mounting the hood it is necessary to pay attention to the minimum installation
distances between the lower part of the hood and the upper part of the hob as shown in the
specific mounting pictures. Where it is possible to reach, we advice a distance between 700
and 800 mm.
If the user decides to install the hood at lower distances than the ones shown, the
manufacturer declines any responsabilità for eventual damages caused by the hood
due to strong heat or damages to property or persons caused directly or indirectly by
any type of malfunctioning break down or possible fire.
Arrange for a socket outlet or standard connection to the electric mains; if the hood is
used as a suction hood, it is necessary to make a hole towards the outside (i.e in the
open air) for the scavenging of the fumes.
It is absolutely forbidden for the user to connect the air discharge of the hood, when
used a suction hood, to boiler chimneys, gas, fume or vapour scavenging chimneys or
any other duct, even only ventilation ducts, which have been used or will be used for
other devices. Moreover it is not permitted to connect the scavenging pipe for fumes
in other adjacent rooms or wellholes, or pipes for fire-fighting devices. In any case it
is necessary to respect all norms concerning scavenging of the air. Any user who
does not adhere to these instructions is risking his own life and the lives of others. In
this case, the manufacturer declines any responsibility.
If the hood is used as a suction hood, it is necessary for qualified personnel to make a
hole for ventilation on the outside wall. If the cooker is gas, it is not advisable to use the
hood at the same time are fireplaces, furnaces, gas or other fuel stoves, or water heaters
which burn up oxygen from the environment in order to function, and in any case
depression in the cooker area must be below 4 Pa (0,04 mbar) and the room must be
sufficiently aired.
If in doubt, national and international standards precisely indicate the rules for the state of art
installation of gas systems and for environment air change, to avoid the possibility of
incomplete combustions with the risk of poisonous fumes being emitted.
If the hood is to be used as a filtering hood, it is necessary to purchase carbon filters (see
OPTIONAL ACCESSORIES).
MOUNTING INSTRUCTIONS
Mount the cooker hood as shown in the pictures of the M series if the hood is used for
suction use, or C series if the hood is used for filtering use.
The hood is equipped with standard fixing material. The person who is mounting the
hood should make sure that the fixing elements are right and suitable for the walls
and ceilings he finds. The manufacturer declines any responsibility for damages
caused by incorrect mounting.
The cooker hood is heavy and in order to move it 2 persons are needed.
The packaging material is dangerous for childen. Never allow the children to play with the
packaging material.

21
During the installation of the cooker hood, always wear protective handgloves to prevent
injuries.
DISMANTLING AND REPOSITIONING OF THE GREASE FILTERS
ŶSwitch the light off and wait untill the bulbs are completely cooled down.
ŶFollow the steps as shown in the pictures.
ŶTo dismantle the grease filter, press the handles, overturn the filters and remove
them.
ŶTo remount the grease filters, put the rear part of the grease filter into its seat, press
the handle, insert the front part of the filter and release the handles.
FITTING AND REMOVAL OF EVENTUAL CARBON FILTERS
If you want to use the hood as filtering it is necessary to mount the carbon filters as it is
shown in the pictures of the C series. The carbon filters are OPTIONAL and they have to
be bought in a separate way.
There are carbon filters that need replacement after use and carbon filters that can be
regenerated. In case of use of carbon filters which can be regenerated follow the
instructions enclosed to the filters.
GENERAL WARNING
The pipe must be heat, flame and corrosionproof. The manufacturer strongly advises
against the use of reducers or pipes with different diameter to the hood outlet pipe, and
pipes made of flexible aluminium because performance is diminished and noise level
increased.
The end part of the pipe, on the outside of the hole on the wall, must be of such a shape
to avoid rain, gusts of wind or other foreign bodies getting into the pipe. Should there be
any doubt, contact anyone specialising in the installation of gas or ventilation system.
ELECTRICAL CONNECTION
WARNING
The electrical connection can only be carried out by qualified professional personnel,
using standard material and state of the art installation methods. The manufacturer
declines any responsibility for installations carried out by unskilled persons and for
installations which are not in conformity with the standard norms concerning electrical
safety (both concerning methods and materials).
ELECTRICAL TECHNICAL DATA
The electrical technical data are visible inside the hood after the removal of the grease
filters.
CONNECTION TO THE POWER SUPPLY
The flexible feed cable supplied is already connected internally and emerges from the
hood near the air outlet duct.
It is possible to effect two types of electric installation:
Ŷfixed installation;
Ŷinstallation by means of plug on a socket.

22
BEFORE ELECTRICAL INSTALLATION
Before connection you must:
Ŷcheck that the electrical data indicated are in conformity with the main voltage and
frequency values of the building where the hood is to be installed;
Ŷcheck that the building is fitted with electric safety systems to protect against short
circuits and electric shock systems, according to the laws in force;
Ŷinstall an electric socket (or connection point) with a bipolar switch, which has
contacts with an opening of at least 3 mms;
Ŷif it is wished to install the hood with a plug, it is necessary that you have access to
the plug;
Ŷalways turn off the main voltage supply by means of the bipolar switch before
connecting and switch on again only when connections have been completed, tested
and are safe.
If the light of the lamps is weak when the hood is in stand by, then invert the phase
of the plug/socket.
PRECAUTIONS TO BE TAKEN IF REPAIRS ARE TO BE CARRIED OUT
Repairs, including the replacement of the feed cable if necessary, are to be carried out
only by qualified personnel, using standard methods, instruments and materials. Any
repairs carried out by others could prove to be dangerous and could be a fire risk.

7
FUNZIONAMENTO ED UTILIZZO
TIPOLOGIE DI COMANDO
COMANDO TOUCH CONTROL
Imposta la velocità 1 / Tasto premuto 5 secondi spegnimento.
Imposta la velocità 2.
Imposta la velocità 4, con funzione boost di 7 minuti.
Attivazione funzione timer auto-off nella velocità 1 - 2 - 3 (durata 15 minuti)
Imposta la velocità 3.
Accende/spegne le lampade.
GESTIONE FILTRI ANTIGRASSO
Il comando permette un controllo automatico della gestione dei filtri antigrasso in modo
che l’utente non debba preoccuparsi di considerare il tempo trascorso dall’ultima
manutenzione effettuata.
Quando i filtri metallici antigrasso sono da pulire (200 ore), viene emesso un segnale acustico con il
ventilatore in moto, mentre a motore spento il secondo led del display
Reset allarme filtri antigrasso premere il tasto
lampeggia con luce blu.
GESTIONE FILTRO CARBONE
Il comando permette un controllo automatico della gestione dei filtri carbone in modo
che l’utente non debba preoccuparsi di considerare il tempo trascorso dall’ultima
sostituzione effettuata (allarme attivo dopo 100 ore reali di funzionamento).
Quando i filtri carbone sono da sostituire, il terzo led del display lampeggia con luce blu.
Reset allarme filtri carbone premere il tasto

32
MAINTENANCE
GREASE FILTERS
The metallic grease filters are positioned on the bottom of the hood and are used to
contain any grease which is normally emitted in cooking fumes, thereby impeding the
deterioration of the motor.They can be washed either by hand or in the dish washer.
For washing by hand, use hot water and soap; this can be done by hand brushing
vigorously several times and then rinsing under the tap.
After washing, the grease filters should be dried and re-fitted correctly.
It is possible that after washing the filter will have slight change in the colour.
It is advised to wash the grease filters after circa 50-100 hours of use of the
cooking top.
If the grease filters are very dirty, the motor can only take in a small quantity of air,
and performance is reduced;
The grease which accumulates on dirty filters is easily inflammable and can cause fires,
if they are not removed by periodic washes.
The manufacturer declines any responsibility for fires caused by poor maintenance of
the grease filters.
CARBON FILTERS
The carbon filters at the suction outlet of the motor, are used to retain the odours of the
kitchen fumes. It is not necessary to use carbon filters.
The use of carbon filters is necessary if you use the hood as filtering.
There are 2 kinds of carbon filters, carbon filters that can be regenerated and carbon
filters that cannot be regenerated.
Carbon filters that can be regenerated:
Please follow and read the instructions given with the carbon filters that can be
regenerated as far as mounting and re generation are concerned.
Carbon filters that cannot be regenerated:
we advise to replace the carbon filters after circa 200-300 hours of use of the
cooking top. The carbon filters that cannot be regenerated cannot be either washed
nor regenerated but need to be replaced when expired.
Carbon Filters do not guarantee the interchange of oxygen in the air.
To ensure correct ventilation and air interchange in the kitchen, national and
international regulations exist, which should be respected.
The manufacturer denies any responsibility for fires caused by failure to replace the
carbon filters.
REPLACEMENT OF LAMPS
Always replace the lamps with lamps which have the same electrical characteristics
(see TECHNICAL DATA). Before replacing the lamps, make sure that they are cold and
that power has been completely turned off.
Please follow the sequenze as shown in L series pictures.
Reconnect to electricity.
If te lights are not working, check that the lamps are correctly fit.

33
CLEANING
To preserve the hood in good condition, clean this periodically following the advice given
as follows.
Make sure that power has been completely turned off.
The detergent solution recommended is a combination of WATER and NEUTRAL
LIQUID SOAP. It is of vital importance that the liquid soap should not contain any
grains which could scratch the surface.
The solution should be applied first onto a soft cloth which is then rubbed over the
shell. It is important to follow the pattern of the satin finish with the cloth.
It is absolutely forbidden to pour liquids directly onto the hood.
The cloth used should not have any buttons, zips, fasteners or anything else which
could scratch the surface.
The use harsh abrasive or granular products, petrol, spirits or similar products which
could damage the surface of the materiall, is severely forbidden.
The manufacturer will not be responsible for any damages either functional or to the
appearance of the hood, caused by cleaning operations carried out using unsuitable
products or unsuitable methods.
ACCESSORIES
The following optional accesories are available and are sold separately:
ŶONE USE CARBON FILTERS;
ŶCARBON FILTERS THAT CAN BE REGENERATED;
ŶFILTERING KIT;
ŶCHECK VALVE.
IF YOU ENCOUNTER A PROBLEM
Disconnect the hood from the mains electricity supply and keep it disconnected for ca 1
minute, then reconnect.
If the behaviour of the hood seems strange, read the procedure for resetting carbon and
grease filters concerning the kind of control in your hood. (see FUNCTION AND USE).
If the lights are weakly on when the hood is in stand by, please Se le luci rimangono
debolmente accese quando la cappa è in stand-by, invertire le fasi della spina /presa di
alimentazione.
This manual suits for next models
2
Table of contents
Languages:
Other Barazza Ventilation Hood manuals
Popular Ventilation Hood manuals by other brands

Schweigen
Schweigen HN-6C installation guide

Fisher & Paykel
Fisher & Paykel HP60 installation instructions

Electrolux
Electrolux ERHC1238S Installation & user manual

Thermador
Thermador PHE 30 instructions

Zanussi
Zanussi ZHT 530 Installation, use and maintenance handbook

Progress
Progress PDG6140E Instructions for use and installation