baridi DH52 User manual

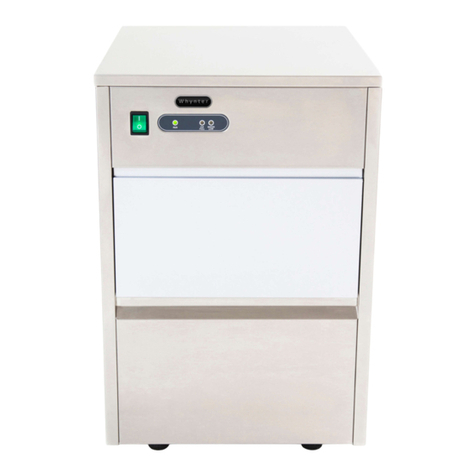
Baridi 12kg/24hr Ice Cube Maker
with LED Display 10 Minute Freeze
Model No. DH52
Thank you for purchasing a Dellonda product. Manufactured to a high standard, this product will, if used according to these instructions, and properly
maintained, give you years of trouble free performance.
LINE
DRAWING
www.dellonda.co.uk DH52 Issue:1 11/11/2020

2
Important Information
Please read these instructions carefully and note any safe operational requirements, warnings & cautions. Use the product correctly and with
care for the purpose for which it is intended. Failure to do so may cause damage and/or personal injury and will invalidate the warranty. Keep
these instructions safe for future use.
About the Product
Produces up to 12kg ice in 24 hours, producing each batch in just 10 minutes! Choose between two sizes of ice cube. Electronic control with LED
display. 2.2L water tank and 1.3L ice basket. LED indicators show when water level is low and when ice compartment is full.
Safety Instructions
ELECTRICAL SAFETY
WARNING! It is the responsibility of the owner and the operator to read, understand and comply with the
following:
You must check all electrical products, before use, to ensure that they are safe. You must inspect power
cables, plugs, sockets and any other connectors for wear or damage. You must ensure that the risk of electric
shock is minimised by the installation of appropriate safety devices. A Residual Current Circuit Breaker
(RCCB) should be incorporated in the main distribution board. You must also read and understand the
following instructions concerning electrical safety.
9Ensure that cables are always protected against short circuit and overload.
9Regularly inspect power supply cables and plugs for wear or damage and check all connections to ensure
that none are loose.
9Ensure that the voltage marked on the appliance matches the power supply to be used and that the plug is
tted with the correct fuse - see fuse rating at right.
8DO NOT use worn or damaged cables, plugs or connectors. Have any faulty item repaired or replaced
immediately by a competent electrician.
Recommended fuse rating
13 Amp
Refer to
instruction
manual
Warning:
Flammable
Contents
Part Description Quantity
1 Rear Cover 1
2 Top Cover 1
3Water Tray 1
4 Evaporator 1
5 Ice Shovel 1
6 Ice Bin Full Sensor 1
7 Transparent lid 1
8 Ice Basket 1
9 Water Reservoir 1
10 Filter 1
11 Water Drain Plug 1
12 Compressor 1
13 Power Cord 1
14 Control panel 1
Specication
Water tank capacity: 2.1L
Ice basket capacity: 1.3L
Pcs per batch: 9
Refrigerant (weight) R600a (21g)
Vesicant: Cyclopentane (C5H10)
Power consumption: 120W
Supply: 230V-50Hz

3
9 It is recommended that this appliance is wired directly to a fused isolator switch. If, however, a plug is tted, the following applies:
9Fit a new plug according to the following instructions (UK only).
A) Connect the GREEN/YELLOW earth wire to the earth terminal ‘E’.
B) Connect the BROWN live wire to the live terminal ‘L’.
C) Connect the BLUE neutral wire to the neutral terminal ‘N’.
D) After wiring, check that there are no bare wires, that all wires have been correctly connected, that the cable restraint is tight.
GENERAL SAFETY
IMPORTANT NOTICES
When using an electrical appliance, basic safety precautions should always be followed to reduce the risk of re, electric shock, and/or
injury, including the following:
9Read all instructions before using.
9Remove all packing material and carefully check your ice maker to ensure it is in good condition and that there is no damage to the ice
maker or power cord and plug.
9Before using the Ice maker for the rst time, please wait 2 hours after positioning it, and keep the transparent lid open for at least 2 hours.
9Pure water is not allowed to be used on this unit, spring water is recommended.
9Ensure the voltage is compliant with the voltage range stated on the rating label, and ensure the earthing of the socket is in good
condition.
9If the supply cord is damaged, it must be replaced by the manufacturer or its service agent or a similarly qualied person in order to avoid
a hazard.
8DO NOT upend this product or incline it over a 45℃ angle.
9To protect against risk of electric shock, DO NOT pour water on cord, plug and ventilation, immerse the appliance in water or any other
liquid.
WARNING! Unplug the appliance after using or before cleaning.
9Keep the appliance 8cm from other objects to ensure the good heat dispersion.
8DO NOT use the accessories which are not recommended by Manufacturer.
9This appliance can be used by children aged from 8 years and above and persons with reduced physical, sensory or mental capabilities
or lack of experience and knowledge if they have been given supervision or instruction concerning use of the appliance in a safe way and
understand the hazards involved. Children shall not play with the appliance. Cleaning and user maintenance shall not be made by children
without supervision. Children should be supervised to ensure that they DO NOT play with the appliance.
8DO NOT use the appliance close by ames, hot plates or stoves.
8DO NOT switch on the power button frequently (ensure 5min interval at least) to avoid the damage of compressor.
9Metal sheet or other electric objects are not allowed to be inserted into the appliance to avoid re and short circuit.
8DO NOT use outdoors.
9Never clean with scouring powders or hard implements.
9Please keep the instruction manual.
WARNING: DO NOT store explosive substances such as aerosol cans with a ammable propellant in this appliance.
9This appliance is intended to be used in household and similar applications such as
– staff kitchen areas in shops, ofces and other working environments;
– farm houses and by clients in hotels, motels and other residential type environments;
– bed and breakfast type environments;
– catering and similar non-retail applications
9The refrigerant and insulation blowing gas is ammable, when disposing of the appliance, do so only at an authorized waste disposal centre.
DO NOT expose to ame.
9If the power cord is damaged; it must be replaced by the manufacturer, its service agent or a similarly qualied person in order to avoid a
hazard.
9Fill with potable water only.
9It is normal for the compressor and condenser surface to reach temperatures between 70°C and 90°C during operation and surrounding
areas may be very hot.
9Due to fast freezing, ice cubes may appear “Cloudy”. This is air trapped in the water and will not affect quality or taste of ice.
9This appliance is not intended for use by persons (including children) with reduced physical, sensory or mental capabilities or lack
of experience and knowledge unless they have been given supervision or instruction concerning use of the appliance by a person
responsible for their safety.
9Children should be supervised to ensure that they DO NOT play with the appliance.
8DO NOT immerse in water.
WARNING: – keep ventilation openings ,in the appliance enclosure or in the built-in structure clear of obstruction.
WARNING: – DO NOT use mechanical devices or other means to accelerate to defrosting process ,other than those recommended by the
manufacturer.
WARNING: – DO NOT damage the refrigerant circuit.
WARNING: – DO NOT use electrical appliance inside the food storage compartments of the appliance , unless they are of the type
recommended by the manufacture.
WARNING! Professional repair only.

Control Panel Operation
Operating Instructions
• Note: Water reservoir and pipeline should be cleaned before use.
• Step 1. Unplug the unit, and clean the water reservoir by adding water, then remove the plug to drain out the water from water reservoir.
• Step 2. Reinstall the plastic plug, and add clean water. After connecting the power supply, press and hold “SELECT” button for 3 seconds to
activate pipeline self-cleaning process. After cleaning, drain out the water.
• Step 3. Open the lid and take out the ice basket to add appropriate water into water reservoir.
• Note: The water poured into water reservoir should be lower than the water reservoir’s MAX level. When water volume goes beyond the max level,
please open the bottom water drain plug to drain the spare water out. Then close the transparent lid.
• Step 4. Select the desired ice size, the machines default size of ice is large.
• Note: Please select the (S) small sized ice cubes when ambient temperature is below 15°C. When the ambient temperature is higher than 30°C,
(L) Large ice cube sizes are recommended.
• Note: For the rst three cycles, the ice may be small and irregular in size.
• Note: When the ice collecting tray is full please remove the ice immediately, DO NOT allow the ice collecting tray to overll.
Cleaning & Use Guidance
• 1. Clean the inner liner, ice collecting tray, water box, ice shovel and evaporator frequently. When cleaning, unplug the unit and remove the ice
cubes. Use a diluted solution of water and vinegar to clean the inside and the outside surface of the Ice maker. DO NOT spray Ice maker with
chemicals or diluted agents such as acids, gasoline or oil. Rinse thoroughly before starting.
• 2. Keep ventilation openings in the appliance enclosure, or in the built-in structure, clear of obstruction. DO NOT use mechanical devices or other
means to accelerate the defrosting process, other than those recommended by the manufacturer.
• 3. Using the machine after being left for a period of time. It may not have enough water to pump in the system, and the indicator of “ADD WATER”
will keep lighting. At this time, you just need to press POWER button again, the machine can enter normal state.
• 4. To ensure the cleanness of ice, please change water for water reservoir at least once one day. If not using for a long time, drain the water from
the machine, clean it and make sure it is completely dry before storing.
• 5. If the compressor stops due to a shortage of water, is over-full of water or there is an interruption of the power supply, it will delay for 3 mins to
start up after restarted.
• 6. Always use fresh water before starting ice production either at initial installation or after a long shut-off period.
• The POWER indicator will ash after the unit is plugged in, and then the machine enters standby state. It will start to work by
pressing POWER button, accompanying indicator lighting. During operation, pressing this button, the machine will return to
standby state.
• This button is for selecting the size of ice. The default setting is large ice, if the smaller one is needed, press this button. When
you select the desired size, corresponding indicator of S (small) or L (large) will be on.
• Press and hold “SELECT” button for 3 seconds to activate the pipeline self-clean process, which “pumps water through for 30
seconds --- water tank run to drain out water” as a cycle, and this cycle will run for 5 times. “S” and “L” will ash in turn until the
self-cleaning process is over and the machine enters standby mode. Remove the plastic plug to drain water and then whole
process will be nished.
• When the indicator for this button turns red, it means there is insufcient water in the water reservoir, you need to add enough
water and press the POWER button to restart the machine.
• When the ice reaches the max storage capacity, the indicator on this button will ash, and the machine will stop working.
Remove the ice and the machine will start again. If the level of the ice is lower than the level of ‘ice bin full’ sensor, the machine
will restart automatically.

Dellonda Limited, Sole UK Distributor of Baridi
Kempson Way, Suffolk Business Park, Bury St Edmunds, Suffolk. IP32 7AR
Troubleshooting
Environment Protection, Waste Electrical and Waste Electronic Equipment Regulations
(WEEE)
Recycle unwanted packaging materials. When this product is no longer required, or has reached the end of its useful life, please dispose
of in an environmentally friendly way. Drain any uids (if applicable) into approved containers, in accordance with local waste regulations.
Please note that this product contains one or more batteries. It is our policy to continually improve products and we reserve the right to
alter data, specications and parts without prior notice. No liability is accepted for incorrect use of this product. Guarantee is 12 months
from purchase date, proof of which is required for any claim.
Problem Possible Cause Solution
The compressor works abnormally with a
buzzing noise.
The voltage is lower than recommended. Stop the Ice maker and DO NOT restart until
the voltage is normal.
Water shortage indicator light is on. 1. There is no water.
2. The pump is full of air.
1. Add to some water until it reaches MAX
position.
2.Press POWER button to restart.
Indicator lights on display are not on. Blown fuse/ No power. Replace fuse/ Turn power on.
The ice made is too large and with pieces
sticking together.
1. Water temperature is too low.
2. Ice of previous cycles left in the water tray.
1. Select the small size.
2. Take out the ice while the unit is in the
standby state.
All indicators ash simultaneously. Water tray is blocked by ice cube. Unplug the power to take out the ice which
blocking the tray, then plug the power and
press the POWER button, the machine will
restart 3mins later.
Troubleshooting
• 1. Please note, if a power failure occurs due to disconnection of the power cord, or the power button being pressed to ‘off’ during an ice making
cycle, small ice chips may have formed and lodged in the automatic shovel causing it to jam. If this occurs, the ice chips may be removed
by disconnecting the ice maker from the power supply and gently pushing the shovel to the rear of the cabinet, removing the ice chips, then
restarting.
• 2. Please check if the water reservoir is level if the ice shovel can not move the ice to ice basket. If not, please push the ice shovel back into
position by hand, then press the POWER button to restart.
Table of contents
