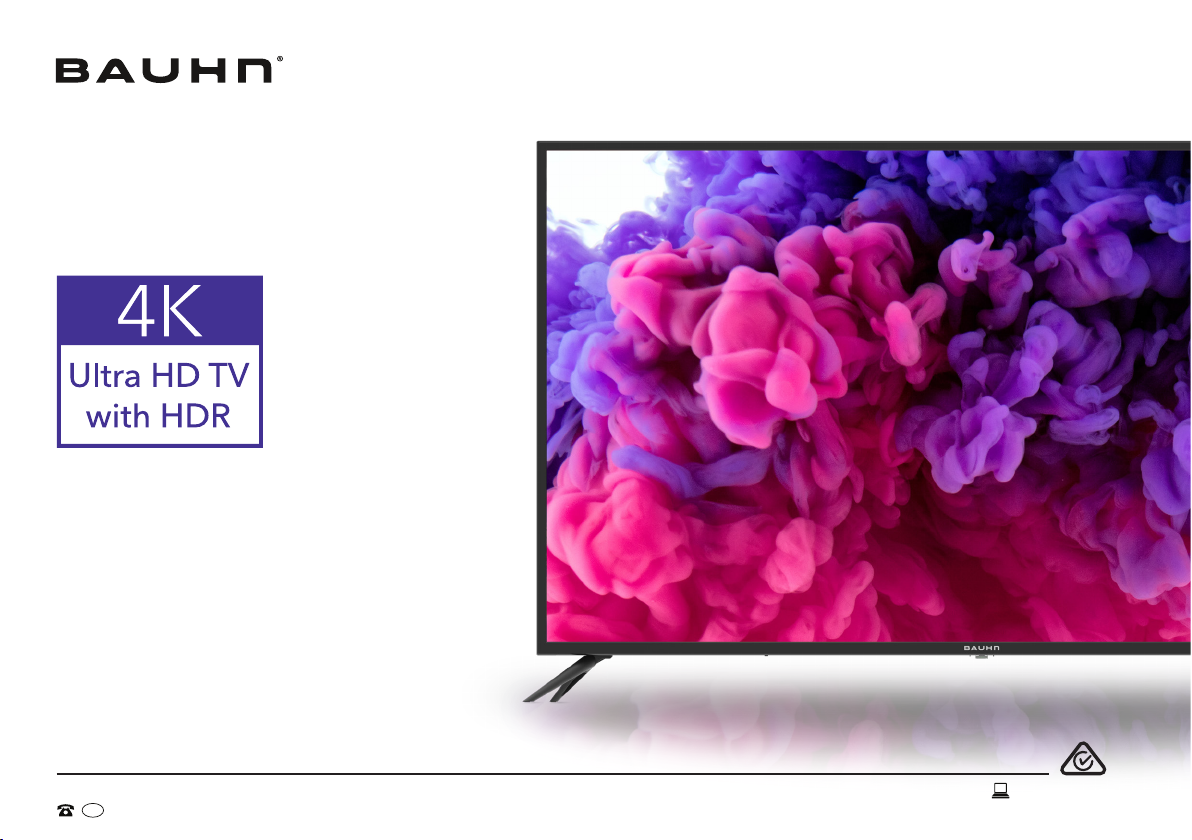
Bauhn ATV50UHD-1120 User manual

User Manual
MODEL: ATV50UHD-1120
50
”
AFTER SALES SUPPORT
1300 886 649
MODEL: ATV50UHD-1120 PRODUCT CODE: 703650 11/2020
AUS

2
Welcome
Congratulations on your purchase!
This manual tells you all you need to know about using your new BAUHN®product.
Please take special note of any important safety and usage information presented with the symbol.
All products brought to you by BAUHN®are manufactured to the highest standards of performance and safety and,
as part of our philosophy of customer service and satisfaction, are backed by our comprehensive 1 Year Warranty.
Domestic use only: This product is intended for indoor domestic use only. It is not suitable for commercial, industrial
or outdoor use. Do not use this product for anything other that its intended purpose, and only use it as described in
this manual.
We hope you will enjoy using your purchase for many years to come.

3
On-Screen Set Up 17
TV Setting Menus 18
Channel 20
Picture 22
Sound 24
Time 25
Lock 26
Option 28
High Dynamic Range (HDR) 31
TV Guide 32
Recording 33
Recording Live TV 34
Scheduled Recording 34
Playback 34
Pause Live TV (Time-shift) 35
USB Mode 36
Set up 36
Contents
Welcome 2
Unpack and Prepare 4
What's in the Box 4
Important Tips 5
Attaching the Stand 6
Wall-Mounting the TV 7
Connect to Power 8
Connect your Antenna 8
Controls and Connections 9
Get to know your TV 9
Buttons on the TV 9
Ports on the TV 10
Remote Control 12
Setup 12
Using the Remote Control 13
Standard Remote 14
Easy Remote 16
Troubleshooting 39
Specications 42
Compliance and
Responsible Disposal 43
Warranty Information 44
Repair and Refurbished
Goods or Parts Notice 45

4 | UNPACK AND PREPARE
See the top flap of the box
for how to handle the TV
without damaging it!
Unpack and Prepare
What's in the Box
In the box you will find:
A. 50" 4K Ultra HD TV with HDR
B. Remote Control
C. Easy Remote Control
D. AAA Activ Energy Batteries (4)
E. TV Stands (2)
F. Screws for TV Stands (2)
G. AV Cable
H. Warning Sheet
I. TV Toppling Safety Message
J. Quick Start Guide
K. Warranty Certificate
L. General Safety Warnings
M. User Manual
M
You will need:
• Phillips-head screwdriver (for stand installation)
• Someone to help you lift and install your TV
• Antenna cable (to watch live TV)
Before installing your new TV, check you have everything needed.

UNPACK AND PREPARE | 5
Important Tips
• Place the TV on a level surface.
• Place the TV away from any source that may generate heat or vibrations.
• Make sure there is enough space around vents for airflow.
• The remote control works up to 5 metres away from the TV.
• Unplug the TV before cleaning it.
• Clean using a dry cloth only - do not use water or chemicals.
• Use only the power supply provided.
• It is highly recommended to use safety straps for securing the TV in place.
• Keep liquid, children and pets away from the TV at all times.

6 | UNPACK AND PREPARE
Attaching the stand
• This TV is heavy! We recommend asking
someone to help you lift it.
• Unplug the TV from the power outlet before
installing or removing the stand.
• Only touch the frame, not the screen.
• It is highly recommended to use safety straps for
securing the TV.
CAUTION!
Do not apply
excessive force as
you might damage
the screw holes.
Unless you are wall-mounting the TV, you will need to
attach its stand/legs.
1. Lay the TV face-down on a soft, flat surface (like the
sofa, or a towel on a table) larger than the TV itself.
2. Match the stands to the installation points on the
underside of the TV.
3. Attach the stands to the TV at the installation points
using the screws provided. (Grab a screwdriver for
this bit).

UNPACK AND PREPARE | 7
200mm
Back of the TV
200mm
Wall-mounting the TV
The TV comes with holes on the back panel for use with
wall-mounting brackets (bracket not included).
Use four standard M6*10mm screws (or longer,
depending on the mounting bracket) to wall-mount this
TV (screws are not included).
• Unplug the TV from the power outlet
before wall-mounting.
• Contact a professional for assistance with
wall-mounting the TV.
Required
• VESA Mounting
Bracket
• 4 x M6*10mm
screws (or longer
as required)
The screws in the package are for securing the TV stand
only. If you are wall-mounting the TV, consult a qualified
installer for advice on bracket support and wall support.

8 | UNPACK AND PREPARE
Free-to-airTVinHD(HighDenition)
High Definition (HD) channels
provide the best viewing quality and
are available with a digital antenna
connection.
TV channels in Ultra HD resolution are
not currently available in Australia.
Therefore when you watch HD
broadcast signals on an Ultra HD TV,
the picture can appear 'soft' and lacks
the detail you see when watching the
same content on an HD TV.
Connect to power
Make sure the TV is switched off at the power outlet
until you have finished connecting your cables.
Connect your antenna
Antenna cable not included.
Don't forget to plug in the TV
to the power outlet. Leave
the power switched off until
installation is finished.
ABC HD
SBS ONE HD
7HD
9HD
10 HD
PRIME7 HD
WIN HD
Example
HD Channels

CONTROLS AND CONNECTIONS | 9
See next page for more info on the connections.
Controls and Connections
Get to know your TV
Buttons on the TV
On/Standby light and Remote sensor
Bottom view
• When the TV is on standby, press this
button to turn the TV on.
• When the TV is on, press to turn the TV off.

10 | CONTROLS AND CONNECTIONS
Ports on the TV
1 2 3 54
1ANTENNA IN
FREE-TO-AIR
TV
Connect your antenna for live TV. (Antenna cable not included.)
2
DIGITAL
AUDIO OUT
(OPTICAL)
SOUND
Connect an external digital audio device. Use an Optical cable
(not included) to connect the unit with an amplifier, soundbar or
other audio decoding device for digital audio signal output.
3(CVBS)
VIDEO IN
PICTURE
You can use this to connect your DVD player. Supports Standard
Definition (SD) picture quality. Requires an AV cable (included).
4AUDIO IN
SOUND
You can use this to connect Audio to your TV for AV or
Component video inputs. Requires an RCA Stereo Audio cable
(not included but you can use the supplied AV cable).
5USB
STORAGE
»PVR record and pause live TV
»Play your stored media files (supported file codecs and
extensions may vary)
»Software updates
ANTENNA IN
22
11
(CVBS)
VIDEO IN
DIGITAL AUDIO
OUT (OPTICAL)

CONTROLS AND CONNECTIONS | 11
6 8 97
6
Headphone
Jack
SOUND
Connect to your headphones, amplifier or audio device, using an
AUX cable (not included).
7
HDMI
Use a high-speed
HDMI cable for
best picture and
sound quality.
SOUND
PICTURE
COMPUTER
All-digital connection between the TV and any HDMI device.
Supports Ultra HD. Requires a High Speed HDMI cable (not
included).
8PC AUDIO
SOUND
Connect audio from your PC via a 3.5mm connector
(not included).
9PC VGA
PICTURE
Connect to a PC or other device with a VGA cable (not included).
HDMI 1 HDMI 2 HDMI 3
(ARC)
AUDIO VGA
PC IN

12 | REMOTE CONTROL
Setup
Insert two AAA size batteries according to the polarity
markings (+/-) inside the compartment. Make sure the
batteries are correctly aligned and properly pushed into
place.
Precautions When Using Batteries
• Do not use old and new batteries together.
• Do not use different types of batteries (e.g.
Manganese and Alkaline batteries) together.
• Remove the batteries from the remote if you do not
intend to use it for a long time.
• When discarding used batteries, follow any
guidelines for recycling and disposal of batteries
that apply in your local area.
• Keep batteries away from children and pets.
• Never throw batteries into a fire or expose them to
extreme heat.
Remote Control
AAA size
batteries
included
1
2
3

REMOTE CONTROL | 13
Using the Remote Control
To use the remote, point it towards the remote sensor
at the front of the TV. The remote will not operate if its
path is blocked.
The remote has a range of up to about 5 metres from
the TV at an angle of up to 30 degrees to either side of
the sensor, as illustrated below.
Image is an
example only.
Remote sensor
location on TV
may vary.
Remote Hints and Tips
• Do not drop, step on or otherwise
impact the remote control. This
may damage the parts or lead to
malfunction.
• Do not place objects between the
remote control and the remote
sensor.
• Do not use this remote control while
simultaneously operating a remote
control for other devices.
5m

14 | REMOTE CONTROL
POWER: Switch the TV to On or Standby.
GOTO: Jump to a different chapter of the DVD.*
ANGLE: View DVD playback from different
angles, if the DVD has this feature.*
FAV: Press to display your favourite program in
DTV mode.
TEXT: Switch between TV and Teletext mode.**
SUBTITLE: Enable/disable subtitles.
SIZE/ZOOM: Change the picture size.
MEDIA: Select USB mode.
: PLAY/PAUSE in TIMESHIFT and USB mode.
REC / D.SETUP: Record program in DTV
mode / Display the main disc menu.*
: Stop playback.
MENU: Display the main TV menu.
/ / / : Press the UP/DOWN/LEFT/RIGHT
buttons to navigate the on-screen menus and
adjust the system settings.
OK: Confirm your selection / Display the
channels list (DTV).
Standard Remote
TV/RADIO / EJECT: Switch between TV or radio
in DTV mode / Eject a disc (DVD).
A-B: Repeat selected DVD scenes.*
REPEAT: Repeat playback of a selected
chapter, title, or the entire DVD.
SLEEP: Set the TV sleep timer.
HOLD/FREEZE: Hold the picture temporarily.
SUBPAGE: Manually jump to the previous or next
subpage of Teletext.**
ASPECT: Change the size of the image on your
screen.
: Move fast forward.
: Move fast backward.
/INDEX: Play next file / Display the recorded
programs list (DTV).
: Play the previous file.
TITLE/EXIT: Display the DVD title menu / Exit
from the main TV menu displayed on the screen.*

REMOTE CONTROL | 15
SOURCE: Switch the input source.
MUTE: Mute the sound. Press again or press
V+ to restore the sound.
VOL +/-: Turn the volume up/down.
DISPLAY: Display information of the current
program.
NUMBER BUTTONS (0-9): Press to select a
TV channel directly when watching TV.
-/--: Switch the digits.
AUDIO/LANG: Switch the available sound-
track language (DTV/DVD).
D.MENU/GUIDE: Launch the TV Guide
(DTV).
CH +/-: Change to the next or previous
channel.
: Return to the previous channel.
S-MODE: Cycle through the different
sound modes.
P-MODE: Cycle through the different
picture modes.
* DVD-related function do not apply to
this model TV.
** Teletext is no longer available in
Australia.

16 | REMOTE CONTROL
Easy Remote
MENU
INFO
: Switch the TV to On or Standby
/ / / : Press the UP/
DOWN/LEFT/RIGHT buttons to
navigate
(MENU): Display the main menu
(INFO): Display information of
the current program
VOL : Turn the volume up or
down
: Mute the sound. Press again or
press VOL+ to restore the sound
(SOURCE): Switch the input
source
OK: Confirm your selection.
Display the channels list (DTV)
(EXIT): Exit from the main TV
menu displayed on the screen
CH : Go to the next or
previous channel
GUIDE : Launch the TV Guide
(DTV)

ON-SCREEN SET UP | 17
Make sure the TV is plugged in at
the power socket and switched
on. Press the (ON) button to
turn on the TV.
On-Screen Set Up
Make sure equipment is properly connected (as shown on pages
10-11) before connecting the TV to power.
On/Standby light is WHITE
in standby mode.
On/Standby light is OFF
when the TV is on.
First Time Setup menu
When you turn the TV on for the first time, the First Time
Setup menu will appear.
Follow the prompts using the / / / buttons to
select your preferences. You will be able to adjust:
Press OK to start auto tuning free-to-air channels.
If you change your mind, you can update your
preferences in the settings menu later.

18 | TV SETTING MENUS
Once you have programmed any
settings, the unit will retain them in
its memory until you change them,
even after turning the TV off.
TV Setting Menus
Menu Navigation Buttons
Function Remote Button
Display the main menu
Select different sub-
menus /
Enter a sub-menu OR
Select preferred option /
Adjust a value / / /
Return to the previous
menu
Exit a menu
Press the MENU button to display the TV settings menu.
See the guide below for all the other buttons you'll need
to use to adjust and change your settings.
Menus Index
Channel 20
• Auto Tuning
• ATV Manual Tuning
• DTV Manual Tuning
• Channel Edit
• Schedule List
• Signal Information

TV SETTING MENUS | 19
Picture 22
• Picture Mode
• Personal Mode Settings:
• Contrast, Brightness, Saturation,
Tint, Sharpness
• Picture Settings: Colour Temp,
Noise Reduction, HDMI Mode,
Aspect Ratio
Sound 24
• Sound Mode
• Treble
• Bass
• Balance
• Auto Volume
• Surround Sound
• SPDIF Mode
• AD (Auto Description) Switch
• SPDIF Audio Delay
• Audio Delay
Time 25
• Clock
• Time Zone
• Off Time
• On Time
• Sleep Timer
• Auto Standby
• OSD Timer
Lock 26
• Lock System
• Set Password
• Block Channel
• Parental Guidance
• Key Lock
• Hotel Mode
Option 28
• System Language
• Audio Language
• Subtitle Language
• Hearing Impaired
• PVR File System
• Blue Screen
• First Time Installation
• Shipping Condition
• Reset To Defaults
• Software Update (USB)
• HDMI CEC
• HDMI UHD
• Usage Mode
• System Information

20 | TV SETTING MENUS
Channel
Option Description
Auto Tuning Automatically tune all available free-to-air TV channels. Adjust settings (default settings are set for
Australia). Press OK to start scanning.
ATV Manual Tuning
Manually select and tune analog TV channels. (Analog TV is no longer supported in Australia).
Current channel: Press the / buttons to select the channel number to save the tuned signal.
Colour System: Select the colour system (PAL in Australia).
Sound System: Select the sound system (BG in Australia).
Fine-Tune: View the file tune setting.
Search: Press the OK button to start tuning.
DTV Manual Tuning Manually select and tune digital TV channels. Use / to select the broadcast channel. Press OK to
begin scanning.
Channel Edit See the next page for more information.
Schedule List Manage scheduled recordings. Press REPEAT to add a new program to record.
Press A-B to edit an existing schedule. Press GOTO to delete an existing schedule.
Signal Information Display current signal information (DTV mode only).
Table of contents
Other Bauhn HDTV manuals

Bauhn
Bauhn ATV24FHDC-0221 User manual

Bauhn
Bauhn ATV32HDG-1022 User manual

Bauhn
Bauhn ATV32HDG-0722 User manual

Bauhn
Bauhn B48-63UHDF User manual

Bauhn
Bauhn ATV32HDG-0423 User manual

Bauhn
Bauhn ATV32HD-1121 User manual

Bauhn
Bauhn ATV65UHDG-0620 User manual

Bauhn
Bauhn ATV24HDG-0223 User manual

Bauhn
Bauhn ATV32HDG-1021 User manual