Beastx MICROBEAST PLUS User manual

BEASTX Wiki:Books/MBPlus 52 ENG
wiki.beastx.com

March 22, 2021
On the 28th of April 2012 the contents of the English as well as German Wikibooks and Wikipedia
projects were licensed under Creative Commons Attribution-ShareAlike 3.0 Unported license. A
URI to this license is given in the list of figures on page 335. If this document is a derived work
from the contents of one of these projects and the content was still licensed by the project under
this license at the time of derivation this document has to be licensed under the same, a similar or a
compatible license, as stated in section 4b of the license. The list of contributors is included in chapter
Contributors on page 333. The licenses GPL, LGPL and GFDL are included in chapter Licenses on
page 343, since this book and/or parts of it may or may not be licensed under one or more of these
licenses, and thus require inclusion of these licenses. The licenses of the figures are given in the list of
figures on page 335. This PDF was generated by the L
A
T
EX typesetting software. The L
A
T
EX source
code is included as an attachment (source.7z.txt) in this PDF file. To extract the source from
the PDF file, you can use the pdfdetach tool including in the poppler suite, or the http://www.
pdflabs.com/tools/pdftk-the-pdf-toolkit/ utility. Some PDF viewers may also let you save
the attachment to a file. After extracting it from the PDF file you have to rename it to source.7z.
To uncompress the resulting archive we recommend the use of http://www.7-zip.org/. The L
A
T
EX
source itself was generated by a program written by Dirk Hünniger, which is freely available under
an open source license from http://de.wikibooks.org/wiki/Benutzer:Dirk_Huenniger/wb2pdf.

Contents
1 Introduction 3
2 MICROBEAST PLUS - What's that? 5
3 Additional guides 7
4 Firmware version 5.2.x 9
5 Hardware options 11
6 Software options 13
7 Safety Notes 15
8 Box content and accessories 19
9 This is what you get when buying the MICROBEAST PLUS 21
10 This is what you get when buying the MICROBEAST PLUS HD 23
11 Optional accessory 25
12 Hardware installation 27
13 Attaching your Microbeast PLUS to the helicopter 29
14 Introduction to MICROBEAST PLUS HD 31
15 Receiver connection 33
16 Standard receiver 35
17 Receivers with single wire output (single-line receivers) 37
18 Remote satellite (Spektrum® DSM/JR® DMSS/ALIGN® iBus) 39
19 Spektrum® SRXL2 receiver 41
20 Radio system 43
21 Preparing the radio system 45
22 Spektrum® DSM2/DSMX receiver binding 49
III

Contents
23 Receiver Menu 51
24 Preset function assignments for Single-line receivers 53
25 Adjustment on the device 55
25.1 Point A - Receiver type . . . . . . . . . . . . . . . . . . . . . . . . . . . . . 55
25.2Functionassignment ............................... 56
25.3 Point N - Throttle failsafe . . . . . . . . . . . . . . . . . . . . . . . . . . . . 59
26 Setup with StudioX 61
26.1Receivertype................................... 61
26.2Functionassignment ............................... 62
26.3Throttlefailsafe.................................. 63
27 SETUP MENU (Basic heli setup) 65
28 Adjustment on the device 67
28.1Buttoncontrol .................................. 68
28.2Stickcontrol.................................... 69
29 Basic setup with StudioXm 71
30 SETUP MENU A - Device orientation 73
31 Adjustment at the device 75
32 Setup with StudioXm 77
33 SETUP MENU B - Swashplate frequency 79
34 Adjustment on the device 81
35 Setup with StudioXm 83
36 Servo connection 85
37 SETUP MENU C - Rudder pulse width 87
38 Adjustment on the device 89
39 Setup with StudioXm 91
40 SETUP MENU D - Rudder servo frequency 93
41 Adjustment on the device 95
42 Setup with StudioXm 97
43 Manuals:MBPlusFblV52:Setupmenu E 99
44 Mechanical setup of the rudder servo 101
IV

Contents
45 Adjustment on the device 103
45.1 SETUP MENU E - Rudder limits . . . . . . . . . . . . . . . . . . . . . . . . 103
45.2 SETUP MENU F - Rudder control direction . . . . . . . . . . . . . . . . . 103
46 Setup with StudioXm 105
47 Extra info: Why setting stick endpoints? 107
48 Extra info: How the gyro works! 109
49 SETUP MENU G - Collective and cyclic pitch mixing (CCPM) 113
50 Adjustment on the device 115
51 Setup with StudioXm 117
51.1 Virtual swash rotation . . . . . . . . . . . . . . . . . . . . . . . . . . . . . . 117
51.2Customswashmixing .............................. 117
52 Additional info: What swash mixing is required for my helicopter? 119
53 SETUP MENU H - Servo directions 121
54 Adjustment on the device 123
55 Setup with StudioXm 125
56 SETUP MENU I - Cyclic directions 127
57 Adjustment on the device 129
58 Setup with StudioXm 131
59 Extra info: Why setting stick endpoints? 133
60 Extra info: How the gyro works! 135
61 SETUP MENU J - Servo trim 137
62 Adjustment on the device 139
62.1Separateservotrim................................ 139
62.2 Trimming the swashplate . . . . . . . . . . . . . . . . . . . . . . . . . . . . 139
62.3 Deleting the trimming . . . . . . . . . . . . . . . . . . . . . . . . . . . . . . 140
63 Setup with StudioXm 141
64 SETUP MENU K - Cyclic throw 143
65 Adjustment on the device 145
66 Setup with StudioXm 147
67 Measuring pitch without pitch gauge 149
V

Contents
68 SETUP MENU L - Collective pitch 151
69 Adjustment on the device 153
70 Setup with StudioXm 155
71 What pitch is useful for my helicopter? 157
72 Measuring pitch without pitch gauge 159
73 SETUP MENU M - Servo limit 161
74 Adjustment on the device 163
75 Setup with StudioXm 165
76 Headspeed Governor 167
77 What's a Headspeed Governor? 169
78 Hardware installation 171
78.1 Electric drive system with external phase sensor . . . . . . . . . . . . . . . . 171
78.2 Electric drive system with rpm signal output from the speed controller . . . 172
78.3 Combustion drive system (nitro/gas) . . . . . . . . . . . . . . . . . . . . . . 173
79 Activating the governor function 175
80 Adjustment on the device 177
81 Setup with StudioX 179
82 Sensor test routine 181
83 Motor start position 185
84 Adjustment on the device 187
85 Setup with StudioX 189
86 Full throttle position 191
87 Adjustment on the device 193
88 Setup with StudioX 195
89 GOVERNOR MENU D - Setting up the transmitter 197
90 How to control the Governor 199
90.1ElectricGovernor................................. 199
90.2 Nitro Governor - with separate control channel . . . . . . . . . . . . . . . . 202
90.3 Nitro Governor - simple mode . . . . . . . . . . . . . . . . . . . . . . . . . . 205
VI

Contents
91 GOVERNOR MENU E - Throttle signal divider 209
92 Adjustment on the device 211
93 Setup with StudioX 213
94 GOVERNOR MENU F, G &H - Main gear ratio 215
95 Adjustment on the device 217
96 Setup with StudioX 219
97 PARAMETER MENU A - Quick Trim 221
98 Adjustment at the device 223
98.1 Trimming the swashplate . . . . . . . . . . . . . . . . . . . . . . . . . . . . 223
98.2Rudderservo ................................... 223
98.3Resetadjustment................................. 224
98.4 Trimming the artificial horizon (optional) . . . . . . . . . . . . . . . . . . . 224
99 Adjustment with StudioX 225
100PARAMETER MENU B - Control Style 227
101Adjustment at the device 229
102Setup with StudioX 231
103PARAMETER MENU - Special parameters C to K 233
104Adjustment at the device 235
105Setup with StudioX 237
106Parameter explanation 239
106.1Speed flight stability (Point C) . . . . . . . . . . . . . . . . . . . . . . . . . 239
106.2Rudder rate consistency (Point D) . . . . . . . . . . . . . . . . . . . . . . . 239
106.3Stickdeadzone(E)................................ 241
106.4Torque precompensation/RevoMix (F) . . . . . . . . . . . . . . . . . . . . . 242
106.5Cyclicresponse(G)................................ 243
106.6Pitchboost(H).................................. 244
106.7Throttle response (I) . . . . . . . . . . . . . . . . . . . . . . . . . . . . . . . 245
106.8Slow rampup speed (J) . . . . . . . . . . . . . . . . . . . . . . . . . . . . . . 245
106.9Fast rampup speed (K) . . . . . . . . . . . . . . . . . . . . . . . . . . . . . 246
107Gain settings 249
108Tail gyro 251
109Cyclic adjustment 253
VII

Contents
110Adjustment at the device 255
110.1Tailgyro...................................... 255
110.2Cyclicadjustment ................................ 256
111Setup with StudioX 259
112AttitudeControl 261
113What is AttitudeControl and how to use it 263
113.1Levelingmodes.................................. 263
113.2Activating AttitudeControl in flight . . . . . . . . . . . . . . . . . . . . . . 264
113.3Functional test of AttitudeControl . . . . . . . . . . . . . . . . . . . . . . . 267
113.4Flying with AttitudeControl . . . . . . . . . . . . . . . . . . . . . . . . . . . 269
113.5Fine tuning of AttitudeControl . . . . . . . . . . . . . . . . . . . . . . . . . 270
114Adjustment at the device 273
115Setup with StudioX 277
116Bank Switching (optional) 279
117Bank Switching - What's that? 281
118Usage instructions 283
119Setting Bank Switching with StudioX 287
120Reset to default settings 289
121Performing factory reset at the device 291
122Factory reset with StudioX 293
123Information about firmware versions 295
124Reading the current firmware version 297
124.1LED display of the device . . . . . . . . . . . . . . . . . . . . . . . . . . . . 297
124.2Representation of values . . . . . . . . . . . . . . . . . . . . . . . . . . . . . 297
125StudioX software and mobile app 299
126Windows PC/mac and USB2SYS computer interface 301
126.1Installation .................................... 301
126.2Connecting the USB2SYS with your BEASTX device . . . . . . . . . . . . 303
127Smartphone/tablet and BLE2SYS bluetooth interface 305
128Basic functionality 307
129BEASTX flybarless system 309
129.1Connectingtodevice............................... 309
VIII

Contents
129.2Overviewscreen.................................. 310
130BLE2SYS Configuration 311
130.1DeviceName ................................... 311
130.2Automatic deactivation . . . . . . . . . . . . . . . . . . . . . . . . . . . . . 311
130.3Changepincode ................................. 312
130.4Firmwareupdate................................. 312
131Presets/Backup/Restore/Reset 313
132Preset helicopter settings 315
133Backup/Restore 317
134Reset all settings 321
135Firmware update 323
136Introduction 325
137freakware Network 327
138Update procedure 329
139When the update fails 331
140Contributors 333
List of Figures 335
141Licenses 343
141.1GNU GENERAL PUBLIC LICENSE . . . . . . . . . . . . . . . . . . . . . 343
141.2GNU Free Documentation License . . . . . . . . . . . . . . . . . . . . . . . 344
141.3GNU Lesser General Public License . . . . . . . . . . . . . . . . . . . . . . 345
1


1 Introduction
This page is a translated version1of the page Manuals:MBPlusFblV52:Intro2and the trans-
lation is 100% complete.
1https://wiki.beastx.com/index.php?title=Special:Translate&group=page-Manuals%
3AMBPlusFblV52%3AIntro&action=page&filter=&language=en
2https://wiki.beastx.com/./index.php/Manuals:MBPlusFblV52:Intro
3

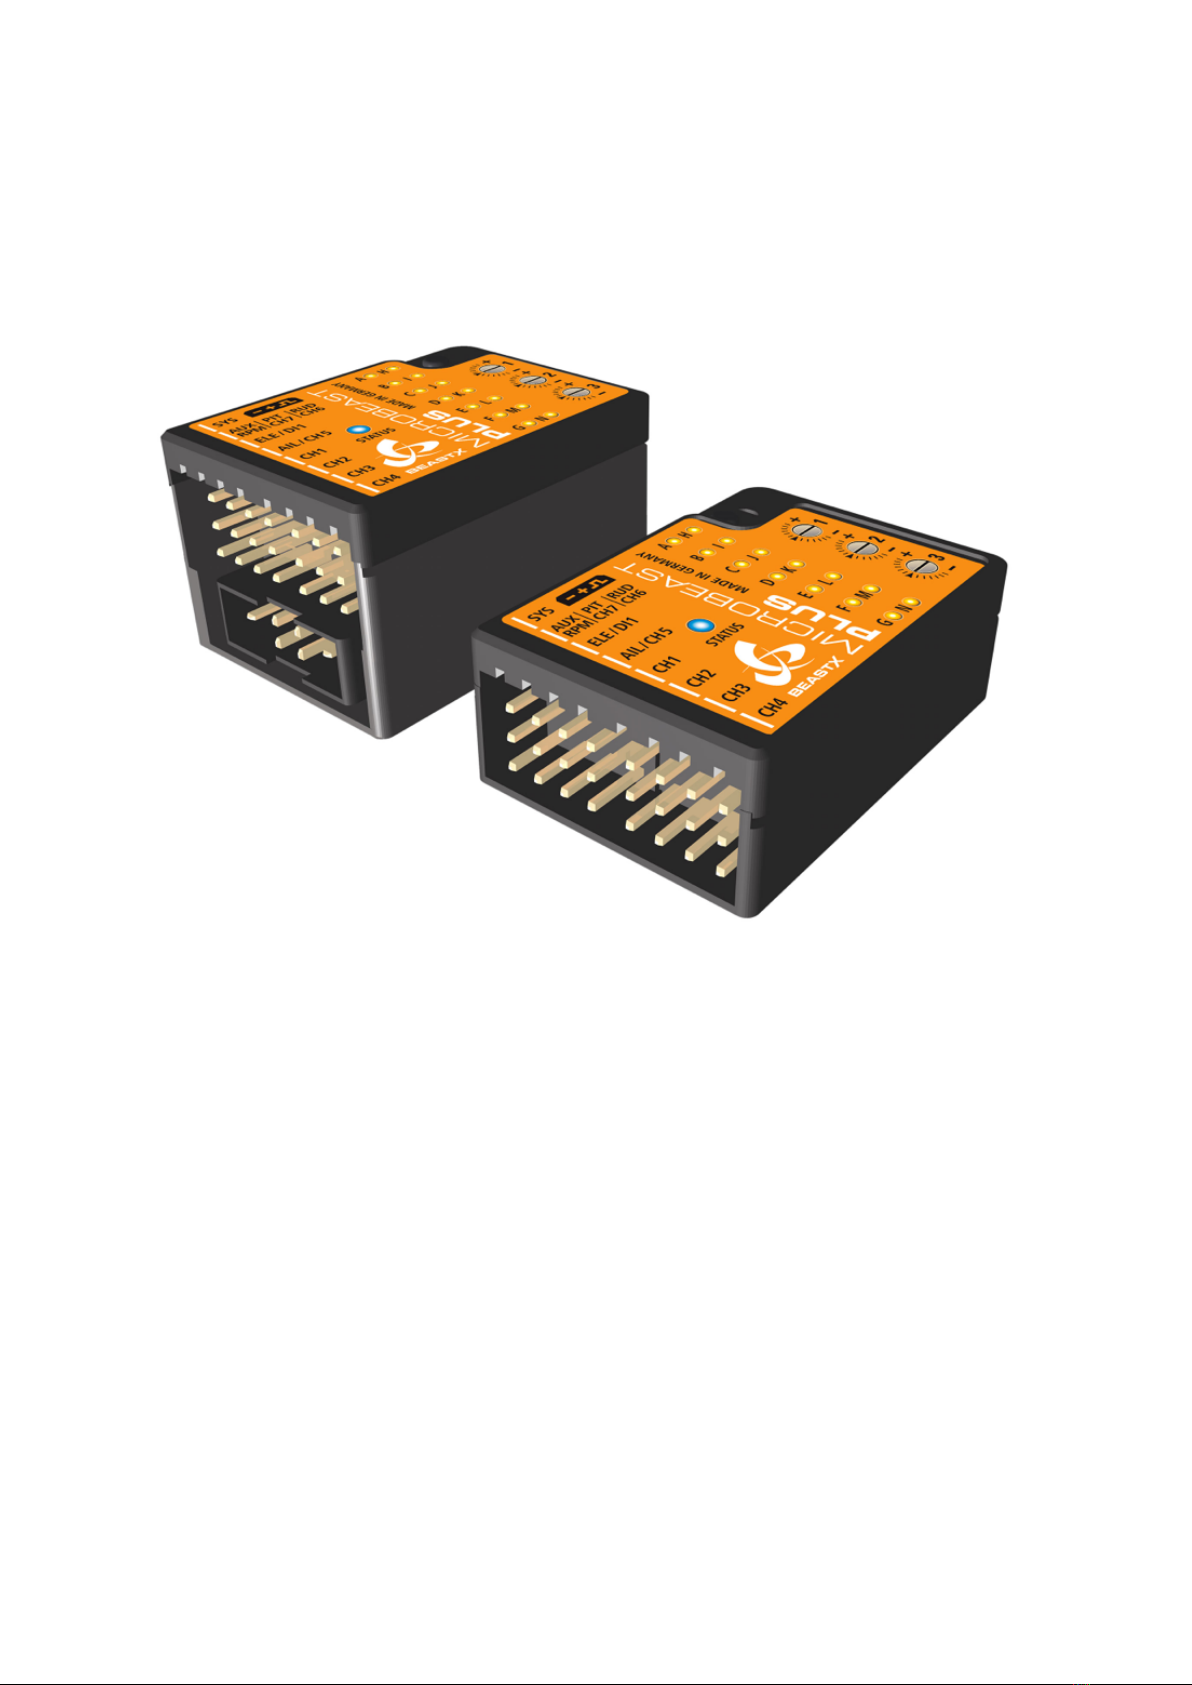
2 MICROBEAST PLUS - What's that?
Figure 1
MICROBEAST PLUS is a gyro system which is used to stabilize and control your flybarless
RC Helikopter on all three flight axis. It can be used with many different types of helicopters
like 3D aerobatic helis, F3C competition helicopters as well as scale helicopters with 2 or
more rotorblades. The system comes with basic flybarless stabilization functionality and
can be upgraded by paid update to the ”ProEdition”. This enables additional features like
AttitudeControl for recue bailout or constant leveling and a feature called Bank Switching
which allows to change between different parameter presets in flight to serve different flight
conditions or flying styles.
• wide input voltage range from 4 to 9 Volts
• supports nearly all types of radio systems with conventional receiver wiring as well as lots
of different serial signal receivers like SBUS, XBUS, EXBUS, iBus, UDI, SRXL, SRXL2,
SPPM, SUMD, Spektrum/JR/ALIGN remote satelite
• preset swash plate mixing for mCCPM and 90, 120, 140 eCCPM + fully customizable
swash mixing with up to 4 swash plate servos and virtual phasing for scale helicopters
5

MICROBEAST PLUS - What's that?
• swash plate servo update rate with up to 333Hz
• integrated tail gyro with torque precompensation (”RevoMix”) supports all types of rudder
servos with 760, 960 and 1500(1520)µs pulse width and up to 560Hz update rate
• integrated head speed governor for electric and nitro/gas driven helicopters (requires rpm
sensor pickup or esc with rpm signal output)
• optional upgrade to ”ProEdition” with bank switch feature for full customization and
AttitudeControl for rescue bailout and selfleveling
• MICROBEAST PLUS HD comes with a switchable high power input for large helicopters
with power hungry standard servos and additonal vibration resistance due to aluminum
housing
To setup MICROBEAST PLUS there is no need for any additional devices. All you need
is your radio system and your helicopter. Thanks to the well proven EasySetup system you
can do all the necessary adjustment directly at the device and in very short time. If you like
to get more insight into the system and like to have a more visualized type of setup you can
also use the StudioX App for PC/Mac or StudioXm for your smartphone/tablet in combi-
nation with the USB2SYS interface (PC/Mac) or BLE2SYS interface (smartphone/tablet)
(optional available). These apps are the source to get even more out of your device like
saving/restoring paramaters, firmware updates, loading preset heli configurations and
making advanced adjustment to fully customize your MICROBEAST PLUS to your needs.
6

3 Additional guides
This online manual is very extensive and covers all topics in detail, i.e. radio setup,
mechanical helicopter setup, power distribution, description of additional features and of
course all the menu adjustments and what these do and what they are necessary for. So
reading this manual can give you a detailed knowledge about the system and should help
to give answers to almost all questions you may have. Anyhow, for a first start you may
just go with the quick start guide1and only refer to the online manual if you have some
specific question. Also the quick reference card2can give you a good overview for the
different menu structures and adjustment procedures that can be performed directly at the
device.
1http://www.beastx.com/download/manual/microbeast/MBPlus_QuickStart_V52_EN.pdf
2http://www.beastx.com/download/manual/microbeast/MBPlus_QuickReferenceCard_V52_EN.pdf
7

4 Firmware version 5.2.x
Please note that these instructions are only valid for the MICROBEAST PLUS
firmware version 5.2.x!
The firmware version can be detected by connecting the device to a computer using the
USB2SYS interface (optional) or tablet/smartphone using the BLE2SYS interface (optional)
together with the StudioX App. During initialization also you can directly read from the
display of the device what firmware version it is running: After power up when the Status-
LED lights red, for a few seconds the Menu-LEDs A to G display the first digit of the
firmware version and the LEDs H to N the second digit.
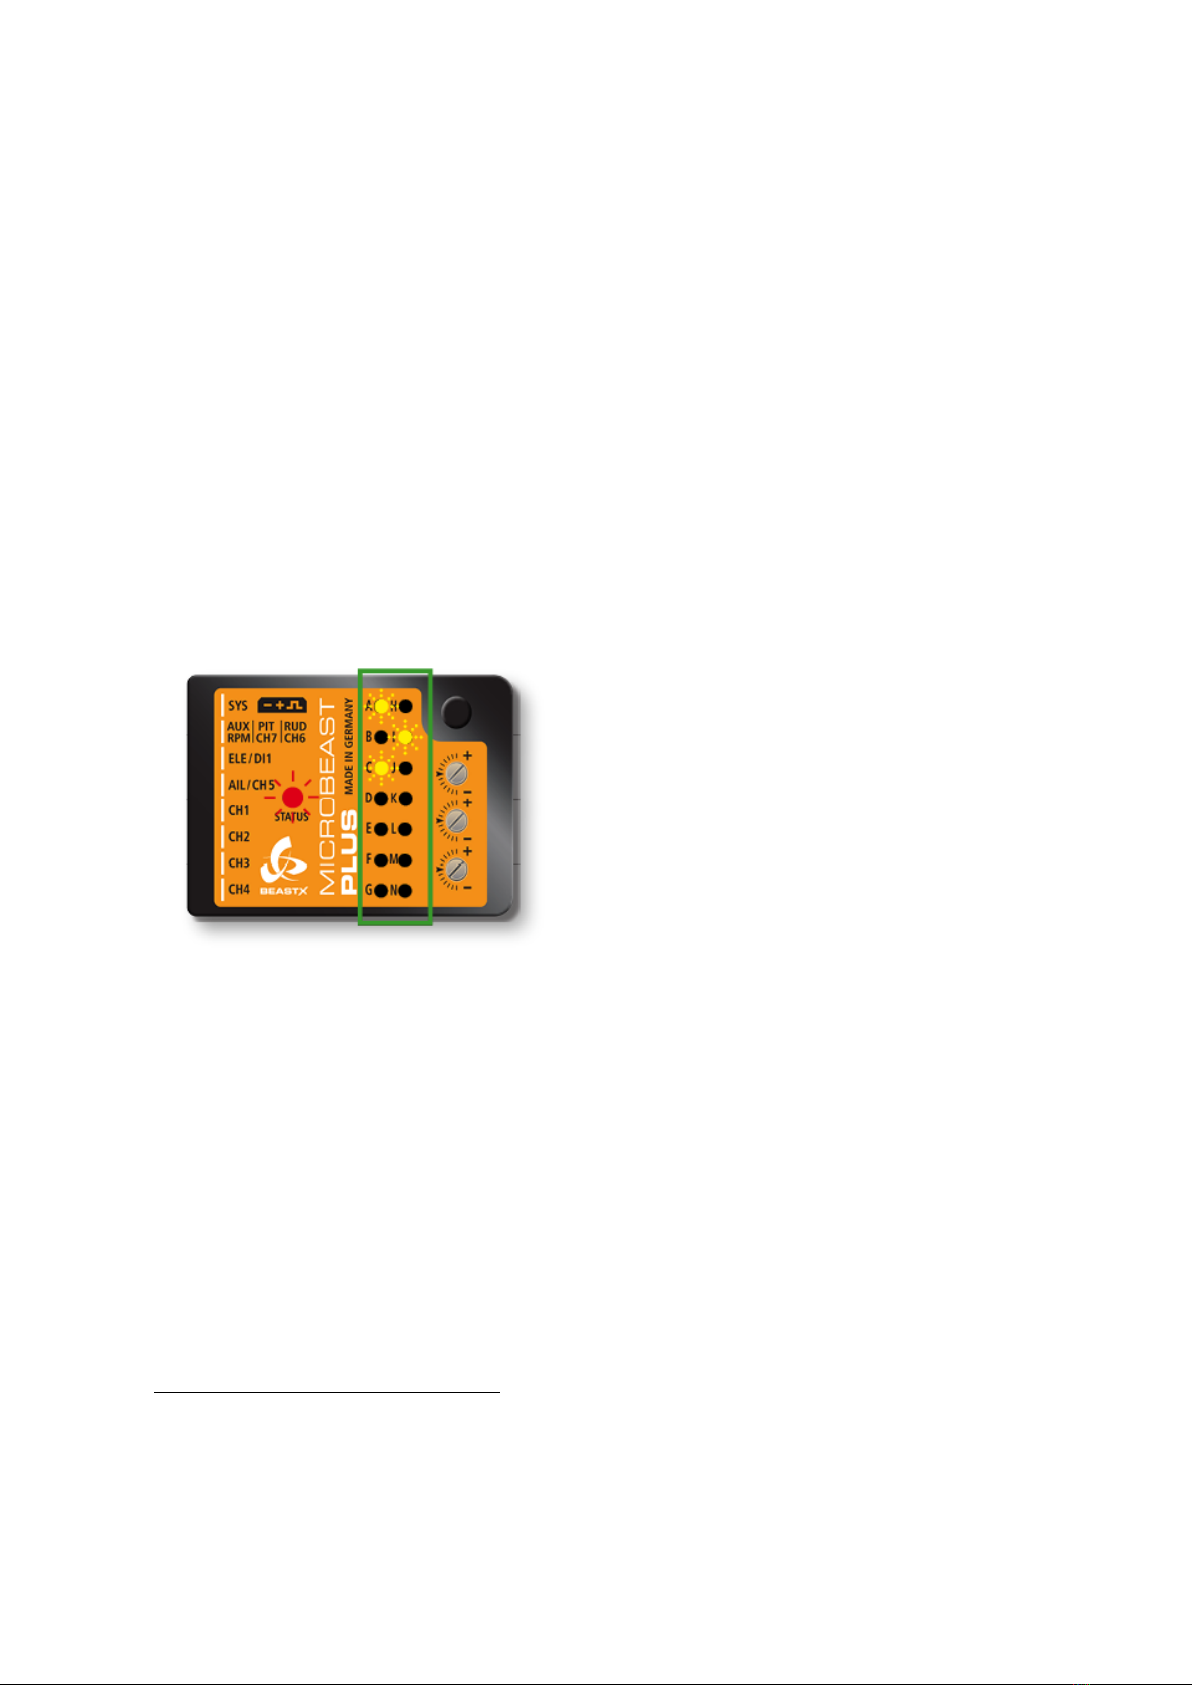
Figure 2
Firmware version 5.2.x
In the left row menu LEDs A and C indi-
cate major version ”5”.
In the right row LED I lights up which
stands for minor version ”2”.
(Click here1to see what's new with MICROBEAST Version 5.2.x compared to older
firmware versions.)
1https://wiki.beastx.com/./index.php/Help:FAQ:General/en#Differences_between_firmware_
versions_.28changelog.29
9


5 Hardware options
MICROBEAST
PLUS
MICROBEAST PLUS
HD
Power supply connection Standard servo ports High power input
On/Off Switch
Casing Plastic Aluminum composite
Recommended heli size 250 - 700 550 - 800
11

Other manuals for MICROBEAST PLUS
2
This manual suits for next models
1
Table of contents


