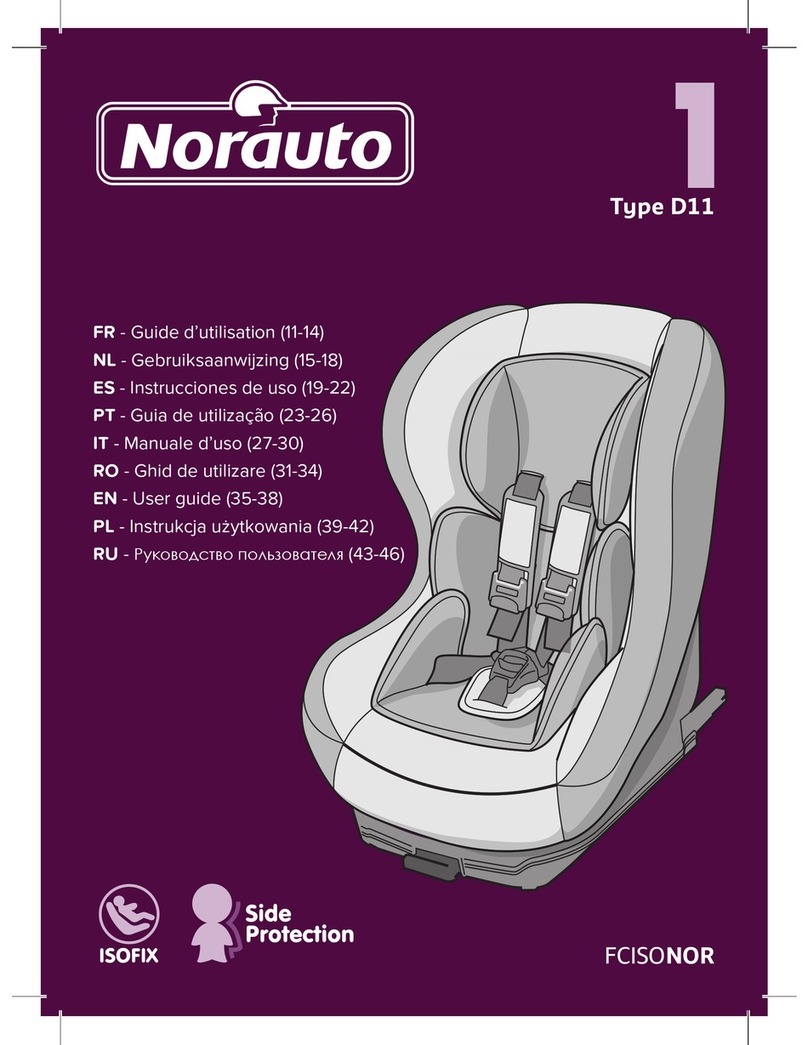
bebeduE Beyond GR016-15V1 User manual

“IMPORTANTE - IMPORTANT”
Conservar las instrucciones para futuras consultas. Leer atentamente.
Antes de usar, ler atentamente as advertências e conservá-las.
Conservare le istruzioni per consultarle in futuro. Leggere attentamente
Before use, read carefully the warning sheet and preserve it.
Conservez les instructions pour référence ultérieure. Lisez-le attentivement.
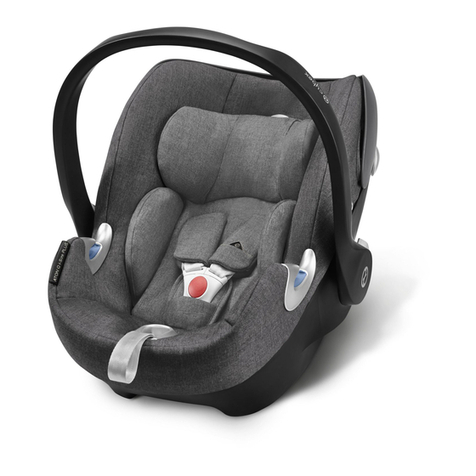
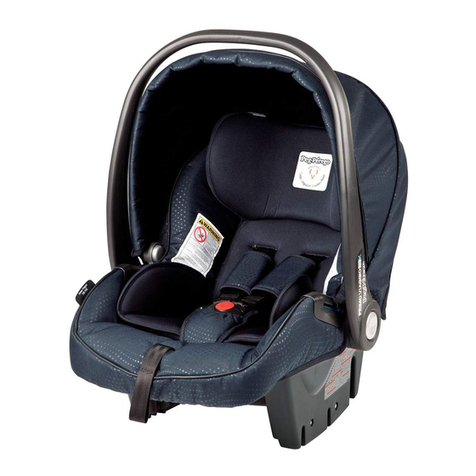
Autosilla Grupo 0+ BebéDue Beyond
Group 0+ BebéDue Beyond safety car seat
Cadeira de automóvel Grupo 0+ BebéDue Beyond
Seggiolino auto Gruppo 0+ BebéDue Beyond
Siège auto Groupe 0+ BebéDue Beyond
UNE-EN: 1888:2012
ECE 44/04
Mod. GR016-15V1


ES
IT
FR
PT
EN
CONTENIDO
· Reductor
· Capota
· Protector de arnés
· Protector de hebilla
COMPONENTI
· Riduttore
· Capote
· Protezione dell’imbragatura
CONTENU
· Réducteur
· Canopy
· Protecteurs pour les épaules
· Protecteur de la boucle
COMPONENTES
· Reductor
· Capota
· Protector arnês
CONTENT
· Reducer
· Canopy
· Harness protectors
· Buckle protector
GRUPO 0+
· Grupo 0+ · Grupo 0+
· Gruppo 0+ · Group 0+
· Groupe 0+

ES
IT
PT
EN FR
1. Asa de transporte
2. Reductor
3. Protector de arnés
4. Arnés
5. Hebilla
6. Capota
7. Vestidura
8. Ranuras
9. Protector de hebilla
10. Marca “Press”
11. Correa ajuste arnés
1. Maniglia di trasporto
2. Riduttore
3. Protezione dell’imbra -
gatura
4. Imbragatura
5. Fibbia
6. Capote
7. Rivestimento
8. Fessure
10. Etichetta “Press”
11. Cinghia di regolazione
dell’imbragatura
1. Asa de transporte
2. Reductor
3. Protectores de arnês
4. Arnês
5. Fivela
6. Capota
7. Cobertura
8. Ranhuras
10. Marca “Press”
11. Correia de ajuste do
arnês
1.Transport handle
2. Reducer
3. Harness protectors
4. Harness
5. Buckle
6. Canopy
7. Lining
8. Slots
9. Protector buckle
10. “Press” mark
1.Poignée de transport
2. Réducteur
3. Harnais Protector
4. Harnais
5. Boucle
6. Bois
7. Garment
8. Les fentes
9. Protecteur boucle
10. Mark "Presse"
1
2
3
4
5
6
7
8
9
10
11
9. Protector fivela
9. Protezione fibbia
11. Harness fitting strap 11. Harnais sangle de
réglage

1
AB
CD
23

4
5 6
A
BC
“Click”

7
8
A B
C D
E

9
AB
A
A
BC
DE

F
Posiciones del asa de transporte
Posiçoes del asa de transporte
Posizioni della maniglia di transporto
Positions of the transport handle
Porter positions de la poignée
10
AB
CD

“IMPORTANTE”: LEA DETENIDAMENTE LAS
INSTRUCCIONES DE USO Y GUARDAR ESTAS
INSTRUCCIONES PARA CONSULTAS FUTURAS.
Gracias por depositar su conanza en los productos Bebé Due.
AUTOSILLA GRUPO 0+ Silla BEBÉDUE Beyond
Para niños hasta 13 kg
ATENCIÓN
1. Este asiento de seguridad infantil es universal y está aprobado por la Regulación ECE 44.04 para
su utilización general en vehículos por lo que se podrá instalar en la gran mayoría de asientos de
coches aunque no en todos.
2. Se podrá instalar adecuadamente si el fabricante del vehículo señala en el manual del automóvil
que el vehículo acepta asientos de seguridad infantil universales para este grupo.
3. Este asiento de seguridad infantil es universal y cumple normativas más estrictas que las que se
aplicaban a diseños previos que no se calican de universal.
4. En caso de duda, consulte al fabricante del asiento de seguridad infantil o a su proveedor.
Sólo se puede instalar en vehículos con 3 puntos estáticos, 3 puntos retractiles, aprobados por
la normativa UN/ECE número 16 u otros estándares equivalentes.
PELIGRO EXTREMO: No utilice esta silla en asientos de pasajeros equipados con airbag
frontal (SRS).
CINTURÓN DE SEGURIDAD OBLIGATORIO DEL AUTOMÓVIL
“ADVERTENCIA: La autosilla no debe colocarse nunca en un asiento con airbag frontal (SRS).”
La autosilla sólo se puede instalar con un cinturón diagonal y de cintura de tres puntos en el asiento
delantero o posterior del coche.
CÓMO INSTALAR EL GRUPO 0+ EN EL AUTOMÓVIL (Fig.1)
A. Coloque el grupo 0+ en un asiento de pasajeros con cinturón de tres puntos y
sitúelo en sentido contrario a la marcha. El asa de transporte debe estar en la 1ª posición.
B. Pase el cinturón diagonal por la ranura situada en el respaldo y luego ancle el cinturón de
seguridad, compruebe que el cinturón no se ha dado la vuelta.
C. Pase el cinturón de cintura por las ranuras situadas en los laterales del grupo 0+.
D. Por último tire del cinturón de seguridad hasta que el grupo 0+ quede
perfectamente jado al asiento del automóvil.
ES

PASOS PREVIOS A LA INSTALACIÓN EN LA SILLA BEBÉDUE BEYOND
Este Grupo0+ se instalará “exclusivamente” en la “Silla BebéDue Beyond”.
Primero debe abrir el chasis y frenar las ruedas traseras.
INSTALACIÓN DEL GRUPO 0+ EN EL CHASIS (Fig. 2 )
Plantee el grupo 0+ sobre el chasis. Debe quedar centrado para que los anclajes del chasis
coincidan con los del grupo 0+. Ancle el grupo 0+ al chasis asegurándose de que han hecho el clic
ambos anclajes.
Puede comprobar que está bien anclado levantando el grupo 0+. Si la instalación es correcta,
también se levantará el chasis.
DESINSTALACIÓN DEL GRUPO 0+ DEL CHASIS (Fig. 3)
Levante las palancas situadas en los anclajes del grupo 0+ y al mismo tiempo tire de él hacia arriba,
este quedará libre.
IMPORTANTE: Realice siempre esta operación sin el bebé en el grupo 0+.
CÓMO ABROCHAR LA HEBILLA DE SEGURIDAD DEL GRUPO 0+ (Fig.4)
A. Encaje las dos partes de los conectores de la hebilla.
B. Encaje los dos conectores de la hebilla pectoral en la ranura situada en la parte superior de la
hebilla central. Compruebe siempre que el arnés se ha abrochado correctamente tirando de las
correas de los hombros hacia arriba.
C. Para desabrochar el arnés, apriete el botón rojo de la hebilla.
CÓMO AJUSTAR EL ARNÉS (Fig. 5 y 6)
Levante las correas de los hombros para tensar el arnés de la cintura y después estire la correa
ajustadora hasta que el arnés quede completamente tenso (Fig. 5).
Deberá ajustar el arnés lo máximo posible pero evitando que el niño se sienta incómodo.
Asegúrese de que la correa de la cintura del arnés queda por debajo de la tripa del niño, lo más
cerca posible de los muslos. Puede resultar peligroso que el arnés quede ojo. Compruebe que el
arnés se ajusta adecuadamente y ajústelo siempre que el niño se siente en la silla.
Para aojar el arnés, pulse en la marca “Press” mientras sujeta con la otra mano las dos correas de
los hombros. Empuje hacia usted las correas de los hombros para aojar el arnés (Fig.6).
ALTURA ADECUADA DE LAS CORREAS DE LOS HOMBROS (Fig. 7)
El arnés tiene 2 posiciones de altura.
Compruebe siempre que las correas de los hombros tienen la altura correcta para el niño.
Los hombros del niño deberán estar siempre por debajo de la ranura del arnés.
ES

CAMBIO DE LA ALTURA DE LA CORREA DE LOS HOMBROS (Fig.8)
A. Desabroche el arnés apretando el botón rojo.
B. Quite los protectores de las correas de hombros.
C. Quite el reductor.
D. Tire de la correas desde la parte trasera del respaldo y páselas por la siguiente ranura de
posición superior o inferior.
E. Una vez pasadas las correas por la ranura deseada, vuelva a colocar el reductor y los
protectores de las correas.
CÓMO SACAR LA VESTIDURA DEL GRUPO 0+ PARA SU LAVADO (Fig.9)
A. Desinstale la capota. Para ello, coloque el asa de transporte en la posición (ver g. 2).
Mueva la capota hacia delante hasta que los enganches de la varilla estén en línea con los
encajes, seguidamente tirar hacia fuera desde la varilla.
B. Desabroche el arnés para sacar las protecciones de las correas de los hombros y el reductor.
C. Quite la hebilla de la entrepierna. Para ello, debe buscar el conector metálico que aguanta
la cinta de la hebilla en la parte inferior del grupo 0+. Tire del conector hacia fuera y saque
la cinta del conector.
D. Tire de la hebilla hacia arriba y saque el protector.
E. Desenganche los clips laterales de la vestidura.
F. Saque la parte superior e inferior de la vestidura hacia delante y ya estará libre.
Para volver a colocar la vestidura, siga los pasos a la inversa.
CÓMO REGULAR EL ASA DE TRANSPORTE (Fig.10)
Presionar los botones rojos de ambos lados y mover el asa de transporte hasta la posición
deseada. Tiene 4 posiciones.
CONSEJOS DE LAVADO
Lavar a mano en agua templada con detergente para prendas delicadas. No emplee utilizar
detergente abrasivo y nunca utilice lejía ni tiña el tejido.
Deje que se seque al aire tendido en la sombra.
Compruebe las etiquetas de lavado.
Las partes de plástico y las partes pintadas debería limpiarlas con agua y un detergente suave,
nunca utilizar un detergente abrasivo.
MANTENIMIENTO
El grupo 0+, igual que otros productos dinámicos, necesita de su atención regular para que no
tenga problemas de servicio.Utilice protecciones de temperatura (protector solar silla auto)
cuando deje su automóvil aparcado al sol.
Nunca deje el grupo 0+ expuesto a la luz solar directa durante largos periodos de tiempo, los
tejidos y piezas de plástico pueden dañarse.
Compruebe regularmente las partes del grupo 0+.
Inspeccione regularmente las juntas, jaciones, correas y agarraderas... para asegurarse de que
estén seguras y cumplan su funcionamiento. Guarde el grupo 0+ en un lugar seco y seguro.
ES

ADVERTENCIAS
ADVERTENCIAS
Si no obedecen estas advertencias y no se siguen las instrucciones de montaje, el
resultado podrían ser lesiones graves.
“ADVERTENCIA – Puede ser peligroso dejar al niño sin vigilancia”.
· Nunca instale el grupo 0+ en un asiento con sistema AIRBAG frontal.
· Nunca lleve al bebé en el grupo 0+ sin abrochar el arnés.
· Nunca utilice nada (cojín, ropa, etc.) para elevar el grupo 0+ en el asiento, en caso de
accidente no actuaría correctamente.
· Nunca intente desmontar, modicar o añadir ninguna parte del grupo 0+.
· Nunca exceda el peso al cual está homologado el grupo 0+, 13kg.
· Nunca coloque el grupo 0+ sobre una supercie elevada, mesas, camas, etc.
· Nunca lleve el grupo 0+ sin estar anclado al automóvil, aunque no se use.
· Nunca deje desatendido al bebé en el grupo 0+.
· Nunca instale el grupo 0+ en asientos posicionados en dirección hacia la ventana.
· Ninguna silla de auto es a prueba de escape: los sistemas de anclaje no pueden ser
diseñados completamente para asegurar que el bebé no intente desabrocharse y cumplir
con los requerimientos legales estándar europeo ECE R44/04. El arnés debe ser abrochado
y ajustado correctamente cada vez que siente al bebé e intentar persuadirle de que no se
desabroche.
· Después de un accidente cambiar el grupo 0+ por otro nuevo.
· Tener cuidado que ninguna parte del grupo 0+ sea dañada o aplastada al reclinar los
asientos o con las puertas del automóvil.
· Tener extremo cuidado cuando se instale el grupo 0+, ya que una correcta instalación
puede salvar la vida del bebé en caso de accidente.
· El grupo 0+ garantiza la seguridad del mecanismo cuando es usado por el primer
comprador. No utilizar productos de segunda mano cuando son de seguridad.
· Es importante que el resto de pasajeros y/o la carga (maletas, etc.) del automóvil tengan
el cinturón de seguridad abrochados y/o estén bien sujetos, ya que en caso de accidente
pueden salir disparados de sus asientos y dañar al bebé.
· El arnés de grupo 0+ no debe ser utilizado sin su protección.
·“ADVERTENCIA: No dejar nunca al niño desatendido.”
·“ADVERTENCIA: Para evitar lesiones, asegúrese de que el niño se mantiene
alejado durante el despelgado y el plegado de este producto”.
· ADVERTENCIA:El grupo0+ debe ser usado únicamente por el número de
niños para el que ha sido diseñado. (un niño solamente)
ES

·“ADVERTENCIA: Para los asientos de coche usados en conjunción con un chasis, este
vehículo no reemplaza a una cuna o una cama. Si el niño necesita dormir, entonces debería
colocar en un capazo, cuna o cama adecuados
·“ADVERTENCIA:Sólo se deben usa repuestos proporcionados o recomendados por el
fabricante / distribuidor.
·“ADVERTENCIA: No permita que el niño juegue con este producto”.
·“ADVERTENCIA: El dispositivo de estacionamiento se debe engranar cuando se coloca
y desmonta al niño.
·“ADVERTENCIA: El grupo 0+ debe ser usado únicamente por el número de niños para
el que ha sido diseñado.
·“ADVERTENCIA: Cualquier carga jada al manillar y/o a la parte, trasera del respaldo
y/o en los laterales del vehículo puede afectar a la estabilidad del vehículo.
ADVERTENCIAS
ES
Este Grupo 0+ es también compatible con la silla
“BebéDue Beyond”
Silla
“BebéDue
Beyond” Chasis
“BebéDue
Beyond”
G0+
“BebéDue
Beyond”

IMPORTANT: READ THESE INSTRUCTIONS
CAREFULLY AND KEEP FOR
FUTURE REFERENCE.
Thank you for placing your trust in Bebé Due products.
CAR SEAT GROUP 0+ BEBÉDUE Beyond child safety seat
For babies up to 13 kg
WARNING
1. This is a universal child safety seat and has been approved under ECE Regulation 44.04 for
general use in vehicles: it may therefore be installed on most car seats, although not on all of them.
2. It can be suitably installed if the vehicle’s manufacturer states in the car manual
that universal child safety seats for this group can be used in the vehicle.
3. This is a universal child safety seat and satises stricter regulations than those that were applied
to previous designs not rated universal.
4. If in doubt, consult the child safety seat manufacturer or supplier.
This seat may only be installed in vehicles with 3-point static, 3-point retractable seat belts,
approved by the UN/ECE Regulation No. 16 or equivalent standards.
EXTREMELY DANGEROUS: Do not use this seat on a passenger seat equipped with
front (SRS) airbag.
USE OF THE CAR SAFETY BELT (SEAT BELT) IS OBLIGATORY
WARNING: This seat must never be used on a seat equipped with front (SRS) airbag.
The car seat may only be installed using a three-point lap and diagonal belt on the
car’s front or rear seats.
INSTALLING THE GROUP 0+ SEAT IN A CAR (Fig. 1)
A. Put the group 0+ seat facing the rear of the vehicle on a passenger seat which has a
three-point seat belt. The carry handle must be the 1st position.
B. Pass the diagonal part of the seatbelt through the slot in the backrest and fasten the seatbelt,
checking that the belt is not twisted.
C. Pass the lap section of the seatbelt through the slots situated on the sides of the group 0+ seat.
D. Finally, pull the seatbelt to adjust it until the group 0+ seat is rmly attached to the car seat.
EN

STEPS PRIOR TO INSTALLING THE BEBÉDUE BEYOND CHILD SAFETY SEAT
This group 0+ seat must only be installed in a BebéDue Beyond pushchair.
First open the pushchair chassis and engage the rear wheel brakes.
INSTALLING THE GROUP 0+ SEAT IN THE PUSHCHAIR CHASSIS (Fig. 2)
Position the group 0+ seat on the chassis. It should be aligned so that the chassis mountings are
in line with the corresponding group 0+ seat mountings. Fit the group 0+ seat into the chassis,
making sure that both mountings have made a “click” sound, indicating that they are correctly
in place.
You can check correct installation by lifting up the group 0+ seat; if it is correctly installed, the
chassis will lift up along with the seat.
UNINSTALLING THE GROUP 0+ SEAT FROM THE PUSHCHAIR CHASSIS (Fig. 3)
Lift the levers situated on the mountings of the group 0+ seat while simultaneously pulling
upwards to release the seat.
IMPORTANT: Always perform this operation when the baby is not in the
group 0+ seat.
FASTENING THE SAFETY BUCKLE ON THE GROUP 0+ SEAT (Fig. 4)
A. Fit together the two parts of the buckle connectors.
B. Fit the two chest buckle connectors into the slot on the top of the central buckle. Always
check that the harness has been fastened correctly by pulling the shoulder straps upwards.
C. To unfasten the harness, press the red button on the buckle.
ADJUSTING THE HARNESS (Fig. 5 and 6)
Lift the shoulder straps to tense the waist section of the harness and then pull the
adjustment strap until the harness is completely tense (Fig. 5).
You should adjust the harness as much as is possible while ensuring that the child is not
uncomfortable.
Ensure that the waist strap of the harness is below the child’s stomach, as close as possible to
the thighs. If the harness is loose, this may be dangerous. Check that the harness is correctly
adjusted and adjust it whenever the child is placed in the seat.
In order to loosen the harness, press on the point marked “Press” while supporting the two
shoulder straps with your other hand. Pull the shoulder straps towards you to loosen the
harness (Fig. 6).
CORRECT HEIGHT FOR THE SHOULDER STRAPS (Fig. 7)
The harness has 2 height positions.
Always check that the shoulder straps are at the right height for the child.
The child’s shoulders must always be below the harness slot used.
EN

CHANGING THE HEIGHT OF THE SHOULDER STRAPS (Fig. 8)
A. Unfasten the harness by pressing on the red button.
B. Remove the pads from the shoulder straps.
C. Remove the head hugger.
D. Pull the straps through from behind the back support, then pass them through the higher
or lower slot as required.
E. Once the straps have been passed through the desired slot, put the head hugger
and the shoulder strap pads back in place.
REMOVING THE GROUP 0+ SEAT COVERS FOR WASHING (Fig. 9)
A. Remove the canopy. To do this, put the carry handle into position as shown in Fig. 2. Move
the canopy forwards until the hooks on the bar are in line with the catches, then pull the
bar outwards.
B. Unfasten the harness in order to remove the head hugger and the shoulder strap pads.
C. Remove the crotch buckle. To do this, look for the metal connector which holds
the buckle strap to the lower part of the group 0+ seat. Pull the connector outwards and
remove the strap from the connector.
D. Pull the buckle upwards and remove the protective pad.
E. Unhook the side clips from the cover.
F. Pull the upper and lower parts of the cover towards you to release the cover.
To put the cover back on, follow the instructions in reverse order.
ADJUSTING THE CARRY HANDLE (Fig. 10)
Press the red buttons on either side and adjust the carry handle to the desired
position. The handle has 4 positions.
WASHING INSTRUCTIONS
Hand wash with warm water using a detergent for delicate fabrics. Do not use
abrasive detergents and never use bleach or attempt to dye the fabric.
Hang up to dry in the shade.
Check the washing care labels.
Plastic and painted parts must be cleaned with water and a mild detergent: never use an
abrasive detergent.
MAINTENANCE
As in the case of other products with moveable parts, this group 0+ seat requires regular
maintenance in order to avoid service issues. Use protection against high temperatures
(sunshade designed for the car seat) when parking the car in the sun.Never leave your
group 0+ seat exposed to direct sunlight for prolonged periods of time as this may damage
fabrics and plastic components. Regularly check the parts of group 0+ seat.
Regularly inspect the joints, fastenings, straps, grips, etc., in order to ensure that they are safe
and full their intended functions.Store the group 0+ seat in a safe and dry place.
EN

WARNINGS
WARNINGS
Failure to follow these warnings or assembly instructions could result in serious injury.
WARNING - It is dangerous to leave a child unattended.
· Never install the group 0+ seat on a seat with a front AIRBAG system.
· Never carry a baby in the group 0+ seat without fastening the harness.
· Never use any item (cushion, clothing, etc.) to raise the group 0+ seat on the seat, since
in the event of an accident the seat would not function correctly.
· Never try to disassemble, modify or add any part to the group 0+ seat.
· Never exceed the weight limit for which the group 0+ seat has been approved: up to 13kg.
· Never put the group 0+ seat on a raised surface – tables, beds, etc.
· Never carry the group 0+ seat in the car unless it is correctly fastened in place, even if it
is not in use.
· Never leave a baby unattended in the group 0+ seat.
· Never install the group 0+ seat on seats facing a window.
· No car seat is escape-proof: the anchoring systems cannot be designed to fully ensure
that the baby cannot unfasten itself and still comply with the legal requirements of the
European standard, the ECE R44/04 regulation.
· The harness must be fastened and adjusted correctly every time the baby is put in the
seat, and you should discourage the baby from unfastening it.
· After an accident, replace the group 0+ seat with a new one.
· Take care to ensure that no part of the group 0+ seat is damaged or crushed by the car
doors or when the seats are reclined.
· Take great care when installing the group 0+ seat, since installing it correctly
may save your baby’s life in the event of an accident.
· The mechanism of the group 0+ seat is guaranteed to be safe when it is used by the rst
purchaser. Do not use second-hand safety products.
· It is important that other passengers and/or the load (suitcases, etc.) in the car are
buckled in using safety belts and/or properly secured by some other method, since, in
the event of an accident, these could be thrown from the seats and injure the baby.
· The group 0+ seat harness must not be used without its protective pads.
·WARNING: Never leave your child unattended.
· WARNING: To prevent injury, make sure that the child is kept clear
when folding and unfolding this product.
· WARNING: The group 0+ seat must only be used by the number
of children for which it was designed (one child only).
EN

· WARNING: Car seats used in conjunction with a chassis are no replacement
for a cot or bed. If your child needs to sleep, you should place them in a
suitable carrycot, cot or bed.
· WARNING: Only use spare parts provided or recommended by the
manufacturer/distributor.
· WARNING: Do not allow children to play with this product.
· WARNING: The parking device must be engaged when getting your child
in and out of the seat.
· WARNING: The group 0+ seat must only be used by the number of children
for which it was designed.
· WARNING: Any load attached to the handle and/or back section of the
backrest and/or sides of the pushchair may aect its stability.
WARNINGS EN
This group 0+ car seat is also compatible with the
“BebéDue Beyond” pushchair.
Seat unit
“BebéDue
Beyond”
G0+
“BebéDue
Beyond”
Chassis
“BebéDue
Beyond”

“IMPORTANTE”: LEIA ATENTAMENTE AS
INSTRUÇÕES DE UTILIZAÇÃO E GUARDE-AS
PARA PODER CONSULTÁ-LAS FUTURAMENTE.
Obrigado por depositar a sua conança nos produtos Bebé Due.
CADEIRA AUTO GRUPO 0+ Cadeira BEBÉDUE Beyond
Para crianças de até 13 kg
ATENÇÃO
1. Esta cadeira de segurança infantil é universal e está aprovada pelo regulamento CEE 44.04 para
utilização geral em veículos e pode, portanto, instalar-se na grande maioria de assentos de veículos
(mas não em todos).
2. Pode instalar-se adequadamente se o fabricante do veículo indicar no manual do automóvel que
o veículo admite cadeiras de segurança infantil universais para o referido grupo.
3. Esta cadeira de segurança infantil é universal e cumpre normas mais estritas que as que se
aplicavam a desenhos anteriores que não se qualicavam como universal.
4. Em caso de dúvida, consulte o fabricante da cadeira de segurança infantil ou o seu fornecedor.
Só pode instalar-se em veículos com 3 pontos estáticos, 3 pontos retráteis, aprovados pela
norma UN/CEE nº 16 ou outros padrões equivalentes.
PERIGO EXTREMO: Não utilize esta cadeira em assentos de passageiros equipados com
airbag frontal (SRS).
CINTO DE SEGURANÇA OBRIGATÓRIO DO AUTOMÓVEL
“ADVERTÊNCIA: A cadeira auto não deve ser instalada em um assento com airbag frontal (SRS).”
A cadeira auto só pode ser instalada com um cinto diagonal e de cintura de três pontos no assento
dianteiro ou traseiro do veículo.
COMO INSTALAR O GRUPO 0+ NO AUTOMÓVEL (Fig. 1)
A. Coloque o grupo 0+ em um assento de passageiros com cinto de três pontos e posicione-o no
sentido contrário ao de marcha. A pega de transporte deve estar colocada na 1ª posição.
B. Passe o cinto diagonal pela ranhura situada no encosto. Em seguida, xe o cinto de segurança
e comprove que o cinto não deu a volta.
C. Passe o cinto de cintura pelas ranhuras situadas nas laterais do grupo 0+.
D. Por último, puxe do cinto de segurança até que o grupo 0+ que perfeitamente xo ao
assento do automóvel.
PT
Table of contents
Languages:
