Becken BMVC4687 User manual

INSTRUCTIONS MANUAL
MANUAL DE INSTRUCCIONES
MANUAL DE INSTRUÇÕES
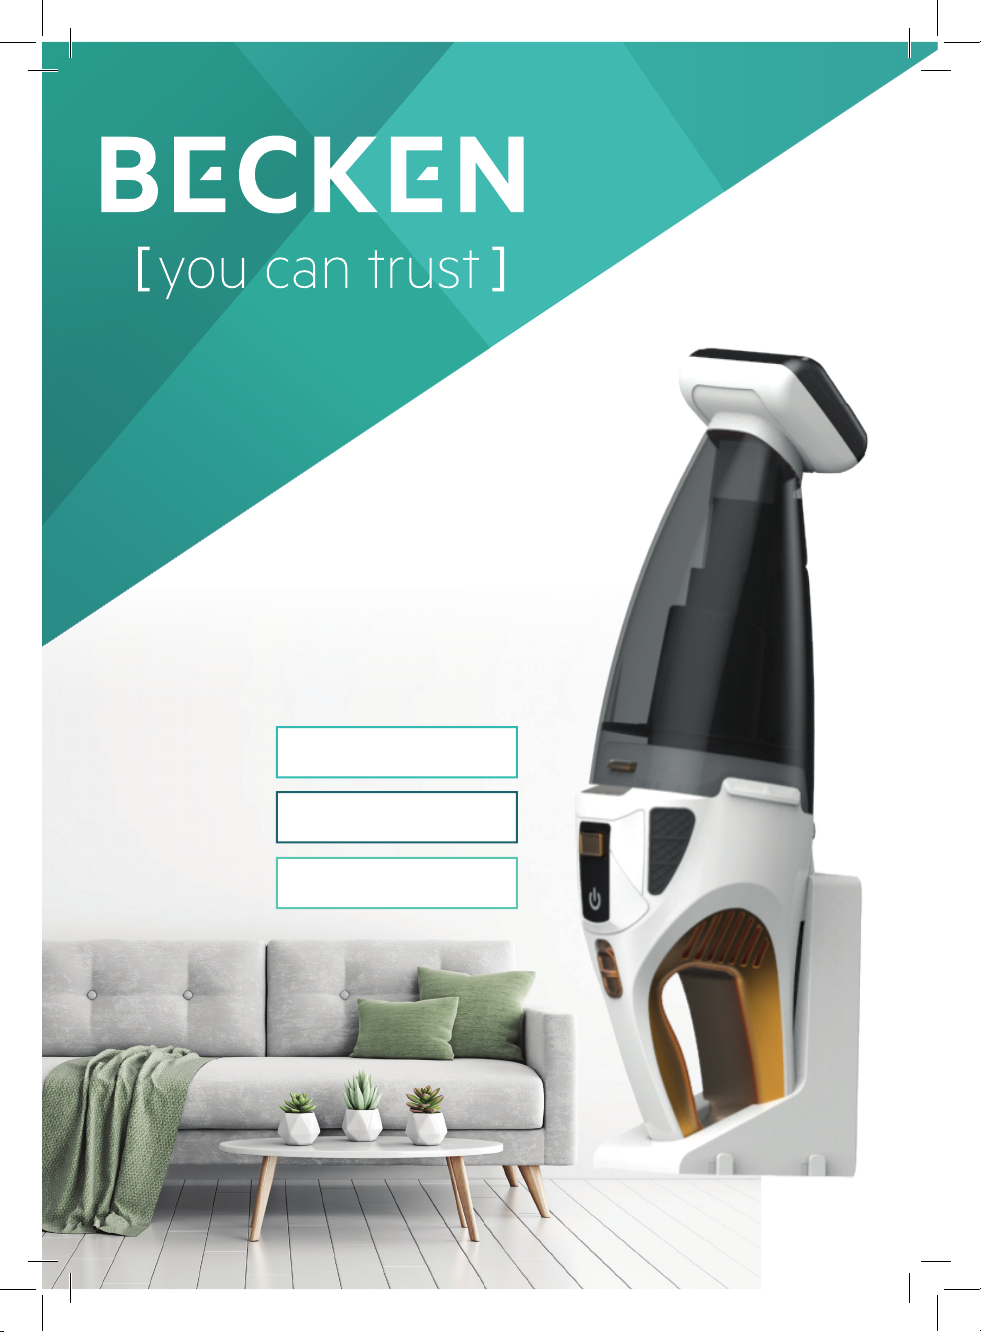
BMVC4687
Mini Vacuum
Cleaner
Mini Aspirador
Mini Vacuum
Cleaner
Mini Aspirador

Dear client,
Thank you for purchasing this product.
The quality of this appliance has been certified by several
laboratory tests. This instructions manual is provided to
simplify the use of the appliance as well as to guarantee a
safe use.
Please read carefully the instructions and safety measures
described in this manual.
We sincerely hope you will be satisfied when using your new
appliance.

3
EN
Mini Vacuum cleaner | Mini Aspiradora | Mini Aspirador
INDEX
1. SAFETY INSTRUCTIONS 4
1.1. Power Supply 6
1.2. Power Cord and Other Cables 6
1.3. Humidity and Water 6
1.4. Cleaning 6
1.5. General Precautions 7
2. OPERATING INSTRUCTIONS 9
2.1. Product Description 9
2.2. Product usage 12
2.3. Maintenance 16
3. TECHNICAL SPECIFICATIONS 18
4. POSTSALE SERVICE 19
5. ENVIRONMENTAL PROTECTION 20

4
1. SAFETY INSTRUCTIONS
WARNING
RISK OF ELECTRIC SHOCK
DO NOT OPEN
Warning: to avoid the risk of electric shock, do not
remove the cover. The interior does not contain
any parts that can be repaired by the user. Ask for
assistance from the Customer Support Service.
Important Warnings
Before using your appliance read these instructions manual
carefully and keep it in a safe place as you may need to
consult it in the future.
Before turning on your appliance, and to ensure a safe and
correct operation, do not use if:
• It has fallen to the ground;
• You notice any evidence of damage;
• Any anomaly occurs during its operation.
WARNING – To reduce the risk of re, electric shock, or injury:
• Do not use the appliance outdoors or on wet surfaces.
• Do not allow it to be used as a toy and pay please close
attention when used by or near children.
• Please use it only as described in this manual, and only
attachments recommended by the manufacturer.
• Do not put any object into existing openings and do not use

5
EN
Mini Vacuum cleaner | Mini Aspiradora | Mini Aspirador
the appliance if any opening is blocked; keep it free of dust,
lint, hair, and anything that may reduce air ow.
• Keep hair, loose clothing, ngers, and all parts of your body
away from openings and moving parts.
• Please be extra careful when cleaning on stairs.
• Do not submerge the appliance in water or subject it to
humidity.
• Do not use the product to pick up ammable or combustible
liquids, such as gasoline, or in areas where these liquids may
be present.
• Do not pick up anything that is burning or smoking, such as
cigarettes, matches, or hot ashes.
To avoid hazards or deterioration of your appliance through
incorrect use it is advisable to read these instructions
thoroughly.
Your appliance should not be used for other purposes than
the ones intended and solely for household use. Any damage
resulting from using the appliance outside this scope, any
incorrect use, as well as any manual modications to the product
will not be covered and automatically voids the warranty.
Assistance
In case of malfunction, take your appliance to the Customer
Support Service for assistance.

6
This appliance can be used by children from the age of 8
and by people with reduced physical, sensorial or mental
capabilities and/or lack of experience and knowledge if they
have been given instructions on using the appliance safely
and if they understand the hazards involved. Children may
not play with the appliance. Cleaning and maintenance must
not be carried out by children without supervision.
These instructions are also available at
www.suporteworten.pt
1.1. Power Supply
Make sure the main voltage is compatible with the appliance’s. If this is
not the case, please consult the Customer Support Service.
1.2. Power Cord and Other Cables
Do not tangle the cord or pull it to disconnect the appliance. Also, keep
the cord away from warm surfaces.
Never use the appliance if it has a damaged cable or socket.
Take it to the Customer Support Service for replacement.
1.3. Humidity and Water
Do not use your appliance in humid places. Do not allow the appliance
to become wet under any circumstances as this may be dangerous.
To avoid fire hazard or electric shock do not expose your appliance
to humidity or water. Furthermore, do not place your appliance under
water (e.g. for cleaning).
1.4. Cleaning
Before cleaning, be sure to switch o the appliance and remove the
plug from the main power supply. Always allow the unit to cool down
before cleaning.
To clean the exterior of the product, use a dry soft cloth only.

7
EN
Mini Vacuum cleaner | Mini Aspiradora | Mini Aspirador
1.5. General Precautions
• Please follow the instructions in the user manual which will help you
to properly install and operate this product and enjoy its advanced
features. Please keep the instructions for future reference.
• Read all instructions before using the product.
• Maintenance and service operations are only to be carried out by
authorized professionals.
• Any damage caused by manual modifications to the product is not
covered by the warranty.
• If this product is used for other purposes than the ones originally
intended, or if it is not correctly connected, the product may become
damaged and the warranty will be voided.
Additional Safeguards
• Do not charge the appliance outdoors.
• Do not use the adapter with an extension cord, connecting the
adapter directly to a power outlet instead.
• Do not change any accessories while the appliance is turned on.
• Always store the appliance indoors and keep it in a dry location
when not in use to avoid any accidents.
• Under extreme conditions, leaks in the battery cells may occur. In
the event that battery fluid comes into contact with skin or eyes, the
aected area must be immediately rinsed o with water and then
contact a physician.
• Do not look into the air vents when the unit is switched on because
there is a possibility of small debris being discharged from the
openings, especially after cleaning/replacing the filters as debris
inside the unit can be agitated.

8
• Do not use the handheld vacuum cleaner for vacuuming up sharp
objects or glass shards.
• Do not use the handheld vacuum cleaner to vacuum up chemical
products, stone dust, plaster, cement or other similar particles.
• The appliance is not suitable for flammable and explosive
substances or chemical and aggressive liquids.
• Do not open the appliance under any circumstances. Please note
that operations that are not carried out by authorized professionals
can result in injury.
• Always store the appliance indoors and store it in a dry location after
use to avoid any accidents.
For Household Use Only
• The adapter may not be used for other purposes. Never carry
the wall mount or the adapter by the cord and when moving the
appliance do not pull it by the cord.
• Prevent unintentional starting by ensuring the switch is in the
o-position before connecting to the battery pack, picking up or
carrying the appliance.
• Please make sure that the ventilation slits are never obstructed
because a blocked ventilation circuit can result in overheating and
damage to the appliance.
• This product contains rechargeable batteries. Do not throw them
into a fire and subject them to high temperatures as there is a risk of
explosion!
• When disconnect the appliance from the power supply always pull
by the power plug not the cable.
• Please make sure to keep the handheld vacuum cleaner away from

9
EN
Mini Vacuum cleaner | Mini Aspiradora | Mini Aspirador
heating elements, ovens or other heated appliances and surfaces.
• Never attempt to recharge non-rechargeable batteries.
• Do not use the handheld vacuum cleaner without the dust filter
inserted.
• Do not use the adapter for a dierent product and do not attempt
to charge this appliance with a dierent adapter. Please use only the
adapter supplied with this appliance.
• The batteries in this appliance cannot be replaced.
2. OPERATING INSTRUCTIONS
2.1. Product Description
The handheld vacuum cleaner may only be used to vacuum dry or dry
materials. Do not vacuum people or animals with this appliance. Any
other use of or modification to the appliance is considered improper
and poses significant accident risks. The manufacturer is not liable for
damage caused due to unintended use or incorrect operation. Please
note that this appliance is not intended for commercial use.
Package contents
• Rechargeable Handheld Vacuum
• Crevice nozzle
• Universal nozzle
• Precision nozzle
• Small brush attachment
• Rotating brush attachment
• Wall mount
• Assembly materials (2 screws, 2 plugs)
• Power supply unit
• Operating instructions
• Check the package for completeness and for signs of visible damage.

10
• If the delivery is incomplete or damage has occurred as a result
of defective packaging or during transport, please contact the
Customer Support Service.
Description of the appliance
1
2 3
18 14
17 16
15 13 12 11
4
5
6
6
9 8
7
10
1Crevice nozzle
2Universal nozzle
3Precision nozzle
4Small brush attachment
5Release switch
6Rotating brush attachment
7Wall mount
8Accessory holders
9Coaxial power connector
10 Power supply unit
11 On/o switch
12 Charge indicator light
13 Release button
14 Motor unit
15 Operating light
16 HEPA filter
17 Filter holder
18 Dirt bin

11
EN
Mini Vacuum cleaner | Mini Aspiradora | Mini Aspirador
2.2. Product usage
Prior to first use
• Remove all packaging materials from the appliance.
• Check whether the filter holder 17 and the HEPA filter 16 are secure
in the dirt bin 18 since they can come loose during transportation.
To insert the filter holder 17 and the HEPA filter 16 into the dirt bin 18 ,
proceed as follows:
- You can only insert the filter holder 17 in a specific position
within the dirt bin 18 , so please check the reference “UP”
meaning that it should face upward. Insert the filter holder 17
into the dirt bin 18 as far as possible and make sure the filter
holder 17 is seated correctly and the rubber lip seals the dirt
bin 18 .
- Insert the HEPA filter 16 into the filter holder 17 so that the
locks on the HEPA filter 16 fit in the corresponding notches
on the filter holder 17 . The arrow on the HEPA filter 16 must
point to the arrow on the filter holder 17 . Then turn the HEPA
filter 16 clockwise in the direction of the symbol.
• Place the dirt bin 18 on the motor unit 14 :
- First, position the contacts on the bottom of the dirt bin 18
onto the contact pins on the bottom of the motor unit 14 .
Move the two locks on the motor unit 14 into the notches on
the dirt bin 18 .
- Press the top of the dirt bin 18 on the top of the motor unit
14 until the lock audibly clicks into place. The dirt bin 18 is
now securely attached to the motor unit 14 .
Information on the rechargeable batteries
• The appliance uses rechargeable lithium-ion batteries so before
using it for the first time, these batteries have to be charged. The
charge indicator light 12 flashes red during charging. Once the

12
batteries are fully charged, the charge indicator light 12 lights up
green.
• If the charge indicator light 12 flashes green and red, the battery is
completely discharged and the appliance will shut o within one
minute.
• We recommend the following to get the best use out of your
rechargeable batteries: Once all batteries are charged, unplug the
power supply unit 10 from the socket. Do not connect the power
supply unit 10 to the socket until you can feel the appliance’s suction
capacity weakening.
Wall mounting
• Please ensure that there are no power cords or other conduits or
pipes in the wall at the location where you intend to drill the holes
for the wall mount 7. Please be extra careful because drilling into a
current-carrying electric cord can be potentially fatal!
1. Find a suitable location for the wall mount 7:The handheld
vacuum cleaner must be able to be removed easily and a
socket must be located nearby. Please make sure there are
no electric or water lines in the wall here.
2. Drill two holes spaced about 110 mm from one another. The
holes must be suitable for 5 mm plugs.
3. Insert the plugs into the holes and tighten the screws so that
the head sticks out a few millimeters.
4. Hang the wall mount 7with the holes on the two screws
and make sure the screws slide into the slots. The wall
mount 7should be as close to the wall as possible. You can
set the right spacing or compensate for uneven walls by
tightening or loosening the screws.
5. Please make sure the power cord does not get pinched and

13
EN
Mini Vacuum cleaner | Mini Aspiradora | Mini Aspirador
that it is positioned correctly in the recess.
6. Move the two accessory holders 8to the left and right onto
the locks of the wall mount 7. You can place the nozzles on
the accessory holder 8.
7. Insert the coaxial power connector 9on the power supply
unit 10 into the wall mount 7from below. Secure the coaxial
power connector 9by turning it.
8. Finally, plug the power supply unit 10 into a socket.
Charging
• Please make sure that the on/o switch 11 is pushed back (“OFF”
position) before you begin charging.
• Place the appliance in the wall mount 7. The locks on the wall
mount 7should slide into the notch on the motor unit 14 and the
coaxial power unit 9into the socket on the bottom of the motor unit
14 . The charge indicator light 12 flashes red and charging begins.
• Once charging is complete, which can take about 5 to 5.5 hours
when the battery is completely depleted, the charge indicator light
12 lights up green. The appliance automatically switches to trickle
charging. Still, do not leave the appliance connected to the power
supply unit 10 to prevent any damage to the batteries.
• Do not charge the batteries until you can feel the appliance suction
capacity weakening and the charge indicator light 12 flashes green.
• If the charge indicator light 12 flashes green and red, the battery is
completely discharged and the appliance will shut o within one
minute.
• The appliance can also be charged via the power supply unit. Turn
the coaxial power connector 9slightly to remove it from the wall

14
mount 7and insert it into the socket on the appliance.
• Do not operate the appliance while charging.
Operating
• The suction opening should always be open and not blocked as
blockages lead to overheating and damage to the motor.
• Please make sure that the HEPA filter 16 is inserted before using the
appliance.
• Never vacuum liquid.
• Please note that if the rotating brush attachment 6is jammed and
prevents the brush from turning, the appliance shuts o. The charge
indicator light 12 flashes red, and the operating light 15 turns o. In
this case, remove the blockage as described in the “Cleaning the
brush attachment” chapter. Move the on/o switch 11 to the “OFF”
position and then to position I or II to start using the appliance again.
1. Remove the appliance from the wall mount 7or, if you
are not using the wall mount 7, unplug the coaxial power
connector 9from the socket.
2. Insert the nozzle you would like to use into the suction
opening. For more information, see chapter “Using the
accessories”.
3. To turn the appliance on, move the on/o switch 11 forward
to position I (= low setting) or position II (= high setting).
The charge indicator light 12 lights up yellow on setting I and
green on setting II. The operating light 15 lights up.
4. To turn o the appliance, move the on/o switch 11 back to
the “OFF” position. All lights turn o.

15
EN
Mini Vacuum cleaner | Mini Aspiradora | Mini Aspirador
Using the accessories
Slightly press down to insert the crevice nozzle 1, the precision nozzle
3into the suction opening on the appliance and make sure the
attachment is securely placed. Only use the small brush attachment 4
and the universal nozzle 2in combination with the crevice nozzle 1.
Place it on the crevice nozzle 1so that the lock on the crevice nozzle
1locks into the hole on the small brush attachment 4or the universal
nozzle 2. Please note that you can only position the rotating brush
attachment 6in one direction. Push the two contact pins on the brush
attachment 6onto the contact socket on the bottom of the suction
opening, then choose the right accessory:
Crevice nozzle
The crevice nozzle 1is ideal for cleaning diicult-to-reach spaces,
such as crannies in furniture, heater segments, etc.
Universal nozzle
The universal nozzle 2is ideal for cleaning various surfaces. Please
use only in combination with the crevice nozzle 1.
Precision nozzle
The precision nozzle 3is primarily suitable for cleaning corners and
diicult-to-reach places.
Small brush attachment
Use the small brush attachment 4to gently clean delicate surfaces
and small objects (e.g. keyboards, electrical devices, etc.). Please use
only in combination with the crevice nozzle 1.
Rotating brush attachment
The rotating brush attachment 6is designed for cleaning upholstery
and carpets. Please note that it can only be attached in one direction.
• If the rotating brush attachment 6is jammed and prevents the
brush from turning, the appliance shuts o. In this case, remove
the blockage as described in the “Cleaning the brush attachment”
chapter. Move the on/o switch 11 to the “OFF” position and then to
position I or II to start using the appliance again.

16
2.3. Maintenance
Cleaning
• Do not use aggressive, chemical or abrasive cleaning agents since
these could damage the outer surfaces of the appliance.
Emptying the dirt bin and cleaning the filter:
• To achieve the best results, empty the dirt bin 18 and clean the
HEPA filter 16 regularly.
1. If you have not yet done so, unplug the appliance from the
adapter or remove it from the wall mount 7.
2. To open the dirt bin 18 , press the release button 13 and
remove the dirt bin 18 from the appliance.
3. Remove the filter holder 17 , including the HEPA filter 16 , from
the dirt bin 18 by pulling both straight out of the dirt bin 18 .
4. Empty the dirt bin 18 .
5. Remove the HEPA filter 16 from the filter holder 17 by
turning it counterclockwise in the direction of the symbol
and pulling it out.
6. Tap on the HEPA filter 16 and the filter holder 17 over a
garbage can. If necessary, you can rinse the filter holder 17
and the HEPA filter 16 with clear water. Before using the
parts again, allow them to dry completely and do not dry the
HEPA filter 16 with hot air.
7. Put the filter holder 17 back in the dirt bin 18 . Please make
sure the filter holder 17 is seated correctly and the rubber lip
seals the dirt bin 18 .
8. Insert the HEPA filter 16 into the filter holder 17 so that the
locks on the HEPA filter 16 fit in the corresponding notches
on the filter holder 17 . The arrow on the HEPA filter 16 must

17
EN
Mini Vacuum cleaner | Mini Aspiradora | Mini Aspirador
point to the arrow on the filter holder 17 . Turn the HEPA
filter 16 clockwise in the direction of the symbol.
9. Place the dirt bin 18 back on the motor unit 14 :
- First, position the contacts on the bottom of the dirt bin 18
onto the contact pins on the bottom of the motor unit 14 :
Move the two locks on the motor unit 14 into the notches on
the dirt bin 18 :
- Press the top of the dirt bin 18 on the top of the motor unit 14
until the lock audibly clicks into place. The dirt bin 18 is now
securely attached to the motor unit 14 :
Cleaning the brush attachment
To achieve the best results, the rotating brush attachment 6should be
regularly checked for blockages and free of hair, fringes and dirt.
For simple cleaning, you can remove the brush from the brush
attachment 6:
1. If you have not yet done so, remove the brush attachment 6
from the suction opening.
2. Move the release switch 5below the brush attachment 6
in the direction of the arrow as far as it will go. You can now
remove and clean the brush.
3. To insert the brush after cleaning, proceed as follows:
- First, insert one end of the brush onto the oscillating shaft on
the opposite side of the release switch. Please note that only
one side of the brush fits onto the oscillating shaft.
- Now, insert the other end of the brush into the corresponding
notch on the other end of the release switch.
- Move the release switch 5in the direction opposite the arrow
to secure the brush. The brush should now be secured on the
brush attachment 6.

18
Cleaning the appliance
1. Clean the housing and accessories with a damp cloth.
For stubborn residues, add a mild detergent to the cloth.
2. Dry all parts well before using the appliance again
or storing it.
3. TECHNICAL SPECIFICATIONS
Appliance
Input voltage / current 22.5 V (DC), 500 mA
Polarity (plus inside, minus outside)
Rotating brush attachment
Input voltage 18.5 V (DC)
Power supply unit
Input voltage / current 100-240V ~ 50-60Hz; 0,28A
Output voltage / current 22.5 V (DC), 500 mA
Protection class II / (double insulation)
Eiciency class VI
Polarity (plus inside, minus outside)
Classication ZD012A225050
Rechargeable batteries
Capacity 2000 mAh
Rechargeable battery 18.5 V (DC)
(5x 3.7 V lithium-ion battery)

19
EN
Mini Vacuum cleaner | Mini Aspiradora | Mini Aspirador
4. POSTSALE SERVICE
Becken has designed this appliance in order to guarantee maximum
reliability. However, if a problem occurs do not attempt to open the
appliance - there is a risk of electrical shock. If you are not able to solve
the problem, please contact the Customer Support Service of any
Worten, Modelo or Continente store in order to be assisted. Worten
Equipamentos para o Lar provides a 2-year warranty for manufacturing
defects from the date of purchase of the appliance.
WARNING: any attempt to repair the appliance without contacting the
manufacturer or seller will void the warranty.
All users must be familiar with these instructions. Knowing what could
go wrong can help prevent problems from occurring.
5. ENVIRONMENTAL PROTECTION
In order to protect the environment, we strive to reduce
the volume of packaging used, limiting it to three easily
sorted materials: cardboard, paper and plastic. The
appliance is manufactured using recyclable materials
after disassembled by a specialized company. Please
comply with local regulations concerning the recycling
of all materials.
The integrated rechargeable battery in this appliance cannot be
removed for disposal.
Electrical devices cannot be disposed of as part of normal household
waste. It must be forwarded in accordance with the applicable legal
provisions. This will allow old electrical devices to be recycled and
environmental pollution to be kept to a minimum.

20
Estimado cliente:
Gracias por adquirir este producto.
Este aparato ha sido sometido a diversas pruebas que
avalan su calidad. Este manual de instrucciones está
destinado a facilitar el uso del aparato y garantizar un uso
seguro.
Lea atentamente las instrucciones, así como las medidas de
seguridad descritas en este manual.
Utilice este producto solo como se describe y solo para las
áreas de aplicación especificadas. Asimismo, proporcione
estas instrucciones de uso a cualquier futuro propietario.
Esperamos sinceramente que esté satisfecho con su nuevo
aparato.
Table of contents
Languages:
Other Becken Vacuum Cleaner manuals