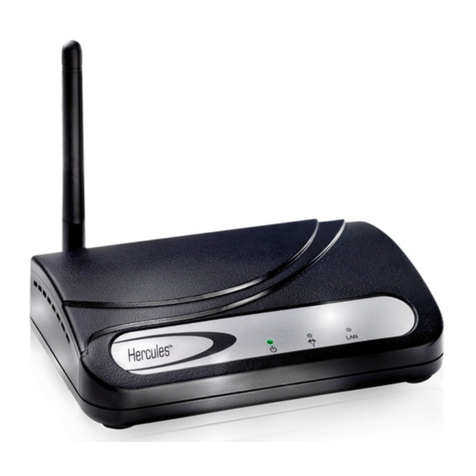
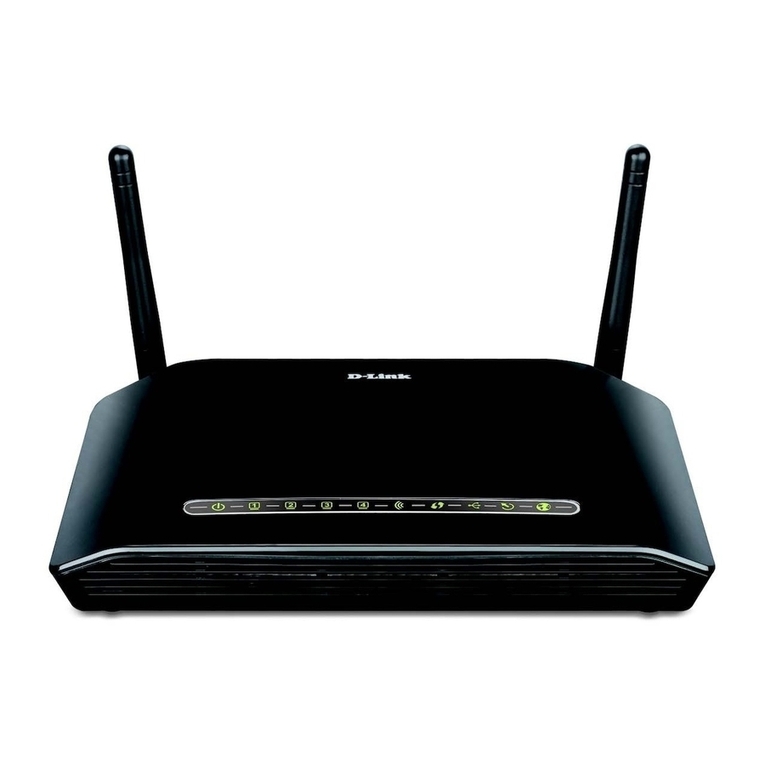
BeeWi Mobile Wireless Gateway Router User manual

Mobile Wireless Gateway Router
USER'S GUIDE


User’s guide
ENGLISH
FRANCAIS
DEUTSCH
ITALIANO
ESPAÑOL
PORTUGUES
4
14
24
34
44
54

4
1.1 Product Brief
The BWG200 Wireless Mobile Router creates a secure and efficient mobile
WiFi Hotspot from 3G broadband-enabled cellular phones and modems.
Enjoy the simplicity and convenience of WiFi in any circumstances without
having to search around for a hotspot.
Connecting a data-ready cellular phone or modem into the USB host port,
the BWG200 will automatically establish a connection to your cellular pro-
vider's data network. It works similar to the way a home router manages
a DSL or Cable modem - connect and forget. Once you plug in a cellular
USB device or modem, you can associate your PC with the BWG200 just
like in a Café Hotspot and you are on the Internet. You can optionally use
the RJ-45 Ethernet port with a wired LAN to give you easy shared wireless
access when available.
1.2 Features
- WiFi extension to Cellular Broadband Network
- Build-in WiFi (IEEE802.11b/g)
- 10/100 Ethernet LAN port
- Upgrading drivers for all kinds of cellular USB devices (USB Modem,
Express Card or Cellular Phone)
- Dial On Demand and Auto-Reconnect
- DHCP Server
- Firewall
- Wireless encryption
- User friendly Web GUI
- Firmware upgradeable using the browser interface
1. INTRODUCTION
Thank you for purchasing the BWG200 Wireless Router from
BEEWI. Please read the following instructions to learn how to
configure and use more effectively your product.

5
1.3 Specifications
ENGLISH
Model
WiFi Standards
Wired LAN Network
Connection
BWG200 (Portable Wireless Router)
IEEE 802.11b/g
10/100 BASE-T
Internet Connection
Security
Encryption
Device Management
Interface
LED
Platform Compatibility
Requires compatible cellular device with
USB connection
Via Web Browser (HTTP)
RJ45
USB (Type A Female)
Reset (Press about 5 seconds until the WAN LED
turn off, it is about to restore default settings)
WLAN
(The light indicates the status of WiFi)
WAN
(Flickering indicates the Router is starting up while
keeping on means it has accessed the Internet)
Power
(Turning on indicates that power supply is normal)
Enable/Disable SSID, Internet Access
Control
64/128 bit WEP, WPA/WPA2, and WPA-
PSK/WPA2-PSK
Windows 98SE/NT/2000/XP/Vista, Mac OS X,
Linux, and all kinds of WiFi-enabled PDAs

6
2.1. Connection
Step 1: Connect a USB modem to the BWG200 router
Step 2: Plug the BWG200 router to the power to turn it on
Note: always connect the USB modem first in the router when it is not yet
plugged to the power. In case another USB modem is used, unplug the
router before changing the USB modem.
2.2. Setup/Configuration
2.2.1. Connection to the router
Detect the Wireless Router in your computer wireless network connection
window. Then click ‘Connect’. The screen shows that the connection is es-
tablished.
2.2.2. Login
Open a browser and type the IP address in the address bar, for example
http://192.168.1.1.
When connection is established, the Login screen will appear. Type user
name and password (default of both user name and password are ‘admin’),
and click OK.
2. INSTALLATION
Dimensions
Weight
Operating Temperature
Power Supply
100 x 75 x 30 mm
185g (Device only)
0-50°C
PWR100-A: AC 90-260V
(Changeable AC clip adapters for different
standards)

7
If the user name and password are correct, the browser will enter into
administrator mode. The administrator screen is shown below:
3.1 Setup
3.1.1 WAN Setup
Click on Setup on the left side of the screen. The WAN Setup Screen is
shown below:
3. ROUTER CONFIGURATION
ENGLISH

8
Dial Number
User Name
Password
APN
The dial number provided by the ISP.
User name provided by the ISP.
Password provided by the ISP.
The Access Point Name provided by ISP.
DNS
SIM PIN PIN codes of the SIM card.
The IP address of the Domain Name
System, you may leave it blank since the
value will be caught from the ISP.
Click on Save/Reboot to make the new setup effective and wait until the
router has been rebooted before testing the connection.
3.1.2 LAN Setup
Configure the Router IP Address and Subnet Mask for LAN interface.
Click on Save/Reboot to make the new setup effective.
3.2 Wireless
3.2.1 Basic
This page allows you to enable or disable the wireless network, hide
network from active scans, set SSID wireless network name and restrict
channel set based on country requirements.
3.2.2 Security
This page allows you to configure security features of the wireless
LAN interface. You can set network authentication method, select data
encryption type WEP, WPA or WPA2, specify whether a network key is
required to authenticate to this wireless network and specify encryption
level.

9
ENGLISH
3.2.3 MAC Filter
This page allows you to configure MAC address filter to control devices
connected to the router.
3.2.4 Wireless Bridge
This page allows you to configure wireless bridge features of the wireless
LAN interface. This is useful if you want to use the router as repeater or
if you want to use wireless repeater stations connected to the router in
Access Point mode to extend the Wireless LAN coverage.
3.2.5 Advanced
This page allows you to configure advanced features of the wireless LAN
interface. You can select a particular channel on which to operate, force
the transmission rate to a particular speed, set the fragmentation threshold,
set the RTS threshold, set the wakeup interval for clients in power-save
mode, set the beacon interval for the access point, set XPress mode and
set whether short or long preambles are used.
3.2.6 Station Info
This page shows authenticated wireless stations and their status.
3.3 Management
3.3.1Settings

10
- Backup: to back up the router settings on a PC file.
- Update: to update the router settings from the back up file on the PC.
- Restore Default Settings: to restore default settings on the router.
3.3.2 System Log
The System Log dialog allows you to view the System Log and configure
the System Log options
3.3.3 Access Control
- Services: a Service Control List enables or disables services from being
used.
- IP Address: the IP Address Access Control mode, if enabled, permits
access to local management services from IP addresses contained in the
Access Control List. If the Access Control mode is disabled, the system will
not validate IP addresses for incoming packets.
- Passwords: access to your Router is controlled through 3 user accounts:
admin, support, and user. The user name "admin" has unrestricted access
to change and view configuration of the router. The user name "support" is
used to allow an ISP technician to access your Router for maintenance and
to run diagnostics. The user name "user" can access the Router, view confi-
guration settings and statistics, as well as, update the router's software.
Use the fields to enter up to 16 characters and click "Apply" to change or
create passwords (Note passwords cannot contain a space).

11
ENGLISH
3.3.4 Update Software
Update firmware of the Router.
Step 1: Obtain an updated software image file from your ISP.
Step 2: Enter the path to the image file location in the box below or click
the "Browse" button to locate the image file.
Step 3: Click the "Update Software" button once to upload the new image
file.
NOTE: The update process takes about 2 minutes to complete, and your
the Router will reboot.
3.3.5 Save and reboot
Save the settings and reboot the Router.
3.4 FTP Server
Enable FTP Server.
3.5 Logout
Log out and leave administration mode.

12
European Union Directives Conformance Statement
Hereby, VOXLAND declares that this product is in compliance
with:
• The essential requirements and other relevant provisions of Directive
1999/5/EC
• All other relevant EU Directives
You can view your product’s Declaration of Conformity (DoC) to Directive
1999/5/EC (to R&TTE Directive) at www.bee-wi.com.
Caring for the environment by recycling
Do not dispose of electrical devices or accessories with your hou-
sehold waste.
In some countries or regions, collection sys-
tems are set up to handle electrical and electronic waste
items. Contact your regional authorities for more details.
Copyright and other legal information
BEEWI is a registered trademark. Other trademarks mentioned herewith
are owned by their proprietor. All other product or service names are the
property of their respective owners.
The use of wireless devices and their accessories may be prohibited or
restricted in certain areas. Always obey the laws and regulations on the
use of these products.
This product is covered by a 2-year product warranty which is valid from
the date of purchase. Users are not permitted to make changes or modify
the device in any way. Changes or modifications not expressly approved
by the party responsible for compliance will void the user’s warranty.
Please visit our website www.bee-wi.com for more information.
© VOXLAND, 2009.

13
ENGLISH
NOTES:

14
1.1 Description du produit
Le routeur sans fil BWG200 vous permet de créer votre propre Hotspot
large bande, sécurisé et performant, par simple adjonction d’un modem
ou d’un téléphone mobile 3G. Vous pourrez ainsi profiter de la simplicité
et du confort d’une connexion WiFi sans fil en toutes circonstances sans
avoir à rechercher un autre Hotspot aux alentours.
Le routeur BWG200 établi automatiquement une connexion au réseau de
votre opérateur 3G, dès que vous connectez un modem ou un téléphone
mobile 3G sur son port USB. Cela fonctionne de la même façon que sur
votre modem-routeur LAN domestique (DSL ou câble) et vous pouvez vous
connecter au réseau sans être attaché physiquement.
Vous pouvez aussi connecter votre routeur sur un modem LAN via la prise
RJ45 afin de créer une passerelle WiFi et de partager facilement et sans
fil votre accès Internet.
1.2 Caractéristiques principales
- Extension WiFi de réseaux cellulaires large bande
- WiFi intégré, conforme au standards IEEE802.11b/g
- Ports Ethernet LAN 10/100
- Pilotes disponibles pour la mise à jour du routeur pour tous types de
modems cellulaires sur prise USB (Modems USB, Express Card ou télé-
phones mobiles)
- Serveur DHCP Server
- Pare-feu intégré
- Cryptages sans fil
- Interface de configuration Web simple et facile
- Mise à jour directe à partir de l’interface de configuration
1. INTRODUCTION
Merci d’avoir choisi le routeur sans fil BWG200 de BEEWI.
Veuillez lire les instructions suivantes afin de configurer et utili-
ser au mieux votre appareil.

15
FRANÇAIS
1.3 Spécifications
Modèle
Standards WiFi
Connexion filaire réseau
LAN
BWG200 (Routeur Sans Fil Mobile)
IEEE 802.11b/g
10/100 BASE-T
Connexion Internet
Sécurité
Cryptage
Gestion et configuration
Interface
Indicateurs lumineux
Systèmes supportés
Requiert un modem cellulaire compatible
avec connexion USB
Via browser Web (HTTP)
RJ45
USB Type A femelle
Bouton de remise à zéro : pression de 5 seconds
jusqu’à ce que la diode WAN s’éteigne
Attention : la remise à zéro restaure la
configuration par défaut !
WLAN :
indique l’état de la liaison WiFi
WAN :
indique l’état de la connexion Internet
- indicateur clignotant : recherche du réseau
- indicateur fixe : accès Internet effective
Power :
indique la connexion effective à l’alimentation
SSID activé/désactivé, contrôle d’accès
Internet
WEP 64/128 bit, WPA/WPA2 et WPA-
PSK/WPA2-PSK
Windows 98SE/NT/2000/XP/Vista, Mac OS X,
Linux, et tous types d’assistants personnels WiFi

16
2.1 Connexion au réseau
Etape 1 : Connectez un modem USB au routeur BWG200.
Etape 2 : Connectez le routeur BWG200 sur une prise de courant.
Note : toujours connecter le modem USB avant de mettre le routeur sous
tension. Dans le cas où un autre modem USB doit être utilisé, débrancher
le routeur avant de changer de modem USB.
2.2 Configuration
2.2.1 Connexion au routeur
Détectez le routeur sans fil dans la fenêtre de connexion aux réseaux sans
fil puis activez la connexion.
2.2.2 Login
Ouvrez un browser Internet et entrez l’adresse IP http://192.168.1.1
dans la barre d’adresse.
Dès la connexion établie, une fenêtre de login apparaîtra. Entrez le nom
d’utilisateur et le mot de passe par défaut et cliquez OK. Le nom d’utilisa-
teur par défaut et le mot de passe par défaut sont « admin ».
2. INSTALLATION
Dimensions
Poids
Operating Temperature
Power Supply
100 x 75 x 30 mm
185g (routeur seul)
0-50°C
PWR100-A: AC 90-260V
(Changeable AC clip adapters for different
standards)

17
FRANÇAIS
Si le nom d’utilisateur et le mot de passe sont corrects, le browser entrera
en mode administration, la fenêtre s’ouvrant sur les informations WAN.
3.1 Configuration initiale (Setup)
3.1.1 Configuration WAN (Setup / WAN)
Sur l’onglet à gauche de l’écran, sélectionnez “Setup”. The WAN Setup
Screen is shown below:
3. CONFIGURATION DU ROUTEUR

18
Pour enregistrer les nouveaux paramètres, cliquez sur SAVE/REBOOT et
attendez que le routeur ait rebooté pour tester votre connexion.
3.1.2 Configuration LAN (Setup / LAN)
Configuration de l’adresse IP et du masque de sous-réseau pour l’interface
LAN. Pour enregistrer les nouveaux paramètres, cliquez sur SAVE/
REBOOT.
3.2 Configuration Sans Fil (Wireless)
3.2.1 Réglages de base (Wireless / Basic)
Permet d’activer ou désactiver le réseau sans fil, de cacher le réseau, de
changer le nom SSID du réseau sans fil, et de restreindre les canaux en
fonction de la réglementation.
3.2.2 Sécurité (Security)
Permet de configurer les fonctions de sécurité de l’interface réseau sans
fil LAN. Vous pouvez choisir la méthode d’authentification, sélectionner
le type de cryptage WEP, WPA ou WPA2, spécifier si une clé réseau est
requise et spécifier le niveau de cryptage.
Dial Number
User Name
Password
APN
Le numéro d’appel fourni par l’opérateur.
Le nom d’utilisateur fourni par l’opérateur.
Le mot de passe fourni par l’opérateur.
Access Point Name, nom du point
d’accès fourni par l’opérateur
DNS
SIM PIN Code PIN de la carte SIM utilisée.
L’adresse IP du Domain Name System. Vous
pouvez le laisser vierge car cette valeur
sera remplie automatiquement.

19
3.2.3 Filtrage MAC (MAC Filter)
Permet de programmer le filtrage MAC pour contrôler les appareils connectés
au routeur.
3.2.4 Pont sans fil (Wireless Bridge)
Permet de configurer les fonctionnalités de pont de l’interface réseau local sans
fil. C’est utile dans le cas ou vous voulez utiliser le routeur comme répéteur ou
si vous voulez connecter d’autres stations sans fil sur le routeur en mode point
d’accès pour étendre la couverture du réseau local sans fil.
3.2.5 Mode avancé (Advanced)
Pour configurer les fonctions avancées de l’interface réseau local. Vous pouvez
choisir un canal de fonctionnement particulier, forcer le taux de transmission à
une certaine vitesse, programmer le palier de fragmentation, choisir le palier
RTS, configurer les intervalles d’activation pour les clients en mode économie
d’énergie ou de balise pour le point d’accès, configurer le mode Xpress ou si
des préambules courts ou longs doivent être utilisés.
3.2.6 Info Station (Station Info)
Cette page affiche les stations authentifiées et leurs statuts respectifs.
3.3 Gestion (Management)
3.3.1 Configuration (Settings)
- Backup: pour sauvegarder la configuration du routeur sur un fichier de
FRANÇAIS

20
sauvegarde sur le PC.
- Update: pour mettre à jour la configuration du routeur à partir du fichier de
sauvegarde sur le PC.
- Restore Default Settings: pour restaurer la configuration par défaut du routeur.
3.3.2 Registre du système (System Log)
Vous permet de visualiser le registre d’évènement du système et de paramétrer
les options pour configurer le registre du système.
3.3.3 Contrôle d’accès (Access Control)
- Services : la liste de contrôle des services vous permet d’activer ou désactiver
les services nécessaires.
- Adresse IP : le mode de contrôle d’accès de l’adresse IP vous permet
d’accéder
The IP Address Access Control mode, if enabled, permits access to local
management services from IP addresses contained in the Access Control List. If
the Access Control mode is disabled, the system will not validate IP addresses
for incoming packets.
- Mots de passe (Passwords):
L’accèsaurouteurestcontrôlé par3comptesutilisateurdifférents:administrateur
(admin), support (support) et utilisateur (user). L’utilisateur « admin » a un accès
non restreint pour visualiser et changer la configuration du routeur. L’utilisateur
« support » est réservé au technicien pour la maintenance et le diagnostic.
L’utilisateur « user » peut accéder au routeur et visualiser la configuration et les
statistiques ainsi que mettre à jour le logiciel. Utilisez les champs pour entrer
jusqu’à 16 caractères et activez « Apply » pour créer ou changer un mot de
passe (le mot de passer ne doit pas contenir d’espace).
This manual suits for next models
1
Table of contents
Languages:
