Beko DEN59420D User manual

www.beko.com.tr
DEN59420DX
EN
Document Number :
1592670100_AA_BEKO_E8P_EN/06-08-18.(17:14)
Dishwasher
User’s Manual

www.beko.com.tr
DEN59420DX
EN
Document Number :
1592670100_AA_BEKO_E8P_EN/06-08-18.(17:14)
Dishwasher
User’s Manual

Explanation of symbols
Throughout ths User Manual the followng symbols are used:
C
Important nformaton or useful
hnts about usage.
A
Warnng for hazardous stuatons
wth regard to lfe and property.
B
Warnng for electrc shock.
Packagng materals of the
product are manufactured
from recyclable materals n
accordance wth our Natonal
Envronment Regulatons.
Do not dspose of the packagng materals together wth the domestc or other wastes.
Take them to the packagng materal collecton ponts desgnated by the local authortes.
Please read these instructions first before using your appliance
Thank you for choosng a Beko applance.
Please take some tme to read ths user manual before usng your applance, to ensure
you know how to safely operate the controls and functons.
Carefully follow all unpackng and nstallaton nstructons to ensure the applance s
correctly connected and ftted pror to use.
Please wrte your product model and seral number on the last page of ths user manual,
and store n a safe locaton close to the applance for easy future reference.
Ths user manual may also be applcable for several other models. Dfferences between
models wll be lsted.
If you have any questons or concerns, please call our contact centre or fnd help and
nformaton onlne at www.beko.co.uk
This product was manufactured using the latest technology in environmentally friendly conditions.

Explanation of symbols
Throughout ths User Manual the followng symbols are used:
C
Important nformaton or useful
hnts about usage.
A
Warnng for hazardous stuatons
wth regard to lfe and property.
B
Warnng for electrc shock.
Packagng materals of the
product are manufactured
from recyclable materals n
accordance wth our Natonal
Envronment Regulatons.
Do not dspose of the packagng materals together wth the domestc or other wastes.
Take them to the packagng materal collecton ponts desgnated by the local authortes.
Please read these instructions first before using your appliance
Thank you for choosng a Beko applance.
Please take some tme to read ths user manual before usng your applance, to ensure
you know how to safely operate the controls and functons.
Carefully follow all unpackng and nstallaton nstructons to ensure the applance s
correctly connected and ftted pror to use.
Please wrte your product model and seral number on the last page of ths user manual,
and store n a safe locaton close to the applance for easy future reference.
Ths user manual may also be applcable for several other models. Dfferences between
models wll be lsted.
If you have any questons or concerns, please call our contact centre or fnd help and
nformaton onlne at www.beko.co.uk

CONTENTS
1 INSTRUCTIONS FOR SAFETY
AND ENVIRONMENT 4
General safety .......................................4
Intended use..........................................4
Children’s safety....................................5
Disposing of packaging material ........5
Transportation of the product............5
Compliance with WEEE Directive and
Disposing of the Waste Product.........6
Compliance with RoHS Directive........6
Package information ............................6
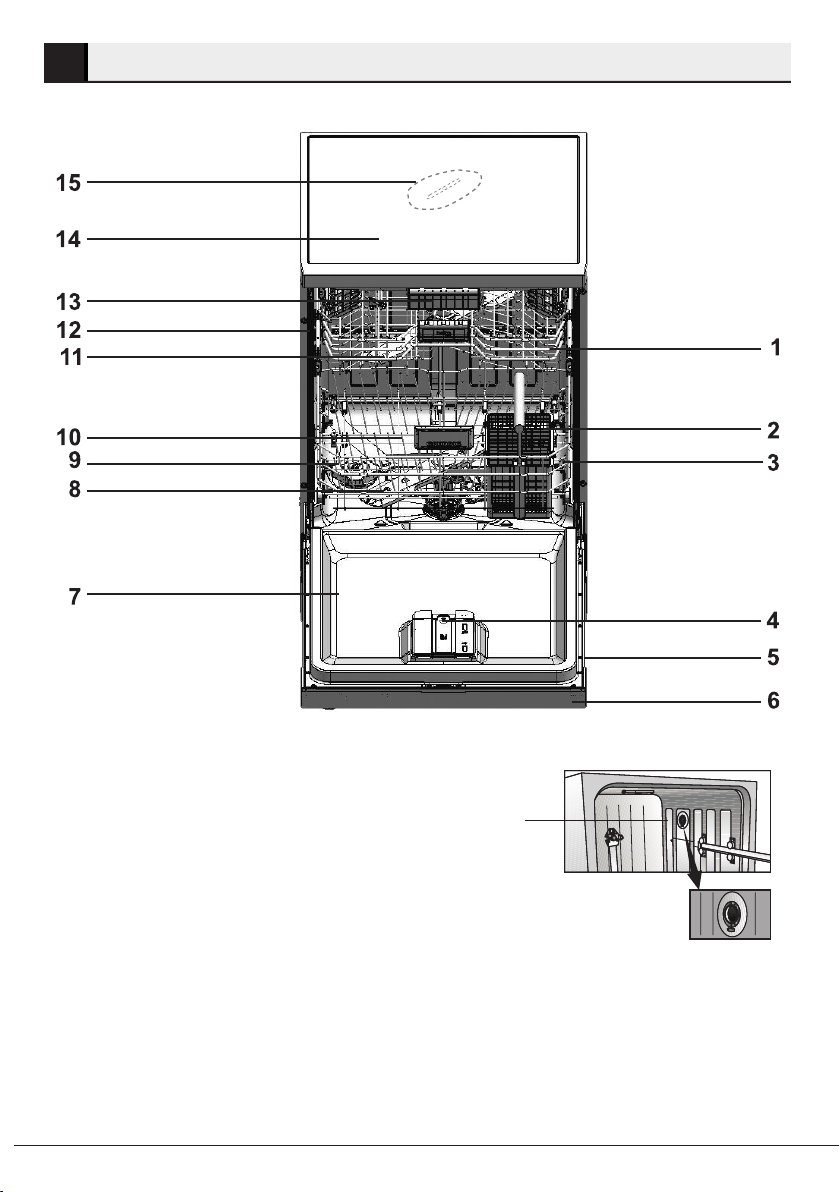
2 DISHWASHER 7
Overview ................................................7
Fan drying system.................................8
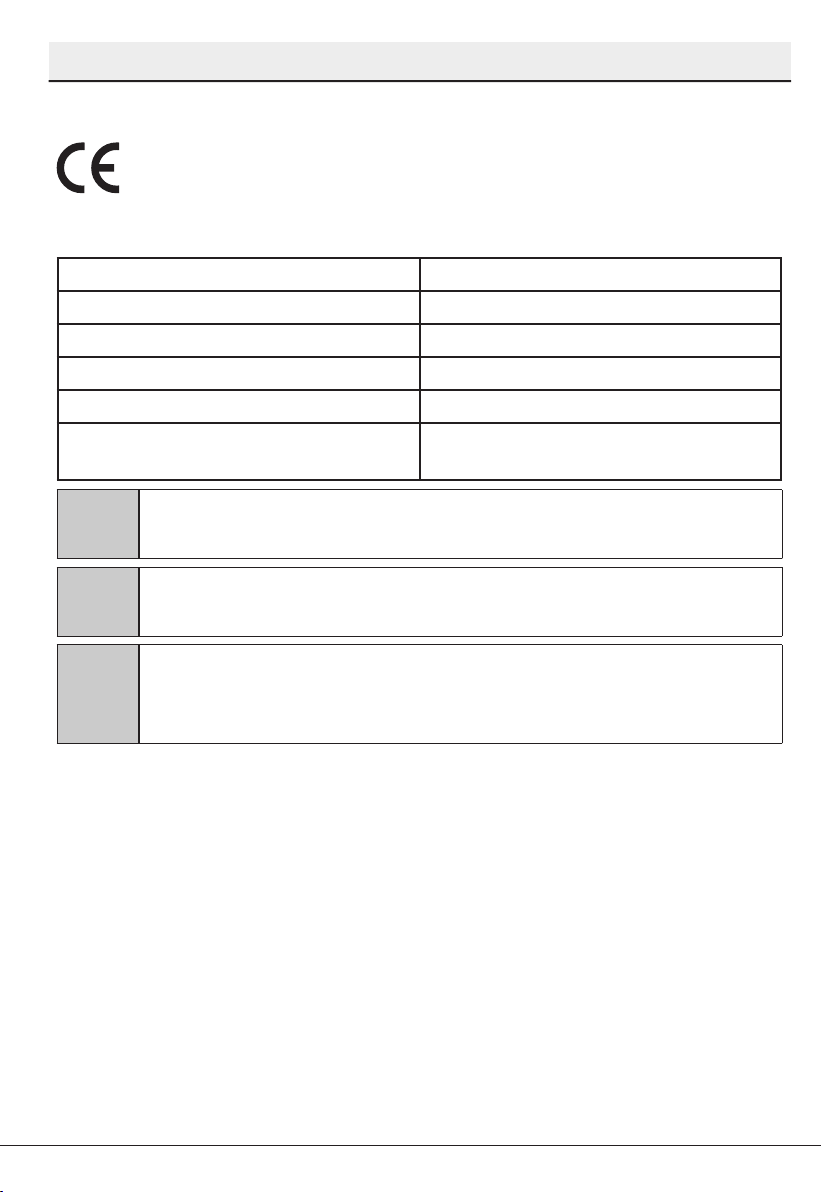
Technical specications.......................8
3 INSTALLATION 9
Appropriate installation location .......9
Connecting water supply.....................9
Connection to the drain .................... 10
Adjusting the feet.............................. 10
Electrical connection......................... 10
This appliance must be earthed.......11
Fitting a dierent plug.......................11
Initial use..............................................11
4 PREPARATION 12
Tips for energy saving........................12
Water softening system ....................12
Adjusting the water softening
system ..................................................12
Adding salt ...........................................14
Detergent.............................................15
Adding Liquid/Gel Detergent and
Rinse Aid ..............................................16
Powder Detergents ............................17
Tablet detergents .............................. 18
Collapsible upper basket wires.........21
Tray Wash Supports............................21
Upper basket multipurpose service
rack....................................................... 22
Upper basket height adjustable
rack....................................................... 22
Cutlery basket .................................... 23
Collapsible lower basket tines ......... 23
Adjusting the height of the upper
basket .................................................. 24
5 OPERATING THE PRODUCT25
Programme Selection / Programme
Cancel key............................................ 26
Function Keys ..................................... 26
Preparing the machine...................... 26
Programme selection........................ 26
Auxiliary functions ............................ 29
Scheduling the washing time ...........31
Starting the programme................... 32
Cancelling the programme ............... 32
Adjusting the amount of rinse aid... 33
Salt indicator ( ) .............................. 33
Rinse Aid indicator ( )..................... 33
End of programme ............................. 33
Water cut-o warning....................... 33
Overowing warning......................... 34
6 HOMEWHIZ FUNCTION 35
HomeWhiz Setup and User Account
Settings ............................................... 35
7 MAINTENANCE AND
CLEANING 39
Cleaning the outer surface of the
product ................................................ 39
Cleaning the interior of the machine39
Cleaning the lters ............................ 39
Cleaning the hose lter.....................40
Cleaning the impellers ...................... 41
Lower impeller.................................... 41
Upper impeller ................................... 41
8 TROUBLESHOOTING 42
9 GUARANTEE 47

4
Dshwasher / User’s Manual
/53 EN
Instructions for safety and envIronment
1
Ths secton contans safety
nstructons that wll help to gve
protecton from rsk of personal
njury or property damage. Falure
to follow these nstructons shall
vod all warrantes.
General safety
•Never place the product
on a carpet-covered floor;
otherwse, lack of arflow
beneath the product wll
cause electrcal parts to
overheat. Ths wll cause
problems wth your product.
•Do not operate the product
f the power cable / plug s
damaged! Call the Authorsed
Servce Agent.
•Connect the product to a
grounded outlet protected
by a fuse complyng wth
the values n the “Techncal
specfcatons” table. Do
not neglect to have the
groundng nstallaton made
by a qualfed electrcan.
Our company shall not be
lable for any damages that
wll arse when the product
s used wthout groundng
n accordance wth the local
regulatons.
•The water supply and
dranng hoses must be
securely fastened and reman
undamaged.
•Unplug the product when not
n use.
•Never wash the product by
spreadng or pourng water
onto t! There s the rsk of
electrc shock!
•Never touch the plug wth
wet hands! Never unplug by
pullng on the cable, always
pull out by grabbng the plug.
•The product must be
unplugged durng nstallaton,
mantenance, cleanng and
reparng procedures.
•Always have the repar
procedures carred out by the
Authorsed Servce Agent.
Manufacturer shall not be
held lable for damages that
may arse from procedures
carred out by unauthorsed
persons.
•Never use chemcal solvents
n the product. They brng
forth the rsk of exploson.
•When you pull the upper and
lower baskets out completely,
the door of the product wll
bear all the weght of the
baskets. Do not put other
loads on the door; otherwse,
the product may tlt.
•Never leave the door of
the product open apart
from loadng and unloadng
procedures.
•Do not to open the door of
the product when t s runnng
unless necessary. Be careful
for the rush of hot steam
when you need to open the
door.
Intended use
•Ths product has been
desgned for domestc use.
•It must be used to do the
domestc type dshes only.

Dshwasher / User’s Manual
5 / 53
EN
Instructions for safety and envIronment
•Ths applance s ntended
to be used n household and
smlar applcatons such as:
- Staff ktchen areas n shops,
offces and other workng
envronments.
•Only dshwasher safe
detergents, rnse ads and
addtves must be used.
•The manufacturer waves
any responsblty arsen
from ncorrect usage or
transportaton.
•Ths applance can be used
by chldren aged from 8 years
and above and persons wth
reduced physcal,sensory
or mental capabltes or
lack of experence and
knowledge f they have
been gven supervson or
nstructon concernng use
of the applance n a safe
way and understand the
hazards nvolved. Chldren
shall not play wth the
applance. Cleanng and user
mantenance shall not be
made by chldren wthout
supervson.
Children’s safety
•Electrcal products are
dangerous for the chldren.
Keep chldren away from the
product when t s n use. Do
not let them to tamper wth
the product.
•Do not forget to close the
door of the product when
leavng the room where t s
located.
•Store all detergents and
addtves n a safe place away
from the reach of the chldren.
Disposing of packaging
material
Packagng materals are
dangerous to chldren. Keep
packagng materals n a safe
place away from reach of the
chldren.
Packagng materals of the
product are manufactured from
recyclable materals. Dspose
of them properly and sort n
accordance wth recycled waste
nstructons. Do not dspose
of them wth normal domestc
waste.
Transportation of the
product
A
If you need to move the
product, do t n uprght
poston and hold from
the rear sde. Tltng the
product onto ts front
sde may cause the
electronc parts n t get
wet and damaged.
1. Unplug the product before
transportng t.
2. Remove water dranage and
water supply connectons.
3. Dran the remanng water n
the product completely.

6
Dshwasher / User’s Manual
/53 EN
Instructions for safety and envIronment
Compliance with WEEE
Directive and Disposing
of the Waste Product
Ths product comples wth
EU WEEE Drectve
(2012/19/EU). Ths product
bears a classfcaton symbol
for waste electrcal and electronc
equpment (WEEE).Ths product
has been manufactured wth hgh
qualty parts and materals whch
can be reused and are sutable for
recyclng. Do not dspose of the
waste product wth normal
domestc and other wastes at the
end of ts servce lfe. Take t to the
collecton center for the recyclng
of electrcal and electronc
equpment. Please consult your
local authortes to learn about
these collecton centers.
Compliance with RoHS
Directive
The product you have purchased
comples wth EU RoHS Drectve
(2011/65/EU). It does not contan
harmful and prohbted materals
specfed n the Drectve.
Package information
Packagng materals of the product
are manufactured from recyclable
materals n accordance wth our
Natonal Envronment Regulatons.
Do not dspose of the packagng
materals together wth the
domestc or other wastes. Take
them to the packagng materal
collecton ponts desgnated by
the local authortes.

Dshwasher / User’s Manual
7 / 53
EN
Dishwasher
2
Overview
1. Upper basket
2. Cutlery basket
3. Lower basket
4. Automatc Lqud/Gel Detergent and Rnse Ad
Dosng System
5. Type Label
6. Control panel
7. Door
11. Lower mpeller
9. Salt reservor ld
10. Flters
11. Upper mpeller
12. Upper basket ral
13. Upper cutlery basket ( depends on model )
14. Upper table ( depends on model )
15. Celng mpeller ( depends on model )
16. Fan dryng system ( depends on model )
16

8
Dshwasher / User’s Manual
/53 EN
Dishwasher
Technical specications
Compliance to standards and test data / EC declaration of conformity
Ths product comples wth the followng EU drectves;
Development, producton and sales stages of ths product comply wth the safety
rules ncluded n all pertanng European Communty regulatons.
2014/35/EU, 2014/30/EU, 93/68/EC, IEC 60436/DIN 44990, EN 50242
Power nput 220-240 V, 50 Hz (see ratng label)
Total power consumpton 1800-2100 W (see ratng label)
Heater power consumpton 1800 W (see ratng label)
Total current (depends on the model) 10 A (see ratng label)
Dran pump power consumpton 30 W (see ratng label)
Water pressure 0.3 –10 bar (= 3 – 100 N/cm = 0.01-1.0
Mpa)
C
Techncal specfcatons may be changed wthout pror notce to mprove the
qualty of the product.
C
Fgures n ths manual are schematc and may not match the product exactly.
C
Values stated on the markngs of the product or n the prnted documents
accompanyng the product are obtaned n the laboratory on bass of the relevant
standards. Dependng on operatonal and envronmental condtons of the
product, these values may vary.
Note for test institutions:
Data requred for performance tests shall be provded upon request. Requests can be
e-maled to the followng address:
dishw[email protected]om
Do not forget to provde the code, stock and seral numbers of the product to be tested n
your request e-mal along wth your contact nformaton. Code, stock and seral numbers of
the product may be found on the type label attached to the sde wall of the door.
Fan drying system
Fan dryng system ensures effcent dryng of your dshes.
It s normal to hear a dfferent sound than that of washng cycle durng fan operaton.

Dshwasher / User’s Manual
9 / 53
EN
3Installation
To make the product ready for use, make
sure that the electrcty, tap water supply
and water dranage systems are approprate
before callng the Authorsed Servce Agent.
If they are not, call a qualfed techncan
and plumber to have any necessary
arrangements carred out.
C
Preparaton of the locaton
and electrcal, tap water and
waste water nstallatons at the
place of nstallaton s under
customer's responsblty.
B
Manufacturer shall not be held
responsble for damages arsng
from processes carred out by
unauthorsed persons.
A
Pror to nstallaton, vsually
check f the product has any
defects on t. If so, do not have
t nstalled. Damaged products
cause rsks for your safety.
C
Make sure that the water nlet
and dscharge hoses are not
folded, pnched or crushed
whle pushng the product nto
ts place after nstallaton or
cleanng procedures.
When placng the product, pay attenton not
to damage the floor, walls, ppng, etc. Do
not hold the product from ts door or panel
to move t.
Appropriate installation
location
•Place the product on a sold and flat
floor that has suffcent load carryng
capacty! The product must be nstalled
on a flat surface n order for the door to
be closed comfortably and securely.
•Do not nstall the product at places
where temperature may fall below 0ºC.
•Place the product on a rgd floor. Do
not place t on a long ple rug or smlar
surfaces.
B
Ensure the power cable does
not get trapped under the
product.
•Make sure that you select a locaton
that wll allow you to load and unload
the dshes n a fast and comfortable
manner.
•Install the product n a place close
to the tap and the dran. Select the
nstallaton locaton by consderng
that t wll not be changed after the
connectons are made.
Connecting water supply
•Do not use old or used water nlet
hose on the new product. Use the new
water nlet hose suppled wth the
product.
•Connect the water nlet hose drectly
to the cold water tap. Permtted water
temperature up to 25°C. Pressure
comng from the tap should be
mnmum 0.3 and maxmum 10 bars. If
the water pressure exceeds 10 bars, a
pressure relef valve should be nstalled
n between.
•Open the tap completely after makng
the connectons to check for water
leaks.
A
For your safety, close the water
nlet tap completely after the
washng programme s over.

10
Dshwasher / User’s Manual
/53 EN
Installation
Connection to the drain
Water dscharge hose can drectly be
connected to the dran hole or snk’s
dranage. The length of ths connecton
must be mn. 50 cm and max. 100 cm from
the floor. A dscharge hose longer than 4
meters wll cause washng performance
to be affected.Attach the water dscharge
hose to the dranppe wthout bendng t.
Tghtly fx the water dscharge hose to the
dranppe n order to prevent any dslocaton
of the water dscharge hose durng
operaton of the product.
min
300
min
120
max 1000
min 500
C
Dranppe must be connected
to the foul water system and t
should not be connected to any
surface water dran.
Adjusting the feet
If the door of the product cannot be closed
properly or f the product wobbles when you
push t slghtly, then you need to adjust the
feet of the product. Adjust the feet of the
product as llustrated n the relevant secton.
A
Dswashers door must be
algned properly otherwse hot
steam can escape! Danger of
serous burns, other njury or
may damage furnture.
Electrical connection
Before you nsert the plug nto the wall
socket make sure that the voltage and
the frequency shown n the ratng label
corresponds to your electrcty supply.
We recommend that ths applance be
connected to the mans supply va a sutable
swtched and fused socket n a readly
accessble poston.
If the supply cord or the mans lead s
damaged please do not replace t yourself.
The supply cord or the mans lead must be
replaced by a Authorsed Servce Agent or a
smlarly qualfed person.

Dshwasher / User’s Manual
11 / 53
EN
Installation
Wth the alternatve plugs a 13A fuse must
be ftted ether n the plug or adaptor or
n the man fuse box. If n doubt contact a
qualfed electrcan.
Initial use
Before startng to use the product, make
sure that all preparatons are made n
accordance wth the nstructons n sectons
“Important safety nstructons” and
“Installaton”.
•Before usng the product, fll the salt
reservor wth 1 ltre of water, add salt
(see next page) and str to dssolve.
Run the Dshwasher wthout dshes
on a short programme wth a small
amount of detergent.
A
There mght be a small amount
of water left n the product after
factory qualty control tests. Ths
causes no harm to the product.
AThis appliance must
be earthed
If the ftted moulded plug s not
sutable for your socket, then
the plug should be cut off and
an approprate plug ftted.
Destroy the old plug, whch s
cut off as a plug wth a bared
cord could cause a shock
hazard f nserted nto a socket
elsewhere n the house.
The moulded plug on ths
applance ncorporates a 13A
fuse. Should the fuse need to
be replaced an ASTA approved
BS1362 fuse of the same ratng
must be used. Do not forget
to reft the fuse cover. In the
event of losng the fuse cover,
the plug must not be used
untl a replacement fuse cover
has been ftted. Colour of the
replacement fuse cover must be
the same colour as that vsble
on the pn face of the plug. Fuse
covers are avalable from any
good electrcal store.
Fitting a dierent plug
As the colours of the wres n the mans
lead of ths applance may not correspond
wth the coloured markngs dentfyng the
termnals on your plug, proceed as follows:
1. Connect the green - yellow or green
(earth) wre to the termnal n the plug
marked ‘E’ or wth the symbol or
coloured green and yellow or green.
2. Connect the blue (neutral) wre to
the termnal n the plug marked ‘N’ or
coloured black.
3. Connect the brown (lve) wre to the
termnal n the plug marked ‘L’ or
coloured red.

12
Dshwasher / User’s Manual
/53 EN
PreparatIon
4
Tips for energy saving
Followng nformaton wll help you use
the product n an ecologcal and energy-
effcent manner.
Wpe away any coarse food remnants on the
dshes before puttng them n the product.
Operate the product after fllng t
completely.
When selectng a programme, consder
the table of "Programme data and average
consumpton values".
Do not put more detergent than suggested
on the detergent package.
Water softening system
The product s equpped wth a water
softenng system whch reduces the
hardness of ncomng water. Ths system
softens the supply water to a level that wll
allow washng the dshes wth the requred
qualty.
Dshwasher salt s used for ths purpose.
Adjusting the water
softening system
Cleanng, rnsng and dryng performance of
your dshwasher wll ncrease when water
softenng system s adjusted properly.
Adjust the new water hardness level
accordng to the Water hardness level
nstructon n ths booklet.
Use the test strp suppled wth the product
accordng to the steps gven below to
determne hardness level of your supply
water.

Dshwasher / User’s Manual
13 / 53
EN
PreparatIon
Remove the test
strip from the
packet.
Turn on the tap and
let the water run for
about a minute.
Hold the test strip in
the water for about
a second.
Remove the test
strip from the water
and shake it.
Wait for 1 minute. The test strip shows
you the hardness
level.
After determnng hardness level of the supply water:
1. After swtchng on your machne, long press the Menu key
2. Pres the settngs menu key for 3 seconds to enter the Settngs Menu.
3. Usng <- and +> keys, proceed untl the water hardness settng ndcator becomes on (“r”
poston wll be dsplayed).
4. Usng the Selecton key, adjust water hardness level accordng to the hardness of the
supply water. For correct settng please see “Water hardness level settng table”.
5. Press the Menu key to ext the settngs menu. Your settng wll be saved automatcally.
Water hardness level adjustment table
Hardness
Level
English Water
Hardness °dE
German Water
Hardness °dH
French Water
Hardness °dF Water Hardness Level Indicator
Level 0 0-5 0-4 0-8 Press the Selection key to switch the water
hardness level to position 1. (r1)
Level 1 6-9 5-7 9-13
Level 2 10-15 8-12 14-22 Press the Selection key to switch the water
hardness level to position 2. (r2)
Level 3 16-19 13-15 23-27 Press the Selection key to switch the water
hardness level to position 3. (r3)
Level 4 20-24 16-19 28-34 Press the Selection key to switch the water
hardness level to position 4. (r4)
Level 5 25-62 20-50 35-90 Press the Selection key to switch the water
hardness level to position 5. (r5)
In order to protect your glassware aganst glass corroson n an optmal way, you have to
perform the same hardness settngs, whch you have made n the control panel, wth the
regeneraton settng swtch.
For example, f you have adjusted to “3rd level” n the control panel, also set the regeneraton
adjustment swtch to 3rd level.
Regeneration Adjustment Switch
0th Level 1st Level 2nd Level 3rd Level 4th Level 5th Level
1 1 2 3 4 5

14
Dshwasher / User’s Manual
/53 EN
PreparatIon
3. Add 1 ltre of water to salt reservor of
your machne only n ntal use.
4. Add salt to the salt compartment. To
speed up dssoluton rate of salt n
water, str t wth a spoon.
C
You can put about 2 kg of
softenng salt nto the salt
reservor.
5. Replace the ld and tghten t when the
reservor s full.
C
You need to add salt rght before
startng the machne. Thus, the
overflowng salty water wll be
flushed mmedately, preventng
the rsk of corroson n machne.
In cases where you would not
start washng mmedately,
run your machne empty n the
shortest program.
C
Snce dfferent salt brands n the
market have dfferent partcle
szes and snce the water
hardness may vary, dssoluton
of the salt n water may take
a couple of hours. Therefore,
Salt Indcator remans on for a
whle after addng salt nto the
machne.
If the hardness level of the supply water
s above 90 °dF or f you are usng well
water, then t s recommended to use water
purfcaton devces and specal flters.
If the hardness level of the supply water s
below 13°dF, there s no need to use salt
n your dshwasher. If ths s the case, “No
Salt Warnng Indcator” (f any) llumnates
contnuously on the panel of your machne.
If the water hardness level adjustment s set
to level 1, the “No salt warnng ndcator” wll
llumnate contnuously although t s not
necessary to use salt. If you use salt under ths
condton, salt wll not be consumed and the
Salt ndcator wll not llumnate.
C
If you move your house, t s
necessary to readjust water
hardness level of your machne
by consderng the nformaton
gven above accordng to the
hardness level of the supply
water n your new locaton.
Your machne wll dsplay the
most recently adjusted water
hardness level.
C
Adjust the water softness
level accordng to the "Water
hardness level nstructon"
suppled wth your machne.
Adding salt
C
Use only specal softenng salts
produced partcularly for the
dshwashers n your machne.
1. Frst take the lower basket out to add
softenng salt.
2. Turn the salt reservor ld counter-
clockwse to open t (A).

Dshwasher / User’s Manual
15 / 53
EN
PreparatIon
Detergent
You can use powder, tablet and lqud/gel
detergent n the machne.
A
Only use the detergents
produced partcularly for
use wth dshwashers n the
machne. We recommend you
not to use detergents that
contan chlorne and phosphate
as they are harmful for the
envronment.
Your dshwasher s equpped wth an
Automatc Lqud/Gel Detergent Dosng
System.
Thanks to ths system, the amount of rnse
ad and lqud/gel detergent requred for the
selected washng programme s adjusted
automatcally.
C
Please read the nformaton
gven n secton “Operatng
the Product” to actvate or
deactvate the Automatc
Lqud/Gel Detergent Dosng
adjustment.
C
When the Automatc Lqud/
Gel Detergent functon s
enabled, the Automatc Lqud/
Gel Detergent ndcator on
the panel wll lght up f there
s lqud/gel detergent n the
detergent box. If there s lttle or
no detergent n the detergent
box, the ndcator wll flash.
C
When the Automatc Lqud/Gel
Detergent ndcator starts to
flash, there s enough detergent
for at least 5 washng cycles.
•Factory settngs of the Automatc
Lqud/Gel Detergent Dosng
System are based on the detergent
amount recommended by detergent
manufacturers.
•You can proceed to the Settngs menu
to change the Automatc Lqud/Gel
Detergent Dosng settng accordng
to your habts, or accordng to the
recommendatons by the detergent
manufacturer f you are usng a
dfferent lqud/gel detergent.
C
Please follow the nstructons
gven n secton “Operatng the
Product” to change the settngs
of the Automatc Lqud/Gel
Detergent Dosng System and
Rnse Ad.
C
In addton to lqud/gel
detergents that functon only
as a detergent, there are also
lqud/gel detergents that act as
rnse ad and/or soften water.
Follow the manufacturer’s
recommendatons when usng
these detergents.
Detergent manufacturer’s
recommendatons about the amount of
lqud/gel detergent to be used are as
follows:
For lghtly soled dshes 20 ml
For moderately soled dshes 25 ml
For heavly soled dshes 30 ml
C
Some gel-type detergents may
not be sutable for automatc
dosng as they are hghly
vscous. Apply ths type of
detergents onto the nner
surface of the dshwasher’s
door or drectly nto the
dshwasher, payng attenton
to the recommendatons of the
detergent manufacturer.

16
Dshwasher / User’s Manual
/53 EN
PreparatIon
C
Wpe clean any splled rnse ad
outsde the reservor. Otherwse,
t wll cause foamng n the next
washng cycle, reducng the
washng performance of the
product.
C
The rnse ad used n
dshwashers s a specal product
that s recommended to ncrease
dryng effcency and prevent
water or lme stans on the
washed tems. For ths reason,
care must be pad to have rnse
ad n the rnse ad reservor
and to use rnse ads produced
specally for dshwashers only.
Using the Automatic Liquid/Gel
Detergent Dosing System
In order to use the Automatc Lqud/
Gel Detergent Dosng functon, select
Automatc Lqud/Gel Detergent Dosng
functon on the control panel.
When the functon s actve, ts ndcator
comes lt and the system uses approprate
amount of detergent and rnse ad n each
washng program.
C
Press the key agan to cancel
the functon.
C
When automatc lqud/gel
detergent dosng functon
s selected, do not use other
types (powder, tablet, etc) of
detergents.
If you want to use another type
of detergent while the automatic
liquid/gel detergent dosing system
is full, cancel the automatic liquid/
gel detergent dosing function on
Adding Liquid/Gel
Detergent and Rinse Aid
The Automatc Lqud/Gel Detergent Dosng
system s found on the door of your
dshwasher.
1
2
After fully openng the door of the
dshwasher, open the decoratve cover as
shown wth arrows 1 and
A
B
C
D
2. Open the cover shown wth (A) n the
pcture and add rnse ad. Open the cover
shown wth (B), add lqud/gel detergent and
close the covers.
C
The ndcator marked wth (C) on
your machne nforms you about
the lqud/gel detergent level n
the box.
C
The ndcator marked wth (D) on
your machne nforms you about
the rnse ad level n the box.

Dshwasher / User’s Manual
17 / 53
EN
PreparatIon
Installing/Removing the Liquid/
Gel Detergent and Rinse Aid Box
Top remove the rnse ad and detergent
boxes, push and lft the system cover on
both sdes as shown wth arrows 1 and 2 and
open.
1
21
Lft and remove the rnse ad box (A).
AB
1
2
Move the detergent box (B) n the drecton
of the arrow (1) and lft to remove (2). Once
the cleanng or fllng procedure s complete,
follow the above steps n reverse order to
re-nstall the detergent and rnse ad boxes.
Powder Detergents
C
You can fnd the correct amount
of powder detergent for the
selected programme n the
table "Programme Data and
Consumpton Values".
C
You can apply powder
detergent onto the cover of the
dshwasher or drectly nto the
machne.
the control panel. Then you can use
powder, tablet or liquid/gel detergent.
C
Use only lqud/gel detergent
sutable for the dshwasher.
A
Do not mx dfferent brands of
lqud/gel detergents.
C
Do not fll the lqud/gel
detergent box wth lquds or
chemcal cleaners (vnegar,
bleacher etc.) other than lqud/
gel detergent.
C
Lqud/gel detergents that lost
ther fludty and became frm
must not be used n automatc
lqud/gel detergent dosng
system.
Liquid/gel detergents must be used
in a short time once they have been
unpacked. Unpacked liquid/gel
detergents may lose their fluidity in
time.
C
If a dfferent brand or type of
lqud/gel detergent wll be used,
make sure prevous detergent
s depleted completely and then
remove and clean the lqud/gel
detergent tank under tap water.
C
Fll the rnse ar box only wth
rnse ad, and the detergent box
only wth lqud/gel detergent.
If you fll t napproprately,
mmedately remove the boxes,
empty them and clean under
runnng water.

18
Dshwasher / User’s Manual
/53 EN
PreparatIon
C
To use powder detergents, go to
the Settngs menu to dsable the
Automatc Lqud/Gel Detergent
Dosng System and f any, the
Tablet Detergent functon.
C
Powder detergents must be
used wth programmes wthout
Prewash. See Programme Data
and Consumpton Values.
C
Use powder detergent n short
programmes wthout prewash
snce the solublty of the tablet
detergent changes dependng
on the temperature and tme.
Tablet detergents
Table detergents exhbt water softenng
and / or rnse ad effect n addton to
detergent effect. Some types of these
detergents also contan specal-purpose
washng chemcals such as glass and
stanless steel protectors.
C
Tablet detergents gve
satsfyng results only under
certan usage condtons. The
best washng performance n
dshwashers s obtaned by usng
detergent, rnse ad and water
softenng salt ndvdually.
A
C
Place the tablet detergent nto
the Tablet Detergent Box found
on the upper basket of the
dshwasher (A).
C
When usng tablet detergents,
you can use the Tablet
Detergent Functon to mprove
the dryng performance of the
dshwasher (based on model).
Tablet detergent types commonly found on
the market:
2in1:
Contans detergent, rnse ad or water
softenng salt
3in1:
Contans detergent, rnse ad and
water softenng salt
4in1:
Contans glass protectors n addton
to detergent, rnse ad and water softenng
salt
5in1:
Contans glass and stanless steel
protectors n addton to detergent, rnse ad
and water softenng salt
C
When usng tablet detergents,
follow the manufacturer's
nstructons on the packagng.
C
Contact the detergent
manufacturer f your dshes
are wet and/or f you notce
lmescale spots partcularly on
your glasses after the washng
programme s over when usng a
tablet detergent.
When you switch to powder
detergent from tablet detergent:
1. Make sure that salt and rnse ad
reservors are full.
2. Set the water hardness to the hghest
level and perform an empty run.
3. After the empty washng cycle, revew
the user manual and readjust the water
hardness level so as to sut the water
supply.
This manual suits for next models
3
Table of contents
Other Beko Dishwasher manuals

Beko
Beko DFS26024B User manual

Beko
Beko DIN15Q10 User manual

Beko
Beko DFN28320W User manual

Beko
Beko BDFN36650CX User manual

Beko
Beko DFS04R10S User manual

Beko
Beko DFS05020W User manual

Beko
Beko DDT28430X User manual

Beko
Beko DWI644 Installation instructions

Beko
Beko DFS05013S User manual

Beko
Beko DIN24215 User manual

Beko
Beko DEN48X20X User manual

Beko
Beko DFN05321S User manual

Beko
Beko DIN 1400 XN User manual

Beko
Beko DFS28R20W User manual

Beko
Beko BDIS38020Q User manual

Beko
Beko DSFN 1534 User manual

Beko
Beko BM 5015 YX User manual

Beko
Beko DFN 1000 X User manual

Beko
Beko DWD5414 User manual

Beko
Beko DFS05014W User manual