3Installaton
Refer to the nearest Authorsed
Servce Agent for nstallaton of your
product. To make the product ready
for use, make sure that the electrcty,
tap water supply and water dranage
systems are approprate before
callng the Authorsed Servce
Agent. If they are not, call a qualfed
techncan and plumber to have any
necessary arrangements carred out.
CPreparation of the location and
electrical, tap water and waste
water installations at the place of
installation is under customer's
responsibility.
BInstallation and electrical
connections must be carried out
by the Authorised Service Agent.
Manufacturer shall not be held
liable for damages that may arise
from procedures carried out by
unauthorised persons.
BPrior to installation, visually check
if the product has any defects on
it. If so, do not have it installed.
Damaged products cause risks for
your safety.
AMake sure that the water inlet
and discharge hoses are not
folded, pinched or crushed while
pushing the product into its place
after installation or cleaning
procedures.
When placing the product, pay
attention not to damage the floor,
walls, piping, etc. Do not hold the
product from its door or panel to
move it.
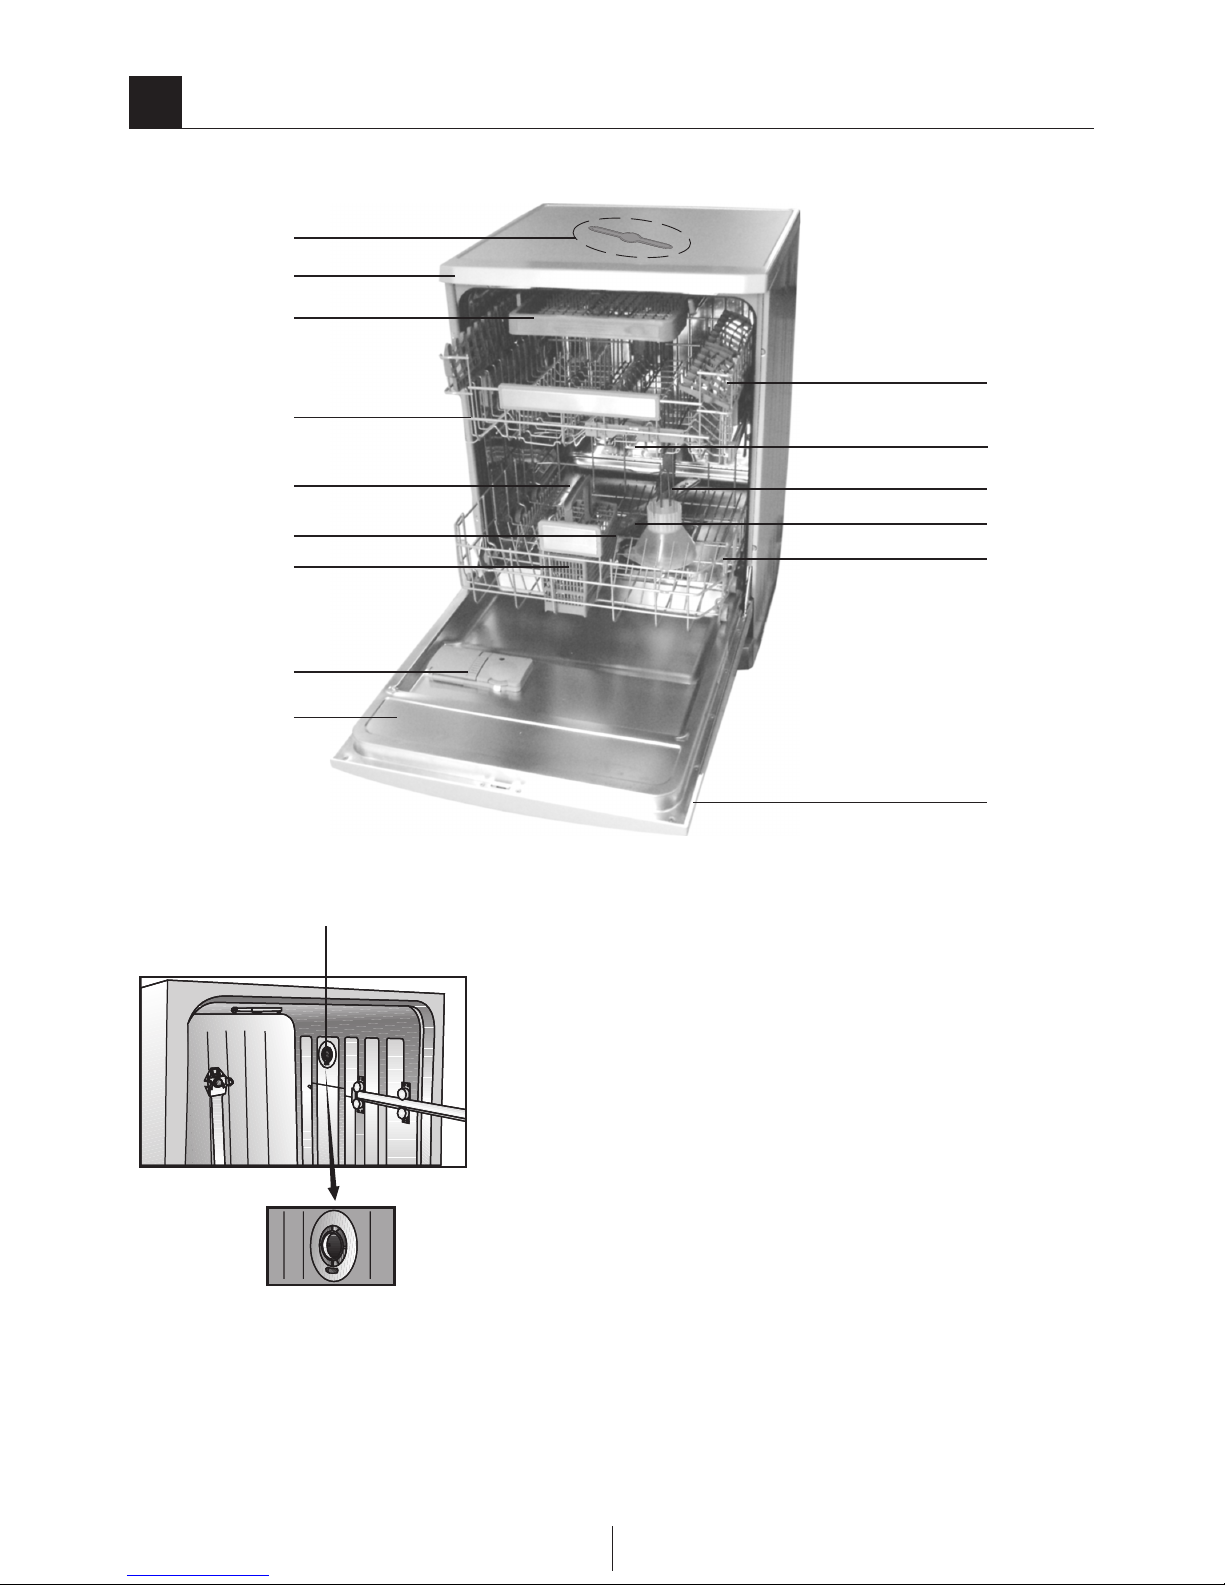
Approprate nstallaton
locaton
· Place the product on a sold and
at oor that has sucent load
carryng capacty! The product
must be nstalled on a at surface
n order for the door to be closed
comfortably and securely.
· Do not nstall the product at
places where temperature may
fall below 0ºC.
· Place the product at least 1 cm
away from the edges of other
furnture.
· Place the product on a rgd oor.
Do not place t on a long ple rug
or smlar surfaces.
ADo not place the product on the
power cable.
· Make sure that you select a
locaton that wll allow you to
load and unload the dshes n a
fast and comfortable manner.
· Install the product n a place close
to the tap and the dran hole.
Select the nstallaton locaton
by consderng that t wll not be
changed after the connectons
are made.
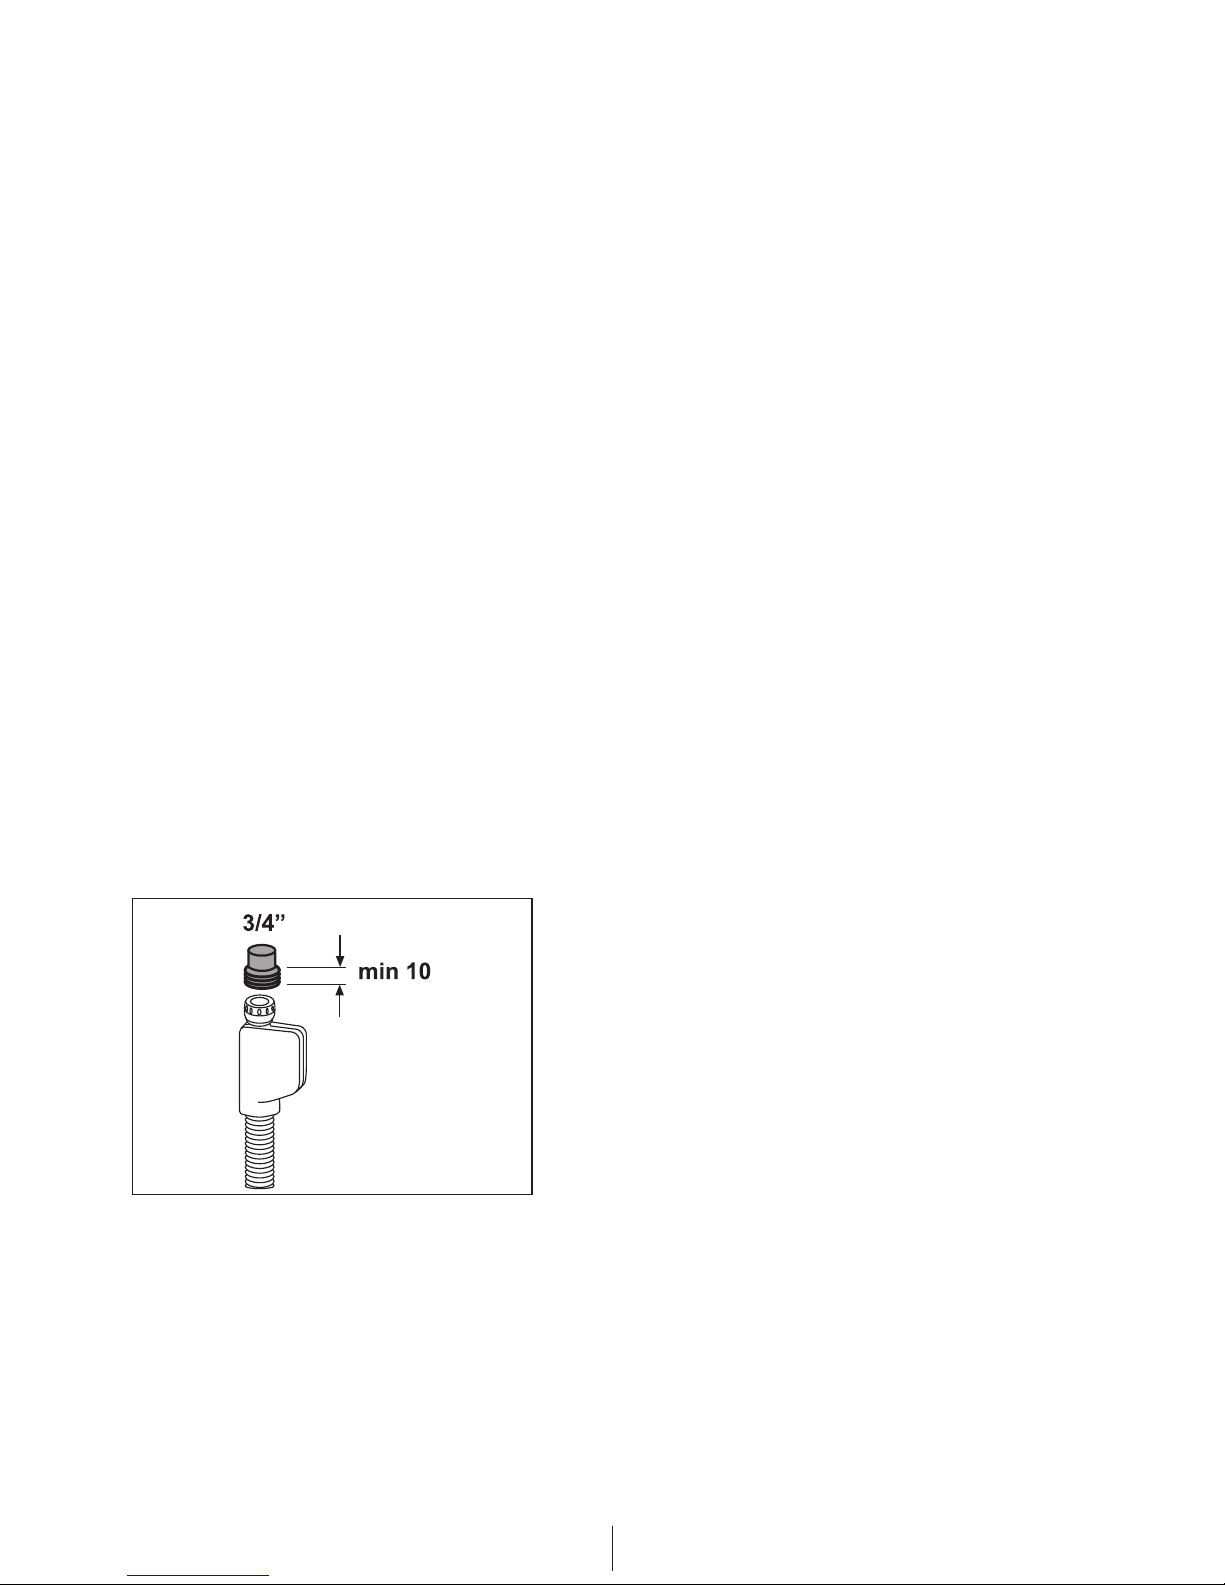
Connectng water supply
CWe recommend attaching a filter
on the house/apartment supply
water inlet to protect the machine
from damages that may arise
from impurities (sand, dirt, rust,
etc.) coming from the urban water
supply system or from your own
water system as well as to prevent
complaints such as yellowing or