Beko HPI 51012 B User manual

HPI 51012 B
01M-8910423200-5120-01 / 01M-8910463200-5120-01 / 01M-8910473200-5120-01
User Manual
Induction Hob
EN / TH / ID / VN

Ths product has been manufactured n envronmental frendly modern plants wthout
gvng any harm to the nature.
Please read this manual first!
Dear Customers!
Thank you for preferring a Beko product. We hope that you get the best results from
your product which has been manufactured with high quality and state-of-the-art
technology. Therefore, please read this entire user manual and all other accompanying
documents carefully before using the product and keep it as a reference for future use.
If you handover the product to someone else, give the user manual as well. Follow all
warnings and information in the user manual.
Remember that this user manual is also applicable for several other models. Differences
between the models are explicitly described in the manual.
Meanings of the Symbols
Following symbols are used in the various section of this manual:
C
Important information and useful hints about
usage.
AWARNING:
Warnings for dangerous situa-
tions concerning the safety of life and property.
B
Warning for electric shock.
Warning for hot surfaces.
Do not immerse.
Potection class against electric shock.

3 / EN
Induction Hob / User Manual
CONTENTS
ENGLISH 4-14

4 / EN Induction Hob / User Manual
This section contains safety in-
structions that will help protect
from risk of personal injury or prop-
erty damage. Failure to follow these
instructions shall void any warranty.
1.1 General safety
•This appliance can be used by chil-
dren aged from 8 years and above
and persons with reduced physical,
sensory or mental capabilities or
lack of experience and knowledge
if they have been given supervision
or instruction concerning use of the
appliance in a safe way and under-
stand the hazards involved.
Children shall not play with the ap-
pliance. Cleaning and user main-
tenance shall not be made by chil-
dren unless they are older than 8
and supervised.
•Keep the appliance and its cord
out of reach of children less than 8
years.
•This appliance is intended to be
used in household and similar ap-
plications such as:
- Staff kitchen areas in shops, of-
fices and other working environ-
ments;
- Farm houses
- By clients in hotels, and other
residential type environments;
- Bed and Breakfast type environ-
ments.
- It is not fit for industrial use.
•Installation and repair procedures
must always be performed by Au-
thorized Service Agents.
•The manufacturer shall not be held
responsible for damages arising
from procedures carried out by un-
authorized persons which may also
void the warranty. Before installa-
tion, read the instructions carefully.
•Do not operate the product if it is
defective or has any visible damage.
•Ensure that the product function
knobs are switched off after every
use.
•Do not cover the appliance and do
not place items weighing more than
8 kg on it. Too much weight can
cause damage.
1.2 Electrcal safety
•If the product has a failure, it should
not be operated unless it is repaired
by an Authorized Service Agent.
There is the risk of electric shock!
•Only connect the product to a
grounded outlet/line with the volt-
1 Important nstructons and warnngs
for safety and envronment

5 / EN
Induction Hob / User Manual
1 Important nstructons and warnngs
for safety and envronment
age and protection as specified in
the “Technical specifications”. Have
the grounding installation made by
a qualified electrician while using
the product with or without a trans-
former. Our company shall not be
liable for any problems arising due
to the product not being earthed in
accordance with the local regula-
tions.
•Never wash the product by spread-
ing or pouring water onto it! There
is the risk of electric shock!
•The product must be disconnected
during installation, maintenance,
cleaning and repairing procedures.
•If the power connection cable for
the product is damaged, it must be
replaced by the manufacturer, its
service agent or similarly qualified
persons in order to avoid a hazard.
•The appliance must be installed so
that it can be completely discon-
nected from the mains supply. The
separation must be provided by a
switch built into the fixed electrical
installation, according to construc-
tion regulations.
•Any work on electrical equipment
and systems should only be carried
out by authorized and qualified per-
sons.
•In case of any damage, switch off
the product and disconnect it from
the mains. To do this, turn off the
fuse at home.
•Make sure that fuse rating is com-
patible with the product.
Metallic objects such as
knives, forks, spoons and
lids should not be placed
on the hotplate since they
can get hot.
1.3 Product safety
•The appliance and its accessible
parts become hot during use. Care
should be taken to avoid touching
heating elements. Children less
than 8 years of age shall be kept
away unless continuously super-
vised.
•Never use the product when your
judgment or coordination is im-
paired by the use of alcohol and/or
drugs.
•Be careful when using alcoholic
drinks in your dishes. Alcohol evap-
orates at high temperatures and
may cause fire since it can ignite
when it comes into contact with hot
surfaces.
•Do not place any flammable materi-

6 / EN Induction Hob / User Manual
1 Important nstructons and warnngs
for safety and envronment
als close to the product as the sides
may become hot during use.
•Keep all ventilation slots clear of ob-
structions.
•Do not use steam cleaners to clean
the appliance as this may cause an
electric shock.
•Unattended cooking on a hob with
fat or oil can be dangerous and may
result in fire. NEVER try to extin-
guish a fire with water, but switch
off the appliance and then cover
flame e.g. with a lid or a fire blanket.
•Danger of fire: Do not store items
on the cooking surfaces.
•If the surface is cracked, switch off
the appliance to avoid the possibil-
ity of electric shock.
•After use, switch off the hob ele-
ment by its control and do not rely
on the pan detector.
•Metallic objects such as knives,
forks, spoons and lids should not
be placed on the hob surface since
they can get hot.
•The appliance is not intended to be
operated by means of an external
timer or separate remote-control
system.
•Vapour pressure that build up due to
the moisture on the hob surface or at
the bottom of the pot can cause the
pot to move. Therefore, make sure
that the oven surface and bottom of
the pots are always dry.
•Hotplates are equipped with “In-
duction” technology. Your induction
hob that provides both time and
money savings must be used with
pots suitable for induction cook-
ing; otherwise hotplates will not
operate. See.General information
about cooking, page 14, selecting
the pots.
•As induction hobs create a mag-
netic field, they may cause harmful
impacts for people who use devices
such as insulin pump or pacemaker.
•Use only hob guards designed by
the manufacturer of the cooking
appliance or indicated by the man-
ufacturer of the appliance in the
instructions for use as suitable or
hob guards incorporated in the ap-
pliance. The use of inappropriate
guards can cause accidents.
•Prevention against possible fire
risk!
•Ensure all electrical connections are
secure and tight to prevent risk of
arcing.
•Do not use damaged cables or ex-
tension cables.

7 / EN
Induction Hob / User Manual
1 Important nstructons and warnngs
for safety and envronment
•Ensure liquid or moisture is not acces-
sible to the electrical connection point.
1.4 Intended use
•This product is designed for domes-
tic use. Commercial use will void the
guarantee.
•This appliance is for cooking pur-
poses only. It must not be used for
other purposes, for example room
heating.
•The manufacturer shall not be liable
for any damage caused by improper
use or handling errors.
1.5 Safety for chldren
•Accessible parts may become hot
during use. Young children should
be kept away.
•The packaging materials will be
dangerous for children. Keep the
packaging materials away from chil-
dren. Please dispose of all parts of
the packaging according to environ-
mental standards.
•Electrical products are dangerous
to children. Keep children away
from the product when it is oper-
ating and do not allow them to play
with the product.
•Do not place any items above the ap-
pliance that children may reach for.
1.6 Dsposng of the old
product
Compliance with RoHS Directive:
The product you have purchased complies
with EU RoHS Directive (2011/65/EU). It
does not contain harmful and prohibited
materials specified in the Directive.
1.7 Complance wth the WEEE
Drectve and Dsposng of the
Waste Product:
This product complies with EU WEEE Directive
(2012/19/EU). This product bears a classification
symbol for waste electrical and electronic equip-
ment (WEEE).
This symbol indicates that this product
shall not be disposed with other house-
hold wastes at the end of its service
life. Used device must be returned to
offical collection point for recycling of
electrical and electronic devices. To find these col-
lection systems please contact to your local au-
thorities or retailer where the product was pu-
chased. Each household performs important role
in recovering and recycling of old appliance.
Appropriate disposal of used appliance helps pre-
vent potential negative consequences for the en-
vironment and human health.
1.8 Package nformaton
Packaging materials of the product are
manufactured from recyclable materi-
als in accordance with our National
Environment Regulations. Do not dis-
pose of the packaging materials to-
gether with the domestic or other wastes. Take
them to the packaging material collection points
designated by the local authorities.

8 / EN Induction Hob / User Manual
2 General information
2.1 Overvew
1. Ceramic plate
2. Control bar
3. LED display
4. Fans (exhaust)
5. Ring
1
5
4
2 3
2.2 Techncal data
Applied voltage/
frequency
220-240 V ~ 50-60Hz
Rated power
2000 W
Dimension (cm)
29x37x4 cm
Net weight
approx. 2.4 kg

9 / EN
Induction Hob / User Manual
2 General information
2.3 Control panel
1. Pause / Go button
2. Timer button
3. “-”- button
4. Display window
5. “+”- button
6. Temperature/Power Selection button
7. On/off button
2.4 Before usng New
Inducton hod
•Read this guide, taking special note of the
“Safety Warnings” section.
•Remove any protective film that may still be on
your ceramic plate.
2.5 Usng the Touch Controls
•Insert the main plug into the wall socket.
•Place the cookware in the middle of the respec-
tive ring.
•Press the on/off button to turn on the display.
•Adjust the appliance according to your cooking
requirements.
•After use, press the on/off button to place the
appliance on standby.
•Immediately disconnect the mains plug from
the wall outlet.
•Allow the appliance to cool completely.
•The buttons on the control panel are touch-sen-
sitive. This means that there is no need to press
them down firmly. Use your finger-tips, not your
fingernails, to type.
•Always keep the buttons clean and dry. Do not
cover them with objects such as cloths, pothold-
ers or other cooking utensils. Even a thin film of
water can impair the function of the buttons.
•Always keep ventilation openings unobstructed.
•Only use cookware that contains food or liquid
and always place it in the middle of the hob.
•For your safety, the single hob will turn off after
2 hours of inactive use, meaning no buttons are
pushed to change the temperature, the output
or the time.
1 2 3 4 5 6 7

10 / EN Induction Hob / User Manual
2 General information
•The single hob is equipped with overheating
protection. If the cookware becomes too hot,
the appliance switches off automatically and
the error message “E5” or “E6” appears on the
display. Wait a few minutes and let the hob cool
down if the appliance gets too hot.
•The appliance is then free to be used again
without any problem.
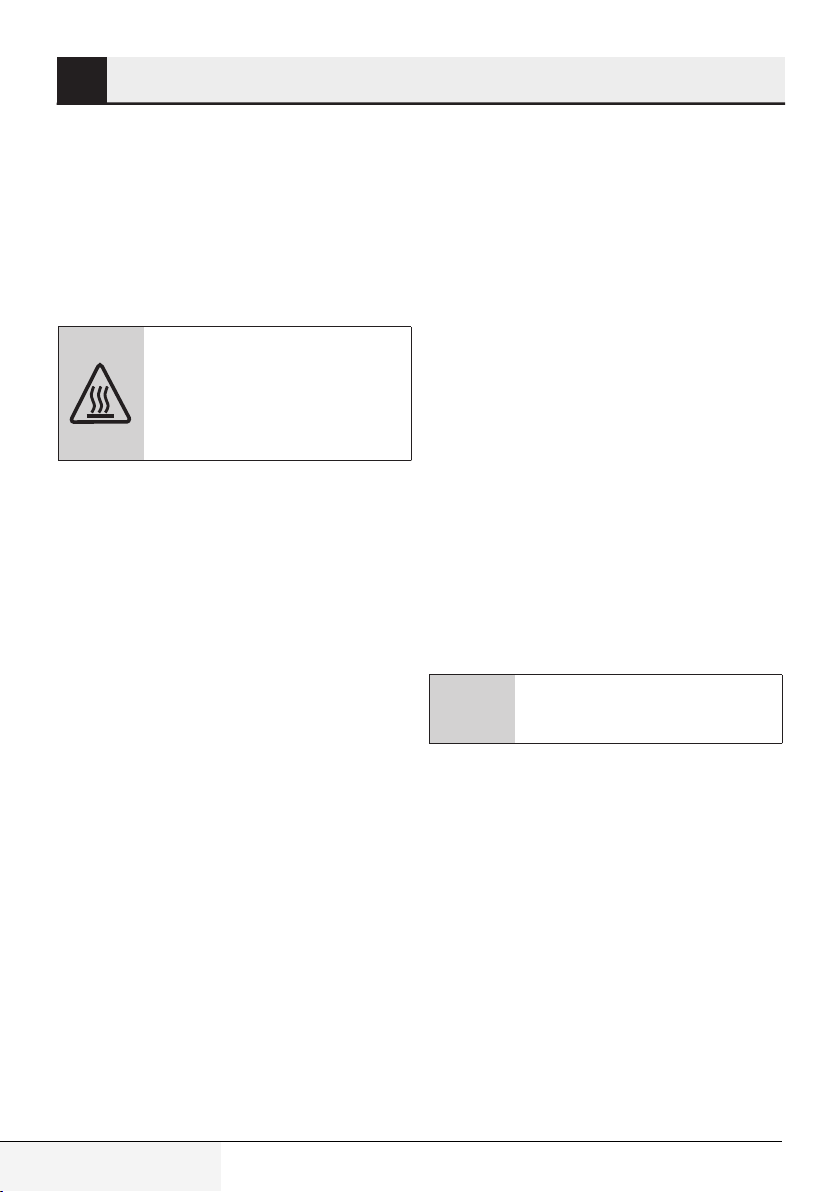
Do not touch the hot surfaces
during and after use. The hob
heats up intensely and reach-
es high temperatures -it pos-
es a burn risk.
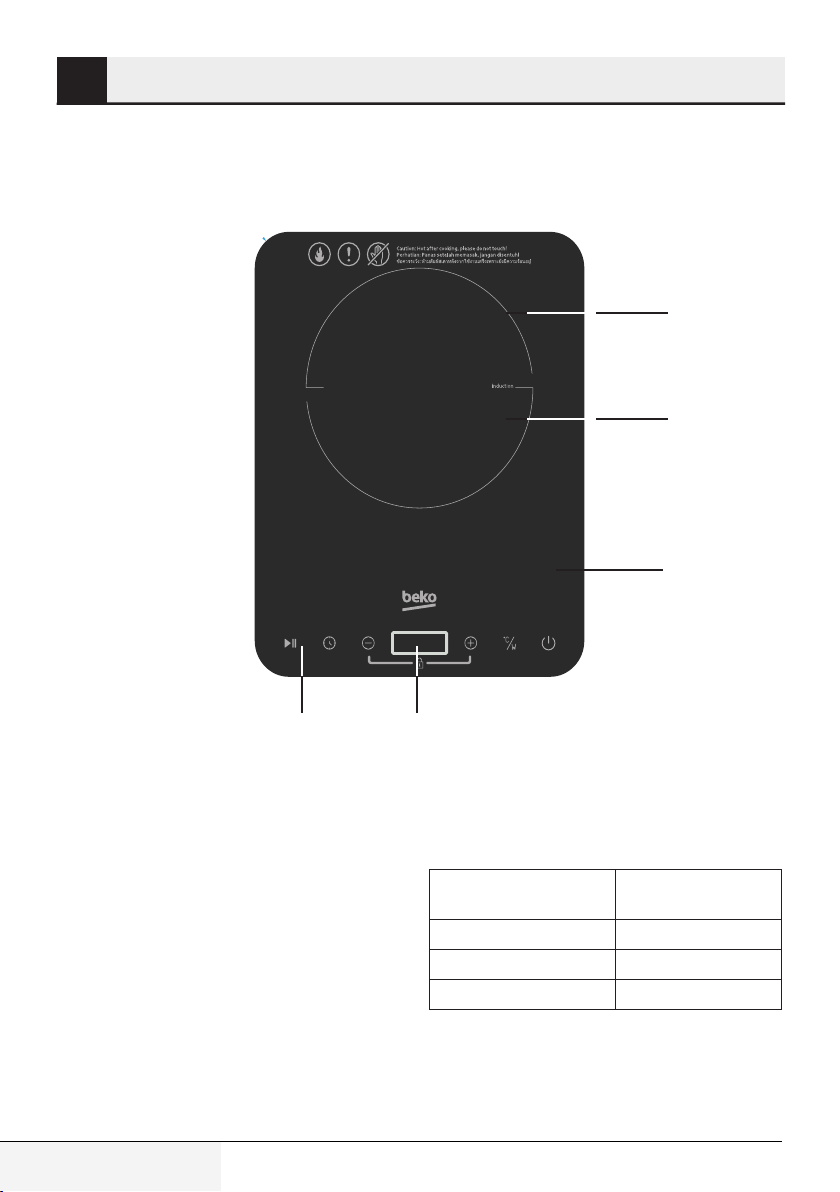
2.6 Settng the power
The hob can be set from 200 W up to 2.000 W.
•Press the temperature/power selection button.
The indicator will light up. The “1200” message
will appear on the display when suitable cook-
ware is placed on the hob.
•Touch the +/- buttons to increase or decrease
the power.
•Touch the - button twice quickly to the min
power 200W. Touch the + button twice quickly
to the max power 2000W.
2.7 Settng the temperature
The hob can be set from 60°C up to 240°C.
•Press the temperature/power selection button.
The indicator will light up. “240C” will appear on
the display if you have placed suitable cookware
on the hob.
•Touch the+/- buttons to increase or decrease
the temperature by the step of 5°C. Keep press-
ing the +/- buttons to increase or decrease the
temperature by step of 10 °C.
•Touch the - button twice quickly to the min tem-
perature 60°C. Touch the + button twice quickly
to the max temperature 240°C.
2.8 Settng the tmer
•First set the power or temperature.
•Press the timer button to activate the timer
mode. The timer symbol will light up, as will the
numbers on the display.
•Touch the +/- buttons to increase or decrease
the amount of time being set. Press and hold
the button to increase or decrease the time in
10-minute increments. You can set the timer for
1 to 180 minutes.
•Touch the - button twice quickly to the min time
0 minute. Touch the + button twice quickly to
the max time 180 minutes.
•After setting the time, press the timer button
again and the countdown will start.
•Once the set time has elapsed, the appliance will
stop heating and switch itself off.
•Automatic shutdown: If the appliance is running
continuously without a set timer, it will auto-
matically switch itself off 2 hours after being
switched on. In timer mode, automatic shut-
down is overridden.
C
The LED display will show the de-
fault value “OFF”.
2.9 Lockng the applance
The appliance can be locked to prevent it being op-
erated unintentionally.
•Press the + and - buttons simultaneously to lock
the appliance.
•In this mode, only the on/off button can be used
to turn off the appliance. All other functions are
locked.
•Press and hold the + and - buttons simultane-
ously for 3 seconds to cancel the function.

11 / EN
Induction Hob / User Manual
2.10 Pause/go functon
•Press the pause/go button, the indicator will
light up. The cooker stops heating. Press the
pause/go button again, the indicator will disap-
pear. The cooker returns to heat.
2.11 Overflowed water
protecton
•The water overflowed from a pot or a pan and
covers any three buttons, the cooker will stop
working.
2 General information

12 / EN Induction Hob / User Manual
3 Compatible cookware
Iron oil frying pan
Enamel stainless
steel kettle
Enamel cooking
utensil
Stainless steel pot Iron pan Iron kettle
Iron plate
•
Only use cookware that is mentioned
in this instruction manual: flat bot-
tom pots/pans with16-26 cm base
diameter - must be made of steel,
cast iron or enamelled iron.
•
Unsuitable cookware is that which has
a rounded edge or a diameter smaller
than16 cm, and is made of the follow-
ing materials: glass, ceramic copper,
porcelain, stainless steel, aluminium
or plastic.
•
An “EO” error message will appear on
the display if unsuitable cookware is
used on the hob.
•
After first use, white stains may ap-
pear on the bottom of the cookware
used. To remove these stains, heat
some vinegar to 60-80 °C in the af-
fected cookware and remove the
stains with a washing-up brush.
•
Thin pan bases are better suited to
cooking with induction than sandwich
bases, as the thin bases are better
suited to the short reaction times that
come with instant temperature ad-
justment.
•
Only use cookware with flat bottoms,
so that they can stand up straight on
the plate. The diameter of any pans
used should NOT exceed 26 cm.

13 / EN
Induction Hob / User Manual
4 Cleaning and maintenance
A
WARNING:
Before performing
cleaning or maintenance, turn off
the appliance, disconnect the mains
plug from the wall socket and wait
until the appliance has completely
cooled down.
•Do not immerse the appliance in water or other
liquids.
•Never use scouring agents or solvents.
•Clean the ventilation openings with either a soft
dry brush or a small vacuum cleaner. If the ap-
pliance has not been used for a long time, the
openings may be dirty and blocked by dust and
grime.
•Clean the exterior of the appliance with a soft
damp cloth. Use a small amount of neutral deter-
gent if necessary. Dry the appliance thoroughly
with a dry clean cloth.
•When the appliance is not being used for a pro-
longed period of time, remove the power cord
and store the appliance somewhere where it
will be protected from dust and environmental
influences.
•Do not attempt to repair the appliance yourself.
If it does not work properly, replace it with a new
one.

14 / EN Induction Hob / User Manual
5 Troubleshooting
Error
code Problem Solution
E0 There is no cookware on the hob, or the cookware is
not suitable for use with the induction hob.
Use suitable cookware when using the hob (see sec-
tion titled “Suitable cookware”).
E2 The temperature sensor under the hob is defective,
or there has been a short circuit.
Disconnect the appliance from the power supply and
contact our customer service department.
E3 The appliance is being used with a mains voltage
that is too high (> 270 V).
Check and make sure the appliance is plugged into a
properly installed 220-240V, 50-60Hz power outlet.
E4 The appliance is being supplied with too little mains
voltage (<145 V).
Check and make sure the appliance is plugged into a
properly installed 220-240V, 50-60Hz power outlet.
E5 or E6 The appliance has overheated.
Disconnect the appliance from the power supply and
remove the plug from the power outlet. Wait until the
appliance has cooled down. Now the hob should be
working properly again. If the problem persists, contact
customer service and enter the error code that is being
displayed.
The display and symbols light up properly after
the appliance is switched on, but the ring does not
heat up.
Check that you are using suitable cookware with
induction-compatible material, and that the appliance
is in default mode. Check that you are using suitable
cookware with induction-compatible material, and that
the appliance is in default mode.
After plugging in the mains plug and using the on/
off button to turn the appliance on, the display and
symbols are not lighting up.
Check that the power cord is properly plugged into the
wall outlet. Also make sure that the button, the cable
connection, the power supply and the fuse are not
damaged.
The flow of heat stops during cooking. Check whether the oil is burning due to use of exces-
sively high temperatures when frying or deep-frying
foods and also check if the ambient temperature is too
high. Determine whether the ventilation openings are
blocked or dirty. If the appliance has been running for
more than 2 hours since being turned on, its overheat
protection may have been activated. Disconnect the
hob from the power supply, then reconnect the power
supply and restart the appliance.
If the appliance is not working properly, please follow these steps:
1. Check that you have followed the operating instructions precisely and correctly.
2. Check whether the table below offers a feasible solution.
3. Check that all fuses are intact.

àµÒáÁ‹àËÅç¡ä¿¿‡Ò
¤Ù‹Á×Í¡ÒÃ㪌§Ò¹
EN / TH / ID / VN

ËŒÒÁ¨Ø‹Á¼ÅÔµÀѳ±Å§ã¹¹íéÒ
¼ÅÔµÀѳ±¹Õéä´ŒÃѺ¡ÒüÅÔµã¹âç§Ò¹Íѹ·Ñ¹ÊÁÑ·ÕèÁÕ¤ÇÒÁ໚¹ÁԵõ‹ÍÊÔè§áÇ´ÅŒÍÁ áÅÐäÁ‹¡‹ÍãËŒà¡Ô´
ÁžÔÉ·Õè໚¹ÍѹµÃÒµ‹Í¸ÃÃÁªÒµÔ
â»Ã´Í‹Ò¹¤Ù‹Á×ÍàÅ‹Á¹Õ顋͹㪌§Ò¹!
àÃÕ¹ ÅÙ¡¤ŒÒ¼ÙŒÁÕÍØ»¡Òäس
¢Í¢Íº¾ÃФس·Õè·‹Ò¹àÅ×Í¡«×éͼÅÔµÀѳ±¢Í§ Beko àÃÒËÇѧNjҷ‹Ò¹¨Ðä´ŒÃѺ¼ÅÅѾ¸·Õè´Õ·ÕèÊØ´¨Ò¡ ¼ÅÔµÀѳ±¢
ͧ·‹Ò¹ «Öè§ä´ŒÃѺ¡ÒüÅÔµ´ŒÇÂà·¤â¹âÅÂÕÍѹÅíéÒ˹ŒÒ·ÕèÁդسÀÒ¾ÊÙ§ â»Ã´Í‹Ò¹¤Ù‹Á×Í¡Òà 㪌§Ò¹àÅ‹Á¹Õé
áÅÐàÍ¡ÊÒÃÍ×è¹æ ·Õè¨Ñ´ÁÒãˌ͋ҧÅÐàÍÕ´¡‹Í¹àÃÔèÁµŒ¹¡ÒÃ㪌§Ò¹¼ÅÔµÀѳ± áÅÐà¡çºÃÑ¡ÉÒ
¤Ù‹Á×ÍäÇŒÊíÒËÃѺ㪌㹡ÒÃ͌ҧÍÔ§ã¹ÀÒÂ˹ŒÒ ËÒ¡·‹Ò¹Ê‹§µ‹Í¼ÅÔµÀѳ±¹ÕéãËŒ¡Ñº¼ÙŒÍ×è¹ â»Ã´á¹º
¤Ù‹Á×Í¡ÒÃ㪌§Ò¹àÅ‹Á¹Õé仾ÌÍÁ¡ÑºµÑÇà¤Ã×èͧ ¾ÃŒÍÁ·Ñé§»¯ÔºÑµÔµÒÁ¤íÒàµ×͹ áÅТŒÍÁÙÅ µ‹Ò§æ ·Ñé§ËÁ´ã¹
¤Ù‹Á×Í¡ÒÃ㪌§Ò¹àÅ‹Á¹Õé
â»Ã´·ÃҺNjҤًÁ×Í¡ÒÃ㪌§Ò¹àÅ‹Á¹ÕéÊÒÁÒö㪌§Ò¹Ã‹ÇÁ¡Ñº¼ÅÔµÀѳ±ÃØ‹¹Í×è¹ä´Œ ¤ÇÒÁᵡµ‹Ò§
ÃÐËNjҧᵋÅÐÃØ‹¹¨Ð¶Ù¡ÃкØänj͋ҧªÑ´à¨¹ã¹¤Ù‹Á×ÍàÅ‹Á¹Õé
¤íÒ͸ԺÒÂÊÑÞÅѡɳµ‹Ò§æ
ÊÑÞÅѡɳµ‹Í仹Õé໚¹ÊÑÞÅѡɳ·Õè¶Ù¡ãªŒ§Ò¹ã¹¤Ù‹Á×Í¡ÒÃ㪌§Ò¹àÅ‹Á¹Õé:
¢ŒÍÁÙÅ·ÕèÊíÒ¤ÑÞáÅÐà¤Åç´ÅѺ¡ÒÃ㪌§Ò¹·Õè໚¹
»ÃÐ⪹
¤íÒàµ×͹: ¤íÒàµ×͹à¡ÕèÂǡѺʶҹ¡Òó·Õè໚¹
ÍѹµÃÒµ‹ÍªÕÇÔµáÅзÃѾÂÊÔ¹
¤íÒàµ×͹à¡ÕèÂǡѺ俿‡Òªç͵
¤íÒàµ×͹à¡ÕèÂǡѺ¾×é¹¼ÔÇ·ÕèÁÕ¤ÇÒÁÌ͹

àµÒáÁ‹àËÅç¡ä¿¿‡Ò / ¤Ù‹Á×Í¡ÒÃ㪌§Ò¹
3 / TH

àµÒáÁ‹àËÅç¡ä¿¿‡Ò / ¤Ù‹Á×Í¡ÒÃ㪌§Ò¹
4 / TH
¤íÒá¹Ð¹íÒ·ÕèÊíÒ¤ÑÞ áÅФíÒàµ×͹´ŒÒ¹¤ÇÒÁ»ÅÍ´ÀÑÂ
áÅÐÊÔè§áÇ´ÅŒÍÁ
- ·Õè¾Ñ¡·ÕèÁÕ¡ÒÃàµÃÕÂÁÍÒËÒÃઌÒãËŒ
- ËŒÒÁ¹íÒä»ãªŒ§Ò¹ã¹ÍصÊÒË¡ÃÃÁ
• ¡ÒõԴµÑé§áÅСÒë‹ÍÁá«Á¼ÅÔµÀѳ±¨ÐµŒÍ§
´íÒà¹Ô¹¡ÒÃâ´ÂÈٹºÃÔ¡ÒÃ
• ·Ò§ºÃÔÉÑ·¼ÙŒ¼ÅÔµ¨ÐäÁ‹ÃѺ¼Ô´ªÍº¤ÇÒÁàÊÕÂËÒÂ
·Õèà¡Ô´¨Ò¡¡ÒôíÒà¹Ô¹¡ÒÃâ´ÂºØ¤¤Å·ÕèäÁ‹ä´ŒÃѺ
͹ØÞÒµ áÅШзíÒãËŒ¡ÒÃÃѺ»ÃСѹ¶×Í໚¹
âÁ¦Ð ¡‹Í¹·íÒ¡ÒõԴµÑé§ â»Ã´Í‹Ò¹¤Ù‹Á×ÍàÅ‹Á¹Õé
Í‹ҧÅÐàÍÕ´
• ËŒÒÁ㪌§Ò¹àµÒáÁ‹àËÅç¡ä¿¿‡ÒËÒ¡¾ºÇ‹ÒÁÕ
ËͧÃÍ¢ͧ¡ÒêíÒÃØ´àÊÕÂËÒº¹µÑÇà¤Ã×èͧ
• â»Ã´µÃǨÊͺãˌṋã¨Ç‹Ò»Ø†Á¤Çº¤ØÁ¿˜§¡ªÑè¹
¡Ò÷íÒ§Ò¹¶Ù¡»´ÊÇÔµª·Ø¡¤ÃÑé§ËÅѧ¡ÒÃ㪌§Ò¹
• ËŒÒÁ»´¤ÅØÁËÃ×ÍÇÒ§ÊÔ觢ͧ·ÕèÁÕ¹íéÒ˹ѡÁÒ¡
¡Ç‹Ò 8 ¡¡. äÇŒº¹àµÒáÁ‹àËÅç¡ä¿¿‡Ò ¹íéÒ˹ѡ
·ÕèÁÒ¡à¡Ô¹ä»ÊÒÁÒö·íÒãËŒàµÒáÁ‹àËÅç¡ä¿¿‡Ò
àÊÕÂËÒÂä´Œ
1.2 ¡ÒÃ㪌¡ÃÐáÊä¿¿‡ÒÍ‹ҧ»ÅÍ´ÀÑÂ
• ËÒ¡¼ÅÔµÀѳ±ªíÒÃØ´ËŒÒÁ¹íÒÁÒ㪌§Ò¹¨¹¡Ç‹Ò
¨Ðä´ŒÃѺ¡Òë‹ÍÁá«Áâ´ÂÈٹºÃÔ¡Ò÷Õèä´ŒÃѺ
¡ÒÃᵋ§µÑé§ äÁ‹àª‹¹¹Ñé¹ÍÒ¨·íÒãˌ䴌ÃѺÍѹµÃÒÂ
¨Ò¡ä¿¿‡Òªç͵!
• àª×èÍÁµ‹Í¼ÅÔµÀѳ±à¢ŒÒ¡ÑºàµŒÒàÊÕº·ÕèÁÕ¡ÒÃ
µ‹ÍÊÒ´Թ/ÊÒÂä¿·ÕèÁÕáç´Ñ¹ä¿¿‡ÒáÅСÒÃ
»‡Í§¡Ñ¹¡ÃÐáÊä¿¿‡ÒµÒÁ·ÕèÃкØäÇŒã¹ËÑÇ¢ŒÍ
"¢ŒÍÁÙÅ·Ò§à·¤¹Ô¤" à·‹Ò¹Ñé¹
à¹×éÍËÒã¹Ê‹Ç¹¹Õé»ÃСͺ仴ŒÇ¢ŒÍÁÙÅ´ŒÒ¹
¤ÇÒÁ»ÅÍ´ÀÑ·Õè¨Ðª‹Ç»‡Í§¡Ñ¹ÍѹµÃÒ·ÕèÍÒ¨
·íÒãËŒà¡Ô´¡ÒúҴà¨çºËÃ×ͤÇÒÁàÊÕÂËÒµ‹Í
·ÃѾÂÊÔ¹ ËÒ¡äÁ‹»¯ÔºÑµÔµÒÁ¤íÒá¹Ð¹íÒàËŋҹÕé
¨Ð·íÒãËŒ¡ÒÃÃѺ»ÃСѹ¶×Í໚¹âÁ¦Ð
1.1 ¢ŒÍÁÙÅ´ŒÒ¹¤ÇÒÁ»ÅÍ´ÀÑ·ÑèÇä»
• ¼ÅÔµÀѳ±à¤Ã×èͧ¹Õé¨ÐÊÒÁÒö㪌§Ò¹ä´Œ¡Ñº
à´ç¡·ÕèÁÕÍÒÂØ 8 »‚¢Öé¹ä» áÅкؤ¤Å·ÕèÁÕ¤ÇÒÁ
º¡¾Ã‹Í§·Ò§´ŒÒ¹Ã‹Ò§¡Ò »ÃÐÊÒ·ÊÑÁ¼ÑÊ
áÅÐÁÕ¤ÇÒÁ¼Ô´»¡µÔ·Ò§¨Ôµ ËÃ×ͼٌ·Õè¢Ò´
»ÃÐʺ¡ÒóáÅФÇÒÁÃٌ㹡ÒÃ㪌§Ò¹àÁ×èÍ
ä´ŒÃѺ¡ÒôÙáÅÍ‹ҧã¡ÅŒªÔ´áÅÐãËŒ¤íÒá¹Ð¹íÒ
à¡ÕèÂǡѺ¡ÒÃ㪌§Ò¹¼ÅÔµÀѳ±ä´ŒÍ‹ҧ»ÅÍ´ÀÑÂ
ÃÇÁ·Ñé§à¢ŒÒã¨à¡ÕèÂǡѺÍѹµÃÒ·ÕèÍÒ¨à¡Ô´¢Öé¹
Í‹ÒãËŒà´ç¡àÅ‹¹àµÒáÁ‹àËÅç¡ä¿¿‡Ò áÅÐÍ‹Ò
ãËŒà´ç¡·íÒ¤ÇÒÁÊÐÍÒ´ ËÃ×Í´ÙáÅÃÑ¡ÉÒàµÒ
áÁ‹àËÅç¡ä¿¿‡Ò àÇŒ¹áµ‹Ç‹Òà´ç¡¨ÐÁÕÍÒÂØÁÒ¡
¡Ç‹Ò 8 »‚áÅÐÁÕ¼ÙŒãËÞ‹¤Í´ÙáÅÍ‹ҧã¡ÅŒªÔ´
• à¡çºÃÑ¡ÉÒàµÒáÁ‹àËÅç¡ä¿¿‡ÒáÅÐÊÒÂä¿ãËŒ
¾Œ¹Á×Íà´ç¡·ÕèÁÕÍÒÂØ¹ŒÍÂ¡Ç‹Ò 8 »‚
• àµÒáÁ‹àËÅç¡ä¿¿‡ÒÃØ‹¹¹Õé¶Ù¡Í͡ẺÁÒÊíÒËÃѺ
¡ÒÃ㪌§Ò¹ã¹¤ÃÑÇàÃ×͹ áÅСÒÃ㪌§Ò¹ã¹
ÅѡɳзÕè¤ÅŒÒ¡ѹ ઋ¹:
- ˌͧÃѺ»ÃзҹÍÒËÒÃÊíÒËÃѺ¾¹Ñ¡§Ò¹ ઋ¹
ã¹ÃŒÒ¹¤ŒÒ Êíҹѡ§Ò¹ áÅÐʶҹ·Õè·íÒ§Ò¹Í×è¹æ
- ºŒÒ¹Êǹ
- ÊíÒËÃѺ¡ÒÃ㪌§Ò¹â´ÂÅÙ¡¤ŒÒã¹âçáÃÁ áÅÐ
·Õè¾Ñ¡ÍÒÈÑÂÍ×è¹æ

¢ŒÍá¹Ð¹íÒ·ÕèÊíÒ¤ÑÞ áÅФíÒàµ×͹´ŒÒ¹¤ÇÒÁ»ÅÍ´ÀÑÂ
áÅÐÊÔè§áÇ´ÅŒÍÁ
1.3 ¡ÒÃ㪌§Ò¹¼ÅÔµÀѳ±Í‹ҧ»ÅÍ´ÀÑÂ
• àµÒáÁ‹àËÅç¡ä¿¿‡ÒáÅЪÔé¹Ê‹Ç¹·ÕèÊÒÁÒö¨Ñº
µŒÍ§ä´Œ¨ÐÁÕ¤ÇÒÁÌ͹ÊÙ§ÃÐËNjҧ¡ÒÃ㪌§Ò¹
â»Ã´ÃÐÁÑ´ÃÐÇѧÍ‹ÒÊÑÁ¼ÑʺÃÔàdz˹ŒÒàµÒ
·Õè㪌㹡Ò÷íÒ¤ÇÒÁÌ͹ ¤Çáѹà´ç¡ÍÒÂØµíèÒ
¡Ç‹Ò 8 »‚ãËŒÍÂًˋҧ¨Ò¡àµÒáÁ‹àËÅç¡ä¿¿‡Ò
àÇŒ¹áµ‹Ç‹Ò¨ÐÁÕ¼ÙŒãËÞ‹¤Í´ÙáÅÍ‹ҧã¡ÅŒªÔ´
• ËŒÒÁ㪌àµÒáÁ‹àËÅç¡ä¿¿‡Òã¹¼ÙŒ·Õè㪌áÍÅ¡ÍÎÍÅ
áÅÐ/ËÃ×ÍÂÒ·ÕèÍҨʋ§¼Åµ‹Í¡ÒÃ㪌ÇÔ¨ÒóÞÒ³
㹡ÒõѴÊÔ¹ã¨ËÃ×Í¡Ò÷íÒ§Ò¹
• â»Ã´ãªŒ¤ÇÒÁÃÐÁÑ´ÃÐÇѧ㹡ÒÃ㪌à¤Ã×èͧ´×èÁ
»ÃÐàÀ·áÍÅ¡ÍÎÍÅ㹡ÒÃ»ÃØ§ÍÒËÒÃ
áÍÅ¡ÍÎÍŨÐÃÐàË·ÕèÍØ³ËÀÙÁÔÊÙ§áÅÐÍÒ¨
·íÒãËŒà¡Ô´à¾ÅÔ§äËÁŒä´Œà¹×èͧ¨Ò¡áÍÅ¡ÍÎÍÅ
ÊÒÁÒö·íÒãËŒà¡Ô´ä¿ÅØ¡äËÁŒàÁ×èÍÊÑÁ¼ÑʡѺ
¾×é¹¼ÔÇ·ÕèÁÕ¤ÇÒÁÌ͹
• ËŒÒÁÇÒ§Çѵ¶ØäÇä¿äÇŒã¡ÅŒ¡ÑºàµÒáÁ‹àËÅç¡ä¿¿‡Ò
à¾ÃÒкÃÔàdz´ŒÒ¹¢ŒÒ§¢Í§àµÒ¨ÐÁÕ¤ÇÒÁÌ͹
ÊÙ§ÃÐËNjҧ¡ÒÃ㪌§Ò¹
• â»Ã´µÃǨÊͺãˌṋã¨Ç‹Ò¿ÇÊ·Õè㪌ÁÕ¢¹Ò´
·Õèࢌҡѹ䴌¡Ñº¼ÅÔµÀѳ±
äÁ‹¤ÇÃÇÒ§Çѵ¶Ø·Õè໚¹âÅËРઋ¹
ÁÕ´ ªŒÍ¹ÊŒÍÁ áÅнÒËÁŒÍ äÇŒ
º¹Ë¹ŒÒàµÒ à¾ÃÒкÃÔàdz¹Õé¨Ð
ÁÕ¤ÇÒÁÌ͹ÊÙ§
àµÒáÁ‹àËÅç¡ä¿¿‡Ò / ¤Ù‹Á×Í¡ÒÃ㪌§Ò¹
5 / TH
¡ÒõԴµÑé§ÊÒ´Թ¨ÐµŒÍ§´íÒà¹Ô¹¡ÒÃâ´Âª‹Ò§ä¿
·ÕèÁÕ¤ÇÒÁªíÒ¹ÒÞ¡Òà äÁ‹Ç‹Ò¨Ð㪌§Ò¹¼ÅÔµÀѳ±
¡ÑºÍØ»¡Ã³á»Å§ä¿¿‡ÒËÃ×ÍäÁ‹¡çµÒÁºÃÔÉÑ·
¢Í§àÃÒ¨ÐäÁ‹ÃѺ¼Ô´ªÍº»˜ÞËÒ·Õèà¡Ô´¨Ò¡¡ÒÃ
àª×èÍÁµ‹Í¼ÅÔµÀѳ±à¢ŒÒ¡ÑºàµŒÒàÊÕº·ÕèäÁ‹ä´Œ
ÁÕ¡ÒõԴµÑé§ÊÒ´ԹµÒÁÁҵðҹ·Õè¡íÒ˹´
• ËŒÒÁ·íÒ¤ÇÒÁÊÐÍÒ´¼ÅÔµÀѳ±â´Â¡ÒÃ
©Õ´¾‹¹ËÃ×ÍÃÒ´¹íéÒä»·ÕèµÑÇà¤Ã×èͧâ´ÂµÃ§!
äÁ‹àª‹¹¹Ñé¹ ÍÒ¨·íÒãˌ䴌ÃѺÍѹµÃÒ¨ҡ
ä¿¿‡Òªç͵!
• ¶Í´»ÅÑê¡ä¿¢Í§¼ÅÔµÀѳ±·Ø¡¤ÃÑé§¡‹Í¹·íÒ
¡ÒõԴµÑé§ ´ÙáÅÃÑ¡ÉÒ ·íÒ¤ÇÒÁÊÐÍÒ´
áÅЫ‹ÍÁá«Áà¤Ã×èͧ
• ËÒ¡ÊÒÂ俪íÒÃØ´ ¨ÐµŒÍ§à»ÅÕè¹ÊÒÂä¿
àÊŒ¹ãËÁ‹ â´ÂºÃÔÉÑ·¼ÙŒ¼ÅÔµÈٹºÃÔ¡ÒÃËÃ×Í
ª‹Ò§«‹ÍÁ·Õ輋ҹ¡ÒÃÃѺÃͧ¤Ø³ÀÒ¾à¾×èÍ
»‡Í§¡Ñ¹¡ÒÃà¡Ô´ÍѹµÃÒÂ
• µŒÍ§µÔ´µÑé§àµÒáÁ‹àËÅç¡ä¿¿‡ÒãËŒÊÒÁÒöµÑ´
¡ÃÐáÊä¿¿‡ÒÍÍ¡¨Ò¡áËÅ‹§¨‹Ò¡ÃÐáÊä¿¿‡Ò
䴌͋ҧÊÁºÙó â´Â¨ÐµŒÍ§ÁÕÊÇÔµªá¡
µÔ´µÑé§äÇŒã¹Ãкºä¿¿‡ÒÀÒÂ㹺ŒÒ¹µÒÁ
Áҵðҹ·Õè¡íÒ˹´
• §Ò¹·Õèà¡ÕèÂÇ¢ŒÍ§¡ÑºÍØ»¡Ã³ä¿¿‡ÒáÅÐÃкº
µ‹Ò§æ ¨ÐµŒÍ§´íÒà¹Ô¹¡ÒÃâ´Âª‹Ò§·ÕèÁÕ¤ÇÒÁ
ªíÒ¹ÒÞáÅÐä´ŒÃѺ¡ÒÃÃѺÃͧ
• 㹡óշÕèà¡Ô´¤ÇÒÁàÊÕÂËÒÂã´æ ¡çµÒÁãËŒ
»´ÊÇÔµªà¤Ã×èͧáÅеѴ¡ÃÐáÊä¿¿‡Ò¨Ò¡
áËÅ‹§¨‹ÒÂä¿ ã¹¢Ñ鹵͹¹ÕéãËŒ·‹Ò¹»´ÊÇÔµª
àºÃ¡à¡ÍÃ

¢ŒÍá¹Ð¹íÒ·ÕèÊíÒ¤ÑÞ áÅФíÒàµ×͹´ŒÒ¹¤ÇÒÁ»ÅÍ´ÀÑÂ
áÅÐÊÔè§áÇ´ÅŒÍÁ
• Í‹ÒãËŒÁÕÇѵ¶Øã´æ »´¡Ñé¹·Õ誋ͧÃкÒÂÍÒ¡ÒÈ
·Ñé§ËÁ´¢Í§àµÒáÁ‹àËÅç¡ä¿¿‡Ò
• ËŒÒÁãªŒÍØ»¡Ã³·íÒ¤ÇÒÁÊÐÍÒ´Ãкºä͹íéÒ
㹡Ò÷íÒ¤ÇÒÁÊÐÍÒ´àµÒáÁ‹àËÅç¡ä¿¿‡Ò
äÁ‹àª‹¹¹Ñé¹ÍÒ¨·íÒãËŒà¡Ô´ä¿¿‡Òªç͵䴌
• ¡Ò÷íÒÍÒËÒ÷Õ赌ͧ㪌ä¢ÁѹËÃ×͹íéÒÁѹº¹
àµÒáÁ‹àËÅç¡ä¿¿‡Òâ´ÂäÁ‹ÁÕ¤¹¤Í´ÙáÅÍ‹ҧ
ã¡ÅŒªÔ´ ÍÒ¨·íÒãËŒà¡Ô´ÍѹµÃÒÂËÃ×Íà¡Ô´
à¾ÅÔ§äËÁŒä´Œ ËŒÒÁ¾ÂÒÂÒÁ´Ñºä¿â´Â㪌¹íéÒ
ᵋãËŒ»´ÊÇÔµª áÅл´¤ÅØÁà»ÅÇä¿â´Â
㪌Çѵ¶ØÍ‹ҧઋ¹ ½ÒËÁŒÍ ËÃ×ͼŒÒË‹Á´Ñºä¿
• ÍѹµÃÒ¨ҡà¾ÅÔ§äËÁŒ: ËŒÒÁà¡çºÊÔ觢ͧ
µ‹Ò§æ äÇŒº¹Ë¹ŒÒàµÒáÁ‹àËÅç¡ä¿¿‡Ò
• ËÒ¡¾×é¹¼ÔǢͧàµÒáÁ‹àËÅç¡ä¿¿‡ÒᵡÌÒÇ ãËŒ
»´ÊÇÔµªà¤Ã×èͧà¾×èÍ»‡Í§¡Ñ¹¡ÒÃà¡Ô´ä¿¿‡Òªç͵
• ËÅѧ¡ÒÃ㪌§Ò¹ ãËŒ»´ÊÇÔµªâ´Â¡Òᴻ؆Á
·ÕèµÑÇà¤Ã×èͧâ´ÂµÃ§ äÁ‹¤ÇÃ㪌ᵋà«ç¹à«ÍÃ
µÃǨ¨ÑºÀÒª¹Ðà¾Õ§Í‹ҧà´ÕÂÇ
• äÁ‹¤ÇÃÇÒ§Çѵ¶Ø·Õè໚¹âÅËРઋ¹ ÁÕ´ ªŒÍ¹ÊŒÍÁ
áÅнÒËÁŒÍ äÇŒº¹Ë¹ŒÒàµÒ à¾ÃÒкÃÔàdz¹Õé
¨ÐÁÕ¤ÇÒÁÌ͹ÊÙ§
• àµÒáÁ‹àËÅç¡ä¿¿‡Òà¤Ã×èͧ¹ÕéäÁ‹ä´Œ¶Ù¡Í͡Ẻ
ÁÒÊíÒËÃѺ¡ÒÃ㪌§Ò¹Ã‹ÇÁ¡Ñºà¤Ã×èͧµÑé§àÇÅÒ
ËÃ×ÍÃкº¤Çº¤ØÁ¨Ò¡ÃÐÂÐä¡Å·Õè¹íÒÁÒ
àª×èÍÁµ‹Í¨Ò¡ÀÒ¹͡
• ¤ÇÒÁ´Ñ¹äÍ·Õèà¡Ô´¨Ò¡¤ÇÒÁª×鹺¹¾×é¹¼ÔǢͧ
àµÒáÁ‹àËÅç¡ä¿¿‡Ò ËÃ×Í·Õ行¹ÀÒª¹Ð ÍÒ¨
·íÒãËŒàµÒáÁ‹àËÅç¡ä¿¿‡Ò¢ÂѺ䴌 ´Ñ§¹Ñé¹
â»Ã´µÃǨÊͺãˌṋã¨Ç‹Ò¾×é¹¼ÔǢͧàµÒ
áÁ‹àËÅç¡ä¿¿‡Ò áÅСŒ¹ÀÒª¹ÐáËŒ§Ê¹Ô·
ÍÂÙ‹àÊÁÍ
• ˹ŒÒàµÒáÁ‹àËÅç¡ä¿¿‡Ò·íÒ§Ò¹â´Â㪌
à·¤â¹âÅÂÕ “¡ÒÃà˹ÕèÂǹíÒä¿¿‡Ò” àµÒ
áÁ‹àËÅç¡ä¿¿‡Ò«Ö觪‹ÇÂãËŒ·‹Ò¹»ÃÐËÂÑ´ä´Œ·Ñé§
àÇÅÒáÅФ‹Ò㪌¨‹ÒÂà¤Ã×èͧ¹Õé¨ÐµŒÍ§ãªŒ§Ò¹
ËÇÁ¡ÑºÀÒª¹Ð·ÕèàËÁÒÐÊíÒËÃѺ¡Ò÷íÒ
ÍÒËÒÃâ´Â㪌àµÒáÁ‹àËÅç¡ä¿¿‡Òâ´Â੾ÒÐ
äÁ‹àª‹¹¹Ñé¹Ë¹ŒÒàµÒ¨ÐäÁ‹·íÒ¤ÇÒÁÌ͹
â»Ã´´Ù¢ŒÍÁÙÅ·ÑèÇä»à¡ÕèÂǡѺ¡Ò÷íÒÍÒËÒÃ
·Õè˹ŒÒ 14 áÅСÒÃàÅ×Í¡ÀÒª¹Ð
• à¹×èͧ¨Ò¡àµÒáÁ‹àËÅç¡ä¿¿‡Ò¨ÐÊÌҧʹÒÁ
áÁ‹àËÅç¡¢Öé¹ÁÒ ¨Ö§ÍÒ¨·íÒãˌ໚¹ÍѹµÃÒÂ
µ‹Í¼ÙŒ·ÕèãªŒÍØ»¡Ã³Í‹ҧઋ¹ ÍÔ¹«ÙÅÔ¹»˜Á
ËÃ×Íà¤Ã×èͧ¡Ãе،¹ä¿¿‡ÒËÑÇã¨
• â»Ã´àÅ×͡㪌ἧ¡Ñé¹àµÒ·ÕèÍ͡ẺÁÒ
â´ÂºÃÔÉÑ·¼ÙŒ¼ÅÔµàµÒ ËÃ×Íá¼§¡Ñé¹àµÒ
·Õèä´ŒÃѺ¡ÒÃá¹Ð¹íÒ änj㹤ًÁ×Í¡ÒÃ㪌§Ò¹
ÃÇÁ¶Ö§á¼§¡Ñé¹àµÒ·Õè¨Ñ´ÁÒãËŒ¾ÃŒÍÁ¡ÑºàµÒ
¡ÒÃ㪌ἧ¡Ñé¹àµÒ·ÕèäÁ‹àËÁÒÐÊÁÍÒ¨·íÒ
ãËŒà¡Ô´ÍغѵÔà˵Øä´Œ
• ¡Òû‡Í§¡Ñ¹à¾ÅÔ§äËÁŒ·ÕèÍÒ¨à¡Ô´¢Öé¹ä´Œ!
• â»Ã´µÃǨÊͺãˌṋã¨Ç‹Ò¡ÒÃàª×èÍÁµ‹Í
¡ÃÐáÊä¿¿‡Ò·Ñé§ËÁ´ÁÕ¤ÇÒÁ»ÅÍ´ÀÑÂáÅÐ
ṋ¹Ë¹Òà¾×èÍ»‡Í§¡Ñ¹¡ÒÃà¡Ô´»ÃСÒÂä¿
• ËŒÒÁ㪌ÊÒÂä¿ËÃ×Í»ÅÑ꡾‹Ç§·ÕèªíÒÃØ´
• Í‹ÒãËŒÁբͧàËÅÇËÃ×ͤÇÒÁª×é¹ÊÑÁ¼ÑÊâ´¹
¨Ø´àª×èÍÁµ‹Í¡ÃÐáÊä¿¿‡Ò
àµÒáÁ‹àËÅç¡ä¿¿‡Ò / ¤Ù‹Á×Í¡ÒÃ㪌§Ò¹
6 / TH
Table of contents
Languages:
Other Beko Hob manuals

Beko
Beko HISG 64120 User manual

Beko
Beko HISW 75235 S User manual

Beko
Beko HIG 64221 S User manual

Beko
Beko HII 64401 DT User manual

Beko
Beko QHMW6422 User manual

Beko
Beko HIZM 64120 S User manual

Beko
Beko HIC 63401 T User manual

Beko
Beko HIYG 64225 SXO User manual

Beko
Beko HIC 64400 E User manual

Beko
Beko HII 63500 T User manual

Beko
Beko HIMW 75235 S User manual

Beko
Beko HIZM 64121 SX User manual

Beko
Beko HIZM64120S User manual

Beko
Beko HII85770UFT User manual

Beko
Beko HIG75221 User manual

Beko
Beko HII64200FMTW User manual

Beko
Beko HIMG 64225 S User manual

Beko
Beko HIZE 64101 User manual

Beko
Beko HISG 64220 S User manual

Beko
Beko HIC 64403 TX User manual