Contents
:
:
Process
that
you
must
do
=
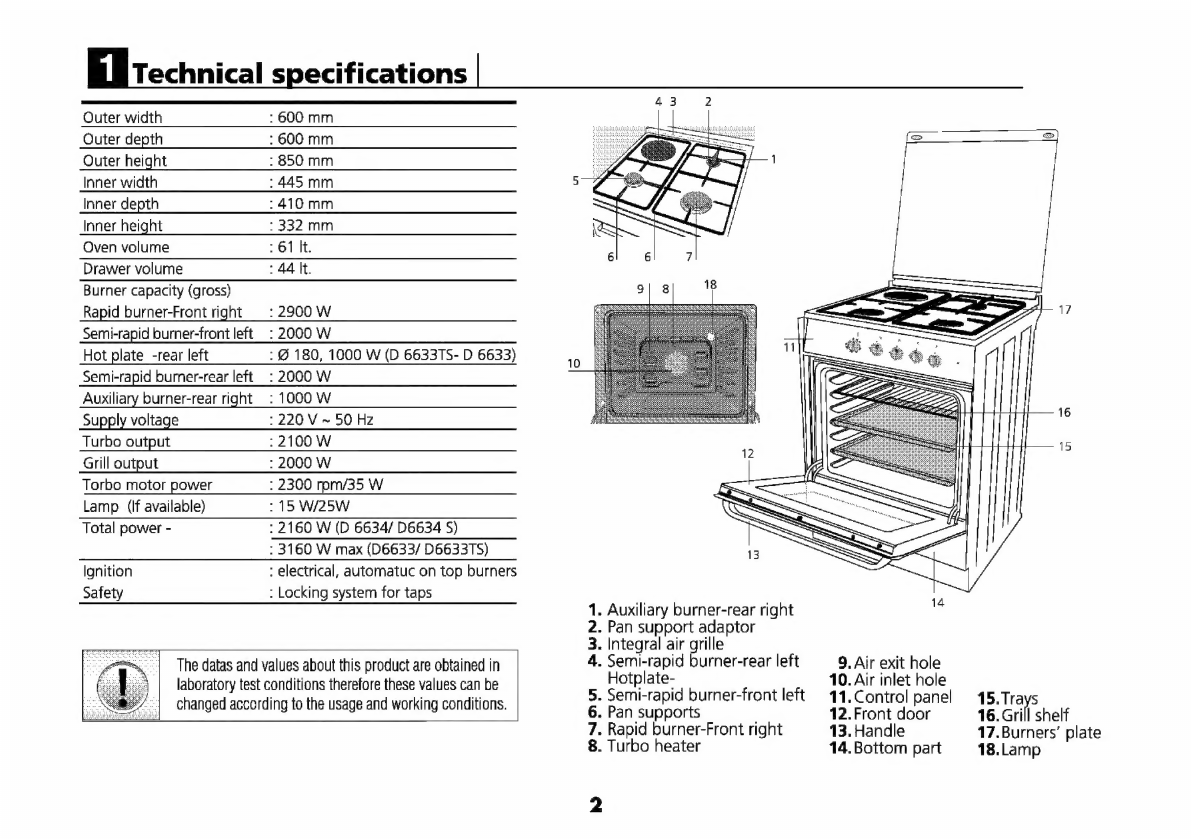
Technical
specifications
Page
2
$
before
calling
services
Page
21
:
Safety
precaution
and
important
items
Page
3
:
Important
do’s
and
dont's
ee
Superior
properties
of
product,
|
practical
and
useful
informations
Page
4
Superior
features...
cirsvsraboce
tennecet
npeecnnestaadenmena
ses
4
Introducing
the
control
panel.............cccceeeceeeeeeeees
5
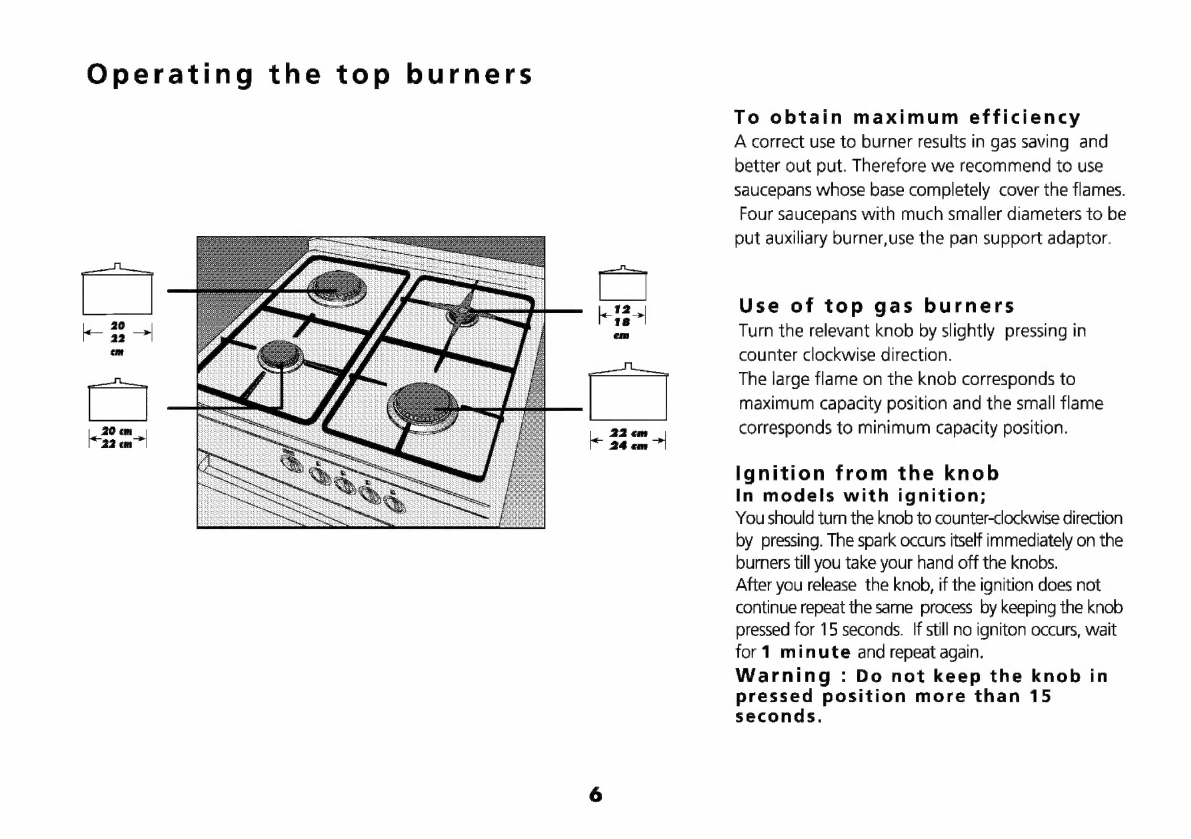
Using
of
top
Dumers
.2.2....0.28s.
cae
ohne
6
USING
OT
oven
part.
ai
escaso
piaraan
8-11
Operating
the
timer.............cccccceecssssseeeeeeeeeres
12-15
>
ST
FALISDOFL
nenna
pale
aboraGaiedload
ienethsauderstusenes
16
|
Maintenance
and
cleaning
Page
17
Lamp
Cl
ies
FICUING
ssetscsecasseoece
vencivcabiassteeasticayeacsaretseectes
18
Gas
installation.
........c..cccccccccccceceseescceceescceeeeeeeeceeeeuss
19