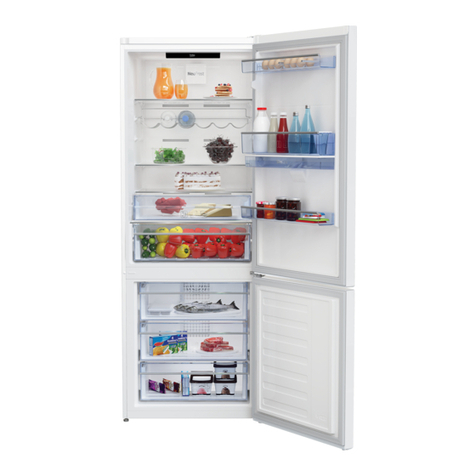
Beko 983630 EI User manual

EN/
58 6848 0000/
Refrigerator
User Manual
983630 EI

A
A
A
C
SUPPLIER’S NAME MODEL IDENTIFIER (*)
INFORMATION
C
.The model information as stored in the product data base
can be reached by entering following website and searching
for your model identifier (*) found on energy label.
https://eprel.ec.europa.eu/
Dear Customer,
Please read this manual before using the product.
Thank you for choosing this product. We would like you to achieve the optimal efficiency
from this high quality product which has been manufactured with state of the art tech-
nology. To do this, carefully read this manual and any other documentation provided
before using the product and keep it as a reference.
Heed all information and warnings in the user manual. This way, you will protect yourself
and your product against the dangers that may occur.
Keep the user manual. Include this guide with the unit if you hand it over to someone
else.
The following symbols are used in the user guide:
Hazard that may result in death or injury.
NOTICE A hazard that may cause material damage to the product or its
surroundings
Important information or useful tips on operation.
Read the user manual.
Risk of fire / Flammable materials

2 /32 EN Refrigerator / User Guide
1 Safety Instructions 3
1.1 Purpose of usage . . . . . . . . . . . . . . . . . 3
1.2 Safety of children, vulnerable persons and
pets. . . . . . . . . . . . . . . . . . . . . . . . . . . . . . 3
1.3 Electrical safety. . . . . . . . . . . . . . . . . . . 4
1.4 Handling Safety. . . . . . . . . . . . . . . . . . . 4
1.5 Installation Safety . . . . . . . . . . . . . . . . . 4
1.6
Operational safety . . . . . . . . . . . . .5
1.7 Maintenance and cleaning safety. . . . . . 7
1.8HomeWhiz . . . . . . . . . . . . . . . . . . . . . . . 7
1.9 Lighting . . . . . . . . . . . . . . . . . . . . . . . . 7
2 Environmental instructions 8
2.1 Compliance with the WEEE Directive and
Disposing of the Waste Product: . . . . . . . . 8
2.2 Compliance with RoHS Directive . . . . . . . . . . 8
2.3 Package information. . . . . . . . . . . . . . . . . . . 8
3 Your Refrigerator 9
4 Installation 10
4.1 The right place for installation . . . . . . . . . . . 10
4.2 For Products With Water Fountain / Ice
Maker . . . . . . . . . . . . . . . . . . . . . . . . . . . 10
4.3 Attaching the plastic wedges . . . . . . . . . . . 10
4.4 Adjustment of the feet. . . . . . . . . . . . . . . . . 11
4.5 Electrical connection. . . . . . . . . . . . . . . . . . 11
5 Preparation 12
5.1 What to do for energy saving . . . . . . . . . . . 12
5.2 First operation . . . . . . . . . . . . . . . . . . . . . . 12
6 Operating the Product 13
6.1 Turning off the product . . . . . . . . . . . . . . . . 13
6 Operation of the Product 14
6.2 Indicator panel . . . . . . . . . . . . . . . . . . . . . . 14
6.3 Support Service Feature . . . . . . . . . . . . . . . 16
6.4 Entering Phone Number for Support Service 16
6.5 Creating a Request Via Support Service . . . 16
6.6 Cancelling a Support Service Request . . . . 16
6.7 Troubleshooting . . . . . . . . . . . . . . . . . . . . 16
6.8 Humidity controlled crisper (EverFresh+) . . . 17
6.9 Blue Light/HarvestFresh . . . . . . . . . . . . . . 17
6.10 Anti-Odour Module . . . . . . . . . . . . . . . . . . 18
(FreshGuard) . . . . . . . . . . . . . . . . . . . . . . . . . . 18
6.11 Ice bucket . . . . . . . . . . . . . . . . . . . . . . . . 19
6.12 Ice maker. . . . . . . . . . . . . . . . . . . . . . . . . 19
6.13The dairy (cold storage) compartment . . . . 19
6.14Crisper . . . . . . . . . . . . . . . . . . . . . . . . . . . 20
6.15Crisper Separator . . . . . . . . . . . . . . . . . . . 20
6.16 Cleaning of the Ethylene Filter . . . . . . . . . 20
6.17 Cleaning of the Crisper Separator . . . . . . . 21
6.18Using the water fountain . . . . . . . . . . . . . . 22
6.19Filling the water tank of the water fountain 22
6.20Cleaning the water tank . . . . . . . . . . . . . . 22
6.21Filling the water tank of the water fountain 23
6.22Cleaning the water tank . . . . . . . . . . . . . . 24
6.23Drip tray . . . . . . . . . . . . . . . . . . . . . . . . . . 24
6.24 Freezing fresh food. . . . . . . . . . . . . . . . . . 25
6.25Recommendations for storing frozen foods in
the freezer compartment . . . . . . . . . . . . . 25
6.26Deep freezer details . . . . . . . . . . . . . . . . . 26
6.27 Placing food . . . . . . . . . . . . . . . . . . . . . . . 26
6.28 Door open alert . . . . . . . . . . . . . . . . . . . . 26
6.29 Illumination lamp . . . . . . . . . . . . . . . . . . . 26
7 Maintenance and cleaning 27
7.1 Stainless Steel External Surfaces. . . . . . . . . 27
7.2 Cleaning of the Products with Glass Doors. . 27
7 Maintenance and cleaning 28
7.3 Preventing Odours. . . . . . . . . . . . . . . . . . . 28
7.4 Protecting Plastic Surfaces . . . . . . . . . . . . 28

3 / 32 EN
Refrigerator / User Guide
1Safety Instructions
• Ths secton ncludes the safety
nstructons necessary to prevent
the rsk of personal njury or materal
damage.
• Our company shall not be held
responsble for damages that may
occur f these nstructons are not
observed.
Installation and repair operations shall always
be performed by Authorized Service.
Always use genuine spare parts and
accessories.
Original spare parts will be provided for
10 years, following the product purchasing date.
Do not repair or replace any part of the
product unless specified expressly in the user
manual.
Do not perform any modifications on the
product.
1.1 Purpose of usage
• This product is not intended for commercial
use and it shall not be used out of its intended
purpose.
This product is intended for operating interiors,
such as households or similar.
For example;
- In the staff kitchens of the stores, offices and
other working environments,
- In farm houses,
- In the units of hotels, motels or other resting
facilities that are used by the customers,
- In hostels, or similar environments,
- In catering services and similar non-retail ap-
plications.
This product shall not be used in open or enclosed
external environments such as vessels, balconies
or terraces. Exposing the product to rain, snow,
sunlight and wind may cause risk of fire.
1.2 Safety of children,
vulnerable persons and pets
• Ths product may be used by chldren
aged 8 years and older and persons
wth underdeveloped physcal,
sensory or mental capabltes or
lack of experence and knowledge
f they have been gven supervson
or nstructon concernng use of the
applance n a the product safe way
and the hazards nvolved.
• Chldren between 3 and 8 years are
allowed to put and take out food to/
from the cooler product.
• Electrcal products are dangerous for
chldren and pets. Chldren and pets
must not play wth, clmb on, or enter
the product.
• Cleanng and user mantenance
should not be performed by chldren
unless there s someone overseeng
them.
• Keep the packagng materals away
from chldren. Rsk of njury and
suffocaton.
• Before dsposng of old products that
shall not be used any more:
1.
Unplug the power cord from the mains socket.
2.
Cut the power cord and remove it from the
appliance together with the plug.
3.
Do not remove the racks and drawers from the
product to prevent children from getting inside the
appliance.
4.
Remove the doors.
5.
Store the product so that it shall not be tipped over.
6.
Do not allow children to play with the scrapped
product.
• Do not dispose of the product by throwing it
into fire. Risk of explosion.
• If there is a lock available in the product’s door,
keep the key out of children’s reach.

4 /32 EN Refrigerator / User Guide
Important safety and environment instructions
1.3 Electrical safety
• The product shall not be plugged
nto the outlet durng nstallaton,
mantenance, cleanng, repar, and
transportaton operatons.
• If the power the cord s damaged,
t shall be replaced by authorzed
servce only to avod any rsk that
may occur.
• Do not tuck the power cord under the
product or to the rear of the product.
Do not put heavy tems on the power
cord. The power cord should not be
bent, crushed, and come nto contact
wth any heat source.
• Do not use an extenson cord, mult-
plug or adaptor to operate your
product.
• Portable mult sockets or portable
power supples may overheat and
cause fre. Thus, do not have a mult-
plug behnd or n the vcnty of the
product.
• The plug shall be easly accessble.
If ths s not possble, a mechansm
that meets the electrcal legslaton
and that dsconnects all termnals
from the mans (fuse, swtch, man
swtch, etc.) shall be avalable on the
electrcal nstallaton.
• Do not touch the plug wth wet
hands.
• When unpluggng the applance, don’t
hold the power cord, but the plug.
• When postonng the applance,
ensure the supply cord s not trapped
or damaged
• Do not locate multple portable
socket-outlets or portable power
supples at the rear of the applance.
1.4 Handling Safety
• Ths product s heavy, do not handle t
by yourself.
• Do not hold the product from ts door
whle handlng the product.
• Be careful not to damage the coolng
system and the ppes whle handlng
the product. Do not operate the
product f the ppes are damaged, and
contact an authorzed servce.
1.5 Installation Safety
• Contact the Authorzed Servce
for the product’s nstallaton. To
prepare the product for nstallaton,
see the nformaton n the user
gude and make sure the electrc
and water utltes are as requred.
If the nstallaton s not sutable, call
a qualfed electrcan and plumber
to have them make the necessary
arrangements. Otherwse, electrc
shock, fre, ssues wth the product or
njures may occur.
• Check for any damage on the product
before nstallng t. Do not have the
product nstalled f t s damaged.
• Place the product on a level and
hard surface and balance wth the
adjustable legs. Otherwse, the
refrgerator may tp over and cause
njures.
• The product shall be nstalled n a
dry and ventlated envronment.
Do not keep carpets, rugs or smlar
floor covers under the product. Ths
may cause rsk of fre as a result of
nadequate ventlaton!
• Do not block or cover ventlaton
holes. Otherwse, power consumpton
may be ncreased and damage to your
product may occur.
• Do not connect the product to supply
systems such as solar power supples.
Otherwse, damage to your product
may occur as a result of the abrupt
voltage fluctuatons!

5 / 32 EN
Refrigerator / User Guide
Important safety and environment instructions
• The more refrgerant a refrgerator
contans, the bgger ts nstallaton
room shall be. In very small rooms,
a flammable gas-ar mxture may
occur n case of a gas leak n the
coolng system. At least 1 m of
volume s requred for each 8 grams
of refrgerant. The amount of the
refrgerant avalable n your product s
specfed n the Type Label.
• The nstallaton place of the product
shall not be exposed to drect sunlght
and t shall not be n the vcnty of a
heat source such as stoves, radators,
etc.
If you cannot prevent installation of the product in
the vicinity of a heat source, you shall use a suit-
able insulation plate and the minimum distance to
the heat source shall be as specified below.
- At least 30 cm away from heat sources such
as stoves, heating units and heaters, etc.,
- And at least 5 cm away from electric ovens.
• Your product has the protecton
class of I. Plug the product n a
grounded socket that conforms wth
the Voltage, Current and Frequency
values specfed n the type label. The
socket outlet shall be equpped wth a
fuse wth a ratng of 10 A – 16 A. Our
company shall not be responsble for
the damages that shall be ncurred
as a result of operatng the product
wthout ensurng ground and
electrcal connectons made as per
local or natonal regulatons.
• The product’s power cable must
be unplugged durng nstallaton.
Otherwse, rsk of electrc shock and
njury may occur!
• Do not plug the product to loose, broken, dirty,
greasy sockets or sockets that has come out
their seats or sockets with a risk of water con-
tact.
• Place the power cord and hoses (if available) of
the product so that they shall not cause a risk of
tripping over.
• Penetration of humidity to live parts or to the
power cord may cause short circuit. Thus, do
not use the product in humid environments or
in areas where water may splash (e.g. garage,
laundry room, etc.) If the refrigerator is wet
by water, unplug it and contact an authorized
service.
• Do not connect your refrigerator to power sav-
ing devices. These systems are harmful for the
product.
1.6
Operational safety
• Do not use chemical solvents on the product.
These materials contain an explosion risk.
• In case of a failure of the product, unplug it and
do not operate until it is repaired by the author-
ized service. There is a risk of electric shock!
• Do not place a source of flame (e.g. candles,
cigarettes, etc.) on the product or in the vicinity
of it.
• Do not get on the product. Risk of falling and
injury!
• Do not cause damage to the pipes of the cool-
ing system using sharp and piercing tools. The
refrigerant that sprays out in case of puncturing
the gas pipes, pipe extensions or upper surface
coatings may cause irritation of skin and inju-
ries of the eyes.
• Do not place and operate electric appliances
inside the refrigerators/deep freezer unless it is
advised by the manufacturer.
• Do not jam any parts of your hands or your
body to the moving parts inside the product.
Be careful to prevent jamming of your fingers
between the refrigerator and its door. Be careful
while opening or closing the door if there are
children around.
• Do not put ice cream, ice cubes or frozen food
to your mouth as soon as you take them out of
the freezer. Risk of frostbite!
• Do not touch the nner walls, metal
parts of the freezer or food kept
nsde the refrgerator wth wet
hands. Rsk of frostbte!
• Do not place soda cans or cans
and bottles that contan fluds
that may be frozen to the freezer
compartment. Cans or bottles may
6 /32 EN Refrigerator / User Guide
Important safety and environment instructions
explode. Rsk of njury and materal
damage!
• Do not use or place materals
senstve aganst temperature
such as flammable sprays,
flammable objects, dry ce or other
chemcal agents n the vcnty of
the refrgerator. Rsk of fre and
exploson!
• Do not store explosve materals
such as aerosol cans wth flammable
materals nsde the product.
• Do not place cans contanng fluds
over the product. Splashng of water
on an electrcal part may cause the
rsk of an electrc shock or a fre.
• Ths product s not ntended for
storage and coolng of medcnes,
blood plasma, laboratory preparatons
or smlar materals and products that
are subject to the Medcal Products
Drectve.
• If the product s used aganst ts
ntended purpose, t may cause
damage to or deteroraton of the
products kept nsde.
• If your refrgerator s equpped wth
blue lght, do not look at ths lght
wth optcal devces. Do not stare
drectly at UV LED lght for a long
tme. Ultravolet rays may cause eye
stran.
• Do not fll the product wth more food
than ts capacty. Injures or damages
may occur f the contents of the
refrgerator falls when the door s
opened. Smlar problems may occur
when an object s placed over the
product.
• Ensure that you have removed any
ce or water that may have fallen to
the floor to prevent njures.
• Change the locatons of the racks/
bottle racks on the door of your
refrgerator whle the racks are
empty only. Danger of physcal njury!
• Do not place objects that may fall/
tpped over on the product. These
objects may fall whle openng or
closng the door and cause njures
and/or materal damages.
• Do not ht or exert excessve pressure
on glass surfaces. Broken glass
may cause njures and/or materal
damages.
• The coolng system n your product
contans R600a refrgerant. The
refrgerant type used n the product
s specfed n the the type label.
Ths gas s flammable. Therefore, be
careful not to damage the coolng
system and the ppes whle operatng
the product. In case of damage to the
ppes;
- do not touch the product or the power cord,
- Keep the product away from potential sources
of fire that may cause the product to catch fire.
- ventilation the area where the product is
placed. Do not use a fan.
- Contact authorized service.
• If the product s damaged and you
observe gas leak, please stay away
from the gas. Gas may cause frostbte
f t contacts your skn.
For Products With Water Fountain / Ice Maker
• Use only drnkng water. Do not fll
the water tank wth frut juce, mlk,
fzzy beverages, alcoholc beverages
or any other lquds ncompatble for
use n the water fountan. Ths may
cause rsk to your health and safety.
• Do not allow the chldren to play wth
the water dspenser or Ice Maker to
prevent accdents and njures.
• Do not nsert your fngers or other
objects nsde the hole of the water

7 / 32 EN
Refrigerator / User Guide
Important safety and environment instructions
dspenser, ce channel or nsde the
contaner of the Ice Maker. Ths may
cause njures or materal damages.
1.7 Maintenance and
cleaning safety
• Do not pull by the door handle f you
shall move the product for cleanng
purposes. Handle may cause njures
f t s pulled too hard.
• Do not clean the product by sprayng
or pourng water on the product and
nsde the product. Rsk of electrc
shock and fre.
• Do not use sharp or abrasve tools
to clean the product. Do not use
materals such as household cleanng
agents, detergents, gas, gasolne,
alcohol, wax, etc.
• Use cleanng and mantenance
agents that are not harmful for food
only nsde the product.
• Do not use steam or steamed
cleanng materals for cleanng the
product and thawng the ce nsde t.
Steam contacts the lve areas n your
refrgerator and causes short crcut
or electrc shock!
• Take care to keep water away from
the electronc crcuts or lghtng of
the product.
• Use a clean, dry cloth to wpe the dust
or foregn materal on the tps of the
plugs. Do not use a wet or damp pece
of cloth to clean the plug. Otherwse,
rsk of fre or electrc shock may occur.
1.8HomeWhiz
(May not be applicable for all models)
• Follow the safety warnngs even f
you are away from the product whle
operatng the product va HomeWhz
app. Also, pay attenton to the
warnngs n the app.
1.9 Lighting
(May not be applicable for all models)
• Contact an authorzed servce when
you shall replace the LED / bulb usng
for lghtng.

8 /32 EN Refrigerator / User Guide
2 Environmental instructions
2.1 Compliance with the WEEE
Directive and Disposing
of the Waste Product:
This product complies with EU WEEE Directive
(2012/19/EU). This product bears a classification
symbol for waste electrical and electronic equip-
ment (WEEE).
This symbol indicates that this product
shall not be disposed with other house-
hold wastes at the end of its service life.
Used device must be returned to offical
collection point for recycling of electrical
and electronic devices. To find these collection sys-
tems please contact to your local authorities or re-
tailer where the product was puchased. Each
household performs important role in recovering
and recycling of old appliance. Appropriate disposal
of used appliance helps prevent potential negative
consequences for the environment and human
health.
2.2 Compliance with RoHS Directive
The product you have purchased complies with EU
RoHS Directive (2011/65/EU). It does not contain
harmful and prohibited materials specified in the
Directive.
2.3 Package information
Packaging materials of the product are
manufactured from recyclable materials
in accordance with our National
Environment Regulations. Do not dis-
pose of the packaging materials together with the
domestic or other wastes. Take them to the pack-
aging material collection points designated by the
local authorities.

9 / 32 EN
Refrigerator / User Guide
1- Freezer compartment door shelves
2- Cooler compartment door shelves
3- Egg Holder
4- Water fountain
5- Cooler compartment small door shelves
6- Bottle shelf
7- Adjustable stands
8- Crisper, Crisper separator and ethylene filter
9- The dairy (cold storage) compartment
10- Filter
11- Glass shelves
12- Fan
13- Icematics
14- Freezer compartment glass shelf
15- Freezer compartment
16- Cooler compartment
3 Your Refrigerator
C*Optional: Figures in this user guide are schematic and may not be exactly match your product. If your
product does not comprise the relevant parts, the information pertains to other models.
*1
*2
3*4
*5
*6
7
7
8
*9
10
*11
12
*13
14
15
16

10 /32 EN Refrigerator / User Guide
4 Installation
4.1 The right place for installation
Your product requires adequate air circulation to
function efficiently. If the product will be placed in an
alcove, remember to leave at least 5 cm clearance
between the product and the ceiling, rear wall and
the side walls.
If the product will be placed in an alcove, remember
to leave at least 5 cm clearance between the
product and the ceiling, rear wall and the side
walls. Check if the rear wall clearance protection
component is present at its location (if provided with
the product). If the component is not available, or
if it is lost or fallen, position the product so that at
least 5 cm clearance shall be left between the rear
surface of the product and the wall of the room.
The clearance at the rear is important for efficient
operation of the product.
4.2 For Products With Water
Fountain / Ice Maker
• The hose sets supplied with the product shall be
used. Do not use the old hose sets. Do not extend
the hoses!
• Always connect your product to cold water inlet.
Do not perform installation on the hot water inlet.
The pressure for the cold water inlet shall be 80 PSi
(550 kPa) maximum. If your water pressure exceeds
80Psi or has a water impact effect, use a pressure
limiting valve on your mains system. Ask help from
professional plumbers if you do not know how to
control your water pressure.
High pressure may cause damage to the hose
connections and pose a risk of flooding.
• Take required precautions against the risk of
freezing of hoses. The operating water temperature
interval shall be 0.6°C (33°F) minimum and 38°C
(100°F) maximum. There is a risk of flooding if the
hose is cracked/perforated.
AWARNING: Do not use extension or multi
sockets in power connection.
BWARNING: The manufacturer assumes
no responsibility for any damage caused
by the work carried out by unauthorized
persons.
BWARNING: The product's power cable
must be unplugged during installation.
Failure to do so may result in death or
serious injuries!
A
WARNING: : If the door span is too
narrow for the product to pass, remove
the door and turn the product sideways; if
this does not work, contact the authorized
service.
• Place the product on a flat surface to avoid
vibration.
• Place the product at least 30 cm away from the
heater, stove and similar sources of heat and at
least 5 cm away from electric ovens.
• Do not expose the product to direct sunlight or
keep in damp environments.
• The product requires adequate air circulation to
function efficiently. If the product will be placed
in an alcove, remember to leave at least 5 cm
distance between the product and the ceiling
and the walls.
4.3 Attaching the plastic wedges
Use the plastic wedges in the provided with
the product to provide sufficient space for air
circulation between the product and the wall.
1.
To attach the wedges, remove the screws on
the product and use the screws provided with the
wedges.

11 / 32 EN
Refrigerator / User Guide
Installation
2.
Attach 2 plastic wedges on the ventilation cover as
shown in the figure.
4.4 Adjustment of the feet
If the product is not in balanced position, adjust the
front adjustable stands by rotating right or left.
4.5 Electrical connection
AWARNING: Do not use extension or
multi sockets in power connection.
BWARNING: Damaged power cable
must be replaced by Authorized
Service.
• Our firm will not assume responsibility for any
damages due to usage without earthing and
power connection in compliance with national
regulations.
• The power cable plug must be easily
accessible after installation.
C
Hot surface warning!
The side walls of your product are
equipped with cooler pipes to enhance
the cooling system. High pressure fluid
may flow through these surfaces, and
cause hot surfaces on the side walls.
This is normal and it does not require
servicing. Be careful when you contact
these areas.

12 /32 EN Refrigerator / User Guide
5 Preparation
5.1 What to do for energy saving
mehmet
AConnecting the product to electronic
energy-saving systems is harmful, as it
may damage the product.
• For a freestanding appliance; ‘this refrigerating
appliance is not intended to be used as a built-
in appliance’ ;
• Do not keep the refrigerator doors open for
long periods.
• Do not place hot food or beverages into the
refrigerator.
• Do not overfill the refrigerator; blocking the
internal air flow will reduce cooling capacity.
• Depending on the product's features;
defrosting frozen foods in the cooler
compartment will ensure energy saving and
preserve food quality.
• Food shall be stored using the drawers in the
cooler compartment in order to ensure energy
saving and protect food in better conditions.
• Make sure the foods are not in contact with
the cooler compartment temperature sensor
described below.
• Since hot and humid air will not directly
penetrate into your product when the doors are
not opened, your product will optimize itself
in conditions sufficient to protect your food.
In this energy saving function, functions and
components such as compressor, fan, heater,
defrost, lighting, display and so on will operate
according to the needs to consume minimum
energy while maintaining the freshness of your
foodstuff.
5.2 First operation
Before using your refrigerator, make sure the
necessary preparations are made in line with
the instructions in "Safety and environment
instructions" and "Installation" sections.
• Keep the product running without placing any
food inside for 12 hours and do not open the
door, unless absolutely necessary.
CA sound will be heard when the
compressor is engaged. It is normal to
hear sound even when the compressor is
inactive, due to the compressed liquids
and gasses in the cooling system.
CIt is normal for the front edges of the
refrigerator to be warm. These areas are
designed to warm up in order to prevent
condensation.
CFor some models, indicator panel turns
off automatically 1 minutes after the door
closes. It will be reactivated when the door
is open or any button is pressed.
ARead the “Safety Instructions” section first!

13 / 32 EN
Refrigerator / User Guide
6 Operating the Product
• Do not use any mechanical tools or any
other tools than the recommendations of the
manufacturer to speed up the thawing operation.
• Do not use parts of your refrigerator such
as the door or drawers as a support or a step.
This may cause the product to trip over or its
components to be damaged.
• The product shall be used for storing food
only.
• Turn off the water valve if you will be away
from home (e.g. at vacation) and you will not be
using the Ice Maker or the water dispenser for a
long period of time. Otherwise, water leaks may
occur.
6.1 Turning off the product
•If you shall not be using the product for a long
period;
- unplug it,
- remove the food to prevent odours,
- wait until the ice is thawed,
- clean the inside and wait until it is dried.
- leave the doors open to prevent damage to internal
body plastics.

14 /32 EN Refrigerator / User Guide
6 Operation of the Product
6.2 Indicator panel
Indicator panels may vary depending on the model of your product.
Audial and visual functions of the indicator panel will assist in using the refrigerator.
*2 *5
6
34
*1
10
7
*9 8
C*Optional: Figures in this user guide are schematic and may not be exactly match your product. If your
product does not comprise the relevant parts, the information pertains to other models.
1. Support Service Key
Press this button for 3 seconds to activate the support
service. Detailed information on the support service is
provided in the “Support Service Feature” section.
2. Quick Freezing Key
When the quick freeze key is pressed, the LED on
the key is illuminated and the quick freeze function
1- Support Service Key
2- Quick Freezing Key/ Handle Light Function Setting Key
3- Fault Condition Indicator
4- Energy Saving (Display Off) Indicator
5- Freezing Compartment Temperature Setting Key
6- Compartment Conversion Key
7- Cooling Compartment Temperature Setting Key
8- Cooling Compartment OFF (Vacation) Function Key
9- Wireless Key
10-
Key for Resetting Wireless Connection Settings
shall be activated. Freezing compartment temperature
is set to -27 Celcius. Press the key again to cancel
function. The quick freezing function shall be
automatically cancelled after 52 hours. To freeze a
large amount of fresh food, press the quick freeze key
before placing the food in the freezer compartment.

15 / 32 EN
Refrigerator / User Guide
Using the product
*Handle Light Function Setting Key
Handle light function might be switched between
open and closed modes by pressing quick freezing
button ( ) for 3 seconds. In the closed mode, the
handle light is only activated when the appliance
door is opened and it goes out after a while after the
door is closed. In the open mode, the handle light
is activated when the appliance door is opened, the
handle light stays on dimly after a while after the
door is closed. The handle light function is set to the
ex-factory closed mode.
3. Fault Condition Indicator
This indicator ( ) shall be active when your
refrigerator cannot perform adequate cooling or in
case of any sensor error. “E” shall be displayed on
the Freezing Compartment temperature indicator
and figures such as 1,2,3... shall be displayed on the
cooling compartment temperature indicator. These
figures provide information to the authorized service on
the error that has occurred.
Exclamation mark may be displayed when you load
warm food to the freezing compartment or keep the
door open for a long period of time. This is not a fault,
this warning shall be removed when the food is cooled
down or when any key is pressed.
4. Energy Saving (Display Off) Indicator
Energy saving function is enabled automatically and the
energy saving symbol ( ) is displayed when the door
of the product is not opened or closed for some period
of time. When the energy saving function is active, all
symbols on the screen other than the energy saving
symbol shall be turned off. When the energy-saving
function is active, pressing any key or opening the
door will deactivate the energy-saving function and the
display signals will return to normal. The energy-saving
function is a function activated ex-factory and cannot
be cancelled.
5. Freezing Compartment Temperature Setting
Key
Temperature setting is made for cooler compartment.
Pressing this key will enable the freezer compartment
temperature to be set at -15,-16,-18,-19,-20,-22,-24
Celcius.
6. Compartment Conversion Key
When the compartment conversion key is pressed for
3 seconds, freezer compartment switches between
cooler, off, and freezer modes respectively. When it is
operated as cooling compartment, the temperature
of the compartment may be set at 8,7,6,5,4,3,2
and 1 Celcius. In case of OFF mode, compartment
temperature indicator shall display “- -”.
7. Cooling Compartment Temperature Setting Key
Allows setting of temperature for cooler compartment.
Pressing this key will enable the cooling compartment
temperature to be set at 8,7,6,5,4,3,2 and 1 Celcius.
8. Cooling Compartment OFF (Vacation) Function
Key
Press the key for 3 seconds to activate the vacation
function. Vacation mode is activated and the LED
on the key is illuminated. “- -” shall be displayed on
the Cooling Compartment temperature indicator and
the cooling compartment does not actively perform
cooling. You shall not keep your food in the cooling
compartment when this function is activated. The other
compartments continue to cool according to the set
temperatures. Press the key for 3 seconds again to
cancel this function.
9. Wireless Key
This key is used to make a wireless connection with
your product via HomeWhiz mobile app.
When the key is pressed for a long period (3 seconds),
the wireless connection symbol on the display/screen
flashes slowly (with intervals of 0.5 seconds). The home
network is initialized on the product this way.
After achieving wireless connection with the product,
wireless connection symbol ( ) illuminates
continuously.
When the initial connection is established, you may
activate/deactivate the connection with a short press
on this key. The wireless connection symbol shall flash
quickly (at 0.2 second intervals) until the connection is
established. When the connection is active, the wireless
network symbol shall light up continuously.
If the connection cannot be established for a long
period, check your connection settings and refer to the
“Troubleshooting” section provided in the user manual.

16 /32 EN Refrigerator / User Guide
Using the product
6.3 Support Service Feature
*May not be available in all models
Support Service is a feature that allows you to create
a request for our expert representatives through a
special offer on your white goods products. After the
request to be created with the Support Service button,
our expert customer representatives will be able to
call you from your mobile phone number that you have
registered in the HomeWhiz application and help you
about all your questions.
6.4 Entering Phone Number
for Support Service
To ensure that your customer representative
may call you after creating a request by pressing
Support Service button, you shall share your mobile
phone number with the application. You may add
or change your mobile phone number through
the communication menu on the HomeWhiz
application.
6.5 Creating a Request Via
Support Service
To create a Support Service request, your product
must be connected to the internet.
1.
Ensure that you have an internet connection on
the product and you have entered your mobile phone
number via HomeWhiz application.
2.
Press the support service key for 3 seconds.
3.
Support Service symbol shall start to blink.
4.
When your request is delivered to the customer
representative successfully, Support Service symbol
shall constantly illuminate.
5.
Your customer representative shall call you via the
telephone number that you have specified on the
HomeWhiz application.
6.
The symbol shall turn off when the call is completed.
7.
If your request does not reach the customer
representative successfully, the light of the symbol will
turn off after a while. In this case, follow the guides in
the troubleshooting step.
6.6 Cancelling a Support
Service Request
If you want to cancel your support service request,
your request shall be delivered to the customer
representative successfully and the symbol shall be
illuminated constantly. To cancel;
1.
Press the support service button for 3 seconds.
2.
Support Service symbol shall start to blink.
3.
Symbol shall turn off when your request is cancelled
successfully.
4.
If your request does not cancel, Support Service
symbol shall constantly illuminate again.
6.7 Troubleshooting
When you press the support service button, the light
of the symbol does not illuminate constantly, turned
off immediately or if it is constantly blink:
1.
Ensure that your product is connected to the internet.
2.
Ensure that you have a HomeWhiz account and
that you have entered your mobile phone number via
HomeWhiz application.
3.
Ensure the accuracy of the phone number that you
registered to the HomeWhiz application.
4.
If the internet connection is not available, this feature
does not work. Check your home internet connection.
Info:
• When you press the support service key; If the
wireless connection is off, it shall be turned on
automatically.
• You will not be allowed to turn off your product’s
wireless connection, while the Support Service
process is in progress.
HomeWhiz application shall be used for wireless
connection. Installation steps are described on the
application during installation.
You may access the application by reading the QR
code available on the HomeWhiz label on the product.
Application is offered through App Store for IOS
devices, and through Play Store for Android devices.
Visit https://www.homewhiz.com/ for detailed
information.’
10. Key for Resetting Wireless Connection
Settings
To reset the wireless connection settings, press Quick
freezing ( ) and wireless connection ( ) keys
simultaneously for 3 seconds. All user information
recorded previously are removed on a product where
wireless connection settings are reset/restored to
factory defaults.

17 / 32 EN
Refrigerator / User Guide
Using the product
6.8 Humidity controlled
crisper (EverFresh+)
(Optional)
Thanks to the humidity controlled crisper,
vegetables and fruits may be stored for a longer
period at an environment with ideal humidity
conditions. With the humidity setting system with
3 options in front of your crisper, you may control
the humidity inside the compartment as per the
food you store. We recommend you to store your
food by selecting vegetable option when you store
vegetables only, fruit option when you store fruit
only and mixed option when you store mixed food.
We recommend that the vegetables and fruits
shall not be stored in bags to improve the storage
period of the food and to better benefit from the
humidity control system. Leaving them in plastic
bags causes vegetables to rot in a short time.
We recommend that cucumbers and broccolis,
in particular, are not stored in closed bags. In
situations where contact with other vegetables is
not preferred, use packaging materials such as
paper that has a certain level of porosity in terms
of hygiene.
When placing the vegetables, place heavy and
hard vegetables at the bottom and light and soft
ones on the top, taking into account the specific
weights of vegetables.
Do not put fruits that have a high ethylene gas
production such as pear, apricot, peach and
particularly apple in the same crisper with other
vegetables and fruits. The ethylene gas coming out
of these fruits might cause other vegetables and
fruits to mature faster and rot in a shorter period
of time.
6.9 Blue Light/HarvestFresh
(Optional)
For Blue light,
Vegetables and fruit stored in crispers illuminated
with blue light continue to perform photosynthesis
and retain their levels of C vitamin thanks to the
effect of the wavelength of the blue light.
For HarvestFresh,
Vegetables and fruit stored in crispers illuminated
with HarvestFresh technology retain their vitamin
levels (vitamins A and C) for a longer period thanks
to the cycles of blue, green, red lights and dark
that simulate the cycle of the day.
When the door of your refrigerator is opened dur-
ing the dark period of the HarvestFresh technology,
your refrigerator shall sense this automatically and
illuminate the crisper with one of the blue, green
or red lights respectively for your convenience. The
dark period shall be continued when you close the
door of your refrigerator so that it shall represent
the night period of the day cycle.
• When the Support Service operation is
complete; Wireless connection shall continue
unless you turn it off.

18 /32 EN Refrigerator / User Guide
Using the product
6.10 Anti-Odour Module
(FreshGuard)
(This feature is optional)
Thanks to this module, which is positioned
behind the evaporator cover in the fresh food
compartment, the air is actively passed over the
titanium dioxide-coated photocatalytic filter and
the cleaned air is circulated inside. In this way,
bad odours are removed from the interior of the
refrigerator before becoming permeated with the
food surfaces, and at the same time, a hygienic
air circulation is achieved via disinfected air. This
feature is driven by the fresh food compartment
fan located behind the evaporator cover, the UV-A
LED and the titanium dioxide-coated odour filter.
Providing a hygienic and odour-free air circulation,
this module will be activated automatically
periodically. If the door of the fresh food
compartment is opened while the module is active,
the fan and UV-A LED will not operate temporarily,
but will resume operation once the door is closed.
In case of a power outage, the module will resume
operation from the point it stopped once the power
is restored.
Note: To prevent bad odours that may occur with
the mixture of odours from different types of food,
we recommend you to store aromatic food such as
cheese, olives and delicatessen in their packaging
and with their lids closed. For the safety of other
food stored, hygienic storage conditions and to
prevent bad odours, we recommend you to remove
the food that you have observed to be spoilt from
the refrigerator as soon as possible.

19 / 32 EN
Refrigerator / User Guide
Using the product
6.11 Ice bucket
(This feature is optional)
Ice bucket allows you take ice easily from the
refrigerator.
Using the ice bucket
1. Take the ice bucket from the freezer
compartment.
2. Fill the ice bucket with water.
3. Place the ice bucket into the freezer
compartment. The ice will be ready after
approximately two hours.
4. Take the ice bucket from the freezer
compartment and bend in slightly over the holder
that you are going to serve. Ice will easily pour into
the serving holder.
6.12 Ice maker
(This feature is optional)
Ice maker allows you take ice easily from the
refrigerator.
Using the ice bucket
1. Remove the water tank in the cooler
compartment.
2. Fill the water tank with water.
3. Place the water tank back. First ice will be ready
in about 4 hours in the ice maker drawer in the
freezer compartment.
CYou may obtain about 60-70 cubes of
ice when the water tank is full.
CWater inside the water tank shall be
replaced within 2-3 weeks at most.
6.13 The dairy (cold storage)
compartment
(This feature is optional)
“The dairy (cold storage) compartment”
provides lower temperature than the refrigerator
compartment. Use this compartment to store
delicatessen (salami, sausages, dairy products
and etc. ) that requires lower storage temperature
or meat, chicken or fish products for immediate
consumption. Do not store fruits and vegetables in
this compartment.
Table of contents
Other Beko Refrigerator manuals

Beko
Beko RFNE 290 E 23 W User manual

Beko
Beko DNE 27001 KL User manual

Beko
Beko CN237220X User manual

Beko
Beko RCSA240M20W User manual

Beko
Beko BL20 Owner's manual

Beko
Beko RCSA330K30BN Instruction Manual

Beko
Beko CCSM1552W User manual

Beko
Beko DN156822W User manual

Beko
Beko CNA 29122 T User manual

Beko
Beko CDA 648 F User manual

Beko
Beko CXFG1601 User manual

Beko
Beko RDE 6206 User manual

Beko
Beko RDNE420K42X User manual

Beko
Beko RCNT375 Series User manual

Beko
Beko GN1306220VZDX User manual

Beko
Beko CXFD 6114B User manual

Beko
Beko 970465 MB User manual

Beko
Beko RCNE560E35ZXP User manual

Beko
Beko BBM335PX User manual

Beko
Beko TLDA 520 User manual