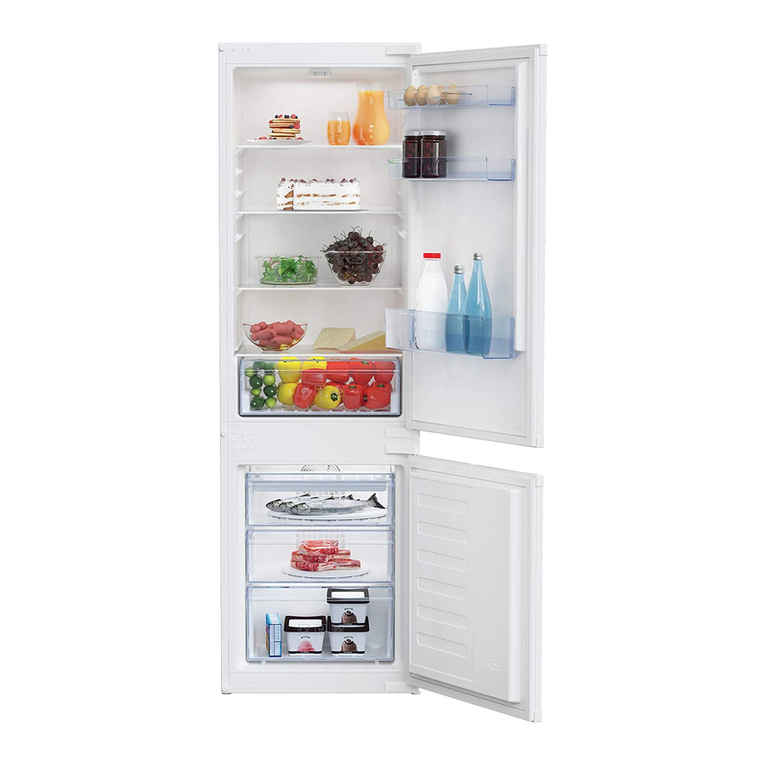
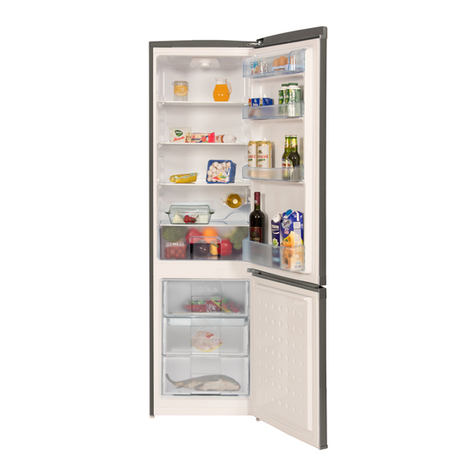
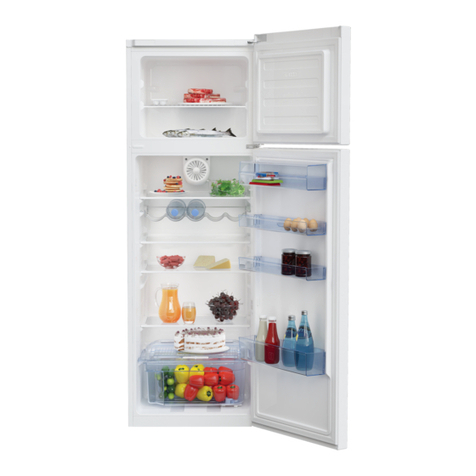
Beko CS 321HA PLUS User manual

CS321HA+
GB
Instruction for use
CZ
Návod k obsluze
HU
Használati utasitás
SK
Návod na použitie
PL
Instrukcja Obsługi

WARNING!
In order to ensure a normal operation of your refrigerating appliance, which uses a completely
environmentally friendly refrigerant the R 600a (flammable only under certain conditions) you
must observe the folloving rules:
Do not hinder the free circulation of the air around the appliance.
Do not use mechanic devices in order to accelerate the defrosting, others than the ones
recommended by the manufacturer.
Do not destroy the refrigerating circuit.
Do not use electric appliances inside the food beeping compartment, others than those that
might have been reccommended by the manufacturer.
UPOZORNNÍ!
Aby byl zajištn normální provoz vaší chladniky, která používá pro životní prostedí zcela
neškodné chladicí médium R600a (vzntlivé pouze za uritých pod
mínek), musíte dodržet
následující pravidla:
Nebrate ve volné cirkulaci vzduchu kolem pístroje.
Nepoužívejte mechanická zaízení pro zrychlení odmražení kromtch, která jsou
doporuená výrobcem.
Nelikvidujte chladicí okruh.
Nepoužívejte elektrické spo
tebie uvnitprostoru pro potraviny kromtch, která by mohl
doporuit výrobce.
FIGYELMEZTETÉS!
Azl, R600a (csak bizonyos körülmények között gyúlékony) teljesen környezetberát gázzal
mködhtberendzés normális mködésének eléréséhez, kövesse a következ
szabályokat:
Ne gátolja a levegkeringését a készülék körül!
Ne használjon más mechanikus eszközöket a gyorsabb felolvasztás érdekében, mint amit a
gyártó ajánl!
Ne szakítsa meg a htközeg keringésirendszerét!
Ne használjon más elektromos eszközöket a mélyfagyasztó részben, mint amiket a gyártó
javasolhat!
VAROVANIE!
Aby sa zabezpeila normálna prevádzka vašej chladniky, ktorá používa úplne ekologicky
nezávadné chladivo R 600a (horavé len pri uritých podmienkach), musíte dodržiava
nasledujúce pravidlá:
Nebráte vonej cirkulácii vzduchu okolo spotrebia.
Nepoužívajte mechanické prístroje na urýchovanie rozmrazovacieho procesu, iné ako
odporúa výrobca.
Neporušujte chladiaci okruh.
Nepoužívajte elektrické spotrebie vo vnútri pípacieho priestoru potravín, iné ako tie, ktoré
odporúal výrobca.
UWAGA!
Producent nie bdzie ponosiodpowiedzialnoci za szkody wynikłe z niestosowania sido
zalecezawartych w instrukcji obsługi. Instrukcjobsługi naley przechowywaw
bezpiecznym miejscu tak, aby mona było z niej korzystaw razie koniecznoci. Moe by
ona przydatna równiedla innego uytkownika.

Bezpenosnadovšetko /25
Elektrické požiadavky /26
Prepravné pokyny /26
Inštalané pokyny /26
Poznávanie spotrebia /27
Navrhnuté rozmiestnenie potravín v spotrebii /27
Riadenie a nastavenie teploty /28
Pred uvedením do prevádzky /28
Skladovanie zmrazených potravín /28
Mrazenie erstvých potravín /28
Tvorba kociek adu /29
Rozmrazovanie /29
Výmena žiarovky vnútorného svetla /29
istenie a údržba /29
Premiestovanie dverí /30
o sa má a o sa nesmie robi/30
Informácie o prevádzkovom hluku /31
Riešenie problémov /32
Technické údaje /32
Bezpieczestwo przede wszystkim /33
Podłczenie do zasilania /34
Instrukcja transportu i ustawienia /34
Monta/34
Zapoznaj siz Twoim urzdzeniem /35
Porady dotyczce przechowywania ywnoci /35
Regulacja temperatury /36
Uruchamianie /36
Porady dotyczce przechowywania zamroonej
ywnoci /36
Mroenie wieej ywnoci /37
Jak robikostki lodu /37
Odmraanie /37
Wymiana arówki /37
Czyszczenie urzdzenia /38
Zmiana kierunku otwierania drzwi /38
rodki ostronoci w trakcie uytkowania /38
Dwiki wydawane podczas pracy /39
Usuwanie usterek /39
Charakterystyka techniczna /40
Tabliczka znamionowa /40
Odzysk opakowania /41
Odzysk starego urzdzenia chłodniczego /41
Safety first /1
Electrical requirements /2
Transportation instructions /2
Installation instructions /2
Getting to know your appliance /3
Suggested arrangement of food in the appliance /3
Temperature control and adjustment /4
Before operating /4
Storing frozen food /4
Freezing fresh food /4
Making ice cubes /5
Defrosting /5
Replacing the interior light bulb /5
Cleaning and care /5
Repositioning the door /6
Do’s and don’ts /6
Information about operating noises /7
Trouble – shooting /8
Thechnical data /8
Bezpenost je vždy nejdležitjší! /9
Požadavky na napájení elektrickou energií /10
Pepravní pokyny /10
Pokyny k instalaci /10
Popis spotebie /11
Doporuený zpsob uspoádání potravin /11
Regulace teploty /12
Pedtím, než spotebizapnete /12
Skladování zmrazených potravin /12
Mražení erstvých potravin /12
Výroba kostek ledu /13
Odmrazování /13
Výmna žárovky vnitního osvtlení /13
ištní a údržba /14
Zmna smru otevírání dveí /14
Doporuení/zákazy /15
Odstraování problém/16
Technické parametry /16
Biztonsági utasítások /17
Elektromos hálózati követelmények /18
Szállítással kapcsolatos tudnivalók /18
Beállítással kapcsolatos tudnivalók /18
A készülék részei és tartozékai /19
Az étel javasolt elrendezése a készülékben /19
Hmérséklet szabályzás és beállítás /19
Bekapcsolás eltti teendk /20
Fagyasztott étel tárolása /20
Friss étel lefagyasztása /20
Jégkocka készítése /21
Leolvasztás /21
A belsvillanyégcseréje /21
Tisztítás és karbantartás /22
Az ajtó nyitási irányának megváltoztatása /22
Fontos tudnivalók /23
Hibaelhárítás /24
Mszaki adatok /24
CZ
Obsah
GB
Index
HU
Tartalomjegyzé
k
PL
Spis treci
SK
Index

1

2
3
4
5

6

Congratulations on your choice of a Quality
Appliance, designed to give you many years of service.
Safety first!
Do not connect your appliance to the electricity supply
until all packing and transit protectors have been
removed.
• Leave to stand for at least 4 hours before switching
on, to allow compressor oil to settle, if transported
horizontally.
• If you are discarding an old appliance with a lock or
latch fitted to the door, ensure that it is left in a safe
condition to prevent the entrapment of children.
• This appliance must only be used for its intended
purpose.
• Do not dispose of the appliance on a fire. Your
appliance contains non CFC substances in the
insulation which are flammable. We suggest you
contact your local authority for information on disposal
and available facilities.
• We do not recommend use of this appliance in an
unheated, cold room. (e.g. garage, conservatory,
annex, shed, out-house etc.)
To obtain the best possible performance and trouble
free operation from your appliance it is very important to
read these instructions carefully. Failure to observe
these instructions may invalidate your right to free
service during the guarantee period.
Please keep these instructions in a safe place for easy
reference.
GB
Instruction for use
1

GB
Instruction for use
Electrical requirements
Before inserting the plug into the wall socket
make sure that the voltage and the frequency
shown in the rating plate inside the appliance
corresponds to your electricity supply.
We recommend that this appliance is
connected to the mains supply via a suitably
switched and fused socket in a readily
accessible position.
Warning! This appliance must be earthed.
Repairs to electri
cal equipment should only be
performed by a qualified technician. Incorrect
repairs carried out by an unqualified person
are carry risks that may have critical
consequences for the user of the appliance.
ATTENTION!
This appliance operates with R 600a which is
an environmental friendly but flammable gas.
During the transportation and fixing of the
product, care must be taken not to damage
the cooling system. If the cooling system is
damaged and there is a gas leakage from the
system, keep the product away from open
flame sources and ventilate the room for a
while.
WARNING - Do not use mechanical devices
or other means to accelerate the defrosting
process, others than those recommended by
the manufacturer.
WARNING - Do not damage the refrigerant
circuit.
WARNING - Do not use electrical appliances
inside the food storage compartments of the
appliance, unless they are of the type
recommended by the manufacturer.
Transportation instructions
1. The appliance should be transported only in
an upright position. The packing as supplied
must be intact during transportation.
2. If during the transport the appliance, has
been positioned horizontally, it must not be
operated for at least 4 hours, to allow the
system to settle.
3. Failure to comply with the above
instructions could result in damage to the
appliance, for which the manufacturer will not
be held liable.
4. The appliance must be protected against
rain, moisture and other atmospheric
influences.
Important!
• Care must be taken while cleaning/carrying
the appliance not to touch the bottom of the
condenser metal wires at the back of the
appliance, as this could cause injury to fingers
and hands.
• Do not attempt to sit or stand on top of your
appliance as it is not designed for such use.
You could injure yourself or damage the
appliance.
• Make
sure that the mains cable is not caught
under the appliance during and after moving,
as this could damage the cable.
• Do not allow children to play with the
appliance or tamper with the controls.
Installation instructions
1. Do not keep your appliance in a room
where the temperature is likely to fall below 10
degrees C (50 degrees F) at night and/or
especially in winter, as it is designed to
operate in ambient temperatures between +10
and +32 degrees C (50 and 90 degrees F). At
lower temperatures the appliance may not
operate, resulting in a reduction in the storage
life of the food.
2. Do not place the appliance near cookers or
radiators or in direct sunlight, as this will
cause extra strain on the appliance's
functions. If installed next to a source of heat
or freezer, maintain the following minimum
side clearances:
From Cookers 30 mm
From Radiators 300 mm
From Freezers 25 mm
3. Make sure that sufficient room is provided
around the appliance to ensure free air
circulation (Item 2).
• Put the back airing lid to the back of your
refrigerator to set the distance between the
refrigerator and the wall (Item 3).
2

GB
Instruction for use
4. The appliance should be positioned on a
smooth surface. The two front feet can be
adjusted as required.To ensure that your
appliance is standing upright adjust the two
front feet by turning clockwise or anti-
clockwise, until firm contact is secured with
the floor. Correct adjustment of feet prevents
excessive vibration and noise.
5. Refer to "Cleaning and Care" section to
prepare your appliance for use.
Getting to know your appliance
(Item 1)
1 - Thermostat and lamp housing
2 - Adjustable Cabinet shelves
3 - Water collector
4 - Crisper cover
5 - Crispers
6 - Compartment for ice cubes support
7 - Compartment for quickly freezing
8 - Compartments for frozen froods keeping
9 - Adjustable foot
10 - Dairy Compartment
11 - Shelf for jars
12 - Bottle stop
13 - Shelf for bottles
Suggested arrangement of food in
the appliance
Guidelines for obtaining optimum storage and
hygiene:
1. The fridge compartment is for the short-
term storage of fresh food and drinks.
2. The freezer compartment is rated
and suitable for the freezing and storage
of pre-frozen food.
The recommendation for storage as
stated on the food packaging should be
observed at all times.
3. Dairy products should be stored in the
special compartment provided in the door
liner.
4. Cooked dishes should be stored in airtight
containers.
5. Fresh wrapped produce can be kept on the
shelf. Fresh fruit and vegetables should be
cleaned and stored in the crispers.
6. Bottles can be kept in the door section.
7. To store raw meat, wrap in polythene bags
and place on the lowest shelf. Do not allow to
come into contact with cooked food, to avoid
contamination. For safety, only store raw meat
for two to three days.
8. For maximum efficiency, the removable
shelves should not be covered with paper or
other materials to allow free circulation of cool
air.
9. Do not keep vegetable oil on door shelves.
Keep the food packed, wrapped or covered.
Allow hot food and beverage
s to cool before
refrigerating. Leftover canned food should not
be stored in the can.
10. Fizzy drinks should not be frozen and
products such as flavoured water ices should
not be consumed too cold.
11. Some fruit and vegetables suffer damage
if kept at temperatures near 0°C. Therefore
wrap pineapples, melons, cucumbers,
tomatoes and similar produce in polythene
bags.
12. High-proof alcohol must be stored upright
in tightly closed containers. Never store
products that contain an inflammable
propellant gas (e.g. cream dispensers, spray
cans, etc.) or explosive substances. These
are an explosion hazard.
3

GB
Instruction for use
Temperature control and adjustment
Operating temperatures are controlled by the
thermostat knob and may be set at any
position between MIN and MAX (the coldest
position).
The average temperature inside the fridge
should be around +5°C (+41°F).
Therefore adjust the thermostat to obtain the
desired temperature. Some sections of the
fridge may be cooler or warmer (such as
salad crisper and top part of the cabinet)
which is quite normal. We recommend that
you check the temperature periodically with a
thermometer to ensure that the cabinet is kept
to this temperature. Frequent door openings
cause internal temperatures to rise, so it is
advisable to close the door as soon as
possible after use.
Before operating
Final Check
Before you start using the appliance check
that:
1. The feet have been adjusted for perfect
levelling.
2. The interior is dry and air can circulate
freely at the rear.
3. The interior is clean as recommended
under "Cleaning and care.”
4. The plug has been inserted into the wall
socket and the electricity is switched on.
When the door is open the interior light will
come on.
And note that:
5. You will hear a noise as the compressor
starts up. The liquid and gases sealed within
the refrigeration system may also make some
(noise), whether the compressor is running or
not. This is quite normal.
6. Slight undulation of the top of the cabinet is
quite normal due to the manufacturing
process used; it is not a defect.
7. We recommend setting the thermostat knob
midway and monitor the temperature to
ensure the appliance maintains desired
storage temperatures (See section
Temperature Control and Adjustment).
8. Do not load the appliance immediately it is
switched on. Wait until the correct storage
temperature has been reached. We
recommend checking the temperature with an
accurate thermometer (see; Temperature
Control and Adjustment).
Storing frozen food
Your freezer is suitable for the long-term
storage of commercially frozen foods and also
can be used to freeze and store fresh food.
For storing home-
frozen fresh food refer to the
storage-life guide on the door-liner.
If there is a power failure, do not open the
door. Frozen food should not be affected if the
failure lasts for less than 20 hrs. If the failure
is longer, then the food should be checked
and either eaten immediately or cooked and
then re-frozen.
Freezing fresh food
Please observe the following instructions to
obtain the best results.
Do not freeze too large a quantity at any one
time. The quality of the food is best preserved
when it is frozen right through to the core as
quickly as possible.
Do not exceed the freezing capacity of your
appliance in 24 h.
Placing warm food into the freezer
compartment causes the refrigeration
machine to operate continously until the food
is frozen solid. This can temporarily lead to
excessive cooling of the refrigeration
compartment.
When freezing fresh food, keep the
thermostat knob at medium position. Small
quantities of food up to 1/2 kg. (1 lb) can be
frozen without adjusting the temperature
control knob.
Take special care not to mix already frozen
food and fresh food.
4

GB
Instruction for use
Making ice cubes
Fill the ice - cube tray 3/4 full with water and
place it in the freezer. Loosen frozen trays
with a spoon handle or a similar implement;
never use sharp-edged objects such as
knives or forks.
Defrosting
A) Fridge compartment
The fridge compartment defrosts
automatically. The defrost water runs to the
drain tube via a collection container at the
back of the appliance (Item 5).
During defrosting, water droplets may form at
the back of the fridge compartment where a
concealed evaporator is located. Some
droplets may remain on the liner and refreeze
when defrosting is completed. Do not use
pointed or sharp-edged objects such as
knives or forks to remove the droplets which
have refrozen.
If, at any time, the defrost water does not
drain from the collection channel, check that
no food particles have blocked the drain tube.
The drain tube can be cleared with a pipe-
cleaner or similar implement.
B) Freezer compartment
Defrosting is very straightforward and without
mess, thanks to a special defrost collection
basin.
Defrost twice a year or when a frost layer of
around 7 (1/4") mm has formed. To start the
defrosting procedure, switch off the appliance
at the socket outlet and pull out the mains
plug.
All food should be wrapped in several layers
of newspaper and stored in a cool place (e.g.
fridge or larder).
Containers of warm water may be placed
carefully in the freezer to speed up the
defrosting.
Do not use pointed or sharp-edged objects,
such as knives or forks to remove the frost.
Never use hairdryers, electrical heaters or
other such electrical appliances for defrosting.
Sponge out the defrost water collected in the
bottom of the freezer compartment. After
defrosting, dry the interior thoroughly. Insert
the plug into the wall socket and switch on the
electricity supply.
Replacing the interior light bulb
Should the light fail, switch off at the socket
outlet and pull out the mains plug.
Then ensure the bulb is screwed securely in
the bulb holder. Replace the plug and switch
on.
If the light still fails, obtain a replacement E14
screw-cap type 15 Watt (Max) bulb from your
local electrical store and then fit it
Carefully dispose of the burnt-out light bulb
immediately.
Cleaning and care
1. We recommend that you switch off the
appliance at the socket outlet and pull out the
mains plug before cleaning.
2. Never use any sharp instruments or
abrasive substances, soap, household
cleaner, detergent or wax polish for cleaning.
3. Use luke warm water to clean the cabinet of
the appliance and wipe it dry.
4. Use a damp cloth wrung out in a solution of
one teaspoon of bicarbonate of soda to one
pint of water to clean the interior and wipe it
dry.
5. Make sure that no water enters the
temperature control box.
6. If the appliance is not going to be used for a
long period of time, switch it off, remove all
food, clean it and leave the door ajar.
7. We recommend that you polish the metal
parts of the product (i.e. door exterior, cabinet
sides) with a silicone wax (car polish) to
protect the high quality paint finish.
5

GB
Instruction for use
8. Any dust that gathers on the condenser,
which is located at the back of the
appliance,
should be removed once a year with a
vacuum cleaner.
9. Check door seals regularly to ensure they
areclean and free from food particles.
10. Never:
• Clean the appliance with unsuitable material;
eg petroleum based products.
• Subject it to high temperatures in any way,
• Scour, rub etc., with abrasive material.
11. Removal of dairy cover and door tray :
• To remove the dairy cover, first lift the cover
up by about an inch and pull it off from the
side where there is an opening on the cover.
• To remove a door tray, remove all the
contents and then simply push the door tray
upwards from the base.
12. Make sure that the special plastic
container at the back of the appliance which
collects defrost water is clean at all times. If
you want to remove the tray to clean it, follow
the instructions below:
• Switch off at the socket outlet and pull out
the mains plug
• Gently uncrimp the stud on the compressor,
using a pair of pliers, so that the tray can be
removed
• Lift it up.
• Clean and wipe it dry
• Reassemble, reversing the sequence and
operations
13. To remove a drawer, pull it as far as
possible, tilt it upwards and then pull it out
completely.
Repositioning the door
Proceed in numerical order (Item 6).
Do’s and don’ts
Do- Clean and defrost your appliance
regularly (See "Defrosting")
Do- Keep raw meat and poultry below
cooked food and dairy products.
Do- Take off any unusable leaves on
vegetables and wipe off any soil.
Do- Leave lettuce, cabbage, parsley and
cauliflower on the stem.
Do- Wrap cheese firstly in greaseproof paper
and then in a polythene bag, excluding
as much air as possible. For best results,
take out of the fridge compartment an
hour before eating.
Do- Wrap raw meat and poultry loosely in
polythene or aluminium foil. This
prevents drying.
Do- Wrap fish and offal in polythene bags.
Do- Wrap food with a strong odour or which
may dry out, in polythene bags, or
aluminium foil or place in airtight
container.
Do- Wrap bread well to keep it fresh.
Do- Chill white wines, beer
, lager and mineral
water before serving.
Do- Check contents of the freezer every so
often.
Do-
Keep food for as short a time as possible
and adhere to "Best Before" and "Use
by" etc. dates.
Do- Store commercially frozen food in
accordance with the instr
uctions given on
the packets.
Do- Always choose high quality fresh food
and be sure it is thoroughly clean before
you freeze it.
Do- Prepare fresh food for freezing in small
portions to ensure rapid freezing.
Do- Wrap all food in aluminium foil or freezer
quality polythene bags and make sure
any air is excluded.
Do- Wrap frozen food immediately after
purchasing and put it in to the freezer as
soon as possible.
Do- Defrost food in the fridge compartment.
6

Don’t
-
Store bananas in your fridge
compartment.
Don’t- Store melon in your fridge. It can be
chilled for short periods as long as it
is wrapped to prevent it flavouring
other food.
Don’t-
Cover the shelves with any protective
materials which may obstruct air
circulation.
Don’t- Store poisonous or any dangerous
substances in your appliance. It has
been designed for the storage of
edible foodstuffs only.
Don’t- Consume food which has been
refrigerated for an excessive length of
time.
Don’t- Store cooked and fresh food together
in the same container. They should
be packaged and stored separately.
Don’t- Let defrosting food or food juices drip
onto food.
Don’t-
Leave the door open for long periods,
as this will make the appliance more
costly to run and cause excessive ice
formation.
Don’t- Use sharp edged objects such as
knives or forks to remove the ice.
Don’t- Put hot food into the appliance. Let it
cool down first.
Don’t- Put liquid-filled bottles or sealed cans
containing carbonated liquids into the
freezer, as they may burst.
Don’t- Exceed the maximum freezing loads
when freezing fresh food.
Don’t- Give children ice-cream and water
ices direct from the freezer. The low
temperature may cause 'freezer
burns'on lips.
Don’t- Freeze fizzy drinks.
Don’t- Try to keep frozen food which has
thawed; it should be eaten within 24
hours or cooked and refrozen.
Don’t- Remove items from the freezer with
wet hands.
GB
Instruction for use
7
Information about operating noises
To keep the selected temperature constant,
your appliance occasionally switches ON the
compressor.
The resulting noises are quite normal.
As soon as the appliance has reached the
operating temperature, the noises
automatically reduce in volume.
The humming noise is emitted by the motor
(compressor). When the motor switches ON,
the noise may briefly increase in volume.
The bubbling, gurgling or whirring noise is
emitted by the refrigerant as it flows through
the pipes.
The clicking noise can always be heard when
the thermostat switches ON/OFF the motor.
A clicking noise may occur when
- the automatic defrosting system is active.
-
the appliance is cooling down or warming up
(material expansion).
If these noises are excessively loud, the
causes are probably not serious and are
usually very easy to eliminate.
- The appliance is not level - Use the height-
adjustable feet or place packing under the
feet.
- The appliance is not free-standing - Please
move the appliance away from kitchen units
or other appliances.
- Drawers, baskets or shelves are loose or
stick - Please check the detachable
components and, if required, refit them.
-
Bottles and/or receptacles are touching each
other - Please move bottles and/or
receptacles away from each other.

Technical data
Brand
Appliance type COMBI
Total gross volume (l.) 320
Total usable volume (l.) 287
Freezer usable volume (l.) 87
Refrigerator useful volume 200
Freezing capacity (kg/24 h) 7
Energy class (1) A+
Power consumption (kWh/year) (2) 254
Autonomy (h) 20
Noise [dB(A) re 1 pW] 40
Ecological refrigerating agent R 600a
(1) Energy class : A . . . G (A = economical . . . G = less economical)
(2) The real power consumption depends on using conditions and appliance location.
Trouble - shooting
If the appliance does not operate when
switched on, check;
• That the plug is inserted properly in the
socket and that the power supply is on. (To
check the power supply to the socket, plug
in another appliance)
• Whether the fuse has blown/circuit breaker
has tripped/main distribution switch has
been turned off.
• That the temperature control has been set
correctly.
• That the new plug is wired correctly, if you
have changed the fitted, moulded plug.
If the appliance is still not operating at all after
above checks, contact the dealer from whom
you purchased the unit.
Please ensure that above checks have been
done, as a charge will be made if no fault is
found.
GB
Instruction for use
8

Blahopejeme Vám k zakoupení tohoto vysoce kvalitního
spotebie . Doufáme, že s ním budete spokojeni
a víme, že Vám bude mnoho let spolehlivsloužit.
Bezpenost je vždy nejdležitjší!
Nepipojujte tento spotebike zdroji elektrické energie
díve, než z nj odstraníte všechny obaly a prvky, které jej
chrání bhem pepravy.
• Pokud byl spotebipepravován v horizontální poloze,
nechejte jej ped zapnutím alespo4 hodiny stát, aby se
mohl usadit kompresorový olej.
• Pi likvidaci starého spotebie, který je na dveích
opaten zámkem nebo západkou, dbejte na to, abyste
spotebizanechali v bezpeném stavu, který nedovolí,
aby se uvnitzavely dti.
• Tento spotebije dovoleno používat pouze k úelm, ke
kterým byl vyroben.
• Nesnažte se tento spotebizlikvidovat pomocí ohn.
Izolace spotebie je tvoena látkami (jinými než CFC),
které jsou holavé. Doporuujeme Vám, abyste se o
možných zpsobech likvidace tohoto spotebie poradili s
místními úady.
• Nedoporuujeme používat tento spotebiv nevytápné
studené místnosti (nap. garáže, skleníky, pístavky, klny,
boudy, atd.).
Pro zajištní optimálního výkonu a bezporuchového
provozu tohoto spotebie je velmi dležité, abyste si
pozornpeetli tento návod k obsluze. Pokud nebudete
dodržovat pokyny, které jsou v nm uvedené, mžete
ztratit nárok na bezplatný servis bhem záruní doby.
Uschovejte prosím tuto píruku na bezpené místtak,
aby byla stále k dispozici.
CZ
Návod k obsluze
9

CZ
Návod k obsluze
10
Požadavky na napájení elektrickou
energií
Ped zapojením zástrky do zásuvky ve zdi
zkontrolujte, jestli naptí a frekvence uvedené
na typovém štítku uvnitspotebie odpovídají
síovému napájení, které máte k dispozici.
Doporuujeme Vám, abyste tento spotebi
pipojili k síovému napájení prostednictvím
vhodnvypínané a jištné zásuvky, která je
snadno dostupná.
Varování! Tento spotebimusí být
uzemnn.
Opravy elektrického zaízení smí provádt
pouze osoby s dostatenou kvalifikací.
Nesprávné opravy provedené nedostaten
kvalifikovanou osobou jsou zdrojem
nebezpeí, které mže mít pro uživatele
spotebie vážné následky.
UPOZORNNÍ!
Tento spotebije naplnn médiem R 600a,
což je ekologicky šetrný avšak holavý plyn.
Bhem pepravy a montáže výrobku si musíte
dát pozor, abyste nepoškodili chladicí systém.
Pokud dojde k poškození chladicího systému
a k úniku plynu, nepibližujte se ke spotebii
s oteveným ohnm a vtrejte místnost.
VAROVÁNÍ:
Nepokoušejte se urychlit proces odmrazování
pomocí mechanických zaízení nebo jiných
prostedk, pokud nejde o prostedky
doporuené výrobcem.
VAROVÁNÍ:
Dejte pozor, aby nedošlo k poškození
chladicího okruhu.
VAROVÁNÍ:
Nepoužívejte uvnitoddíltohoto spotebie
pro skladování potravin jiné elektrické
spotebie, pokud nejde o spotebie
doporuené výrobcem.
Pepravní pokyny
1. Tento spotebiby se ml pepravovat
pouze ve vzpímené (svislé) poloze.
Bhem pepravy není dovoleno odstraovat
ze spotebie obaly.
2. Jestliže byl bhem pepravy spotebi
naklonn do horizontální polohy, musíte ped
jeho zapnutím pokat alespo4 hodiny, což je
doba potebná k ustálení systému.
3. Pokud nedodržíte výše uvedené pokyny,
mže dojít k poškození spotebie. V takovém
pípadse výrobce zíká jakékoliv
odpovdnosti za vzniklé škody.
4. Spotebimusí být chránn ped deštm,
vlhkostí a dalšími atmosférickými vlivy.
Dležité upozornní!
• Pi ištní nebo penášení spotebie si
musíte dát pozor, abyste se nedotkli spodní
ásti kovových drátkondenzátoru v zadní
ásti spotebie, které by mohly zpsobit
poranní prstnebo rukou.
• Nesedejte ani nestoupejte na horní ást
spotebie. Spotebinení k tmto úelm
uzpsoben a proto by mohlo dojít k poranní
osob nebo poškození samotného spotebie.
• Pi pemísování spotebie dejte pozor,
aby se síový kabel nezachytil pod
spotebiem. Mohlo by dojít k jeho poškození.
• Nedovolte dtem, aby si se spotebiem
hráli nebo nastavovali jeho ovládací prvky.
Pokyny k instalaci
1. Neinstalujte tento spotebido místnosti,
ve které pravdpodobnpoklesne
v noci
teplota pod 10ºC (50ºF), zejména pak v
zimním období. Spotebivyžaduje, aby se
teplota okolí pohybovala v rozmezí +10ºC a
ž
+32ºC (50ºF a
ž 90ºF). Pi nižších teplotách
okolí mže docházet k výpadkm spotebie,
což se projeví snížením doby skladova
telnosti
potravin.
2. Neinstalujte spotebido blízkosti sporák
a topných tles nebo tam, kde na spotebi
dopadá pímé slunení svtlo; zamezíte tak
zbytenému nadmrnému zatížení spotebie.
Pokud instalujete tento spotebivedle zdroje
tepla nebo mrazniky, dbejte na to, aby po
stranách spotebie zstal volný prostor
alespo:
30 mm pro vzdálenost od sporák
300 mm pro vzdálenost od topných tles
25 mm pro vzdálenost od mrazniek

CZ
Návod k obsluze
2. Oddíl mrazniky, který je oznaen
symbolem , je vhodný k mražení a
skladová
ní pedem zmrazených potravin.
Dodržujte vždy doporuení, platná pro
skladování v mraznikách oznaených
symbolem , které jsou uvedeny na
obalech potravin.
3. Mléné výrobky skladujte ve speciálním
oddílu ve vnitní ásti dveí chladniky.
4. Uvaené pokrmy skladujte ve
vzduchotsných nádobách.
5. erstvé zabalené plodiny mžete
skladovat na polikách. erstvé ovoce a
zeleninu istte a uložte do oddílu pro
ukládání ovoce a zeleniny.
6. Lahve mžete skladovat ve dveích
chladniky.
7. Pokud chcete skladovat syrové maso,
zabalte jej do polyetylénových sáka položte
na nejnižší poliku. Syrové maso se nesmí
dotýkat vaených potravin, aby nedošlo ke
kontaminaci. Z bezpenostních dvod
skladujte syrové maso max. dva až ti dny.
8. Aby byla úinnost chlazení co nejvyšší,
nezakrývejte vyjímatelné poliky papírem
nebo jinými materiály, které by mohly
pekážet volné cirkulaci chladného vzduchu.
9. Neskladujte v polikách ve dveích
chladniky rostlinný olej. Skladované
potraviny by mly být zabalené nebo zakryté.
Horké potraviny a nápoje nechte ped
vložením do chladniky vychladnout.
Neskladujte zbytky jídla z konzervy uvnittéto
konzervy.
10. Nezmrazujte šumivé nápoje.
Nekonzumujte ochucené ovocné zmrzliny a
podobné výrobky píliš studené.
11. Nkteré druhy ovoce a zeleniny se pi
teplotách kolem 0ºC kazí. Proto zabalte
ananas, melouny, okurky, rajata a podobné
plodiny do polyetylenových sák.
12. Vysokostupový alkohol skladujte ve
svislé poloze v tsnuzavených nádobách.
Nikdy neskladujte v chladnice výrobky
obsahující holavý pohonný plyn
(rozprašovae, dávkovae, atd.) nebo
výbušné látky; mohlo by dojít k výbuchu.
11
3. Zajistte, aby okolo spotebie existoval
dostatenvelký volný prostor, který nebude
bránit volné cirkulaci vzduchu (Obr. 2).
• Pimontujte k zadní ásti chladn
iky krytku
pro zadní ventilaci a nastavte s její pomocí
vzdálenost mezi chladnikou a zdí (Obr. 3).
4. Postavte spotebina rovný povrch. V
pípadpoteby mžete nastavit polohu
spotebie pomocí dvou pedních patek.
Vyrovnejte spotebido svislé polohy
o
táením dvou pedních patek ve smru nebo
proti smru hodinových ruiek, dokud
nedosáhnete pevného kontaktu s podlahou.
Správným nastavením patek pedejdete
nadmrným vibracím a hlunosti spotebie.
Podle pokynv kapitole "ištní a údržba"
pipravte spotebik použití.
Popis spotebie
(Obr. 1)
1 - Oddíl termostatu a lampy (pro vnitní
osvtlení)
2 - Vyjímatelný rošt
3 - Sbrný kanál na zmraženou vodu -
Odtoková trubka
4 - Kryt oddílu pro ukládání zeleniny
5 - Oddíl pro ukládání ovoce a zeleniny
6 - Oddíl pro výrobu kostek ledu
7 - Oddíl pro rychlé mražení
8 - Oddíl pro skladování zmrazených
potravin
9- Nastavitelná patka
10 - Polika s krytem
11 - Polika na sklenice
12 - Zarážka na lahve
13 - Polika na lahve
Doporuený zpsob uspoádání
potravin
Následující pokyny popisují optimální zpsob
skladování potravin pi dodržení všech
hygienických pravidel:
1. Oddíl chladniky slouží ke krátkodobému
uložení erstvých potravin a nápoj.

CZ
Návod k obsluze
Regulace teploty
Provozní teplota se nastavuje pomocí knoflíku
termostatu; tuto teplotu lze nastavit na
nkterou hodnotu v rozmezí MIN a MAX
(nejchladnjší poloha).
Prmrná teplota uvnitchladniky by mla
být pibližn+5ºC (+41ºF).
Nastavte termostatem požadovanou teplotu.
Nkteré ásti chladniky mohou být chladnjší
nebo teplejší než ostatní (nap. oddíl pro
ukládání zeleniny a horní ást chladniky),
což je ale úplnnormální. Doporuujeme
Vám, abyste pomocí teplomru pravideln
kontrolovali teplotu. asté otevírání dveí
zvyšuje vnitní teplotu a proto je vhodné
zavírat dvee co nejdíve po vyjmutí/vložení
požadované potraviny.
Pedtím, než spotebizapnete
Finální kontrola
Pedtím, než zanete chladniku používat,
zkontrolujte:
1. Jestli byla chladnika vyvážena pomocí
nastavitelných patek.
1.
Jestli je vnitek suchý a jestli mže v zadní
ásti volncirkulovat vzduch.
2.
Jestli je vnitek istý (viz. pokyny v kapitole
ištní a údržba).
3. Jestli byla zástrka zasunuta do síové
zásuvky a jestli je pívod elektiny zapnutý. Pi
otevení dveí se rozsvítí vnitní osvtlení
chladniky.
Poznámky k provozu
4. Po zapnutí uslyšíte zvuk, který je
generován spouštním kompresoru. Tekutina
a plyny uzavené uvnitchladicího systému
mohou rovnž vydávat urité zvuky bez
ohledu na to, jestli kompresor bží nebo ne.
To je zcela bžná vlastnost chladniek.
5. Mírné vibrace v horní ásti krytu
spotebie jsou rovnž zcela bžné a vznikají
z dvodu použitéh
o výrobního procesu. Nejde
o závadu spotebie.
7. Doporuujeme Vám nastavit knoflík
termostatu do prostední polohy a pak
mením kontrolovat, zda spotebiudržuje
požadovanou skladovací teplotu (viz. kapitola
Regulace teploty).
Nevkládejte do chladniky potraviny
bezprostednpo jejím zapnutí. Pokejte,
dokud spotebinedosáhne správné
skladovací teploty. Doporuuje provádt
kontrolu teploty mením pesným
teplomrem (viz. kapitola Regulace teploty).
Skladování zmrazených potravin
Mraznika je vhodná k dlouhodobému
skladování komernzmrazených potravin a
lze ji rovnž použít k mražení a skladování
erstvých potravin.
Pi skladování doma zmrazených erstvých
potravin dodržujte pokyny o dob
skladovatelnosti vyznaené na vnitní ásti
dveí mrazniky.
Pokud dojde k výpadku dodávky elektrické
energie, neotevírejte dvee. Není-li výpadek
delší než 20 hodin, nemlo by dojít k ovlivnní
kvality skladovaných potravin. Je-li výpadek
delší, musíte potraviny zkontrolovat a okamžit
sníst nebo uvait a pak znovu zmrazit.
Mražení erstvých potravin
Pi mražení erstvých potravin prosím
postupujte podle následujících pokyn, které
jsou zárukou nejlepších výsledk.
Nezmrazujte píliš velké množství potravin
najednou. Kvalita potravin je nejlépe ochránna
tehdy, když jsou potraviny zmraženy skrz
naskrz až do jejich stedu v co nejkratším ase.
Nepekraujte maximální denní mrazicí
kapacitu spotebie.
Po vložení teplého jídla do oddílu mrazniky
bude chladicí zaízení pracovat nepetržittak
dlouho, dokud nebudou potraviny úpln
zmrzlé. To mže doasnzpsobit nadmrné
ochlazování oddílu chladniky.
12

CZ
Návod k obsluze
Pi mražení erstvých potravin nastavte
knoflík termostatu do prostední polohy. Malá
množství potravin do 0,5 kg (1 lb) lze zmrazit,
aniž by bylo nutno tímto knoflíkem regulovat
teplotu.
Dejte si velký pozor na to, abyste nesmíchali již
zmrazené potraviny s erstvými potravinami.
Výroba kostek ledu
Naplte misku na výrobu kostek ledu ze 3/4
vodou a vložte ji do mrazniky. Uvolnte
zamrzlou misku pomocí držadla lžiky nebo
podobným nástrojem; nikdy nepoužívejte
nástroje s ostrými hranami (nože, vidliky, ...).
Odmrazování
A) Oddíl chladniky
Oddíl chladniky se odmrazuje automaticky.
Odmražená voda stéká do odtokové trubky
prostednictvím sbrné misky v zadní ásti
spotebie (Obr. 5).
Bhem odmrazování se mohou v zadní ásti
oddílu chladniky (v míst, kde je ukrytý
výparník) vytváet vodní kapky. Nkteré
kapky, které zstanou na vnitní strandveí,
mohou po dokonení odmrazování znovu
zmrznout. Nepoužívejte k odstranní tchto
zmrzlých kapek špiaté pedmty nebo
pedmty s ostrými hranami, jako nap. nože
nebo vidliky.
Jestliže pestane odmražená voda odtékat ze
sbrné nádoby, zkontrolujte, jestli není
odtoková trubka ucpaná kousky jídla.
Odtokovou trubku mžete vyistit istiem
potrubí nebo podobným nástrojem.
B) Oddíl mrazniky
Díky použití speciální sbrné misky je
odmrazování velmi jednoduché a nevzniká pi
nm nepoádek.
Odmrazujte mrazniku dvakrát ronnebo
tehdy, když vrstva námrazy dosáhne tloušky
7 mm (1/4").
Pi odmrazování nejprve vypnte
napájení spotebie a vytáhnte síovou
zástrku ze zásuvky.
Zabalte všechny potraviny do nkolika vrstev
novin a uložte je na chladné místo (nap. do
chladniky nebo spižírny).
Chcete-li odmrazování urychlit, vložte opatrn
do mrazniky nádobu s teplou vodou.
Neodstraujte námrazu pomocí špiatých
pedmtnebo pedmts ostrými hranami
(nap. nože nebo vidliky).
Nikdy nepoužívejte k odmrazování vysoušee
vlas, elektrické ohívae nebo jiné elektrické
spotebie. Utete zmrazenou vodu, která se
nashromáždila ve spodní ásti oddílu
mrazniky. Po dokonení odmrazování vnitní
prostory mrazniky ádnvysušte. Vložte
zástrku do síové zástrky a zapnte
napájení.
Výmna žárovky vnitního osvtlení
Pokud pestane žárovka vnitního osvtlení
svítit, vypnte napájení spotebie a
vytáhnte síovou zástrku ze zásuvky.
Potom pevndotáhnte stávající žárovku v
její objímce, vložte zástrku do síové zásuvky
a zapnte napájení.
Jestliže žárovka stále nesvítí, obstarejte si v
prodejnelektro náhradní žárovku se
závitovou paticí E14 o výkonu 15 W (Max) a
vymte ji za spálenou žárovku.
Spálenou žárovku co nejdíve šetrn
zlikvidujte.
13

CZ
Návod k obsluze
ištní a údržba
1. Ped ištním vždy vypnte napájení
spotebie a
vytáhnte síovou zástrku ze
zásuvky.
2. Nikdy nepoužívejte pro ištní ostré
nástroje nebo substance s brusným úinkem,
mýdla, isticí prostedky pro domácnost, prací
prostedky nebo vosková leštidla.
3. Vyistte skíku spotebie vlažnou
vodou a pak ji vyt
ete do sucha.
4. Vyistte vnitní prostory vyždímaným
hadíkem navlheným v roztoku jedné ajové
lžiky bikarbonátu sodného v pl litru (jedné
pint) vody a pak je vytete do sucha.
5. Dbejte na to, aby se do skíky pro ízení
teploty nedostala žádná voda.
6. Pokud nebudete spotebidelší dobu
používat, vypnte jej a vyjmte potraviny.
Poté spotebivyistte a nechte stát s
pootevenými dvemi.
7. Doporuujeme Vám, abyste pro zvýšení
ochrany vysoce kvalitní povrchové úpravy
vyleštili kovové ásti výrobku (tj.
vnjšek
dveí, boní ásti skíky) silikonovým voskem
(leštidlo na auta).
8. Alespojednou ronodstrate
vysavaem prach, který se usazuje na
kondenzátoru v zadní ásti spotebie.
9. Pravidelnkontrolujte, jestli je tsnní dveí
isté a jestli na nm nezstávají zbytky
potravin.
10.
Nikdy:
• Neistte spotebinevhodnými látkami,
nap. výrobky vyrobenými na bázi nafty.
• Nevystavujte spotebivysokým teplotám.
Nedrhnte a neodírejte spotebimateriály s
brusným úinkem.
11.
Odstranní krytu oddílu pro uložení
mléných výrobka misky ve dveích:
• Chcete-li odstranit kryt oddílu pro uložení
mléných výrobk, nadzvednte kryt o
pibližn2,5 cm a vytáhnte jej ze strany,
která má v krytu otvor.
Chcete
-li vyjmout misku ve dveích,
vyprázdnte ji a pak ji jednoduše vysute
smrem nahoru vzhledem k základn.
12. Dbejte na to, aby byla speciální
plastiková miska v zadní ásti spotebie,
která shromažuje odmraženou vodu, vždy
istá. Pokud chcete tuto nádobu za úelem
vyištní vytáhnout, postupujte následujícím
zpsobem:
• Vypnte spotebivypnutím napájení a
vytažením síové zástrky ze zásuvky.
• Pomocí kleští jemnuvolnte kolík na
kompresoru, aby bylo možno misku
vytáhnout.
• Zvednte nádobu.
• Vyistte ji a vytete do sucha.
•
Namontujte nádobu stejným zpsobem ale
s opaným poadím operací, jako pi
demontáži.
13. Chcete-
li vytáhnout zásuvku, co nejvíce ji
vysute, pak ji naklote nahoru a úpln
vytáhnte.
Zmna smru otevírání dveí
Postupujte podle oíslovaných pokyn
uvedených na obrázku 6.
14
Table of contents
Languages:
Other Beko Refrigerator manuals

Beko
Beko DNE 25020 User manual

Beko
Beko BCNA275K2F User manual

Beko
Beko RCNA406K40WN Instruction Manual

Beko
Beko RDSE465K31W User manual

Beko
Beko RDNE350K20B User manual

Beko
Beko GNE 60520 X User manual

Beko
Beko DS230020S User manual

Beko
Beko BCSA306E4SFN Instruction Manual

Beko
Beko B1804N User manual

Beko
Beko B1RCNA344W User manual

Beko
Beko GN1416223ZX User manual

Beko
Beko RCHE300K20S User manual

Beko
Beko GNE 134620 X User manual

Beko
Beko TSE 1411 User manual

Beko
Beko CSA24031X User manual

Beko
Beko CNA365E40ZGW User manual

Beko
Beko GN1416231JX User manual

Beko
Beko RCSA300K30XP User manual

Beko
Beko CN228121 User manual

Beko
Beko DSE 28010 KLS User manual