3. Cooked dishes must be stored in airtight covered containers and are best
placed on either of the removable shelves.
4. Fresh wrapped produce can be placed on the shelf. Fresh fruit and vegetables
should be cleaned and stored in the crisper bins.
5. Bottles can be placed in the door section.
6. To store raw meat, wrap in polythene bags and place on the lowest shelf. Do
not allow to come into contact with cooked food to avoid contamination. For
safety, only store raw meat for two to three days.
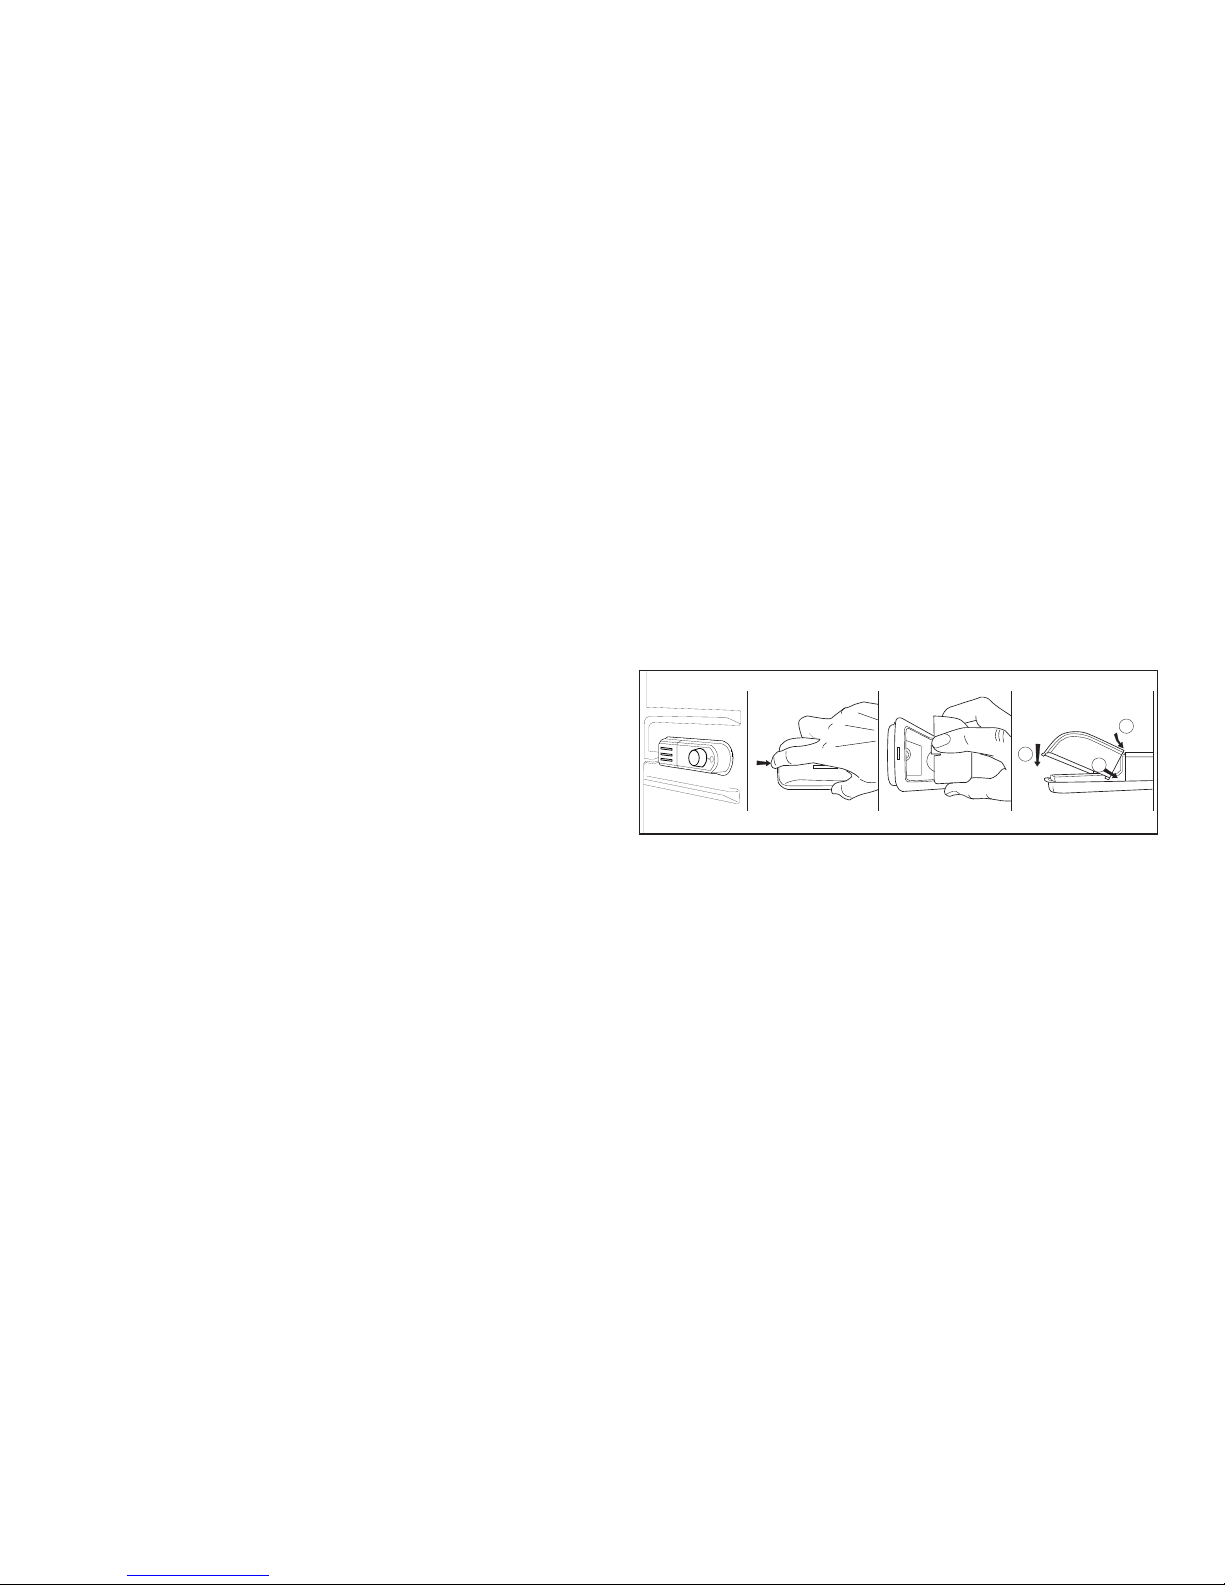
7. Shelves incorporate rear stops and tilting for storing bottles. Lift shelf to clear
grooves when adjusting.
8. To tilt a shelf place the back of the shelf one level below the front of the
shelf. To remove a tilted shelf, first release the back off the grooves and then
pull it.
9. Keep the food packed, wrapped or covered. Allow hot food and beverages
to cool before placing them in the fridge. Do not store explosive substances
in the refrigerator. High proof alcohol must be stored upright in sealed
containers. Left over canned food should not be stored in the can.
10. Fizzy drinks should not be frozen and products such as flavoured water ices
should not be consumed too cold.
11. Some fruit and vegetables suffer damage if kept at temperatures near 0
degrees centigrade. Therefore wrap pineapples, melon, cucumbers,
tomatoes and similar produce in polythene bags.
12. Shelves, racks, crisper bins, dairy compartments, drawers, baskets trays, flaps,
bottle grippers are all removable.
13. Always wrap food using a suitable packaging material before storing in your
appliance to avoid contact with the appliance surface and food remains for
hygiene reasons.
8
TEMPERATURE CONTROL AND ADJUSTMENT
Operating temperatures are controlled by the thermostat and may be set
between 1 and 5, the coldest position.
When the appliance is switched on for the first time, the thermostat should
be adjusted so that, after 24 hours, the average fridge temperature is no
higher than 5°C (41°F ).
We recommend setting the thermostat half-way between the 1 and 5 setting
and monitoring to obtain the desired temperature i. e. towards 5 you will
obtain a colder temperature and vice versa. Some sections of the fridge
may be cooler or warmer ( such as the salad crisper and the top part of
the cabinet ) which is quite normal.
In ambient temperatures above 25°C (77°F), especially in summer, turn the
thermostat knob towards 5. In ambient temperatures below 25°C (77°F)
turn the thermostat knob to a half way position.
Frequent door opening causes internal temperatures to rise, so it is advisable
to close as soon as possible after use.
In case of a temporary ice build up in the fridge compartment reduce the
thermostat setting to 1, monitoring at the same time that the fridge temperature
is maximum +5 degrees C (41 degrees F). Once the ice build up disappears
and the appliance starts auto defrosting again as normal, then you may
increase the thermostat setting, if required. 9
5
4
3
2
1
0
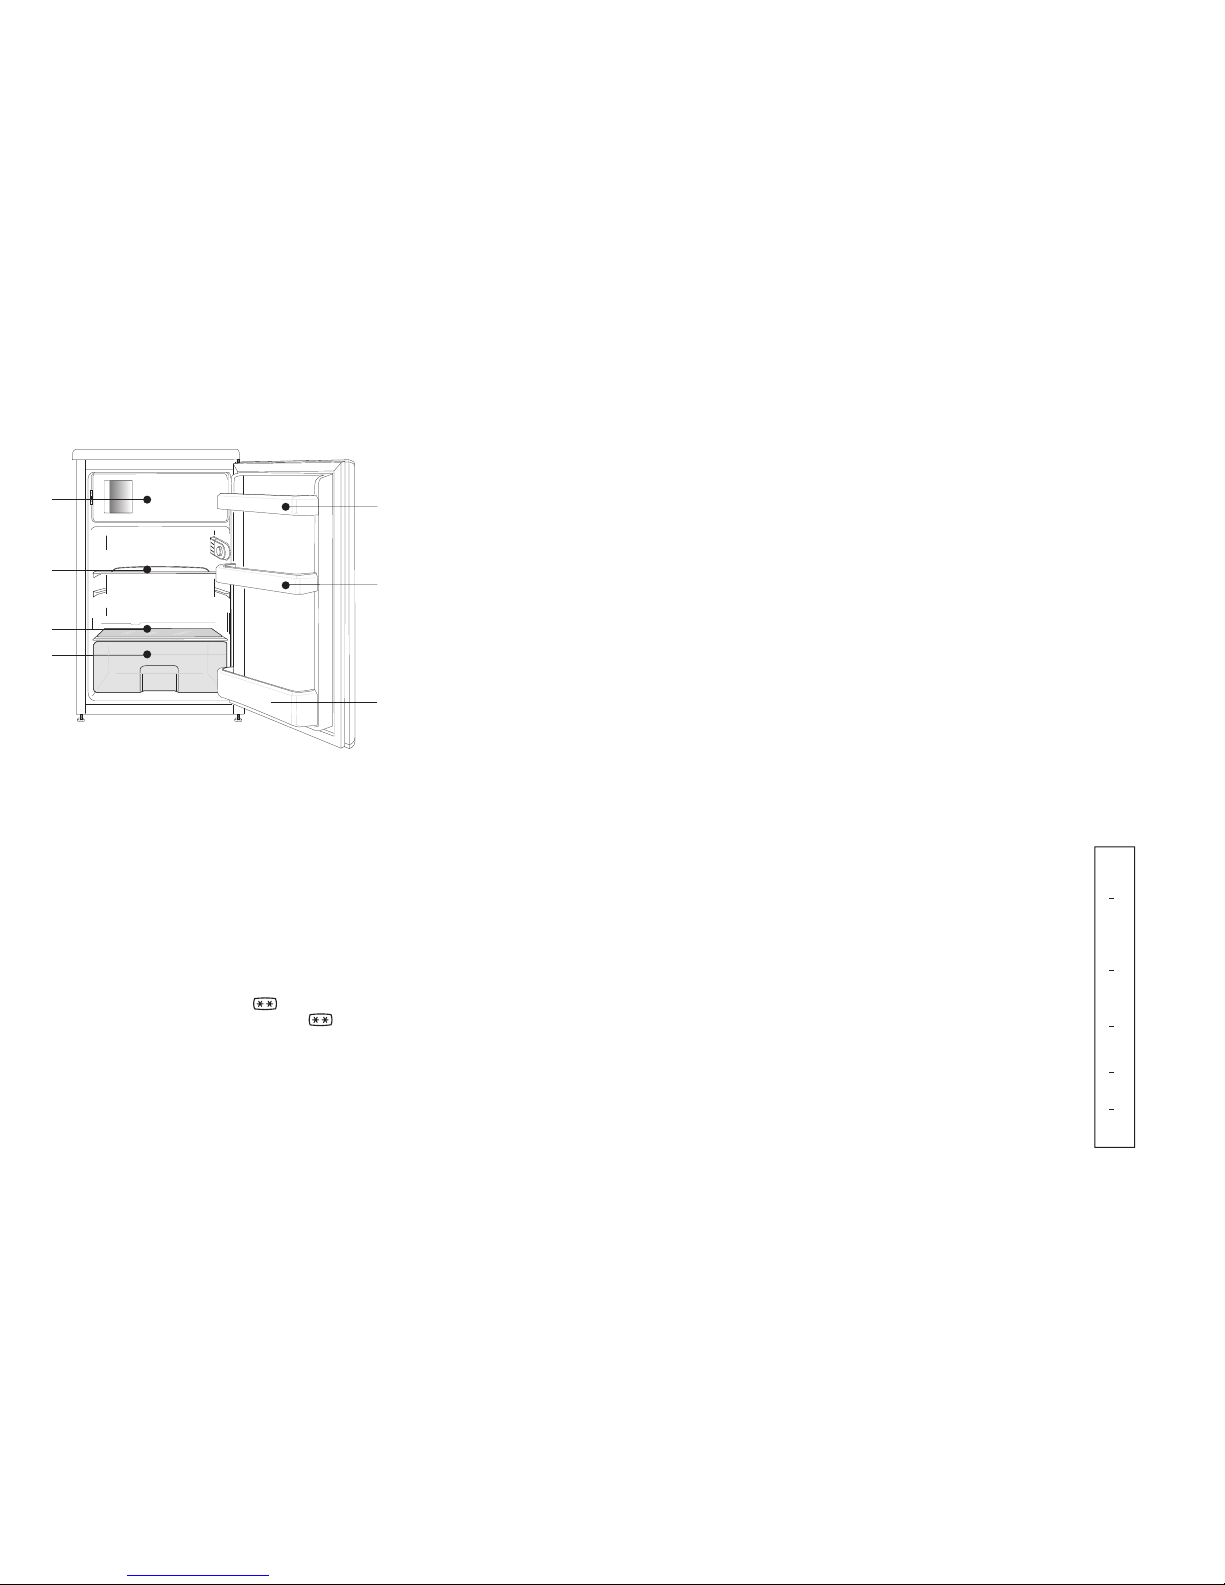
SUGGESTED ARRANGEMENT OF FOOD IN THE FRIDGE
Arrangement Examples (See diagram).
1. Frozen food, rapid cooling of beverages,
making ice cubes.
2. Baked, chilled cooked food, dairy products,
3. Meat, sausages, cold cuts, cans.
4. Fruit, vegetables, salads.
5. Tubes, small bottles and cans.
6. Butter, cheese, dairy products..
7. Beverages, large bottles.
The following guidelines and recommendations are suggested to obtain the best
results and storage hygiene.
1. The frozen food compartment is rated and suitable for the storage of pre-
frozen food. The recommendation for storage as stated on the food
packaging should be observed at all times.
2. The fridge is for the short term storage of fresh food and drinks.
4
2
1
7
5
6
3