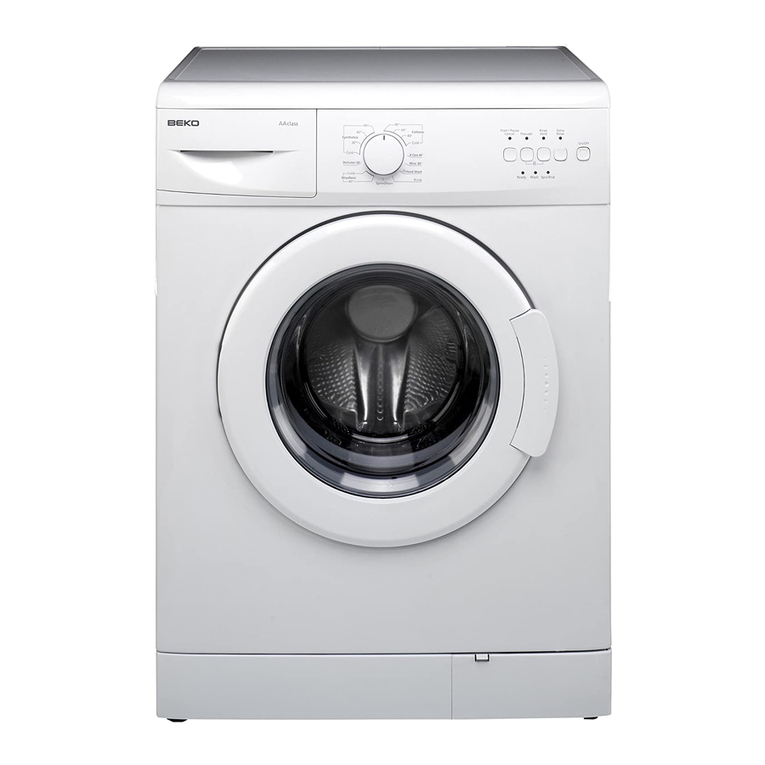
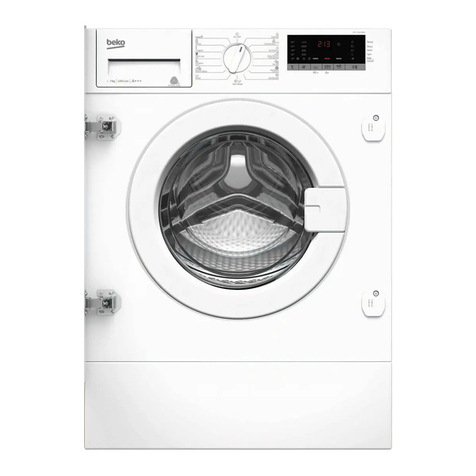
Beko WMB 51221 CS PT User manual

Washing Machine
Plně automatická pračka
Automatická pračka
WMB 51221 CS PT
WMB 51021 CS PT

2EN
1 Important safety instructions
This section contains safety instructions that
will help protect from risk of personal injury
or property damage. Failure to follow these
instructions shall void any warranty.
General safety
• Thisproductshouldnotbeusedbypersons
with physical, sensory or mental disorders
or unlearned or inexperienced people
(including children) unless they are attended
byapersonwhowillberesponsiblefortheir
safety or who will instruct them accordingly
for use of the product.
• Neverplacetheproductonacarpet-
covered floor; otherwise, lack of airflow
beneaththemachinewillcauseelectrical
partstooverheat.Thiswillcauseproblems
with your product.
• Donotoperatetheproductifthepower
cable/plugisdamaged.CalltheAuthorized
ServiceAgent.
• Haveaqualifiedelectricianconnecta
16-Amperefusetotheinstallationlocationof
the product.
• Iftheproducthasafailure,itshouldnot
beoperatedunlessitisrepairedbythe
AuthorizedServiceAgent.Thereistheriskof
electric shock!
• Thisproductisdesignedtoresume
operating in the event of powering on
afterapowerinterruption.Ifyouwishto
canceltheprogramme,see"Cancellingthe
programme" section.
• Connecttheproducttoagroundedoutlet
protectedbyafusecomplyingwiththe
values in the "Technical specifications"
table.Donotneglecttohavethegrounding
installationmadebyaqualifiedelectrician.
Ourcompanyshallnotbeliableforany
damages that will arise when the product is
used without grounding in accordance with
the local regulations.
• Thewatersupplyanddraininghoses
mustbesecurelyfastenedandremain
undamaged. Otherwise, there is the risk of
water leakage.
• Neveropentheloadingdoororremovethe
filter while there is still water in the drum.
Otherwise, risk of flooding and injury from
hot water will occur.
• Donotforceopenthelockedloadingdoor.
Theloadingdoorwillbereadytoopenjusta
few minutes after the washing cycle comes
toanend.Incaseofforcingtheloadingdoor
to open, the door and the lock mechanism
may get damaged.
• Unplugtheproductwhennotinuse.
• Neverwashtheproductbyspreadingor
pouring water onto it! There is the risk of
electric shock!
• Nevertouchtheplugwithwethands!Never
unplugbypullingonthecable,alwayspull
outbygrabbingtheplug.
• Usedetergents,softenersandsupplements
suitableforwashingmachinesonly.
• Followtheinstructionsonthetextiletags
and on the detergent package.
• Theproductmustbeunpluggedduring
installation, maintenance, cleaning and
repairing procedures.
• Alwayshavetheinstallationandrepairing
procedurescarriedoutbytheAuthorized
ServiceAgent.Manufacturershallnotbe
heldliablefordamagesthatmayarisefrom
procedurescarriedoutbyunauthorized
persons.
Intended use
• Thisproducthasbeendesignedfor
domesticuse.Itisnotsuitablefor
commercialuseanditmustnotbeusedout
of its intended use.
• Theproductmustonlybeusedforwashing
and rinsing of laundry that are marked
accordingly.
• Themanufacturerwaivesanyresponsibility
arisen from incorrect usage or transportation.
Children's safety
• Electricalproductsaredangerousforthe
children. Keep children away from the
productwhenitisinuse.Donotletthem
totamperwiththeproduct.Usechildlock
to prevent children from intervening with the
product.
• Donotforgettoclosetheloadingdoor
when leaving the room where the product is
located.
• Storealldetergentsandadditivesinasafe
place away from the reach of the children.

3EN
2 Installation
RefertothenearestAuthorisedServiceAgentfor
installation of the product. To make the product
ready for use, review the information in the
user manual and make sure that the electricity,
tap water supply and water drainage systems
areappropriatebeforecallingtheAuthorized
ServiceAgent.Iftheyarenot,callaqualified
technicianandplumbertohaveanynecessary
arrangements carried out.
CPreparation of the location and electrical,
tap water and waste water installations at
the place of installation is under customer's
responsibility.
B Installationandelectricalconnectionsof
theproductmustbecarriedoutbythe
AuthorizedServiceAgent.Manufacturershall
notbeheldliablefordamagesthatmayarise
fromprocedurescarriedoutbyunauthorized
persons.
APrior to installation, visually check if the
producthasanydefectsonit.Ifso,donot
haveitinstalled.Damagedproductscause
risks for your safety.
C Makesurethatthewaterinletanddischarge
hosesaswellasthepowercablearenot
folded, pinched or crushed while pushing
the product into its place after installation or
cleaning procedures.
Appropriate installation location
• Placethemachineonarigidfloor.Donot
place it on a long pile rug or similar surfaces.
• Totalweightofthewashingmachineandthe
dryer-withfullload-whentheyareplaced
on top of each other reaches to approx.
180 kilograms. Place the product on a solid
and flat floor that has sufficient load carrying
capacity!
• Donotplacetheproductonthepower
cable.
• Donotinstalltheproductatplaceswhere
temperaturemayfallbelow0ºC.
• Placetheproductatleast1cmawayfrom
the edges of other furniture.
Removing packaging reinforcement
Tiltthemachinebackwardstoremovethe
packaging reinforcement. Remove the packaging
reinforcementbypullingtheribbon.
Removing the transportation locks
A Donotremovethetransportation
locksbeforetakingoutthepackaging
reinforcement.
A Removethetransportationsafetybolts
beforeoperatingthewashingmachine,
otherwise,theproductwillbedamaged.
1. Loosenalltheboltswithaspanneruntilthey
rotate freely.
2. Removetransportationsafetyboltsby
turning them gently.
3. AttachthecoverssuppliedintheUser
Manualbagintotheholesontherearpanel.
C Keepthetransportationsafetyboltsinasafe
place to reuse when the washing machine
needstobemovedagaininthefuture.
CNever move the product without the
transportationsafetyboltsproperlyfixedin
place!
Connecting water supply
C Thewatersupplypressurerequiredtorun
theproductisbetween1to10bars(0.1–1
MPa).Itisnecessarytohave10–80litersof
water flowing from the fully open tap in one
minute to have your machine run smoothly.
Attachapressurereducingvalveifwater
pressure is higher.
C Ifyouaregoingtousethedoublewater-inlet
productasasingle(cold)water-inletunit,
you must install the supplied stopper to the
hotwatervalvebeforeoperatingtheproduct.
(Appliesfortheproductssuppliedwitha
blindstoppergroup.)
C Ifyouwanttousebothwaterinletsofthe
product, connect the hot water hose after
removing the stopper and gasket group from
thehotwatervalve.(Appliesfortheproducts
suppliedwithablindstoppergroup.)
A Modelswithasinglewaterinletshouldnot
beconnectedtothehotwatertap.Insuch
a case the laundry will get damaged or the
product will switch to protection mode and
will not operate.
A Donotuseoldorusedwaterinlethoses
onthenewproduct.Itmaycausestainson
your laundry.
1. Connectthespecialhosessuppliedwiththe
product to the water inlets on the product.
Redhose(left)(max.90ºC)isforhotwater
inlet,bluehose(right)(max.25ºC)isforcold
water inlet.
AEnsure that the cold and hot water
connections are made correctly when
installing the product. Otherwise, your
laundry will come out hot at the end of the
washing process and wear out.
4EN
2. Tightenallhosenutsbyhand.Neverusea
wrench when tightening the nuts.
3. Open the taps completely after making
the hose connection to check for water
leaksattheconnectionpoints.Ifanyleaks
occur, turn off the tap and remove the nut.
Retighten the nut carefully after checking
the seal. To prevent water leakages and
damagescausedbythem,keepthetaps
closed when the machine is not in use.
Connecting to the drain
• Theendofthedrainhosemustbedirectly
connected to the wastewater drain or to the
washbasin.
A Yourhousewillbefloodedifthehosecomes
out of its housing during water discharge.
Moreover,thereisriskofscaldingdueto
high washing temperatures! To prevent such
situations and to ensure smooth water intake
and discharge of the machine, fix the end of
the discharge hose tightly so that it cannot
come out.
• Thehoseshouldbeattachedtoaheightof
at least 40 cm, and 100 cm at most.
• Incasethehoseiselevatedafterlayingit
on the floor level or close to the ground
(lessthan40cmabovetheground),water
dischargebecomesmoredifficultandthe
laundry may come out excessively wet.
Therefore,followtheheightsdescribedinthe
figure.
• Topreventflowingofdirtywaterbackinto
the machine and to allow for easy discharge,
do not immerse the hose end into the dirty
waterordriveitinthedrainmorethan15
cm.Ifitistoolong,cutitshort.
• Theendofthehoseshouldnotbebent,
itshouldnotbesteppedonandthehose
mustnotbepinchedbetweenthedrainand
the machine.
• Ifthelengthofthehoseistooshort,useit
byaddinganoriginalextensionhose.Length
ofthehosemaynotbelongerthan3.2m.
To avoid water leak failures, the connection
betweentheextensionhoseandthedrain
hoseoftheproductmustbefittedwellwith
an appropriate clamp as not to come off and
leak.
Adjusting the feet
A Inordertoensurethattheproductoperates
moresilentandvibration-free,itmuststand
levelandbalancedonitsfeet.Balancethe
machinebyadjustingthefeet.Otherwise,
the product may move from its place and
causecrushingandvibrationproblems.
1. Loosenthelocknutsonthefeetbyhand.
2. Adjustthefeetuntiltheproductstandslevel
andbalanced.
3. Tightenalllocknutsagainbyhand.
A Donotuseanytoolstoloosenthelocknuts.
Otherwise, they will get damaged.
Electrical connection
Connecttheproducttoagroundedoutlet
protectedbyafusecomplyingwiththevaluesin
the"Technicalspecifications"table.Ourcompany
shallnotbeliableforanydamagesthatwillarise
when the product is used without grounding in
accordance with the local regulations.
• Connectionmustcomplywithnational
regulations.
• Thevoltageandallowedfuseorbreaker
protection are specified in the “Technical
specifications”section.Ifthecurrentvalueof
thefuseorbreakerinthehouseislessthan
16Amps,haveaqualifiedelectricianinstalla
16Ampfuse.
• Thespecifiedvoltagemustbeequaltoyour
mains voltage.
• Donotmakeconnectionsviaextension
cablesormulti-plugs.
B Damagedpowercablesmustbereplaced
bytheAuthorizedServiceAgents.
First use
Beforestartingtousetheproduct,makesure
that all preparations are made in accordance
withtheinstructionsinsections"Importantsafety
instructions"and"Installation".
To prepare the product for washing laundry,
performfirstoperationinDrumCleaning

5EN
programme.Ifyourmachineisnotfeaturedwith
DrumCleaningprogramme,useCottons-90
programmeandselectAdditionalWaterorExtra
Rinseauxiliaryfunctionsaswell.Beforestarting
the programme, put max. 100 g of powder
anti-limescaleintothemainwashdetergent
compartment(compartmentnr.II).Iftheanti-
limescaleisintabletform,putonlyonetabletinto
compartmentnr.II.Drytheinsideofthebellow
with a clean piece of cloth after the programme
has come to an end.
C Useananti-limescalesuitableforthe
washing machines.
CSome water might have remained in the
productduetothequalitycontrolprocesses
intheproduction.Itisnotharmfulforthe
product.
Disposing of packaging material
Packaging materials are dangerous to children.
Keep packaging materials in a safe place away
from reach of the children.
Packaging materials of the product are
manufacturedfromrecyclablematerials.Dispose
of them properly and sort in accordance with
recycledwasteinstructions.Donotdisposeof
them with normal domestic waste.
Transportation of the product
Unplugtheproductbeforetransporting
it. Remove water drain and water supply
connections.Draintheremainingwaterinthe
productcompletely;see,"Drainingremaining
waterandcleaningthepumpfilter".Install
transportationsafetyboltsinthereverseorder
of removal procedure; see, "Removing the
transportation locks".
CNever move the product without the
transportationsafetyboltsproperlyfixedin
place!
3 Preparation
Things to be done for energy saving
Following information will help you use the
productinanecologicalandenergy-efficient
manner.
• Operatetheproductinthehighest
capacityallowedbytheprogrammeyou
haveselected,butdonotoverload;see,
"Programmeandconsumptiontable".
• Alwaysfollowtheinstructionsonthe
detergent packaging.
• Washslightlysoiledlaundryatlow
temperatures.
• Usefasterprogrammesforsmallquantities
of lightly soiled laundry.
• Donotuseprewashandhightemperatures
for laundry that is not heavily soiled or
stained.
• Donotusedetergentinexcessofthe
amount recommended on the detergent
package.
Sorting the laundry
• Sortlaundryaccordingtotypeoffabric,
colour,anddegreeofsoilingandallowable
water temperature.
• Alwaysobeytheinstructionsgivenonthe
garment tags.
Preparing laundry for washing
• Laundryitemswithmetalattachmentssuch
as,underwiredbras,beltbucklesormetal
buttonswilldamagethemachine.Remove
themetalpiecesorwashtheclothesby
puttingtheminalaundrybagorpillowcase.
• Takeoutallsubstancesinthepocketssuch
as coins, pens and paper clips, and turn
pocketsinsideoutandbrush.Suchobjects
may damage the product or cause noise
problem.
• Putsmallsizeclothessuchasinfant'ssocks
andnylonstockingsinalaundrybagor
pillow case.
• Placecurtainsinwithoutcompressingthem.
Remove curtain attachment items.
• Fastenzippers,sewloosebuttonsand
mend rips and tears.
• Wash“machinewashable”or“hand
washable”labeledproductsonlywithan
appropriate programme.
• Donotwashcoloursandwhitestogether.
New, dark coloured cottons release a lot of
dye.Washthemseparately.
• Useonlydyes/colourchangersand
limescaleremoverssuitableformachine
wash.Alwaysfollowtheinstructionsonthe
package.
• Laundrythataresubjectedtomaterialssuch
as flour, lime dust, milk powder, etc. intensely

6EN
mustbeshakenoffbeforeplacingintothe
machine. Such dusts and powders on the
laundrymaybuildupontheinnerpartsofthe
machine in time and can cause damage.
Correct load capacity
The maximum load capacity depends on the type
of laundry, the degree of soiling and the washing
programme desired.
The machine automatically adjusts the amount
of water according to the weight of the loaded
laundry.
AFollow the information in the “Programme
andconsumptiontable”.Whenoverloaded,
machine's washing performance will drop.
Moreover,noiseandvibrationproblemsmay
occur.
Loading the laundry
• Opentheloadingdoor.
• Placelaundryitemslooselyintothemachine.
• Pushtheloadingdoortocloseuntilyouhear
a locking sound. Ensure that no items are
caught in the door.
CThe loading door is locked while a
programmeisrunning.Thedoorcanonlybe
opened a while after the programme comes
to an end.
A Incaseofmisplacingthelaundry,noise
andvibrationproblemsmayoccurinthe
machine.
Using detergent and softener
Detergent Drawer
The detergent drawer is composed of three
compartments:
-(I)forprewash
-(II)formainwash
–()forsoftener
–(*)inaddition,thereissiphonpieceinthe
softener compartment.
C Thedetergentdispensermaybeintwo
different types according to the model of your
machineasseenabove.
Detergent, softener and other cleaning
agents
• Adddetergentandsoftenerbeforestarting
the washing programme.
• Neveropenthedetergentdrawerwhilethe
washing programme is running!
• Whenusingaprogrammewithoutprewash,
do not put any detergent into the prewash
compartment(compartmentnr.I).
• Inaprogrammewithprewash,donot
putliquiddetergentintotheprewash
compartment(compartmentnr.I).
• Donotselectaprogrammewithprewashif
youareusingadetergentbagordispensing
ball.Placethedetergentbagorthe
dispensingballdirectlyamongthelaundryin
the machine.
• Ifyouareusingliquiddetergent,donot
forgettoplacetheliquiddetergentcupinto
the main wash compartment (compartment
nr.II).
Choosing the detergent type
Thetypeofdetergenttobeuseddependsonthe
typeandcolourofthefabric.
• Usedifferentdetergentsforcolouredand
white laundry.
• Washyourdelicateclothesonlywithspecial
detergents(liquiddetergent,woolshampoo,
etc.) used solely for delicate clothes.
• Washwoolenswithspecialdetergentmade
specifically for woolens.
A Useonlydetergentsmanufactured
specifically for washing machines.
A Donotusesoappowder.
Adjusting detergent amount
Theamountofwashingdetergenttobeused
depends on the amount of laundry, the degree
of soiling and water hardness. Read the
manufacturer's instructions on the detergent
package carefully and follow the dosage values.
• Donotuseamountsexceedingthedosage
quantitiesrecommendedonthedetergent
packagetoavoidproblemsofexcessive
foam, poor rinsing, financial savings and
finally, environmental protection.
• Uselesserdetergentforsmallamountsor
lightly soiled clothes.
• Useconcentrateddetergentsinthe
recommended dosage.
Using softeners
Pour the softener into the softener compartment
of the detergent drawer.
• Usethedosagesrecommendedonthe
package.
• Donotexceedthe(>max<)levelmarkingin
the softener compartment.
• Ifthesoftenerhaslostitsfluidity,diluteit
withwaterbeforeputtingitinthedetergent
drawer.

7EN
Using liquid detergents
If the product contains a liquid detergent
cup:
• Makesurethatyouhaveplacedtheliquid
detergentcupincompartmentnr."II".
• Usethedetergentmanufacturer'smeasuring
cup and follow the instructions on the
package.
• Usethedosagesrecommendedonthe
package.
• Iftheliquiddetergenthaslostitsfluidity,dilute
itwithwaterbeforeputtinginthedetergent
cup.
If the product does not contain a liquid
detergent cup:
• Donotuseliquiddetergentfortheprewash
in a programme with prewash.
• Usethedetergentmanufacturer'smeasuring
cup and follow the instructions on the
package.
• Liquiddetergentstainsyourclotheswhen
usedwithDelayedStartfunction.Ifyouare
goingtousetheDelayedStartfunction,do
notuseliquiddetergent.
Using gel and tablet detergent
Whenusingtablet,gel,etc.detergents,read
the manufacturer's instructions on the detergent
packagecarefullyandfollowthedosagevalues.If
there is not any instruction on the package, apply
the following.
• Ifthegeldetergentthicknessisfluidaland
your machine does not contain a special
liquiddetergentcup,putthegeldetergent
into the main wash detergent compartment
duringfirstwaterintake.Ifyourmachine
containsaliquiddetergentcup,fillthe
detergentintothiscupbeforestartingthe
programme.
• Ifthegeldetergentthicknessisnotfluidalor
intheshapeofcapsuleliquidtablet,putit
directlyintothedrumbeforewashing.
• Puttabletdetergentsintothedetergent
compartmentordirectlyintothedrumbefore
washing.
C Tabletdetergentsmayleaveresiduesinthe
detergentcompartment.Ifyouencounter
suchacase,placethetabletdetergent
betweenthelaundry,closetothelowerpart
of the drum in future washings.
C Usethetabletorgeldetergentwithout
selecting the prewash function.
Using bleaches
• Selectaprogrammewithprewashandadd
thebleachingagentatthebeginningof
theprewash.Donotputdetergentinthe
prewashcompartment.Asanalternative
application, select a programme with extra
rinseandaddthebleachingagentwhilethe
machine is taking water from the detergent
compartment during first rinsing step.
• Donotusebleachingagentanddetergentby
mixing them.
• Usejustalittleamount(approx.50ml)of
bleachingagentandrinsetheclothesvery
wellasitcausesskinirritation.Donotpour
thebleachingagentontotheclothesanddo
not use it for coloured clothes.
• Whenusingoxygenbasedbleaches,
follow the instructions on the package and
select a programme that washes at a lower
temperature.
• Oxygenbasedbleachescanbeused
together with detergents; however, if its
thickness is not the same with the detergent,
put the detergent first into the compartment
nr."II"inthedetergentdrawerandwaituntil
the detergent flows while the machine is
takinginwater.Addthebleachingagentfrom
the same compartment while the machine is
still taking in water.
Using limescale remover
• Whenrequired,uselimescaleremovers
manufactured specifically for washing
machines only.
• Alwaysfollowinstructionsonthepackage.

8EN
4 Operating the product
Control panel
1-ProgrammeSelectionknob(Uppermost
positionOn/Off)
2-ProgrameFollow-upindicator
3-TemperatureAdjustmentbutton
4-SpinSpeedadjustmentbutton
1 2
76543
5-AuxiliaryFunctionbuttons
6-DelayedStartbutton(insomemodels)
7-Start/Pausebutton
Preparing the machine
Makesurethatthehosesareconnectedtightly.
Plug in your machine. Turn the tap on completely.
Placethelaundryinthemachine.Adddetergent
andfabricsoftener.
Programme selection
Selecttheprogrammesuitableforthetype,
quantityandsoilingdegreeofthelaundry
in accordance with the "Programme and
consumptiontable"andthetemperaturetable
below.
90˚C Heavilysoiledwhitecottons
andlinens.(coffeetablecovers,
tableclothes,towels,bedsheets,
etc.)
60˚C
Normally soiled, coloured, fade
proof cottons or synthetic clothes
(shirt, nightgown, pajamas, etc.)
and lightly soiled white linens
(underwear, etc.)
40˚C-
30˚C-
Cold
Blendedlaundryincluding
delicate textile (veil curtains, etc.),
synthetics and woolens.
Select the desired programme with the
ProgrammeSelectionbutton.
CProgrammes are limited with the highest spin
speed appropriate for that particular type of
fabric.
C Whenselectingaprogramme,always
considerthetypeoffabric,colour,degreeof
soilingandpermissiblewatertemperature.
C Alwaysselectthelowestrequired
temperature.Highertemperaturemeans
higher power consumption.
CFor further programme details, see
"Programmeandconsumptiontable".
Main programmes
Dependingonthetypeoffabric,usethe
following main programmes.
• Bavlna (Cottons)
Usethisprogrammeforyourcottonlaundry
(suchasbedsheets,duvetandpillowcasesets,
towels,bathrobes,underwear,etc.).Yourlaundry
willbewashedwithvigorouswashingactionfora
longer washing cycle.
• Syntetika (Synthetics)
Usethisprogrammetowashyoursynthetic
clothes(shirts,blouses,synthetic/cottonblends,
etc.).Itwasheswithagentleactionandhasa
shorterwashingcyclecomparedtotheCottons
programme.

9EN
Forcurtainsandtulle,usetheSynthetic40˚C
programmewithprewashandanti-creasing
functionsselected.Astheirmeshedtexture
causesexcessivefoaming,washtheveils/tulle
byputtinglittleamountofdetergentintothemain
washcompartment.Donotputdetergentinthe
prewash compartment.
• Vlna (Woollens)
Usethisprogrammetowashyourwoolen
clothes. Select the appropriate temperature
complyingwiththetagsofyourclothes.Use
appropriate detergents for woolens.
Additional programmes
For special cases, additional programmes are
availableinthemachine.
C Additionalprogrammesmaydifferaccording
to the model of the machine.
• Bavlna Eco (Cotton Economic)
Usethisprogrammetowashyourlaundry
washableincottonsprogrammeforalonger
time, still with a very good performance for saving
purposes.
C CottonsEcoprogrammeconsumes
less energy compared to other cottons
programmes.
• Babycare
Increasedhygieneisprovidedbyalonger
heatingperiodandanadditionalrinsecycle.Itis
recommendedforbabyclothesandclothesworn
byallergicpeople.
• Ruční (Hand wash)
Usethisprogrammetowashyourwoolen/
delicateclothesthatbear“notmachine-
washable”tagsandforwhichhandwashis
recommended.Itwasheslaundrywithavery
gentle washing action to not to damage clothes.
• Denní praní (Quick+Daily)
Usethisprogrammetoquicklywashyourlightly
soiled cotton clothes.
• Tmavé prádlo (Darkcare)
Usethisprogrammetowashyourdarkcoloured
laundry, or the coloured laundry that you do not
want them get faded. This programme washes
your laundry with low mechanical movements
andatlowtemperature.Werecommendyouto
useliquiddetergentorwoolenshampoofordark
coloured laundry.
• Mix 40
Usethisprogrammetowashyourcottonand
synthetic clothes together without sorting them.
Special programmes
For specific applications, select any of the
following programmes.
• Máchání (Rinse)
Usethisprogrammewhenyouwanttorinseor
starch separately.
• Odstřeďování + Vypouštění (Spin + Drain)
Usethisprogrammetoapplyanadditionalspin
cycle for your laundry or to drain the water in the
machine.
Beforeselectingthisprogramme,selectthe
desiredspinspeedandpressStart/Pausebutton.
First, the machine will drain the water inside of
it. Then, it will spin the laundry with the set spin
speed and drain the water coming out of them.
Ifyouwishtodrainonlythewaterwithout
spinning your laundry, select the Pump+Spin
programme and then select the No Spin function
withthehelpofSpinSpeedAdjustmentbutton.
PressStart/Pausebutton.
C Usealowerspinspeedfordelicatelaundries.
Temperature selection
Wheneveranewprogrammeisselected,the
recommended temperature for the selected
programme appears on the temperature indicator.
To decrease the temperature, press the
TemperatureAdjustmentbutton.Temperaturewill
decrease gradually.
C Iftheprogrammehasnotreached
the heating step, you can change the
temperature without switching the machine
to Pause mode.
Spin speed selection
Wheneveranewprogrammeisselected,the
recommended spin speed of the selected
programme is displayed on the spin speed
indicator.
To decrease the spin speed, press the Spin
SpeedAdjustmentbutton.Spinspeeddecreases
gradually. Then, depending on the model of the
product,"RinseHold"and"NoSpin"options
appearonthedisplay.See"Auxiliaryfunction
selection" section for explanations of these
options.
C Iftheprogrammehasnotreachedthe
spinning step, you can change the speed
without switching the machine to Pause
mode.

10 EN
Programme and consumption table
• Selectable
* Automaticallyselected,nocanceling.
** EnergyLabelprogramme(EN60456)
*** Ifmaximumspinspeedofthemachineislowerthenthisvalue,youcanonlyselectuptothe
maximum spin speed.
C Waterandpowerconsumptionmayvarysubjecttothechangesinwaterpressure,water
hardnessandtemperature,ambienttemperature,typeandamountoflaundry,selectionof
auxiliary functions and spin speed, and changes in electric voltage.
CYou can see the washing time of the programme you have selected on the display of the machine.
Itisnormalthatsmalldifferencesmayoccurbetweenthetimeshownonthedisplayandthereal
washing time.
C Theauxiliaryfunctionsinthetablemayvaryaccordingtothemodelofyourmachine.
EN 2Auxiliaryfunctions
Programme
Max.Load(kg)
ProgrammeDuration(~min)
WaterConsumption(l)
EnergyConsumption(kWh)
Spin speed (rpm)
Prewash
Rychlé praní
Rinse Plus
Anti-Creasing
RinseHold
Soaking
PET program
Temperature
Bavlna 90 5147 66 2.25 max • • • • • • • Cold-90
Bavlna 60 5118 66 1.45 max • • • • • • • Cold-90
Bavlna 40 598 66 0.85 max • • • • • • • Cold-90
BavlnaEco 60** 5 151 47 0.85 max • • • • • • • 40-60
Dennípraní 90 588 55 1.9 max*** • • Cold-90
Dennípraní 60 5 58 55 1max*** • • Cold-90
Dennípraní 30 528 55 0.2 max*** • • Cold-90
Tmavé prádlo 40 2.5 107 58 0.45 800 * • Cold-40
Mix40 40 3 115 45 0.5 800 • • • • • • • Cold-40
Ruční 30 1 43 30 0.15 600 Cold-30
Vlna 40 1.5 60 40 0.3 600 • • Cold-40
Babycare 90 5 165 85 1.9 max • * • • 30-90
Syntetika 60 2.5 116 45 0.9 800 • • • • • • • Cold-60
Syntetika 40 2.5 106 45 0.42 800 • • • • • • • Cold-60

11 EN
Auxiliary function selection
Usethefollowingauxiliaryfunctionsaccording
to your daily needs. Select the desired auxiliary
functionsbeforestartingtheprogramme.
Furthermore, you may also select or cancel
auxiliaryfunctionsthataresuitabletotherunning
programmewithoutpressingtheStart/Pause
buttonwhenthemachineisoperating.Forthis,
themachinemustbeinastepbeforetheauxiliary
function you are going to select or cancel.
Iftheauxiliaryfunctioncannotbeselectedor
canceled, light of the relevant auxiliary function will
blink3timestowarntheuser.
C Somefunctionscannotbeselectedtogether.
Forexample,PrewashandQuickWash.
C Ifasecondauxiliaryfunctionconflictingwith
thefirstoneisselectedbeforestartingthe
machine,thefunctionselectedfirstwillbe
canceled and the second auxiliary function
selection will remain active. For example,
ifyouwanttoselectQuickWashafteryou
haveselectedthePrewash,Prewashwillbe
canceledandQuickWashwillremainactive.
C Anauxiliaryfunctionthatisnotcompatible
withtheprogrammecannotbeselected.
(See."Programmeandconsumptiontable")
C AuxiliaryFunctionbuttonsmayvary
according to the model of the machine.
• Prewash
APrewashisonlyworthwhileforheavilysoiled
laundry. Not using the Prewash will save energy,
water, detergent and time.
CPrewash without detergent is recommended
for tulle and curtains.
• Rychlé praní (Quick Wash)
ThisfunctioncanbeusedinCottonsand
Syntheticsprogrammes.Itdecreasesthe
washingtimesandalsothenumberofrinsing
steps for lightly soiled laundry.
C Whenyouselectthisfunction,loadyour
machine with half of the maximum laundry
specifiedintheprogrammetable.
• Rinse Plus
Thisfunctionenablesthemachinetomake
another rinsing in addition to the one already
made after the main wash. Thus, the risk for
sensitiveskins(babies,allergicskins,etc.)tobe
effectedbytheminimaldetergentremnantson
thelaundrycanbereduced.
• Soaking
TheSoakingauxiliaryfunctionensuresbetter
removalofstainsingrainedintotheclothesby
holding them in the detergent water prior to
startup of the programme.
• PET program (Pet hair removal)
This function helps you to remove the pet hairs
that remain on your clothes.
Whenthisfunctionisselected,yourmachine
addspre-washandadditionalrinsingstepsto
the normal program cycle. Thus, pet hairs are
removedmoreeffectivelybyperformingthe
washing with more water (30%).
ANever wash your pets in your washing
machine.
Delayed Start(Insomemodelsonly)
WiththeDelayedStartfunctionthestartupof
theprogrammemaybedelayedupto3,6or9
hours.
C Donotuseliquiddetergentswhenyouset
DelayedStart!Thereistheriskofstainingof
the clothes.
Open the loading door, place the laundry and put
detergent, etc. Select the washing programme,
temperature,spinspeedand,ifrequired,the
auxiliaryfunctions.Setthedesiredtimeby
pressingtheDelayedStartbutton.Whenthe
buttonispressedonce,3hoursdelayedstart
isselected.Whenthesamebuttonispressed
again, 6 hours delay is selected, and when it
is pressed for the third time, 9 hours delayed
startisselected.IfyoupresstheDelayedStart
buttononceagain,DelayedStartfunctionwillbe
canceled.PressStart/Pausebutton.Previous
delayed start time light turns off and next delayed
starttimelightturnsonafterevery3hours.Atthe
end of the countdown, all delayed start lights will
turn off and the selected programme will start.
C Additionallaundrymaybeloadedduringthe
delayed start period.
Changing the Delayed Start period
PressDelayedStartbutton.Everytimethebutton
ispressed,theperiodwillchangein3-hour
increments and the light of the selected delayed
start time will turn on.
Canceling the Delayed Start function
Ifyouwanttocancelthedelayedstartcountdown
and start the programme immediately:
SettheDelayedStartperiodtozero(alldelayed
start period lights will turn off) or turn the
ProgrammeSelectionknobtoanyprogramme.
Thus,DelayedStartfunctionwillbecanceled.
TheEnd/Cancellightflashescontinuously.
Then, select the programme you want to run
again.PressStart/Pausebuttontostartthe
programme.
Starting the programme
PressStart/Pausebuttontostartthe
programme.Programmefollow-uplightshowing
the startup of the programme will turn on.
C Ifnoprogrammeisstartedornokeyis
pressed within 1 minute during programme
selection process, the machine will switch
to Pause mode and the illumination level of
the temperature, speed and loading door
indicator lights will decrease. Other indicator

12 EN
lights and indicators will turn off. Once the
ProgrammeSelectionknobisrotatedor
anybuttonispressed,indicatorlightsand
indicators will turn on again.
Child Lock
Usechildlockfunctiontopreventchildrenfrom
tampering with the machine. Thus you can avoid
any changes in a running programme.
C IftheProgrammeSelectionknobisrotated
when the child lock is active, the lights on the
1st and 2ndauxiliaryfunctionbuttonswillblink
3 times. The child lock does not allow any
change in the programmes and the selected
temperature, speed and auxiliary functions.
CEven if another programme is selected with
theProgrammeSelectionknobwhilethe
ChildLockisactive,previouslyselected
programme will continue running.
C WhentheChildLockisactiveandthe
machine is running, you can switch the
machine to Pause mode without deactivating
theChildLockbyturningtheProgramme
SelectionknobtoOn/Offposition.When
youturntheProgrammeSelectionknob
afterwards, the programme will resume.
To activate the Child Lock:
1. Press and hold 1st and 2ndAuxiliaryFunction
buttonsfor3seconds.Thelightsonthe1st and
2ndAuxiliaryFunctionbuttonswillflashwhileyou
keepthebuttonspressedfor3seconds.
TodeactivatetheChildLock:
Press and hold 1st and 2nd auxiliary function
buttonsfor3secondswhileanyprogrammeis
running. The lights on the 1st and 2ndAuxiliary
Functionbuttonswillflashwhileyoukeepthe
buttonspressedfor3seconds.
C Inadditiontothemethodabove,to
deactivatetheChildLock,switchthe
ProgrammeSelectionknobtoOn/Off
position when no programme is running, and
select another programme.
C Whenthepowerisrestoredafterapower
failure or after your machine is unplugged
andpluggedinagain,theChildLockwillnot
bedeactivatedwhenthemachineresumes
operating.
Progress of programme
Progressofarunningprogrammecanbe
followedfromtheProgrammeFollow-upindicator.
Atthebeginningofeveryprogrammestep,the
relevant indicator light will turn on and light of the
completed step will turn off.
You can change the auxiliary functions, speed
and temperature settings without stopping the
programme flow while the programme is running.
To do this, the change you are going to make
mustbeinastepaftertherunningprogramme
step.Ifthechangeisnotcompatible,relevant
lights will flash for 3 times.
C Ifthemachinedoesnotpasstothespinning
step,RinseHoldfunctionmightbeactive
ortheautomaticunbalancedloaddetection
systemmightbeactivatedduetothe
unbalanceddistributionofthelaundryinthe
machine.
Loading door lock
There is a locking system on the loading door of
the machine that prevents opening of the door in
caseswhenthewaterlevelisunsuitable.
Loading door light will start flashing when the
machineisswitchedtoPausemode.Machine
checksthelevelofthewaterinside.Ifthelevelis
suitable,LoadingDoorlightilluminatessteadily
within1-2minutesandtheloadingdoorcanbe
opened.
Ifthelevelisunsuitable,LoadingDoorlightturns
offandtheloadingdoorcannotbeopened.If
youareobligedtoopentheLoadingDoorwhile
theLoadingDoorlightisoff,youhavetocancel
thecurrentprogramme;see"Cancelingthe
programme".
Changing the selections after
programme has started
Switching the machine to pause mode
PresstheStart/Pausebuttontoswitchthe
machine to pause mode while a programme is
running. The light of the step which the machine
isinstartsflashingintheProgrammeFollow-up
indicatortoshowthatthemachinehasbeen
switched to the pause mode.
Also,whentheloadingdoorisreadytobe
opened,LoadingDoorlightwillalsoilluminate
continuously in addition to the programme step
light.
Changing the speed and temperature
settings for auxiliary functions
Dependingonthesteptheprogrammehas
reached, you may cancel or activate the auxiliary
functions;see,"Auxiliaryfunctionselection".
You may also change the speed and temperature
settings; see, "Spin speed selection" and
"Temperature selection".
C Ifnochangeisallowed,therelevantlightwill
flash for 3 times.
Adding or taking out laundry
PresstheStart/Pausebuttontoswitchthe
machinetopausemode.Theprogrammefollow-
up light of the relevant step during which the
machine was switched into the pause mode will
flash.WaituntiltheLoadingDoorcanbeopened.
OpentheLoadingDoorandaddortakeoutthe
laundry.Closetheloadingdoor.Makechanges
in auxiliary functions, temperature and speed
settingsifnecessary.PressStart/Pausebuttonto
start the machine.

13 EN
5 Maintenance and cleaning
Servicelifeoftheproductextendsandfrequently
facedproblemsdecreaseifcleanedatregular
intervals.
Cleaning the detergent drawer
Cleanthedetergentdraweratregularintervalsas
shownbelowinordertopreventaccumulationof
powder detergent in time.
Press the dotted point on the siphon in the
softener compartment and pull towards you until
the compartment is removed from the machine.
C Ifmorethannormalamountofwaterand
softener mixture starts to gather in the
softenercompartment,thesiphonmustbe
cleaned.
Washthedetergentdrawerandthesiphonwith
plentyoflukewarmwaterinawashbasin.Wear
protectiveglovesoruseanappropriatebrushto
avoid touching of the residues in the drawer with
yourskinwhencleaning.Insertthedrawerback
into its place after cleaning and make sure that it
is seated well.
Cleaning the water intake filters
There is a filter at the end of each water intake
valve at the rear of the machine and also at
the end of each water intake hose where they
are connected to the tap. These filters prevent
foreignsubstancesanddirtinthewatertoenter
thewashingmachine.Filtersshouldbecleaned
as they do get dirty.
Closethetaps.Removethenutsofthewater
intake hoses to access the filters on the water
intakevalves.Cleanthemwithanappropriate
brush.Ifthefiltersaretoodirty,takethemout
bymeansofpliersandcleanthem.Takeoutthe
filters on the flat ends of the water intake hoses
together with the gaskets and clean thoroughly
under running water. Replace the gaskets and
filters carefully in their places and tighten the hose
nutsbyhand.
Draining remaining water and
cleaning the pump filter
The filter system in your machine prevents solid
itemssuchasbuttons,coinsandfabricfibers
clogging the pump impeller during discharge of
Canceling the programme
To cancel the programme, turn the Programme
Selectionknobtoselectanotherprogramme.
Previousprogrammewillbecanceled.End/
Cancellightwillflashcontinuouslytonotifythat
theprogrammehasbeencanceled.
Your machine will end the programme when you
turntheProgrammeSelectionknob;however,
itdoesnotdrainthewaterinside.Whenyou
select and start a new programme, the newly
selected programme will start depending on the
step the previous programme was canceled in.
For example, it may take in additional water or
continue to wash with the water inside.
C Dependingonthestepwherethe
programme was canceled in, you may have
to put detergent and softener again for the
programme you have selected anew.
Standby mode
Whenthemachinedoesnotmakeanywashing
for approximately 4 minutes, it switches to
Standbymodetosaveenergy.Unnecessary
indicator lights and indicators will turn off in this
mode. Thus, maximum energy saving is ensured.
ToexittheStandbymode,turntheProgramme
Selectionknoborjustpressanybutton.

14 EN
washingwater.Thus,thewaterwillbedischarged
withoutanyproblemandtheservicelifeofthe
pump will extend.
Ifthemachinefailstodrainwater,thepumpfilter
isclogged.Filtermustbecleanedwheneverit
iscloggedorinevery3months.Watermustbe
drained off first to clean the pump filter.
Inaddition,priortotransportingthemachine
(eg., when moving to another house) and in case
offreezingofthewater,watermayhavetobe
drained completely.
A Foreignsubstancesleftinthepumpfiltermay
damage your machine or may cause noise
problem.
Inordertocleanthedirtyfilteranddischargethe
water:
Unplugthemachinetocutoffthesupplypower.
ATemperature of the water inside the machine
mayriseupto90ºC.Toavoidburningrisk,
filtermustbecleanedafterthewaterinthe
machine cools down.
Openthefiltercap.Ifthefiltercapiscomposed
oftwopieces,pressthetabonthefiltercap
downwards and pull the piece out towards
yourself.
Ifthefiltercapisonepiece,pullthecapfromboth
sides at the top to open.
C Youcanremovethefiltercoverbyslightly
pushing downwards with a screwdriver,
throughthegapabovethefiltercover.
Some of our products have emergency draining
hose and some does not have. Follow the steps
belowtodischargethewater.
Dischargingthewaterwhentheproducthasan
emergency draining hose:
Pull the emergency draining hose out from its
seat Place a large container at the end of the
hose.Drainthewaterintothecontainerbypulling
outtheplugattheendofthehose.Whenthe
containerisfull,blocktheinletofthehoseby
replacingtheplug.Afterthecontainerisemptied,
repeattheaboveproceduretocontinuedraining
thewaterfromthemachine.Whendrainingof
waterisfinished,closetheendbytheplugagain
and fix the hose in its place. Turn the pump filter
to take it out.
Dischargingthewaterwhentheproductdoesnot
have an emergency draining hose:
Place a large container in front of the filter to
catch water from the filter. Loosen pump filter
(anticlockwise) until water starts to flow. Fill the
flowing water into the container you have placed
infrontofthefilter.Alwayskeepapieceofcloth
handytoabsorbanyspilledwater.Whenthe
water inside the machine is finished, take out the
filtercompletelybyturningit.
Cleananyresiduesinsidethefilteraswellas
fibers,ifany,aroundthepumpimpellerregion.
Installthefilter.
A Ifyourproducthasawaterjetfeature,be
sure to fit the filter into its housing in the
pump. Never force the filter while installing it
into its housing. Seat the filter into its place
completely. Otherwise, water may leak from
the filter cap.
Ifthefiltercapiscomposedoftwopieces,close
thefiltercapbypressingonthetab.Ifitisone
piece,seatthetabsinthelowerpartintotheir
places and press the upper part to close.

15 EN
WMB51221CSPT WMB51021CSPT
5 5
84 84
60 60
45 45
62 60
230V/50Hz 230V/50Hz
10 10
2200 2200
1200 1000
6 Technical specifications
C Technicalspecificationsmaybechangedwithoutpriornoticetoimprovethequalityoftheproduct.
CFigures in this manual are schematic and may not match the product exactly.
C Valuesstatedontheproductlabelsorinthedocumentationaccompanyingitareobtainedin
laboratoryconditionsinaccordancewiththerelevantstandards.Dependingonoperationaland
environmental conditions of the product, these values may vary.
Models
Maximumdrylaundrycapacity(kg)
Height(cm)
Width(cm)
Depth(cm)
Net weight (±4 kg.)
Electricalinput(V/Hz)
Totalcurrent(A)
Totalpower(W)
Spin speed (rpm max.)

16 EN
7 Troubleshooting
Programmecannotbestartedorselected.
• Washingmachinehasswitchedtoselfprotectionmodeduetoasupplyproblem(linevoltage,
waterpressure,etc.).>>>Press and hold Start / Pause button for 3 seconds to reset the
machine to factory settings. (See. "Canceling the programme")
Waterinthemachine.
• Somewatermighthaveremainedintheproductduetothequalitycontrolprocessesinthe
production.>>>This is not a failure; water is not harmful to the machine.
Machinevibratesormakesnoise.
• Machinemightbestandingunbalanced.>>>Adjust the feet to level the machine.
• Ahardsubstancemighthaveenteredintothepumpfilter.>>>Clean the pump filter.
• Transportationsafetyboltsarenotremoved.>>>Remove the transportation safety bolts.
• Laundryquantityinthemachinemightbetoolittle.>>>Add more laundry to the machine.
• Machinemightbeoverloadedwithlaundry.>>>Take out some of the laundry from the
machine or distribute the load by hand to balance it homogenously in the machine.
• Machinemightbeleaningonarigiditem.>>>Make sure that the machine is not leaning on
anything.
Machinestoppedshortlyaftertheprogrammestarted.
• Machinemighthavestoppedtemporarilyduetolowvoltage.>>>It will resume running when
the voltage restores to the normal level.
Programme time does not countdown. (On models with display)
• Timermaystopduringwaterintake.>>>Timer indicator will not countdown until the machine
takes in adequate amount of water. The machine will wait until there is sufficient amount
of water to avoid poor washing results due to lack of water. Timer indicator will resume
countdown after this.
• Timermaystopduringheatingstep.>>>Timer indicator will not countdown until the machine
reaches the selected temperature.
• Timermaystopduringspinningstep.>>>Automatic unbalanced load detection system might
be activated due to the unbalanced distribution of the laundry in the drum.
C Machinedoesnotswitchtospinningstepwhenthelaundryisnotevenlydistributedinthe
drum to prevent any damage to the machine and to its surrounding environment. Laundry
shouldberearrangedandre-spun.
Foam is overflowing from the detergent drawer.
• Toomuchdetergentisused.>>>Mix 1 tablespoonful softener and ½ l water and pour into
the main wash compartment of the detergent drawer.
A Ifyoucannoteliminatetheproblemalthoughyoufollowtheinstructionsinthissection,consult
yourdealerortheAuthorizedServiceAgent.Nevertrytorepairanonfunctionalproductyourself.
2820521603_EN/070910.1320


18 CZ
1 Důležité bezpečnostní pokyny
Tentooddílobsahujebezpečnostnípokyny,které
pomohousochranoupředzraněnímosobnebo
poškozenímmajetku.Nedodrženítěchtopokynů
způsobíztrátunárokunačerpánízáruky.
Obecné bezpečnostní pokyny
• Tentovýrobekbynemělypoužívatosoby
sfyzickými,smyslovýmičiduševními
poruchamineboneproškolenéčinezkušené
osoby(včetnědětí),pokudjimnepomáhá
osobaodpovědnázajejichbezpečnostnebo
někdo,kdojeřádněnavedepřipoužívání
výrobku.
• Nikdynestavtevýrobeknapodlahu
pokrytoukobercem;jinakbydošlok
přehříváníelektrickýchsoučástekvlivem
nedostatečnéhoprouděnívzduchupod
přístrojem.Tímbymohlyvzniknoutpotížes
vaší pračkou.
• Nepoužívejtestroj,pokudjenapájecíkabel
nebozástrčkapoškozena.Kontaktujte
autorizovanýservis.
• Požádejtekvalifikovanéhoelektrikáře,
abynamontovalpojistku16Adooblasti
instalacevýrobku.
• Pokuddojdekporuševýrobku,nemělbyse
používat,dokudjejneopravíautorizovaný
servis.Hrozírizikozásahuelektrickým
proudem!
• Tentovýrobekbymělpokračovatvprovozu
popřípadnémvýpadkuelektrickéenergie.
Pokudsipřejeteprogramzrušit,postupujte
podle oddílu "Stornování programu".
• Připojtevýrobekkuzemněnézásuvce
chráněnépojistkouvsouladushodnotami
vtabulce"Technickéspecifikace".
Nezapomeňtezajistit,abyvámuzemnění
provedlkvalifikovanýelektrikář.Naše
společnostneneseodpovědnostzažádné
škodyvzniklétím,ževýrobekpoužívátebez
uzemněnívsouladusmístnímipředpisy.
• Hadicepropřívodaodvodvodymusejíbýt
řádněupevněnyazůstatbezpoškození.
Jinakhrozírizikoúnikuvody.
• Nikdyneotevírejtevkládacídvířkaa
nevyjímejtefiltr,kdyžjevodavbubnu.Jinak
vznikárizikozaplavenínebozraněnívlivem
horké vody.
• Neotevírejtezamčenávkládacídvířkasilou.
Vkládacídvířkabudoupřipravenakotevření
pár minut po skončení pracího cyklu. V
případě,žeotevřetevkládacídvířkasilou,
můžedojítkpoškozenídveříamechanismu
zámku.
• Pokudvýrobeknepoužíváte,odpojtejej.
• Nikdynemyjtevýrobektak,ženanějnalijete
vodu!Hrozírizikozásahuelektrickým
proudem!
• Nikdysenedotýkejtezásuvkymokrýma
rukama! Nikdy neodpojujte přístroj taháním
zakabel,vždytahejteažzazástrčku.
• Používejtepracíprášky,avivážeadoplňky
vhodnépouzepropračky.
• Dodržujtepokynynaoděvechinaobalech
pracíchprášků.
• Výrobekjenutnoodpojitběheminstalace,
údržby,čištěníaoprav.
• Činnostiinstalaceaopravmusívždy
provádětzástupciautorizovanéhoservisu.
Výrobceneodpovídázaškodyvzniklé
činnostmi,kteréprovedouneoprávněné
osoby.
Určené použití
• Tentoproduktbylvyrobenprodomácí
použití.Nenívhodnýprokomerčnípoužitía
nesmísepoužívatmimostanovenépoužití.
• Spotřebičlzepoužívatjennamytía
oplachovánílátekspříslušnýmoznačením.
• Výrobceneneseodpovědnostzanesprávné
používáníčipřepravu.
Bezpečnost dětí
• Elektrickévýrobkyjsounebezpečnéproděti.
Udržujtedětimimodosahstroje,kdyžjev
provozu.Nedovoltejimhrátsisestrojem.
Pomocídětskéhozámkuzabránítedětem,
abysihrálysestrojem.
• Nezapomeňtezavíratdvířka,kdyžodejdetez
místnosti,kdejevýrobekumístěn.
• Všechnypracíprostředkyadoplňky
skladujtenabezpečnémmístěmimodosah
dětí.

19 CZ
2 Instalace
Oinstalaciproduktupožádejtenejbližší
autorizovanýservis.Abybylvýrobekpřipravenk
použití,pročtětesiinformacevnávodukpoužitía
zajistěte,abybylaelektřina,přívodvodyasystém
proodvodvodysprávné,nežkontaktujete
autorizovanýservis.Pokudnejsou,přivolejte
kvalifikovanéhomechanikaainstalatéra,aby
provedlvšechnynezbytnéúpravy.
C Zapřípravuumístěníaelektrických,
vodovodníchaodpadníchinstalacínamístě
proumístěnípřístrojeodpovídázákazník.
B Instalaceaelektrickázapojenívýrobkumusí
provéstpracovníkautorizovanéhoservisu.
Výrobceneodpovídázaškodyvzniklé
činnostmi,kteréprovedouneoprávněné
osoby.
A Předinstalacívizuálnězkontrolujte,zda
výrobeknevykazujeznámkypoškození.
Pokud ano, nenechávejte jej instalovat.
Poškozenévýrobkyjsoubezpečnostním
rizikem.
C Zkontrolujte,zdapřívodníaodpadovéhadice
inapájecíkabelnejsouzkroucené,stisknuté
neborozdrcenépřinasouvánívýrobkuna
místopoinstalacinebočištění.
Vhodné umístění pro instalaci
• Postavtespotřebičnapevnouplochu.
Neumisťujtejejnakoberecsdlouhým
vlasemaninapodobnéplochy.
• Celkováhmotnostpračkyasušičky-splnou
náplní-pokudjeumístítenasebe,dosahuje
cca180kilogramů.Umístětevýrobekna
pevnou rovnou plochu s dostatečnou
nosností!
• Neumisťujtevýrobeknanapájecíkabel.
• Neinstalujtevýrobekdomíst,kdemůže
teplotaklesnoutpod0°C.
• Umístětevýrobeksodstupemodokrajů
ostatníhonábytkunejméně1cm.
Sejmutí výztuh obalů
Nakloňtestrojdozaduprosejmutívýztuhobalů.
Sejmětevýztuhyobalůtak,žezatáhneteza
stuhu.
Odstraňování přepravních zámků
A Nesnímejtepřepravnízámkypředtím,než
vyjmetevýztuhyobalů.
A Sejmětebezpečnostníšroubypropřepravu,
nežspustítepračku,jinakdojdekpoškození
výrobku.
1. Uvolnětevšechnyšroubyklíčem,dokudjimi
nelzevolněotáčet.
2. Odstraňtepřepravníbezpečnostníšrouby
tak,žejimijemněotočíte.
3. UpevnětekrytyumístěnévsáčkusPříručkou
proobsluhudootvorůnazadnímpanelu.
C Uschovejtepřepravníbezpečnostníšrouby
nabezpečnémmístěprodalšípoužití,když
budetřebapračkuvbudoucnostiznovu
přemístit.
C Nikdynepřemisťujtespotřebičbezřádně
upevněnýchbezpečnostníchpřepravních
šroubů!
Připojování vody
C Přívodnítlakvodynutnýprospuštění
výrobkuje1až10barů(0,1–10MPa).
Vpraxitoznamená,žezaminutumusíz
vašehoplněotevřenéhokohoutkuvytéct10
-80litrů,abyvašepračkaběželasprávně.
Připevněteventilnaomezenítlaku,pokudje
tlak vody vyšší.
C Pokudhodlátepoužívatvýrobekdvojitým
vstupemvodyjakopřístrojsjediným
(studeným)přívodemvody,musíte
nainstalovat dodanou ucpávku do ventilu pro
horkouvodu,nežvýrobekspustíte.(Platípro
výrobkydodanésezáslepkou.)
C Pokudchcetepoužívatobavstupyvody
svýrobkem,připojtehadicihorkévody
podemontážizarážkyatěsněnízventilu
horkévody.(Platíprovýrobkydodanése
záslepkou.)
A Modelysjedinýmpřívodemvodynepřipojujte
ke kohoutku s horkou vodou. V takovém
případěseprádlopoškodínebosevýrobek
přepnedoochrannéhorežimuanespustíse.
A Nepoužívejtestarénebopoužitépřívodní
hadicenanovývýrobek.Mohlybyzanechat
skvrny na vašem prádle.
1. Připojtezvláštníhadicedodávanéspračkou
kpřívodnímventilůmpračky.Červenáhadice
(levá)(max.90°C)jenahorkouvodu,modrá
hadice(pravá)(max.25°C)jenastudenou
vodu.
A Zajistěte,abypřipojenístudenéateplé
vodybyloprovedenosprávně,kdyžstroj
instalujete.Jinakbynakoncipracíhocyklu
mohloprádlobýthorkéapoškozené.
2. Všechny matice utahujte rukou. Na
utahovánímaticnikdynepoužívejteklíč.

20 CZ
3. Popřipojeníhadiczcelaotevřetekohoutky,
abystezkontrolovali,zdavespojích
nedocházíkúnikůmvody.Pokudzjistíte
úniky,vypnětekohoutasejmětematici.
Znovumaticipečlivěutáhněte,zkontrolujte
takétěsnění.Abystepředešliúnikůmvody
anáslednýmškodám,udržujtekohouty
uzavření,kdyžstrojnepoužíváte.
Připojení k odpadu
• Konecodpadovéhadicepřímopřipojtek
odpadunebodovany.
A Pokudsehadiceodpojízumístěnípři
zaplněnívodou,mohlobydojítkzatopení
vašehodomu.Navíchrozírizikoopaření
zdůvoduvysokýchteplotpřipraní!Aby
nedocházeloktěmtosituacímazajistili
jsteplynulýpřívodiodvodvodyzestroje,
upevnětekonecodpadovéhadiceřádně,
abysenemohluvolnit.
• Hadicipřipevnětedovýškynejméně40cma
nejvýše100cm.
• Pokudjehadicezvednutapoté,coležela
nazeminebovjejíblízkosti(méněnež40
cmnadzemí),jeodčerpánívodyztíženoa
prádlomůžebýtpřivyjímánízpračkypříliš
mokré.Protododržujtevýškuuvedenouna
obrázku.
• Abynedošloknávratušpinavévodyzpět
dostrojeazajistilosesnadnévypouštění,
neponořujte konec hadice do špinavé vody
aneveďtejejdoodpadudélenežna15cm.
Pokudjepřílišdlouhá,seřízněteji.
• Konechadiceneohýbejte,nestoupejtenaněj
aneskládejtejejmeziodpademapračkou.
• Pokudjehadicepříliškrátká,použijte
originálníprodlužovacíhadici.Hadice
nesmíbýtdelšínež3,2m.Abynedošlok
únikuvody,spojmeziprodlužovacíhadicí
aodvodníhadicívýrobkumusíbýtsprávně
sevřenývhodnousvorkou,abynesklouzla
nedošlokúniku.
Upravování nožek
A Má-livášspotřebičfungovattišejiabez
vibrací,musístátrovněavyváženěna
nožkách.Vyrovnejtespotřebičpomocí
nožek.Jinaksemůževýrobekpřesouvat
vprostoruazpůsobitpotížesvibracemia
drcením.
1. Povolteblokovacímaticenanožkách.
2. Upravtenožky,dokudvýrobeknenírovnýa
vyvážený.
3. Všechnymaticeznovuutáhněterukou.
A Nauvolněníblokovacíchmaticnepoužívejte
žádnénástroje.Jinakbysemohlypoškodit.
Elektrické zapojení
Připojtevýrobekkuzemněnézásuvcechráněné
pojistkouvsouladushodnotamivtabulce
"Technické specifikace". Naše společnost nenese
odpovědnostzažádnéškodyvzniklétím,že
výrobekpoužívátebezuzemněnívsouladus
místními předpisy.
• Připojeníbymělosplňovatmístnípředpisy.
• Napětíapovolenáochranapojistek
nebopřerušovačejsouuvedenyvoddíle
“Technické parametry”. Pokud je aktuální
hodnotapojistkynebopřerušovačevdomě
nižšínež16A,požádejtekvalifikovaného
elektrikářeoinstalacipojistkyo16A.
• Stanovenénapětímusíbýtshodnés
napětímvevašísíti.
• Neprovádějtespojenípomocíprodlužovacích
kabelůčirozdvojek.
B Poškozenénapájecíkabelysmívyměňovat
jenzástupciautorizovanéhoservisu.
První použití
Nežzačnetevýrobekpoužívat,zkontrolujte,zda
jsou všechny kroky příprav provedeny v souladu
spokynyvoddílech"Důležitébezpečnostní
pokyny"a"Instalace".
Propřípravuvýrobkunapraníprádlaproveďte
nejprvečinnostvprogramuČištěníbubnu.
Pokudvášvýrobekneobsahujeprogramčištění
bubnu,použijteprogramBavlna-90azvolte
pomocnéfunkceVícevodyneboExtramáchání.
Nežspustíteprogram,vložtemax.100gprášku
proti vodnímu kameni do prostoru pro hlavní
praní(přihrádkač.II).Pokudjepřípravekve
formětablety,vložtejednutabletudopřihrádkyč.
II.Vysuštevnitřekčistýmkusemhadrupoté,co
Table of contents
Languages:
Other Beko Washer manuals

Beko
Beko 60081474CHD1 User manual

Beko
Beko WTG720M2W User manual

Beko
Beko WTB841R2W User manual

Beko
Beko WKD 23520 T User manual

Beko
Beko WY 74242W User manual

Beko
Beko WTX61032W User manual

Beko
Beko WKN 51011 M User manual

Beko
Beko B3W5962IW User manual

Beko
Beko EUR8C4A User manual

Beko
Beko WMA 520 S Manual

Beko
Beko WTK62051W User manual

Beko
Beko WMB 81423 W User manual

Beko
Beko WMXD 760 S Operating instructions

Beko
Beko MWTX91232BI User manual

Beko
Beko WTIK72151 User manual

Beko
Beko 1-WTE 7512 XS0 User manual

Beko
Beko WUYS61236SI-IT User manual

Beko
Beko WRE 7512 XSW User manual

Beko
Beko WUV9726XBA User manual

Beko
Beko WTV6611BC1 User manual