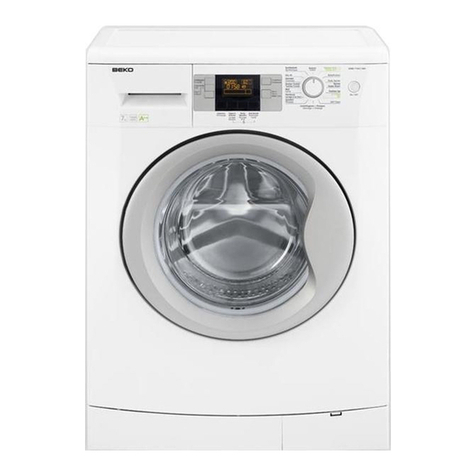
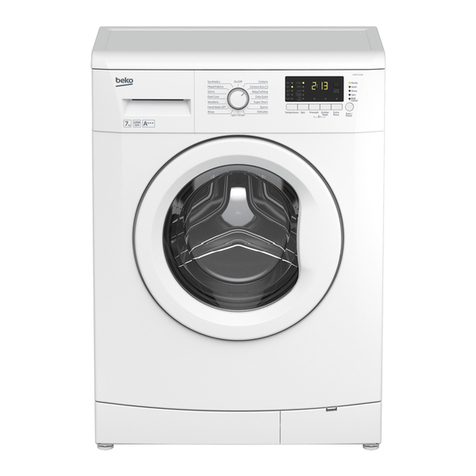
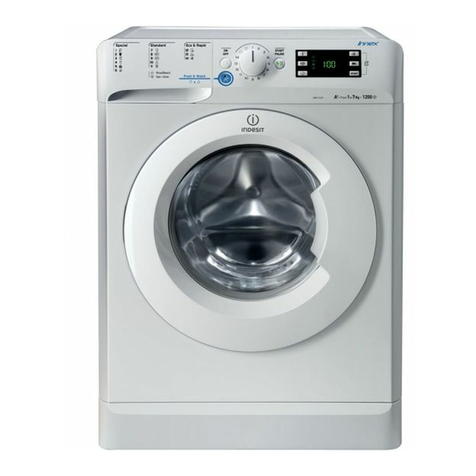
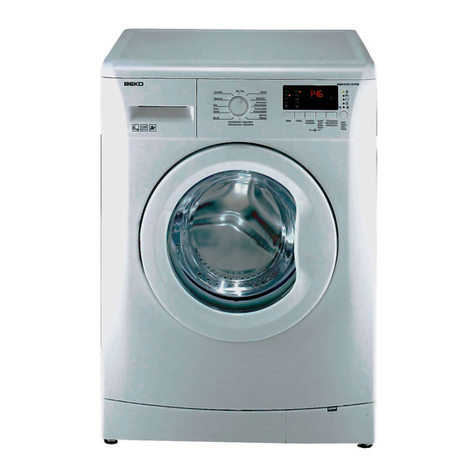
Beko WCB 78127 User manual


5 - EN
Figure 2
Figure 1
4 Selecting a Program and Operating Your Machine
Control panel
Display symbols
Turning the machine on
Plug in your machine. Turn the tap on
completely. Check if the hoses are connected
tightly. Place the laundry in the machine. Add
detergent and softener. Press the “On/Off”
button.
Program selection
Turn the Programme Selection Knob to the
program mode that you wish to wash your
laundry.
The recommended temperature and spin
speed for the selected program appear. Press
“Start/Pause/Cancel” button to start the
program.
Sort the laundry according to type of fabric,
color, degree of soiling and permissible
water temperature when choosing a
program.
Main programs
Depending on the type of textile, the following
1
6 7 8
2 3 4 5
1 - Spin Speed Adjustment button
2 - Display
3 - Temperature Adjustment button
4 - Programme Selection knob
5 - On / Off button
6 - Delayed Start buttons (+ / -)
7 - Auxiliary Function buttons
8 - Start / Pause / Cancel button
F1 F2 F3 F4
a- Spin Speed indicator
b-Temperature indicator
c-Spin symbol
d-Temperature symbol
e-Remaining Time and Delayed Start
indicator
f-Programme Indicator symbols
(Prewash / Main Wash / Rinse /
Softener / Spin)
g-Economy symbol
h-Delayed Start symbol
i-Door Locked symbol
j-Start symbol
k-Pause symbol
l
- Auxiliary Function symbols
m
-
No Water symbol

• Cotton Eco
Use this programme to wash your laundry washable
in cottons programme for a longer time, still with a
very good performance for saving purposes.
• X-Super Short 14
Use this programme to wash your little amount of
• Dark Care
Use this programme to wash your dark coloured
laundry or the laundry that you do not want it get
faded. Washing is performed with little mechanic
action and at low temperatures. It is recommended
to use liquid detergent or woolen shampoo for dark
coloured laundry.
• Shirts
Use this programme to wash the shirts made of
• Freshen Up
Use this programme to remove the odour on the
contain any stains or dirt.
cotton, synthetic and synthetic blended fabrics
together.
• Eco clean
Use this programme, which is much more sensitive
to environment and natural resources, to wash your
lightly soiled and unstained cotton laundry
(max. 3.5 kg) in a short time and economically.
lightly soiled cotton clothes in a short time.
• Self Clean
Use this programme regularly (once in every 1-2
months) to clean the drum and provide the
required hygiene. Run the programme without
any laundry in the machine.To obtain better results,
put powder limescale remover for washing
machines into the detergent compartment .
II. When the programme is over, leave the loading
door ajar so that the inside of the machine gets dry.
• BabyProtect

7 - EN
the rinse hold function in order to prevent your
clothes become wrinkled in an anhydrous
condition. With this function, your laundry is
kept in the final rinsing water. If you want to
spin your laundry after the rinse hold function:
- Adjust the spin speed.
- Press “Start/Pause/Cancel” button.
Program resumes. Your machine drains the
water and spins your laundry.
You can use no spin function in order to drain
the water without spinning at the end of the
program.
• Selectable
* Automatically selected, not cancelable.
** Energy Label program (EN 60456)
Water and power consumption and programme duration may differ from the table shown,
subject to changes in water pressure, water hardness and temperature, ambient temperature,
type and amount of laundry, selection of auxiliary functions, and fluctuations in the supply
voltage.
The auxiliary functions in the table may differ according to the model of your machine.
Programme duration will be displayed on the screen of your machine according to your
selection.
Program selection and consumption table
EN Temperature
℃
Auxiliary functions
Programme (°C)
Max. Load (kg)
Water Consumption (l)
Energy Consumption (kWh)
Prewash
Quick Wash
Rinse Plus
Anti-Creasing
Plus water
Rinse Hold
PHR
Selectable
temperature
range °C
Cottons 90 8 74 2.40 ••••••• 90-Cold
Cottons 60 8 72 1.70 ••••••• 90-Cold
Cottons 40 8 72 0.95 ••••••• 90-Cold
BabyProtect 90
8 72 2.10
*•90-30
Cotton Economic 60** 8 72 1.36 ••••••• 60-Cold
Cotton Economic 40 8 45 1.00 ••••••• 60-Cold
Intensive 60 8 45 0.45 * • • 60-40
Synthetics 60 3 45 0.55 •• • • • • • 60-Cold
Synthetics 40 3 45 0.30 ••••••• 60-Soğuk
Eco Clean 20 3.5 39 0.16 •20
Mix 40 3.5 35 0.20 ••••••• 40-Cold
Xpress Super Short 30 2 55 1.95 • • 30-Cold
Daily Xpress 90 8 55 1.10 • • 90-Cold
Daily Xpress 60 8 65 0.22 • • 90-Cold
Daily Xpress 30 8 82 0.55 • • 90-Cold
Woollens 40 1.5 45 0.3 • • • 40-Cold
Hand wash 30 1 35 0.2 30-Cold
Darkcare 40 3 82 0.55 * •40-Cold
Self Clean 70 - 95 2.15 * 70
Freshen Up - 2 30 0.03 •-

8 - EN
Auxiliary functions
Auxiliary Function Selection Buttons
CSelecttherequiredauxiliaryfunctions
beforestartingtheprogram.
CSomecombinationscannotbeselected
together.(Ex.:Pre-wash)(Figure1-5a)and
QuickWash(Figure1-5b).
Auxiliary function selection
Ifanauxiliaryfunctionthatshouldnotbe
selectedtogetherwithapreviouslyselected
functionischosen,thefirstselectedfunction
willbecancelledandthelastauxiliaryfunction
selectionwillremainactive.
(Ex.:Ifyouwanttoselectpre-washfirstand
thenquickwash,pre-washwillbecancelled
andquickwashwillremainactive.
Auxiliaryfunctionthatisnotcompatible
withtheprogramcannotbeselected.(see,
“ProgramSelectionTable”)
• Prewash
Whenyouselectthisfunction(5a),thedisplay
willindicate“1”symbol.Apre-washisonly
worthwhileforheavilysoiledlaundry.Without
pre-washyousaveenergy,water,detergent
andtime.Pre-washwithoutdetergentis
recommendedforlaceandcurtains.
• Quick Wash
Withthisfunction(5b),thewashtimeis
shortened.The“2”symbolwilllightuponthe
display.Usethisfunctionforsmalleramounts
orslightlysoiledlaundries.
• Anti-Creasing
Withthisfunction(5d),drummovementwill
belessenedtopreventcreasingandspinning
speedislimited.Inaddition,washingiscarried
outatahigherwaterlevel.The“4”symbolwill
lightuponthedisplay.
CWheneveryouselectthisauxiliaryfunction,
loadyourmachinewithhalfofthe
maximumlaundryspecifiedintheprogram
table.
• Pet hair removal
Thisfunctionhelpsyoutoremovethepethairs
thatremainonyourclothes.
Whenthisfunctionisselected,yourmachine
addspre-washandadditionalrinsingstepsto
thenormalprogramcycle.Thus,pethairsare
removedmoreeffectivelybyperformingthe
washingwithmorewater(30%).
ANeverwashyourpetsinyourwashing
machine.
Time display
Thedisplayshowsthetimeremainingfor
theprogramtocompletewhileaprogramis
running.Programdurationmaydifferfromthe
valuesintheconsumptiontablesubjecttothe
changesinthewaterpressure,waterhardness
andtemperature,ambienttemperature,type
andamountoflaundry,auxiliaryfunctions
selected,andchangesinthesupplyvoltage.
Time delay
Withthe“Timedelay”functionyoucandelay
theprogramstartupto24hours.Settingcan
bemadeinintervalsof30minutes.
1. Press“Timedelaying”buttons“+”and“-”
tosetyourdesiredtimedelay.
2. Press“Start/Pause/Cancel”button.Then
thetimedelaystartstocountdown.
CMorelaundrymaybeloadedortakenout
duringthetimedelayperiod.
Changing the delay time
Ifyouwanttochangethetimeduringthe
countdown:
1. Press“Start/Pause/Cancel”button.
2. Press“Timedelaying”buttons“+”or“-”to
setthedesiredtimedelay.
3. Press“Start/Pause/Cancel”button.
Canceling the time delay
Ifyouwanttocancelthetimedelay
countdownandstarttheprogramimmediately:
1. Press“Start/Pause/Cancel”button.
2. Pres“TimeDelaying”“-”buttonto
decreasethetimedelay.Programduration
after30minutesshallbedisplayed.
3. Press“Start/Pause/Cancel”buttontostart
theprogram.
Starting the Program
1. Press“Start/Pause/Cancel”buttontostart
theprogram.
2. Thestartsymbol(Figure2-7j)which
indicatesthattheprogramhasstartedwill
lightup.
3. Thedoorlocksandthedoorlocked
symbol(Figure2-7i)willlightup.
4. TheSymboloftherelevantstep(prewash,
mainwash,rinse,softenerandspin)that
theprogramhasstartedfromwilllightup
(Figure2-7f).
CIfthemachineisnotspinning,the
programmaybeinrinseholdmodeorthe
automaticspincorrectionsystemhasbeen
activatedduetoanexcessiveunbalanced
distributionoflaundryinthemachine.
Changing the selections after the
program has started
Theselectedspinspeedandprogram
temperaturefadeout.Anemptyframe
appears.
Whenthe“Programselection”buttonis
broughttotheappropriateposition,rpmand
temperaturedatareappear.

9 - EN
Switching the machine to standby
mode
Press “Start/Pause/Cancel” button
momentarily to switch your machine to the
standby mode. Auxiliary functions can be
cancelled or selected in accordance with
the step the program is at. The door can be
opened if the water level is suitable. Laundry
may be added / taken out by opening the
door.
Door lock
The Door Locked Symbol (Figure 2-7i) lights
up when the loading door is locked. This
symbol will flash until the door is allowed to
open. Do not force the door at this stage. You
may open the door after the symbol fades out.
Child-proof lock
This function protects the appliance from
being tampered by children. In this case, all of
the buttons are inactive except On/Off button;
by On/Off button you can whether stop or
resume (while child-lock on) the program of
your machine.
The machine is switched to child-lock by
pressing the 2nd and 4th auxiliary functions
for 3 sec. “C:on” (Child lock is activated) label
appears on the screen. The same symbol
will also be displayed whenever any button is
pressed while the machine is child-locked.
To deactivate the child-proof lock, press the
2nd and 4th auxiliary function buttons for 3
sec. “C:OFF” (Child lock is deactivated) label
appears on the screen.
Ending the program through
canceling
“Start/Pause/Cancel” button is pressed for 3
seconds to cancel the program. Start symbol
(Figure 2-7j) will flash during cancellation. After
cancellation, the symbol of the corresponding
step at which the cancellation was made will
remain lit and “End” will appear on the screen.
End of program
When the program is finished, the symbols
of the relevant steps will remain lit up and
the auxiliary function, spin and temperature
data selected at the start-up of the program
will remain selected. “End” will appear on the
display.
5 Maintenance and cleaning
Detergent Drawer
Remove any powder residue buildup in the
drawer. To do this;
1. Press the dotted point on the siphon in the
softener compartment and pull towards
you until the compartment is removed from
the machine.
If more than a normal amount of water
and softener mixture starts to gather in the
softener compartment, the siphon must be
cleaned.
2. Wash the dispenser drawer and the
siphon with plenty of lukewarm water in a
washbasin.
3. Replace the drawer into its housing after
cleaning. Check if the siphon is in its
original location.
Inlet water filters
There is a filter at the end of each water intake
valve at the back side of the machine .These
filters prever the foreign substances and dirt in
the water to enter into the machine. Filters
should be cleaned as they get dirty.
• Close the taps.
• Remove the nuts of the water intake hoses
to clean the surfaces of the filters on the
water intake valves with an appropriate
brush.
• If the filters are very dirty, you can pull them
out by means of pliers and clean them.

10 - EN
hose.Iftheamountofwatertobedrained
offisgreaterthanthevolumeofthe
container,replacetheplug,pourthewater
out,thenresumethedrainingprocess.
• Afterdrainingprocessiscompleted,
replacetheplugintotheendofthehose
andfitthehosebackintoitsplace.
Ifyourproductisnotsuppliedwithan
emergencydrainhose,dothefollowingas
showninthefigurebelow:
• Placealargecontainerinfrontofthefilter
toreceivewaterflowingfromthefilter.
• Loosenpumpfilter(anticlockwise)until
waterstartstoflowoutofit.Directthe
flowingwaterintothecontaineryouhave
placedinfrontofthefilter.Youcanusea
pieceofclothtoabsorbanyspilledwater.
• Whenthereisnowaterleft,turnthepump
filteruntilitiscompletelylooseandremove
it.
• Cleananyresiduesinsidethefilteras
wellasfibers,ifany,aroundthepropeller
region.
• Ifyourproducthasawaterjetfeature,be
suretofitthefilterintoitshousinginthe
pump.Neverforcethefilterwhilereplacing
itintoitshousing.Fitthefilterfullyintoits
housing;otherwise,watermayleakfrom
thefiltercap.
4-Closethefiltercap.
Closethetwo-piecefiltercapofyourproduct
bypushingthetabonit.
Closetheone-piecefiltercapofyourproduct
byfittingthetabsonthebottomintotheir
positionsandpushingtheupperpartofit.
Draining any remaining water and
cleaning the pump filter
Yourproductisequippedwithafiltersystem
whichensuresacleanerwaterdischargethat
extendspumplifebypreventingsoliditems
suchasbuttons,coinsandfabricfibersfrom
cloggingthepumppropellerduringdischarge
ofthewashingwater.
• Ifyourmachinefailstodrainthewater,
thepumpfiltermaybeclogged.Youmay
havetocleanitevery2yearsorwhenever
itisplugged.Watermustbedrainedoffto
cleanthepumpfilter.
Inaddition,watermayhavetobedrainedoff
completelyinthefollowingcases:
• beforetransportingthemachine(e.g.when
movinghouse)
• whenthereisthedangeroffrost
Inordertocleanthedirtyfilteranddischarge
thewater;
1-Unplugthemachinetocutoffthesupply
power.
ATheremaybewaterat90°Cinthe
machine.Therefore,thefiltermustbe
cleanedonlyaftertheinsidewateris
cooleddowntoavoidhazardofscalding.
2-Openthefiltercap.Thefiltercapmaybe
composedofoneortwopiecesaccordingto
themodelofyourmachine.
Ifitiscomposedoftwopieces,pressthetab
onthefiltercapdownwardsandpullthepiece
outtowardsyourself.
Ifitiscomposedofonepiece,holditfrom
bothsidesandopenitbypullingout.
3-Anemergencydrainhoseissuppliedwith
someofourmodels.Othersarenotsupplied
withthisitem.
Ifyourproductissuppliedwithanemergency
drainhose,dothefollowingasshowninthe
figurebelow:
• Pulloutthepumpoutlethosefromits
housing.
• Placealargecontainerattheendofthe
hose.Drainthewateroffintothecontainer
bypullingouttheplugattheendofthe

11 - EN
6 Solution suggestions for problems
Cause Explanation / Suggestion
Programcannotbestartedorselected.
• Machinemayhaveswitchedtoself
protectionmodeduetoaninfrastructure
problem(suchaslinevoltage,water
pressure,etc.).
• Resetyourmachinebypressing“Start/
Pause/Cancel”buttonfor3seconds.(see,
CancelingaProgram)
Thereiswatercomingfromthebottomofthemachine.
• Theremightbeproblemswithhosesor
thepumpfilter.
• Besurethesealsofthewaterinlethosesare
securelyfitted.
• Tightlyattachthedrainhosetothetap.
• Makesurethatthepumpfilteriscompletely
closed.
Machinestoppedshortlyaftertheprogramstarted.
• Machinecanstoptemporarilyduetolow
voltage.
• Itwillresumeoperatingwhenthevoltageis
backtothenormallevel.
Itcontinuouslyspins.Remainingtimedoesnotcountdown.(Formodelswithadisplay)
• Theremaybeanimbalanceoflaundryin
themachine.
• Theautomaticspincorrectionsystemmight
havebeenactivatedduetotheunbalanced
distributionofthelaundryinthedrum.
• Thelaundryinthedrummaybeclustered
(bundledlaundryinabag).Laundryshould
berearrangedandre-spun.
• Nospinningisperformedwhenthelaundryis
notevenlydistributedinthedrumtoprevent
anydamagetothemachineandtoits
environment.
Itcontinuouslywashes.Remainingtimedoesnotcountdown.(Formodelswithadisplay)
• Inthecaseofapausedcountdownwhiletaking
inwater:
• Timerwillnotcountdownuntilthemachineis
filledwiththecorrectamountofwater.
• Themachinewillwaituntilthereisasufficient
amountofwatertoavoidpoorwashingresultsdue
tolackofwater.Thenthetimerwillstarttocount
down.
• Inthecaseofapausedcountdownatthe
heatingstep:
• Timewillnotcountdownuntilthe
selectedtemperaturefortheprogramis
reached
• Inthecaseofapausedcountdownatthe
spinningstep:
• Theremaybeanimbalanceoflaundryin
themachine.
• Theautomaticspincorrectionsystemmighthave
beenactivatedduetotheunbalanceddistribution
ofthelaundryinthedrum.
• Thelaundryinthedrummaybeclustered(bundled
laundryinabag).Laundryshouldberearranged
andre-spun.
• Nospinningisperformedwhenthelaundryis
notevenlydistributedinthedrumtopreventany
damagetothemachineandtoitsenvironment.
Thereisfoamingoverthedetergentdrawer
• Toomuchdetergentwasused.
• Mix1tablespoonfulsoftenerand½literwater
andpourintothemainwashcompartmentofthe
detergentdrawer.

12 - EN
7 Specifications
Specifications of this appliance may change without notice to improve the quality of the product.
Figures in this manual are schematic and may not match your product exactly.
Values stated on the machine labels or in the documentation accompanying it are obtained
in laboratory in accordance with the relevant standards. Depending on operational and
environmental conditions of the appliance, values may vary.
This appliance’s packaging material is recyclable. Help recycle it and protect the environment by
dropping it off in the municipal receptacles provided for this purpose. Your appliance also contains
a great amount of recyclable material. It is marked with this label to indicate the used appliances
that should not be mixed with other waste. This way, the appliance recycling organised by your
manufacturer will be done under the best possible conditions, in compliance with European
Directive 2002/96/EC on Waste Electrical and Electronic Equipment. Contact your town hall or your
retailer for the used appliance collection points closest to your home. We thank you doing your part
to protect the environment.
230V~ 50Hz/
Models
Maximum dry laundry capacity (kg)
Height (cm)
Width (cm)
Depth (cm)
Net Weight (±4kg)
Electricity (V/Hz.)
Total Current (A)
Total Power (W)
Spinning cycle (rpm max.)
8
1200
84
59.7
56.5
70
10
2200
WCB 78127
Dark wash Dark wash Synthetics Cottons Pre-wash Main
wash
Rinse Wash Spin
Drain Anti-
creasing
Duvet Child-
proof lock
Hand
Wash
BabyProtect Cotton
Eco
Woolens
Delicates Pet hair
removal
Daily
Lingerie
expres 14
Super short
express
Daily
express
Rinse hold Start/
Pause
No spin Quick
wash
Finished Cold Self
Clean
Temperature
Mixed 40 Super 40 Extra rinse Freshen
up
Shirts Jeans Sport Time delay Intensive Fasion
care
mini 30
On/Off
Reset
3 sec.
Table of contents
Other Beko Washing Machine manuals

Beko
Beko WMB 81242 LM User manual

Beko
Beko vm 8120 w Operating instructions

Beko
Beko WMP601W User manual

Beko
Beko WMB 51031 User manual

Beko
Beko WMB 61031 M User manual

Beko
Beko WTV 7531 X0 User manual

Beko
Beko WMB 81442 LW User manual

Beko
Beko EV6100 User manual

Beko
Beko WMB 51032 UY User manual

Beko
Beko WMB 61031 M User manual

Beko
Beko WMY 81233 LMB3 User manual

Beko
Beko WMY 71483 LMB2 User manual

Beko
Beko WMB 61031 User manual

Beko
Beko WMY 71233 LMB3 User manual

Beko
Beko WMC126W User manual

Beko
Beko WMB 714422 W User manual

Beko
Beko WMB 61031 M User manual

Beko
Beko WMB 51022 PL PTY User manual

Beko
Beko WMY 81483 LMB2 User manual

Beko
Beko WTAU12AW User manual