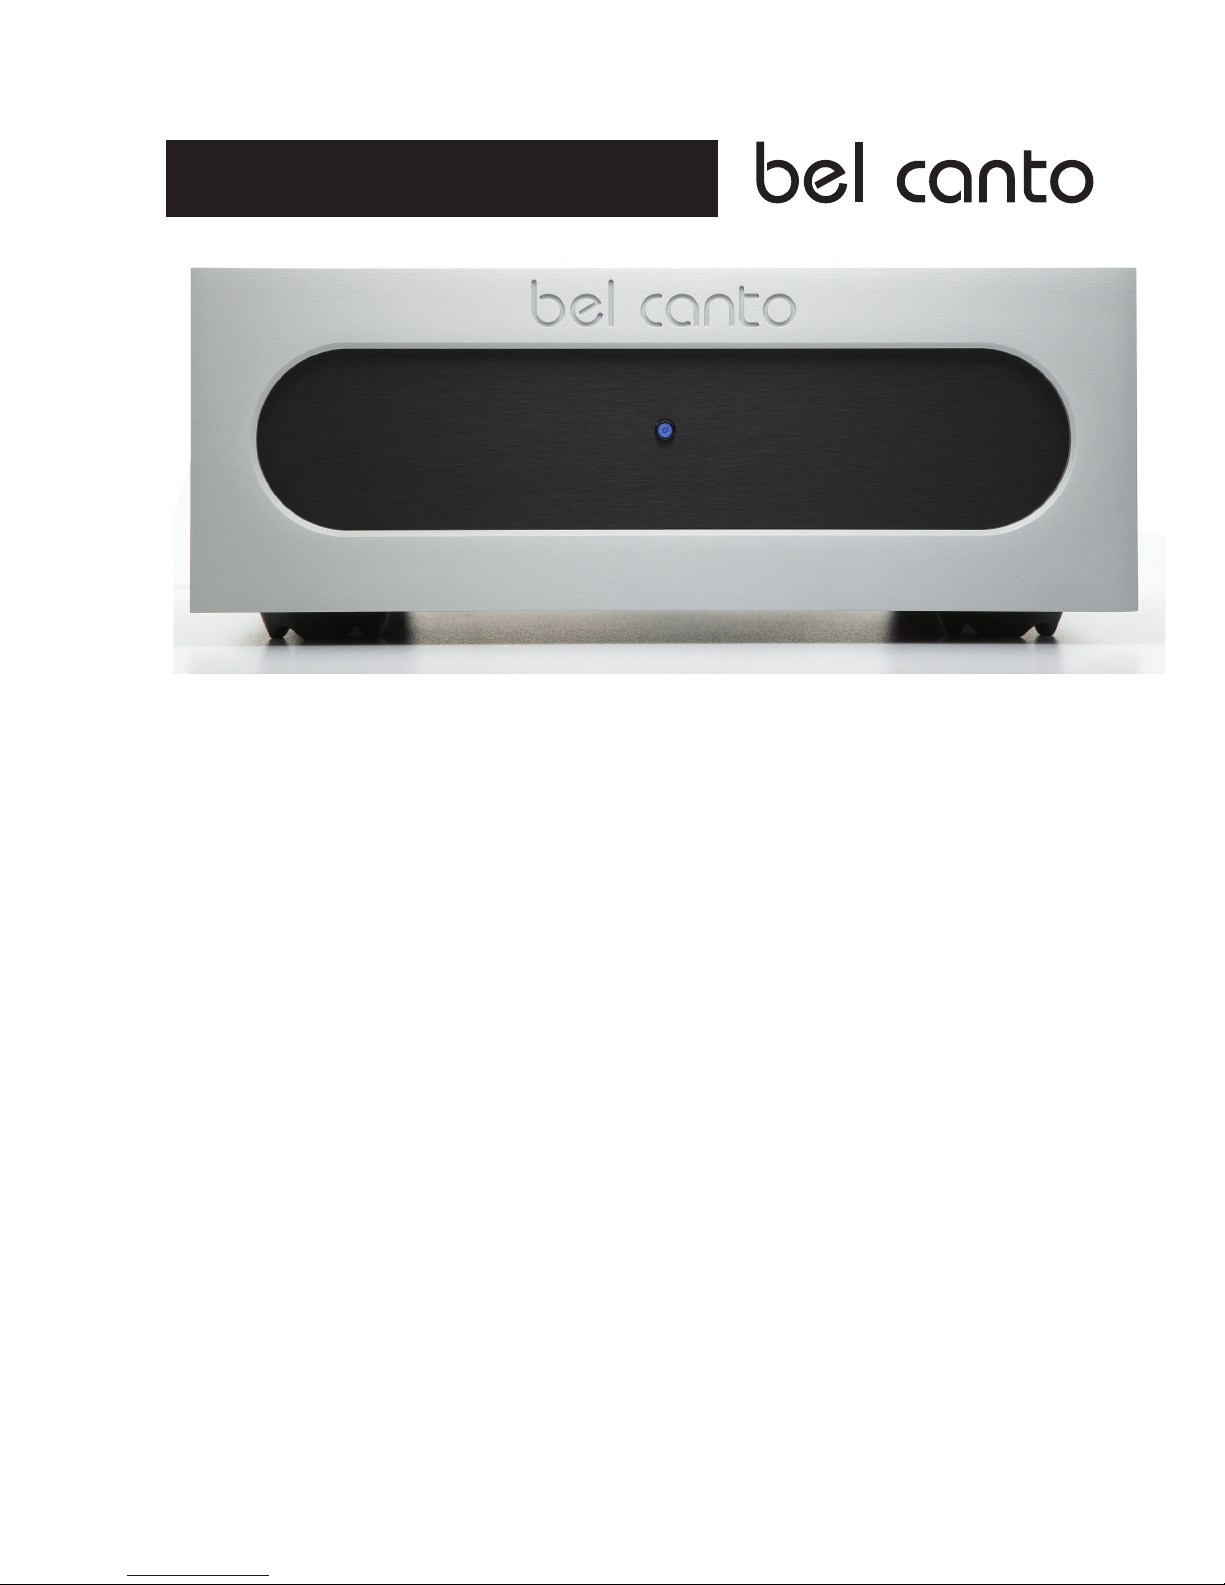
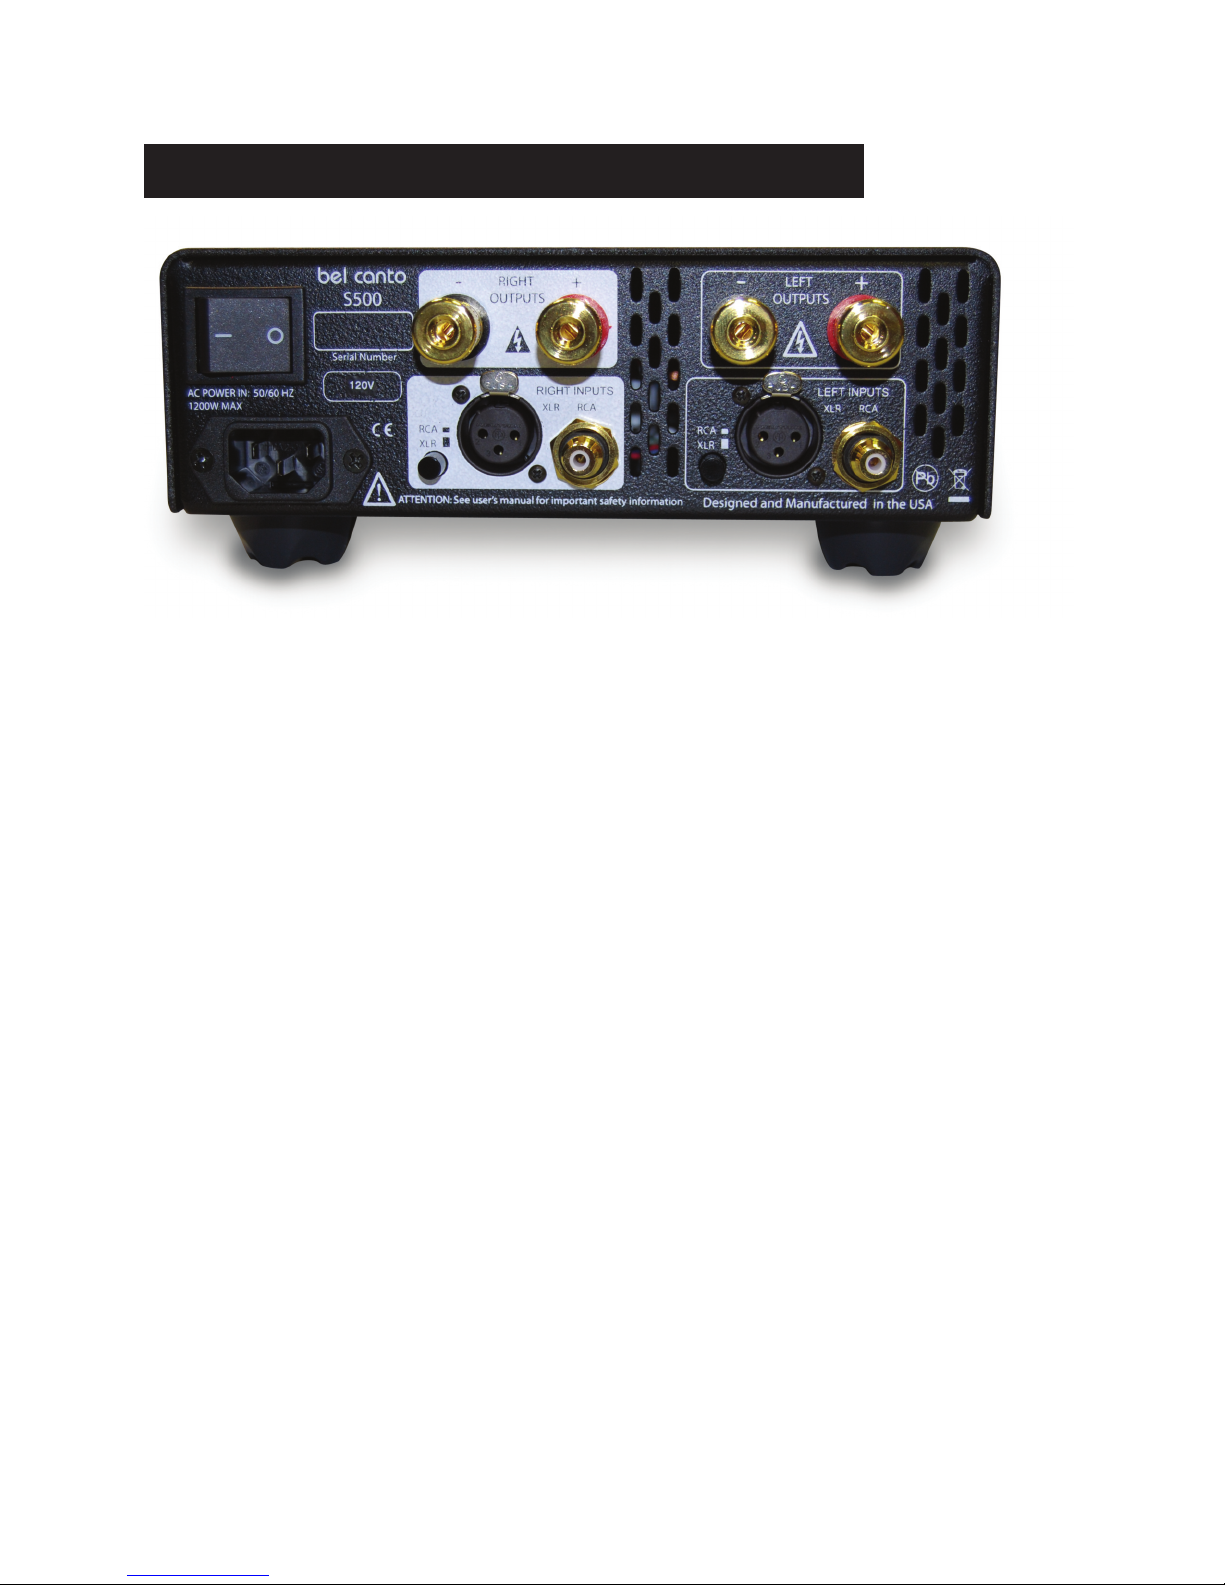
Bel Canto S500 User manual
Other Bel Canto Amplifier manuals

Bel Canto
Bel Canto REF1000 User manual

Bel Canto
Bel Canto SET 80 User manual

Bel Canto
Bel Canto e.One REF500s User manual

Bel Canto
Bel Canto M300 User manual

Bel Canto
Bel Canto PReProTM User manual

Bel Canto
Bel Canto e.One series S125 User manual

Bel Canto
Bel Canto S300i e.One Series User manual

Bel Canto
Bel Canto PRE3vb User manual

Bel Canto
Bel Canto eVo2iTM User manual

Bel Canto
Bel Canto eVo2 User manual

Bel Canto
Bel Canto REF1000m User manual

Bel Canto
Bel Canto Balanced Control Preamplifier Pre1 User manual

Bel Canto
Bel Canto e.One REF150S User manual

Bel Canto
Bel Canto REF1000 User manual

Bel Canto
Bel Canto M300 User manual

Bel Canto
Bel Canto PRe2TM PRe2PTM User manual

Bel Canto
Bel Canto tosca User manual

Bel Canto
Bel Canto e.One C5i User manual

Bel Canto
Bel Canto SETi 40 User manual

Bel Canto
Bel Canto e.One series C7R User manual