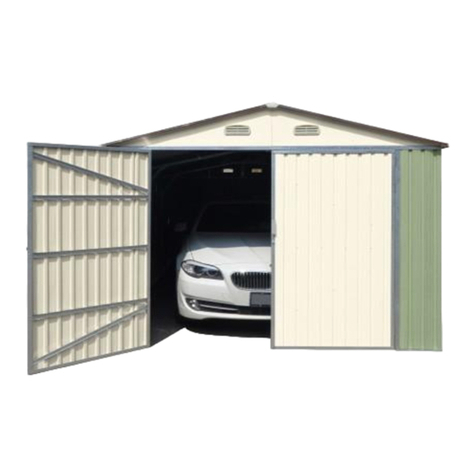
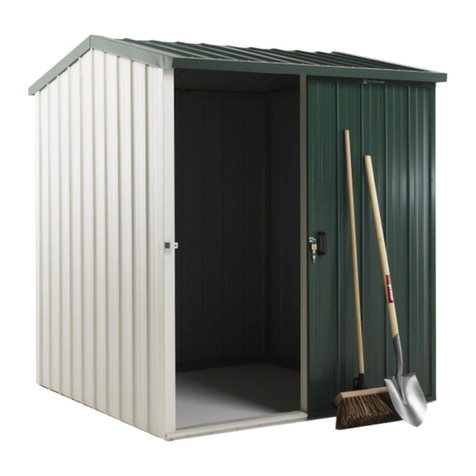
Belleze 014-HG-17061 User manual

www.belleze.com
support@belleze.com
1-800-682-6376
@bellezefurniture
FOLLOW US: CONTACT INFO: ITEM NO. 014-HG-17061
The instruction booklet contains IMPORTANT
safety information. Please read it in full and
keep it for future reference.
Cooper Metal Shed

Estimated time for assembly:
5 hours
Scan this QR Code
to view our online tutorial
2

This furniture requires at least 2 people for assembly.
Read this instruction manual prior to assembly to familiarize yourself with the
various steps and hardwares.
sure that no parts are missing or damaged before assembly. Do not destroy or
discard any packaging until you are certain that you have all the necessary parts
for assembly.
Hand tight all hardwares and careful not to over tighten to avoid damaging the
product.
CAUTION
There are small components used in the construction of this product.
Loose items should be kept away from pets and children to avoid a choking
Be sure to assemble this product in a dry and calm day.
DO NOT attempt to assemble the shed in a rainy or windy day to avoid the risk
The shed must be placed and anchored on top of a base that is leveled all
of personal injury and / or damage to the product
WARNING
around. The base can be constructed with treated timber or concrete to prevent
moisture from entering the shed.
If concrete pad is used as a base, make sure there are slops slanted toward the
ATTENTION
Before Installation, you must check building code or contact your local
government authority to determine if building approval is required.
For safety, please keep pets and children away from the assembly area.
Ensure the product is fully assembled before use. If you are missing any
hardware or products, do not use it until you have restored the missing parts.
Note that extra hardwares have been supplied for your convenience.
3
v.08012023C

PACKAGE CONTENTS
D
J
GC
GC
GC
GC
GE
GE 15-1
16-1
15-2
15-2
15-1
19
19
P7
P7
P7
P7
17R
17L
17R
17L
P10
P10
P11
P11
GF
GF
GF
B4
B2
B2
B3
B1
B4
12
13
12
16
13
14
14
B3
B1
GF
21R
21R
21L
21L
9
11
P9
P9
P2
P2
P2
P2
P2
P2
P2
23R
22R
22R
23L
22L
22L
10R
10L
5
6
7
89
1L
1L
2L
2R
11
3R
3L
18
18
18
1R
1R
P1
P3
P3
D1
D2
P1 P9
P9
P2
P2
4L
4R
4

PACKAGE CONTENTS
CODE PART
1L
1R
2L
2R
3L
3R
4L
4R
5
6
7
8
16
22L
22R
23L
23R
9
10L
10R
11
DESCRIPTION
Left Side Floor Frame
Right Side Floor Frame
Left Rear Floor Frame
Right Rear Floor Frame
Left Front Floor Frame
Right Front Floor Frame
Left Door Jamb
Right Door Jamb
Ramp
Door Track Splice
Left Door Track
Right Door Track
Roof Beam
Left Side Wall Channel
Right Side Wall Channel
Left Rear Wall Channel
Right Rear Wall Channel
Side Wall Angle - 1
Rear Wall Angle - 1
Rear Wall Angle - 2
Side Wall Angle - 2
QTY
2
2
1
1
1
1
1
1
1
1
1
1
1
2
2
1
1
2
1
1
2
67-45/64"
1720mm
67-45/64"
1720mm
32-13/16"
818mm
34-1/2"
876mm
16-1 Roof Beam 1
33-3/8"
848mm
33-3/8"
848mm
46"
1169mm
46"
1169mm
31-13/16"
809mm
31-13/16"
809mm
43-1/2"
1105mm
43-1/2"
1105mm
31-5/16"
794mm
44"
1118mm
44"
1118mm
31-5/16"
794mm
31-13/32"
797mm
31-13/32"
797mm
44"
1118mm
44"
1118mm
923mm
36-13/32"
923mm
36-13/32"
5
v.08012023C

PARTCODE DESCRIPTION QTY
PACKAGE CONTENTS
12 Roof Beam Splice 2
14"
356mm
17L
17R
18
19
21L
21R
B3
B4
P1
P2
P11
Roof Trim - 1
Roof Trim - 2
Horizontal Door Brace
Ridge Cap
Left Gable
Right Gable
Gable Brace - 1
Gable Brace - 2
Wall Panel-2
Wall Panel - 1
Roof Panel - 2
2
2
6
2
2
2
2
2
2
9
2
13 Roof Beam L 2
15-1 Side Roof Trim 2
15-2 Side Roof Trim 2
14 Roof Beam R 2
17"
432mm
B1
B2
Gable Brace - 1
Gable Brace - 2
2
2
1720mm
1720mm
(67-45/64")
(67-45/64")
P3 Wall Panel - 3 2
P10 Roof Panel - 1 2
P9 Corner Panel 4
1720mm
(67-45/64")
33-1/2"
852mm
33-1/2"
852mm
34-1/2"
876mm
34-1/2"
876mm
47-1/2"
1207mm
47-1/2"
1207mm
34-1/2"
876mm
5-1/2"
139mm
5-1/2"
139mm
11-5/16"
286mm
11-5/16"
286mm
(67-45/64")
1720mm
(47-1/2")
1207mm
(47-1/2")
1207mm
P7 Roof Panel - 3 4
(47-1/2")
1207mm
6

PARTCODE DESCRIPTION QTY
PACKAGE CONTENTS
D1
D2
D
J
Door - 1
Door - 2
Connecting panel
Stainless Steel Hanger
1
1
2
2
(14-11/64"x2-1/8")
(14-11/64"x1-7/8")
36x4.8cm
36x5.4cm
1710X432mm
(67-19/64"x17")
1710X432mm
(67-19/64"x17")
7
v.08012023C

4x
2x
8x
2x 4x 4x
4x
344x
281x
2x
72x
328x
4x
72x
4x
ST4.2 x 10mm
ST4.8 x 16mm
M4 x 10mm
M4 x 10mm
PACKAGE CONTENTS
Install all hardware perpendicular to the opening.
G2 GD GB GC
GE F1 F2 F2
F3
S2
J1 F100
S3
GF
GLV02
8

1
Required tools for assembly (Not included)
Assemble the left side oor frames (1L) to the right side oor frames (1R). Then
assemble the left rear oor frame (2L) to the right rear oor frame (2R).
F1
1R
1L
1R
1L
2L
2R
F1 12x
ST4.2 x 10mm
2L is upon 2R
1R is upon 1L
1R is upon 1L
9
v.08012023C
( 13/32" )
( 1/16" )

2
3Assemble the left front oor frame (3L) and right front oor frame (3R) to the
assembly.
Assemble the side oor frames (1L,1R) to the rear oor frames (2L,2R) .
F1 4x
ST4.2 x 10mm
F1 4x
ST4.2 x 10mm
1L
1L
2L
2R
1R 1R
1L
1L
3L
1R
1R
3R
2L
2R
F1
1L 2L
1R
2R
1L
2L
F1
F1
1L
3R
1L
3L
F1
1R
3L
2L is upon 1L
2R is upon 1R
3L is upon 1R
3R is upon 1L
10

4Assemble the ramp (5) to the assembly.
Assemble the wall panel-3 (P3) and corner panel (P9) to the assembly.
1-The code P3/P9 can be found on the back of panel.
5
F1 4x
ST4.2 x 10mm
F1
F2
F2
S3
5x
ST4.2 x 10mm
6x
1x
1x
M4 x 10mmM4 x 10mm
F1
S3
1L
1L
3L
1R
1R
3R
5
2L
2R
5
P3 P9
F2
F2
S3
F1
The 2 holes here should be left
for another panel.
Don't screw on the F1 screws.
3R 3R
5
5
3L
5
5
F1
3L
P3
P9
11
v.08012023C

Assemble the right side wall channel (22R) to the corner panel (P9).
6
F1
S3
3x
ST4.2 x 10mm
3x
F1S3
5
P3
P9
22R
7Assemble the wall panel-1 (P2) to the assembly.
5
F1
S3
P2
The hole on the right should be left.
Don't screw on the F1 screw.
The 2 holes here should be left for
another panel.
Don't screw on the F1 screws.
F1
S3
3x
ST4.2 x 10mm
3x
12

22R
22L
Assemble the corner panel (P9) to the assembly.
8
5
P2
P9
5
P2
S3
F1
9F1
22R
22L
Assemble the left side wall channel (22L) to the assembly.
S3
F1
P9
22R
The hole here should be left
for another panel.
Don't screw on the F1 screw.
The hole on the right should be left.
Don't screw on the F1 screw.
22L
F1
S3
4x
ST4.2 x 10mm
4x
F1
S3
4x
ST4.2 x 10mm
3x
P2
P9
13
v.08012023C

23R is upon 22L
11
Assemble the left rear wall channel (23R) to the assembly.
10
5
P2
P9
22L
F1
S3
F1
23R
Assemble the wall panel-1 (P2) to the assembly.
F1S3
22L
23R
22L
F1
5
P2
P9 23R
23R
P2
The hole on the right should be left.
Don't screw on the F1 screw.
The 2 holes here should be left.
Don't screw on the F1 screws.
F1
S3
5x
ST4.2 x 10mm
4x
F1
S3
3x
ST4.2 x 10mm
3x
14

23L is upon 23R
Assemble the corner panel (P9) to the assembly.
12
F1
S3
5
P2
P9 23R
P2
5
P2
P9 23R
13 Assemble the left rear wall channel (23L) to the assembly.
P9
P9
P2
23R
23L
23R
23L
F1
The hole on the right should be left.
Don't screw on the F1 screw.
The hole on the right of P9
bottom should be left.
Don't screw on the F1 screw.
23L
F1
S3
4x
ST4.2 x 10mm
4x
F1
S3
5x
ST4.2 x 10mm
4x
F1
S3
P2
P9
15
v.08012023C

15 Assemble the corner panel (P9) and Wall Panel-3 (P3)
Assemble the right side wall channel (22R) to the assembly.
14
5
F1
S3
23L
23L 22R
22R
F1
23L
22R
5
The hole on the right should be left.
Don't screw on the F1 screw.
F1
S3
F2
F2
S3
P9
P3
P9
P3
F1
S3
4x
ST4.2 x 10mm
3x
F1
F2
F2
S3
5x
ST4.2 x 10mm
6x
1x
1x
M4 x 10mmM4 x 10mm
The 2 holes on the right
should be left.
Don't screw on the F1 screws.
23L is upon 22R
16

17 Assemble the wall panel-2 (P1) to the assembly.
S3
F1
Assemble the left side wall channel (22L) to the assembly.
The 2 holes here should be left.
Don't screw on the F1 screws.
The hole on the right should be left.
Don't screw on the F1 screw.
22L is upon 22R
16
5
22R
22L
S3
F1
F2
F2
S3
5
P1
P1
F2 2x
M4 x 10mm
F2 2x
M4 x 10mm
F1
S3
4x
ST4.2 x 10mm
3x
F1
S3
8x
ST4.2 x 10mm
10x
22R
22L F1
22R
22L
17
v.08012023C

These 4 holes here should be left.
Don't screw on the F1 screws.
Part 11 is upon Part 9
9
11
9
11
Assemble the side wall angles-1 (9) and side wall angles-2 (11) to the assembly.
18
F1
S3
14x
ST4.2 x 10mm
12x
9
11
F1
9
11
S3
F1
F2 8x
M4 x 10mm
F2 8x
M4 x 10mm
Assemble the gable braces (B1,B2) to the gables (21L,21R).
19
S3 8x
21R 21L
F2
S3 F2
B2 B1
21R 21L
B2 B1
18

21
20
Assemble the air vent windows (GF) to the assemblies.
4x
F2 4x
M4 x 10mm
F2 4x
M4 x 10mm
F2 8x
M4 x 10mm
F2
GF
8x
M4 x 10mm
Assemble the left gables (21L) , gable braces-1 (B3) , roof beam splices (12) , gable
braces-1 (B4) to the right gables (21R).
F2
GF
GF
F2
F2
B4
12
B3
21R 21L
B4
12
B3
21R 21L
GF
GF
Please wear gloves and bend
the corner of Part 12.
Part 12 should be
installed on 21L
between the left
folding edge and B3.
12
F2
B3
12
21L
19
v.08012023C

22 Assemble the rear wall angle-1 (10L) , rear wall angle-2 (10R) and the tri-angle
panel to the assembly.
23 Slide in the door slides (G2) to the left door track (7) and right door track (8).
F1 9x
ST4.2 x 10mm
S3 8x
G2 4x
7
8
10L
10R
5
F1
S3
10L
10R
5
F1
The 2 holes here should be
left for another panel. Don't
screw F1 screws.
10L
10R
10L
10R
20
Table of contents
Popular Outdoor Storage manuals by other brands

Suncast
Suncast BMDB200 Assembly instructions

Biohort
Biohort HighBoard 160 Assembly manual

Yardline
Yardline RIDGEPOINTE Assembly manual

Arrow Storage Products
Arrow Storage Products LWEG86BG Owner's manual & assembly guide

Patiowell
Patiowell T-PS1268S0BN-1A Assembly instructions

ABSCO SHEDS
ABSCO SHEDS CYC15 Assembly & instruction manual