Setting up the oven for first-time use.
When using the oven for the first time it should be should be heated to 230°C for about 30 minutes to burn off any oily residues left
on during the manufacturing process which may contaminate foods with unpleasant smells. To help prevent excess condensation,
cover food wherever possible and do not leave food inside the oven to keep warm after the end of the cooking programme.
Setting the Time / Date
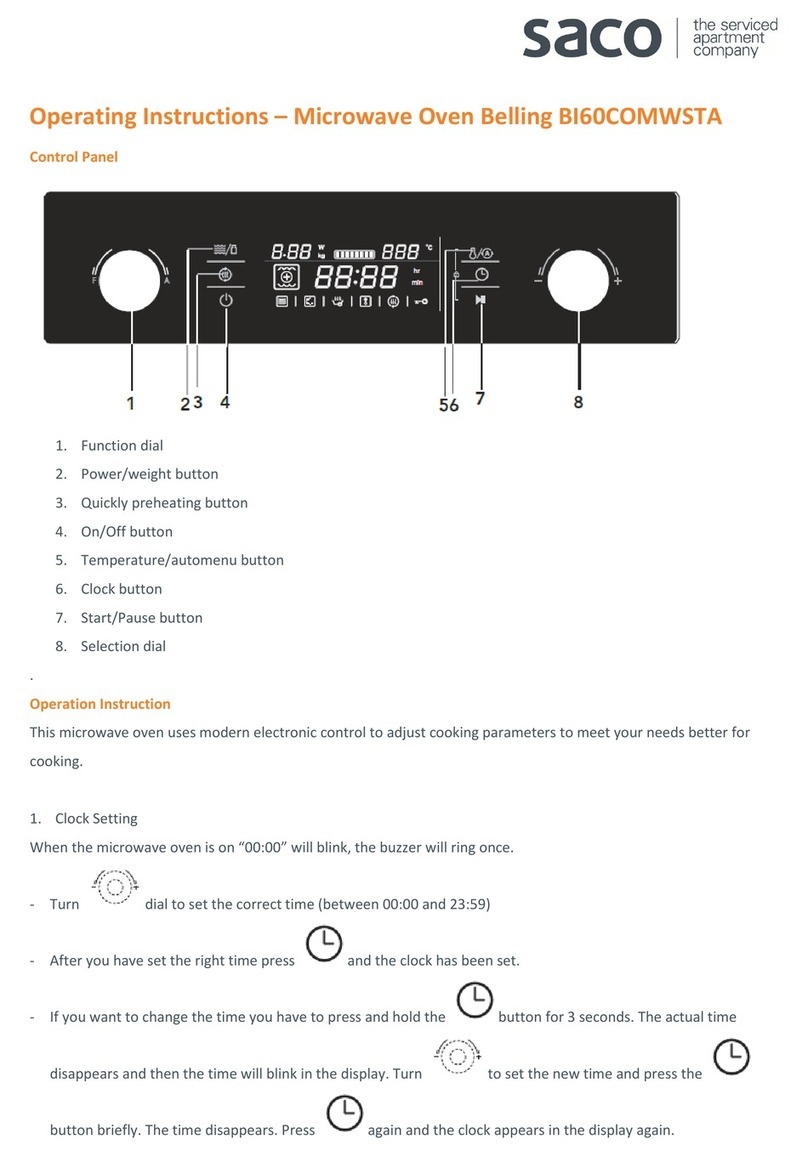
When the appliance is first connected to the power supply, the display screen will show '0:00', with the hours digits flashing. While
the hours digits are flashing, use the plus and/or minus keys to set the current hour, using the 24 hour clock. Then touch the clock
setting key; the hour is set and the minutes can now be set. Use the plus and/or minus keys to set the minutes. Touch the clock
setting key once; the minutes are set. Touch the clock setting key again, and the time of day is accepted.
The clock display uses the 24-hour clock.
When needing to adjust the current time of day, first make sure that no cooking programmes are currently in operation. While the
appliance is in standby mode, touch and hold the clock setting key for about three seconds until the time of day appears and the
hours digits start flashing. While the hours digits are flashing, it can be adjusted as before:
Use the plus and/or minus keys to set the current hour, using the 24-hour clock. Then touch the clock setting key; the hour is set and
the minutes can now be set. Use the plus and/or minus keys to set the minutes. Touch the clock setting key once; the minutes are
set. Touch the clock setting key again, and the time of day is accepted.
To save energy, it is normal for the display screen to go blank when no cooking programme is in operation and no key has been
touched for a while. Touching the clock setting key will display the time of day. Touching the clock setting key again will hide the
time of day again.
Choosing a cooking function
While the appliance is in standby mode, touch the power key until the display screen lights up. Now use the plus and/or minus keys
to scroll through the list of cooking function symbols. Touch the plus or minus key repeatedly until the required cooking function
symbol lights up.
When the microwave symbol is lit up on the left-hand-side of the display screen, the microwave power level and cooking duration
time symbols will light up on the right-hand-side of the display screen to remind you to set these.
Touch the cooking time key, and the duration time will flash. While the duration time is flashing, use the plus and/or minus keys to
select the required cooking time (between 1 minute and 90 minutes). If a 100% microwave power level is set to run for more than
30 minutes, it will automatically be reduced to 80% microwave power level after 30 minutes.
Then touch the adjustment key, and the microwave power level will flash. While the microwave power level is flashing, use the plus
and/or minus keys to adjust the microwave power level.
Touch the start key to start cooking.
Grill function
When the grill symbol is lit up on the left-hand-side of the display screen, the grill and cooking duration time symbols will light up on
the right-hand-side of the display screen to remind you to set the duration time.
Touch the cooking time key, and the duration time will flash. While the duration time is flashing, use the plus and/or minus keys to
select the required cooking time (between 1 minute and 90 minutes).
Touch the start key to start cooking.
Convection
When the convection symbol is lit up on the left-hand-side of the display screen, the temperature and cooking duration time
symbols will light up on the right-hand-side of the display screen to remind you to set these.
Touch the cooking time key, and the duration time will flash. While the duration time is flashing, use the plus and/or minus keys to
select the required cooking time (between 1 minute and 90 minutes).
Then touch the adjustment key, and the temperature figure will flash. While the temperature figure is flashing, use the plus and/or
minus keys to adjust the required temperature (between 110°C
and 230°C).
