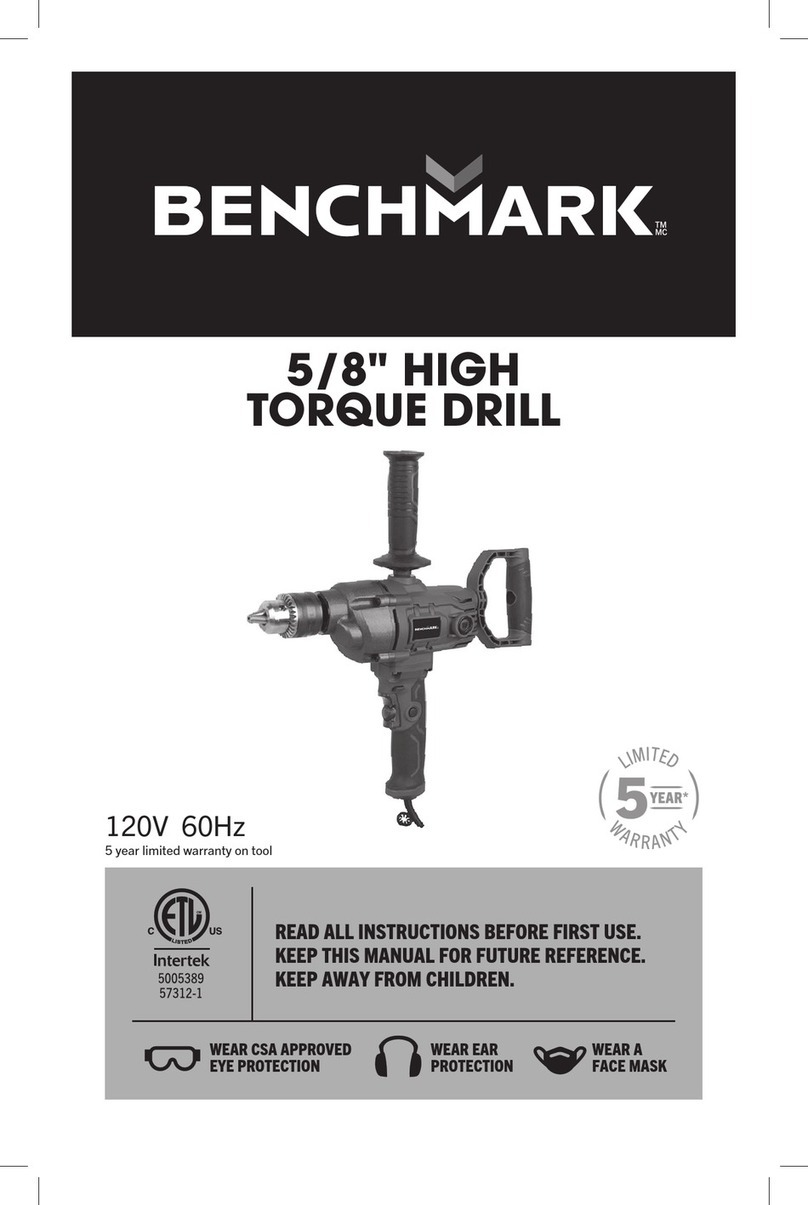
Benchmark 1282661 User manual

WEAR CSA APPROVED
EYE PROTECTION
WEAR EAR
PROTECTION
WEAR A
FACE MASK
READ ALL INSTRUCTIONS BEFORE FIRST USE.
KEEP THIS MANUAL FOR FUTURE REFERENCE.
KEEP AWAY FROM CHILDREN.
5 Year Limited Warranty
3/8" PNEUMATIC DRILL

1
PRODUCT SPECIFICATIONS
3/8" PNEUMATIC DRILL
Chuck 3/8" (10mm) keyless
Max speed 1,800 RPM (no load)
Average air consumption 4 CFM @ 90 PSI
120 psi (8.3 bar)
Working pressure 90 psi (6.2 bar)
Maximum air pressure
3/8”
Recommended hose
Weight
Air inlet size 1/4” NPT
2.4lb (1.1kg)
NEED ASSISTANCE?
Call us on our toll- free customer support line:
1-866-349-8665 (Monday through Friday 9am – 5pm Eastern Standard Time)
Note these instructions pertain to the tool only. Please refer to your
compressors operators manual and follow the manufacturers instructions.
• Technical questions
• Replacement parts
• Parts missing from package
*Please note (where the ¼” NPT connecter is not already installed on the tool) your
tool may be shipped with a black plastic cap installed in the air inlet. Pry the cap
out prior to installing the ¼” NPT connector.

1282 661
3/8" PNEUMATIC DRILL
2
TABLE OF CONTENTS
Product Specifications................................................................................... 1
Table of Contents........................................................................................... 2
Safety Guidelines ..................................................................................... 3-6
Symbols ....................................................................................................... 7
Tool Specific Warnings .................................................................................. 8
.................................................................. 9
Know Your 3/8" Pneumatic Drill
................................................................... 10-16
Assembly and Operation
Maintenance
Exploded View
....................................................................................... 17
Parts List .............................................................................................
............................................................................................
Warranty......................................................................................................
18
19-20
21

3
SAFETY GUIDELINES
DANGER! Potential hazard that will result in serious injury or loss of life.
WARNING:
WARNING! Potential hazard that could result in serious injury or loss of life.
CAUTION! Potential hazard that may result in moderate injury or damage to
equipment.
Note - The word " Note " is used to inform the reader of something he / she needs to
know about the tool.
This manual contains information that relates to PROTECTING PERSONAL SAFETY
and PREVENTING EQUIPMENT PROBLEMS. It is very important to read this manual
carefully and understand it thoroughly before using the product. The symbols listed
below are used to indicate this information.
These precautions are intended for the personal safety of the user and others working
with the user. Please take time to read and understand them.
PERSONAL SAFETY
Do not use oxygen or any other combustible or
bottled gas to power air-powered tools. Failure
to observe this warning can cause explosion
and serious personal injury or death.
Use only the compressed air to power the
air-powered tools. Use a minimum of 25’
(7.6 m) of hose to connect the tool to the
compressor. Failure to comply will result in
serious injury or loss of life.
•
Risk of electric shock: Do not expose a compressor to rain.
Store it indoors. Disconnect the compressor from power
source before servicing. Compressor must be grounded. Do
not use grounding adaptors.
•
Risk of personal injury: Do not direct compressed air from the
air hose towards the user or other personnel.
•
Oxygen
Hydrogen
Explosive
Combustible
SYMBOL MEANING

1282 661
3/8" PNEUMATIC DRILL
4
DANGER!
Keep children away from the work area. Do not allow children to handle
power tools.
Do not use this tool in the presence of flammable liquids or gases. Sparks
that are created during use may ignite gases.
Keep air hose away from heat, oil, and sharp edges. Check air hose for wear
before each use and ensure that all connections are proper.
Always ensure that the workpiece is firmly secured leaving both hands free
to control the tool.
Always ensure that the tool has stopped before putting it down after use, for
safety purposes and to prevent possible damage to the tool/user.
Keep proper footing at all times in order to ensure correct balance.
Always assume that the tool contains fasteners.
Do not point the tool toward yourself or anyone else.
•
•
•
•
•
•
•
•
Risk of inhalation: Never directly inhale the air produced by the
compressor.
•
Risk of bursting: Do not adjust the pressure switch or safety
valve for any reason. They have been pre-set at the factory for
this compressor’s maximum pressure Tampering with the
pressure switch or the safety valve may cause personal injury or
property damage.
•
Risk of burns. The pump and the manifold generate high
temperatures. In order to avoid burns or other injuries, do not
touch the pump, the manifold, or the transfer tube while the
compressor is running. Allow the parts to cool down before
handling or servicing. Keep children away from the compressor
at all times.
•
Risk of bursting: Make sure the regulator is
adjusted so that the compressor outlet
pressure is set lower than the maximum
operating pressure of the tool. Before
starting the compressor, pull the ring on the
safety valve to make sure the valve moves
freely. Drain water from tank after each use.
Do not weld or repair tank. Relieve all
pressure in the hose before removing or
attaching accessories.
•
SYMBOL MEANING

5
WARNING!
Do not allow unskilled or untrained individuals to operate the air tool.
Do not use the tool for any task other than that it is designed to perform.
Locate the compressor in a well-ventilated area for cooling, and a minimum
of 12” (31 cm) away from the nearest wall.
Protect the air hose and the power cord from damage and puncture. Inspect
them for weak or worn spots every week and replace them if necessary.
Always wear hearing protection when using the air compressor. Failure to do
so may result in hearing loss.
Do not carry the compressor while it is running.
Do not operate the compressor if it is not in a stable position.
Do not operate the compressor on a rooftop or an elevated position that
could allow the unit to fall or be tipped over.
Always replace a damaged gauge before operating the unit again.
Do not connect the tool to a compressed air source with a pressure output
that is higher than 90psi.
•
•
•
•
•
•
•
•
•
•
CAUTION!
Always ensure that the tool has stopped before disconnecting the air supply.
Do not wear watches, rings, bracelets, or loose clothing when using any
air- powered tool.
Do not overload the tool. Allow the tool to operate at its optimum speed for
maximum eciency.
Do not use a tool that is leaking air, that has missing or damaged parts, or
that requires repairs. Verify that all screws are securely tightened.
For optimal safety and tool performance, inspect the tool before every usage,
in order to ensure free movement of the trigger, safety mechanisms, and
springs. Always keep your air tool clean and lubricated. Daily lubrication is
essential to avoid internal corrosion and possible failures.
Ensure the floor is not slippery and wear non-slip shoes. Floors should be
kept clean and clear.
Always follow all workshop safety rules, regulations, and conditions when
using the tool and keep the work area clean.
Carry the tool by the handle only, keeping fingers away from the trigger. Do
not carry the tool by the hose, magazine, or any other parts.
Do not use the tool near or below freezing point, as doing so may cause tool
failure. Do not store the tool in a freezing environment to prevent ice
formation on the tools operating valves, as doing so may cause tool failure.
Handling and storage of oil: Use with adequate ventilation. Avoid contact of
oil with eyes, skin, and clothing. Avoid breathing spray or mist. Store in a
tightly closed container in a cool, dry, well-ventilated area free from
Incompatible substances.
Tripping hazard. The air hose may become a tripping hazard when it is
placed in the work area. Use care when walking in the work area.
•
•
•
•
•
•
•
•
•
•
•

1282 661
3/8" PNEUMATIC DRILL
6
CAUTION!
Disconnect tool from the air supply and turn o the
compressor before performing any maintenance or
changing accessories, when clearing a jammed
fastener, when the tool is not in use, when it is being
handed to another person, and when it is left
unattended. Failure to comply may result in moderate
injury or damage to equipment.
•
Use safety goggles and ear protection: Wear safety
glasses with side shields when operating the
tool/compressor and verify that others in the work
area are also wearing safety glasses. Safety glasses
must conform to American National Standards
Institute (ANSI Z87. 1) requirements and must
provide protection from flying particles from the front
and the sides.
Air-powered tools are loud, and the sound can cause hearing damage.
Always wear ear protection to prevent hearing damage and loss. Failure to
comply may result in moderate injury.
Note: Recycle unwanted materials rather than disposing of them as waste. Sort the
tools, hoses, and packaging in specific categories and take to the local recycling
centre or dispose of in an environmentally safe way.
•

7

1282 661
3/8" PNEUMATIC DRILL
8
Do not disconnect or reconnect the air hose with the tool pressed.•
TOOL SPECIFIC WARNINGS
DANGER Potential hazard that will result in serious injury or death.
Never trigger the tool when not applied to a work object.
Loose attachments can cause serious injury
Protect air lines from damage or puncture.
Never point an air tool at oneself or any other person. Serious injury could
occur.
Check air hoses for weak or worn condition before each use. Make sure all
connections are secure.
Keep all nuts, bolts, and screws tight and ensure equipment is in safe
working condition.
Do not put hands near or under moving parts.
Do not drill into areas which may contact electrical wiring or piping.
Hold drill firmly with both hands when using hole saws or other bits that may
bind when breaking through material.
Always wear safety glasses and ear protection during operation.
Do not depress trigger when connecting the air supply hose.
Always use attachments designed for use with air powered tools.
Do not use damaged or worn attachments.
•
•
•
•
•
•
•
•
•
•
•
•
•
WARNING Potential hazard that could result in serious injury or death.

9
KNOW YOUR 3/8" PNEUMATIC DRILL
Keyless 3/8" chuck
¼" Air Inlet
Exhaust
Trigger
Handle
Forward/Reverse Switch

ASSEMBLY AND OPERATION
1282 661
3/8" PNEUMATIC DRILL
10
Always use clean, dry, regulated, compressed air at 4.8 to 6.2 bar (70 to 90 PSI)
Do not exceed the maximum or minimum pressures. Operating the tool at the wrong
pressure (too low or too high) will cause excessive noise or rapid wear of tool.
AIR SYSTEM
Be sure to use proper air compressor with air-powered tools. The compressor
should be able to supply a minimal air delivery of 4 CFM @ 90 SPI to ensure the
compressor can run continuously with the tool.
Compatible Compressors
Guidelines for proper use and operation
No. Description No. Description
3/8" Pneumatic Drill
Quick connector
Quick coupler
Air hose
Lubricator
Regulator (0 to 8.5 bar)
Filter
Cut-o valve
Air compressor
1
2
3
4
5
6
7
8
9
Air Compressor
Size & Power
4 - 5 Gallons Light duty and
intermittent use
Light duty and
intermittent use
Light duty and
intermittent use
6 - 11 Gallons Light duty and
intermittent use
Medium duty and
intermittent use
Medium duty and
intermittent use
15+ Gallons Medium duty and
intermittent use
Heavy duty and
continuous use
Heavy duty and
continuous use
1 1/2 – 2 HP 2 1/2 HP 3 +HP
Fig. 1

The inside diameter of the hose should be increased to compensate for unusually
long air hoses (over 25 feet). Minimum hose diameter should be 3/8" I.D. and fittings
should have 1/4" NPT thread.
The use of air line lubricators and air line filters is recommended to prevent water in
the line that can damage the tool. Drain the air after each use. Clean the air inlet filter
screen on at least a weekly schedule to remove accumulated dirt or other matter
that can restrict air flow.
The tool’s air inlet used for connecting an air supply has standard 1/4" NPT American
thread.
11
Inspect the air hose for cracks or other problems. Replace the hose if worn.
Never point an air hose at another person.
Disconnect the tool when not in use, or before performing service or changing
accessories.
Use proper hoses and fittings. Never use quick change couplings attached to the
tool. Instead, add a hose and coupling between the tool and the air supply.
•
•
•
•
ADDITIONAL WARNINGS
The 3/8" pneumatic Drill is designed for drilling, honing, reaming, hole sawing
and wire bushing. The drill is also used to tighten and loosen threaded fasteners. The
keyless chuck provides fast and convenient change of drill bits. Do not use the tool
for any other purpose than that specified. To do so may be dangerous.
USING THE TOOL
CAUTION: This air tool requires lubrication BEFORE initial use, also before and
after each additional use.
WARNING: Use a clean lubricated air supply that will give a measured air
pressure at the tool of 90 psi/6.2 bar when the tool is running with the trigger
fully depressed. Too high an air pressure and unclean air will shorten the
product life due to excessive wear and may be dangerous causing damage or
personal injury.
The 3/8" chuck (1) is a quick-change keyless chuck for easy bit changing. (Fig. 2)
CHUCK
Fig. 2 Fig. 3
1
2
1

1282 661
3/8" PNEUMATIC DRILL
12
The trigger (1) allows the operator to control the start and stop of the air tool. (Fig. 3)
TRIGGER
The forward/reverse switch (2) is located on the left side of the trigger and the switch
is marked F for forward and R for reverse. (Fig.3)
FORWARD/REVERSE SWITCH
This air tool has an ergonomic grip (1) with rubber over mold, designed for improved
comfort, slippage reduction and better tool control design for improved comfort,
slippage reduction, and better tool control.
HANDLE
The tool’s air inlet (2) located at the bottom of the handle is used for connecting an
air supply with a standard 1/4" NPT American thread. (Fig. 4)
AIR INLET
The exhaust (3) is located at the base of the handle and allows the exhaust to be
directed away from the operator and working area. (Fig. 4)
EXHAUST
Fig. 4
1
2
3
Use recommended hose size. It is recommended that the tool is connected to the air
supply as shown in fig. 1 on page 9. Do not connect the tool to the air line system
without incorporating an easy to reach and operate air shut o valve. The air supply
should be lubricated. It is strongly recommended that an air filter, regulator,
lubricator (FRL) is used as shown in fig. 1 on page 9 as this will supply clean,
lubricated air at the correct pressure to the tool. Details of such equipment can be
obtained from your supplier. If such equipment is not used, then the tool should be
lubricated by shutting o the air supply to the tool and then depressurizing the line
by pressing the trigger on the tool. Disconnect the air line and pour into the air inlet 1
teaspoon (5cc.) of a suitable pneumatic motor lubricating oil, preferably
incorporating a rust inhibitor. Reconnect tool to air supply and run tool slowly for a
few seconds to allow air to circulate the oil.
Lubricate tool daily if used frequently, or when it starts to slow or lose power.

13
Read all instructions before using this tool. All operators must be fully trained in
its use and aware of these safety rules.
Do not exceed the maximum working air pressure of 120 psi/8.3 bar.
Use personal safety equipment.
Use only compressed air at the recommended conditions.
If the tool appears to malfunction, remove from use immediately and arrange for
service and repair.
If the tool is used with a balancer or other support device, ensure that it is fixed
securely.
Always keep hands away from the working attachment fitted to the tool.
The tool is not electrically insulated. Never use the tool if there is any chance of
it coming into contact with live electricity.
When using the tool, always adopt a firm footing and/or position and grip the
tool firmly to counteract any forces or reaction forces that may be generated
while using the tool.
Use only identical spare parts or parts which perform equivalently. Do not make
temporary or permanent repairs with unauthorized parts.
Do not lock, tape, wire, etc., the on/o trigger in the run position. The trigger
must always be free to return to the “o” position when it is released.
Always shut o the air supply to the tool and depress the trigger to release air
from the feed hose before fitting, adjusting, or removing the working attachment.
Check hoses and fittings regularly for wear. Replace if necessary. Do not carry
the tool by its hose. Ensure the hand is removed from the on/o trigger when
carrying the tool with the air supply connected.
Take care against entanglement of moving tool parts with clothing, ties, hair,
cleaning rags, etc. This will cause the body to be drawn towards the tool and
can be very dangerous.
Safe working practices and observe all relevant legal requirements when
installing, using, or maintaining the tool.
Only install the tool when an easily accessible and easily operable on/o switch
is incorporated in the air supply.
Take care that the tool exhaust air does not cause problems or blow onto
another person.
Never lay a tool down unless the working attachment has stopped moving.
Do not start the tool until the bit is securely clamped in the chuck jaws.
Do not start the tool until the bit is in contact with the surface being drilled.
Use drill bits appropriate for the material being drilled.
Do not force the drill. If drilling becomes dicult, professional re-sharpening or
replacement of the bit may be necessary.
Worn/blunt bits should not be used as this condition contributes to increased
vibration and possible tool breakage. A bit that breaks can cause injury.
WARNING:
1.
2.
3.
4.
5.
6.
7.
8.
9.
10.
11.
12.
13.
14.
15.
16.
17.
18.
19.
20.
21.
22.
23.

PRE-START CHECKLIST
1282 661
3/8" PNEUMATIC DRILL
14
Drain water from air compressor tank and condensation from air lines. (Please
refer to air compressor’s operation manual.)
Lubricate the tool. (Please refer to the “Maintenance” section in the manual.)
•
INSTALLING/REMOVING DRILL BITS
ALWAYS disconnect drill from air supply before changing drill bits!•
To install the drill bit, loosen the chuck jaws by turning the front of the chuck
counter-clockwise.
Carefully insert drill bit into chuck. To ensure proper operation, ensure that the bit
is entered between the jaw teeth.
•
•
•
WARNING: Risk of unsafe operation. Firmly grasp air hose with hand when
installing or disconnecting to prevent hose whip.
WARNING: Risk of bursting. Too much air pressure causes a hazardous risk of
bursting. Check the manufacturer’s maximum pressure rating for air tools and
accessories. The regulator output pressure must never exceed the maximum
pressure rating.
Fig. 5
DRILL BIT CHUCK
INSTALLING/REMOVING DRILL BITS CONTINUED
Tighten the chuck jaws by turning the front of the chuck clockwise.•

15
NOTE: Whenever possible, secure the working piece in a vise or clamp prior to
starting drilling.
Fig. 6
DRILL BIT CHUCK

1282 661
3/8" PNEUMATIC DRILL
16
Turn on the air compressor and allow the air tank to be filled.
Set the air compressor regulator to 90 PSI. This air tool operates at a maximum of
90 PSI air pressure.
Adjust tool either in forward or reverse position.
Depress the trigger to start operating the tool.
•
•
•
•
OPERATING PROCEDURES
START-UP
Release the trigger in order to stop the tool.
When changing drills or accessories, always disconnect air supply to avoid injury.
When job is completed, turn o the air compressor and store the air tool after
lubrication.
•
•
•
SHUT-DOWN
Mark the desired drilling location with an awl or punch to provide a seat for the tip
of the bit.
Place drill bit tip on location of mark and apply pressure to trigger to start drill. If
drilling metal, apply lubricant to reduce friction and glazing.
Apply constant, even pressure while guiding the drill.
Reduce pressure before cutting through workpiece. Continue depressing trigger
until bit is fully removed from the drilled hole.
•
•
•
•
OPERATING INSTRUCTIONS
WARNING: Use of safety glasses and a breathing mask is recommended.
Drilling certain materials may create hazardous dust which may require special
breathing equipment. Check before using the tool. Although the tool has a low
noise level, the actual drilling process may cause a noise level such that ear
protectors will be required. Safety gloves are recommended.
CAUTION: Drill bit or surface may become extremely hot during drilling. DO
NOT touch until cooled.

MAINTENANCE
17
Remove any attachment on the air tools, such as: drills, accessories, etc.
Disconnect the tool from the air supply source, place the air inlet face up.
Depress the trigger and place about 1 teaspoon (5cc.) of air tool oil into the air
inlet. (Depressing the trigger will help circulate oil in the motor.)
1.
2.
3.
Connect the tool to an air source, cover the exhaust end with a towel and run
for about 20 to 30 seconds.
4.
LUBRICATION
Air tools require lubrication throughout the lifetime of the tools. The air motor and
bearing uses compressed air to power the tool. The compressed air contains
moisture that will rust the air motor and other parts inside of the tools, therefore
lubrication is required daily. Failure to lubricate the air tool properly will dramatically
shorten the life of the tool and will void the warranty.
STORAGE:
If it is necessary to store the tool for an extended period of time, apply a generous
amount of lubrication before storing. The tool should be allowed to run for
approximately 30 seconds after lubricating, in order to ensure that the lubrication is
uniformly distributed throughout the tool.
NOTE: Use SAE #10 weight oil if air tool oil is not available.
NOTE: Do not store the tool anywhere temperatures will fall below freezing.
To Lubricate the Air Tool Manually:
CAUTION: This air tool requires lubrication BEFORE initial use, also before
and after each additional use.
DANGER! Disconnect the tool from the air compressor before maintenance/
service, adjusting, cleaning jams, reloading, and when it is not in use. Repairs
must be performed by a qualified service technician only. Failure to comply
will lead to serious injury or loss of life.
WARNING: Keep out of the reach of children. If taken internally, do not induce
vomiting, call a doctor immediately.
WARNING: Any excess oil in the motor is immediately expelled from the
exhaust port. Always direct exhaust port away from people or objects.

EXPLODED VIEW
1282 661
3/8" PNEUMATIC DRILL
18

PARTS LIST
WARNING: When servicing, use only original equipment replacement parts.
The use of any other parts may create a safety hazard or cause damage to the tool.
Any attempt to repair or replace electrical parts on this tool may create a safety
hazard unless repairs are performed by a qualified technician. For more information,
call the Toll-free Helpline, at 1-866-349-8665.
Always order by part number.
Key # Part # Part Name Quantity
1
2
3
4
5
6
7
8
9
10
11
12
13
14
15
16
17
18
19
20
21
22
23
24
25
26
27
28
29
03.02.01.011.040-09
03.05.04.049
03.02.01.011.019
03.02.01.011.024-02
05.02.17.0080
03.02.01.011.015
03.05.01.415
03.05.01.191
03.05.01.051
03.02.01.011.018
03.02.01.011.017
03.05.01.043
03.02.01.011.016
03.02.01.011.022
03.05.07.075
03.02.01.011.002
03.05.02.144
03.02.01.011.003
03.02.01.011.004
03.02.01.011.005
03.02.01.011.001
03.02.01.011.006
03.02.01.011.007
03.02.01.011.008
03.02.01.011.010
03.02.01.011.009
03.02.01.011.013
03.05.02.090
03.02.01.011.012
Housing
Pin 3x24
Exhaust Deflector
Air inlet
Dust guard cover
Pin
O-ring 4x2
O-ring 4x1.1
o-ring 12x3
Bushing
Reverse lever
O-ring 11.5×1.8
Spring
Trigger
Bolt M4×8
Sealing washer
Bearing 626ZZ
End Plate
Cylinder
Rotor Blade
Steel wire
Rotor
Front Plate
Washer
Gear wheel
Idle Gear
Gear shaft
Bearing 6201Z
Clamp nut
1
1
1
1
1
1
1
1
1
1
1
1
1
1
1
1
2
1
1
5
1
1
1
1
1
3
1
2
1
19
Table of contents
Other Benchmark Drill manuals
