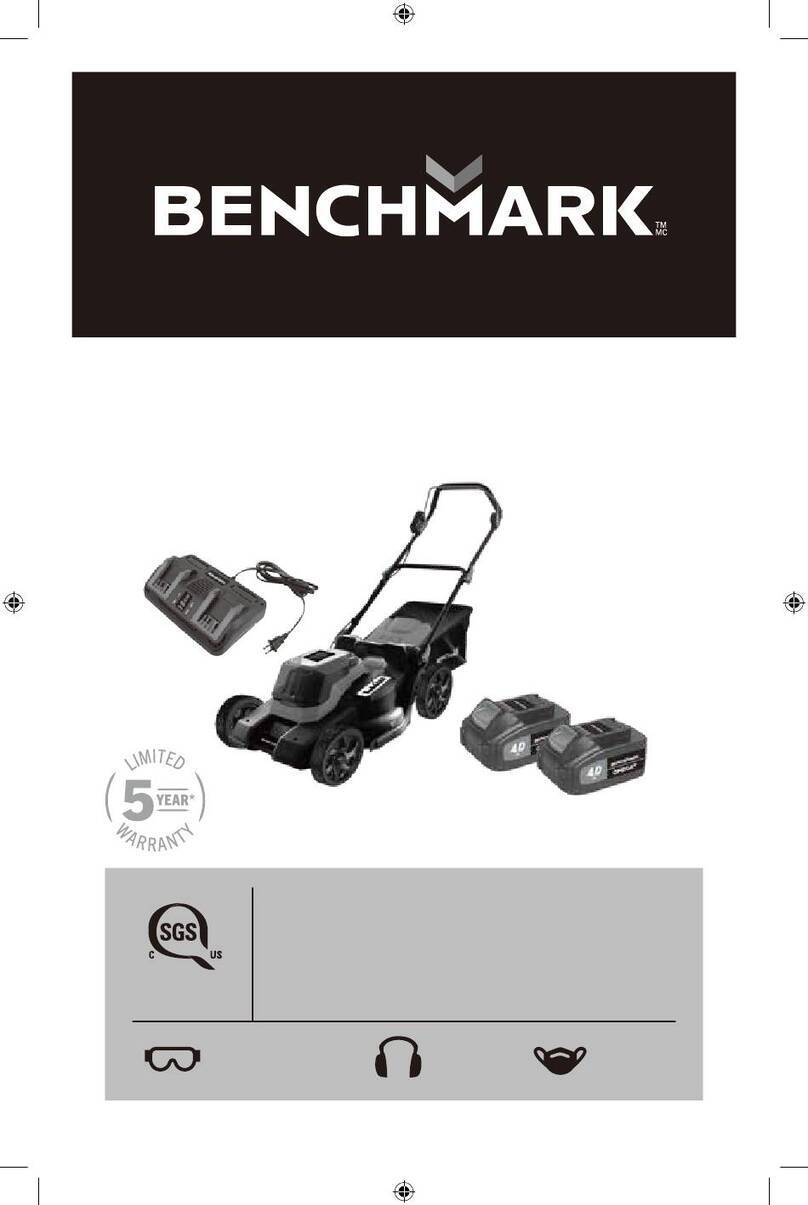
Benchmark 5125-016 User manual

READ ALL INSTRUCTIONS BEFORE FIRST USE.
KEEP THIS MANUAL FOR FUTURE REFERENCE.
KEEP AWAY FROM CHILDREN.
Uses two 20V Max lithium-ion batteries that deliver an initial battery voltage
(measured without a workload) of 40 volts. Nominal voltage is 36V.
WEAR CSA APPROVED
EYE PROTECTION
WEAR EAR
PROTECTION
WEAR A
FACE MASK
GY225502
Includes 2 batteries & 1 charger
5 Year Limited Warranty on tool
3 Year Limited Warranty on battery and charger
40V MAXBRUSHLESS
LAWN MOWER
5125-016k EnProdManual P.indd 1 2020-12-17 2:09 PM

1
PRODUCT SPECIFICATIONS
40V BRUSHLESS LAWN MOWER
Voltage 40V (2 x 20V) No Load
No load 3300 RPM
Cutting width 18" (45.7 cm)
Cutting height 1"-3" (25-75 mm)
Grass catcher volume 60 L (16 gallons)
Weight 65.81 lbs (29.85 kg)
BATTERY AND CHARGER
Battery voltage 2x20V 5 Ah Li-ion
(Maximum charged battery voltage, measured
without load, is 20V with a nominal value of 18V)
Dual charger Up to 150 minutes
Replacement battery 5350-012
Replacement charger 5350-024
NEED ASSISTANCE?
Call us on our toll-free customer support line:
1-866-349-8665 (Monday through Friday 9am – 5pm Eastern Standard Time)
• Technical questions
• Replacement parts
• Parts missing from package
5125-016k EnProdManual P.indd 1 2020-12-17 2:09 PM

5125-016
40V MAX BRUSHLESS LAWN MOWER
2
TABLE OF CONTENTS
.................................................................................. 1
Table of Contents .......................................................................................... 2
General Safety Warnings ............................................................................... 3
Lawn Mower Safety ....................................................................................... 4
Maintenance & Storage ................................................................................. 5
Battery Pack & Charger Safety ...................................................................... 6
Battery Pack Recycling ................................................................................. 8
Safety Symbols .............................................................................................. 9
Know Your 40v Brushless Lawn Mower ........................................................ 12
Assembly .................................................................................................... 13
Checking the Battery Charge Status/Assembly & Operating ......................... 15
Operation .................................................................................................... 17
Maintenance ............................................................................................... 21
Exploded View ............................................................................................ 23
Parts List .................................................................................................... 24
Warranty ..................................................................................................... 29
5125-016k EnProdManual P.indd 2 2020-12-17 2:09 PM

3
GENERAL SAFETY WARNINGS
WARNING: Before using this tool or any of its accessories, read this manual
and follow all Safety Rules and Operating Instructions. The important precautions,
safeguards and instructions appearing in this manual are not meant to cover all
possible situations. It must be understood that common sense and caution are
factors which cannot be built into the product.
EYE, EAR & LUNG PROTECTION
ALWAYS WEAR EYE PROTECTION THAT CONFORMS WITH CSA REQUIREMENTS
OR ANSI SAFETY STANDARD Z87.1
FLYING DEBRIS can cause permanent eye damage. Prescription eyeglasses
ARE NOT a replacement for proper eye protection.
WARNING: Non-compliant eyewear can cause serious injury
if broken during the operation of a garden tool.
WARNING: Use hearing protection, particularly during extended periods
of operation of the tool, or if the operation is noisy.
WEAR A DUST MASK THAT IS DESIGNED TO BE USED WHEN
OPERATING A GARDEN TOOL IN A DUSTY ENVIRONMENT.
WARNING: Dust that is created by power sanding, sawing, grinding, drilling,
and other construction activities may contain chemicals that are known to cause
cancer, birth defects, or other genetic abnormalities. These chemicals include:
• Lead from lead-based paints
• Crystalline silica from bricks, cement, and other masonry products
• Arsenic and chromium from chemically treated lumber
The level of risk from exposure to these chemicals varies, according to how often
this type of work is performed. In order to reduce exposure to these chemicals,
work in a well-ventilated area, and use approved safety equipment, such as a dust
ELECTRICAL SAFETY
WARNING:
to the tool, use proper circuit protection.
WARNING: Ventilation openings in batteries and chargers must always
be open to allow cooling air to circulate freely. Air vents that are blocked,
restricted or covered may result in the battery or charger overheating.
possible serious injury.
5125-016k EnProdManual P.indd 3 2020-12-17 2:09 PM

5125-016
40V MAX BRUSHLESS LAWN MOWER
4
LAWN MOWER SAFETY
SAFETY WARNINGS
1. This product is not intended for use by persons (including children) with
reduced physical, sensory or mental capabilities, or lack of experience and
knowledge, unless they have been given supervision or instruction concerning
use of the product by a person responsible for their safety.
2. Children should be supervised to ensure that they do not play with the
product. Cleaning and user maintenance shall not be made by children
without supervision.
SPECIFIC SAFETY RULES FOR ELECTRICALLY
POWERED LAWN MOWERS
1. Read the instructions carefully. Be familiar with the controls and the proper
use of the product.
2. Never allow children or people unfamiliar with these instructions to use
the product. Local regulations can restrict the age of the operator.
3. Never mow while people, especially children, or pets are nearby.
4. Keep in mind that the operator or user is responsible for accidents or hazards
occurring to other people or their property.
PREPARATION
1. While mowing, always wear substantial footwear and long trousers. Do not
operate the product when barefoot or wearing open sandals. Avoid wearing
2. Thoroughly inspect the area where the product is to be used and remove
all objects which can be thrown by the product.
3. Before using, always visually inspect to see that the cutting blade,
cutting blade bolts and cutting blade assembly are not worn or damaged.
Replace worn or damaged cutting blades and bolts in sets to preserve balance.
Replace damaged or unreadable labels.
4. CAUTION! Do not touch a rotating cutting blade.
OPERATION
1.
2. Avoid operating the product in wet grass, where feasible.
3. Always be sure of your footing on slopes.
4. Walk, never run.
5. Mow across the face of slopes, never up and down.
6. Exercise extreme caution when changing direction on slopes.
7. Do not mow excessively steep slopes.
8. Use extreme caution when reversing or pulling the product towards you.
5125-016k EnProdManual P.indd 4 2020-12-17 2:09 PM

5
9. Stop the cutting blade(s) if the product has to be tilted for transportation when
crossing surfaces other than grass, and when transporting the product to and
from the area to be mowed.
10. Never operate the product with defective guards, or without safety devices,
11. Start the product or switch on the product carefully according to instructions
and with feet well away from the cutting blade(s).
12. Do not tilt the product when switching on the motor, except if the product
has to be tilted for starting. In this case, do not tilt it more than absolutely
necessary and lift only the part, which is away from the operator.
13. Do not start the product when standing in front of the discharge chute.
14. Do not put hands or feet near or under rotating parts.
Keep clear of the discharge opening at all times.
15. Never pick up or carry a product while the safety key is inserted.
16. Stop the machine and remove the disabling device. Make sure that
all moving parts have come to a complete stop:
• whenever you leave the product
• before clearing blockages or unclogging the chute
• before checking, cleaning or working on the product
• after striking a foreign object, inspect the machine for damage and make repairs
before restarting and operating the product
17. If the product starts to vibrate abnormally (check immediately)
• inspect for damage
• replace or repair any damaged parts
• check for and tighten any loose parts
MAINTENANCE AND STORAGE
1. Keep all nuts, bolts and screws tight to be sure the product is in safe
working condition.
2. Check the grass catcher frequently for wear or deterioration.
3. Be careful during adjustment of the product to prevent entrapment
4. Allow the product to cool before storing in any enclosure.
5. When servicing the blades be aware that, even though the power source
6. Replace worn or damaged parts for safety. Use only genuine replacement
parts and accessories.
7. Wear strong work gloves when removing and re-assembling the cutting blade.
5125-016k EnProdManual P.indd 5 2020-12-17 2:09 PM

5125-016
40V MAX BRUSHLESS LAWN MOWER
6
BATTERY PACK & CHARGER SAFETY
BATTERY SAFETY INSTRUCTIONS
WARNING: Only use the charger supplied with this kit to charge the 20V Li-ion
batteries for this tool. Charging any other batteries may damage the charger and
possibly cause serious injury.
1.
another battery pack. Incorrect use may result in electric shock, overheating or
leakage of corrosive liquid from the battery.
2.
3. Be aware of possible hazards when not using your battery tool or when
changing accessories. To reduce risk, remove the safety key and battery pack
from the machine while not in operation. This will reduce the risk of electric
4.
of explosion.
5. Do not crush, drop or damage the battery pack. Do not use a battery pack
or charger that has been dropped or received a sharp blow. A damaged
battery is subject to explosion. Properly dispose of a dropped or damaged
battery immediately.
6. Batteries can explode in the presence of a source of ignition, such as a pilot
light. To reduce the risk of serious personal injury, never use any cordless
7. Do not charge battery in a damp or wet location. Following this rule will reduce
the risk of electric shock.
8. Longer life and better performance can be obtained if the battery pack is
charged when the air temperature is between 75°F / 24°C and 64°F / 18°C.
Do not charge the battery pack in air temperature below 41°F / 5°C or above
105°F / 40.5°C. This is important as it can prevent serious damage
to the battery pack.
9. Under extreme usage or temperature conditions, battery leakage may occur.
If liquid comes in contact with your skin, wash immediately with soap and
10 minutes, then seek immediate medical attention.
10. When battery pack is not in use, keep it away from other metal objects like:
paper clips, coins, keys, nails, screws, or other small metal objects that can
make a connection from one terminal to another. Shorting the battery terminals
5125-016k EnProdManual P.indd 6 2020-12-17 2:09 PM

7
11. Do not disassemble the battery and avoid mechanical damage to the battery.
Risk of short circuit and fumes may be emitted. Ensure fresh air and seek
medical assistance in the event of discomfort.
12. Always remove battery pack from your tool when you are assembling parts,
making adjustments, cleaning, or when not in use. Removing battery pack
will prevent accidental starting that could cause serious personal injury.
13. Always remove battery pack before storing the device. When battery becomes
fully charged, unplug the charger from the power supply and remove the
battery pack from the charger.
14. Keep battery pack dry, clean, and free from oil and grease. Always use a
products, or any solvents to clean battery pack.
15. Keep the battery pack out of the reach of children.
CHARGER SAFETY INSTRUCTIONS
1. The plug of the charger must match the outlet. Never modify the plug
of electric shock.
2. Ensure the battery pack is charged indoors only, in a dry, cool and well
ventilated environment.
3. Do not subject the battery to sunlight over long periods and do not leave it
near a heat source. Heat damages the battery and there is a risk of explosion.
4. Allow a hot battery to cool before charging.
5. Do not use non-rechargeable batteries!
6. Do not attempt to charge battery packs other than those supplied. The charger
7. Before each use, check the charger, cable, and plug. Do not use a defective
charger and do not disassemble the charger. Incorrect reassembly may result
8. Protect the charger against moisture and wet conditions. There is a danger
of electric shock.
9. Operate the charger only with the original batteries. Charging other batteries
10. Avoid mechanical damage to the charger. This can result in internal short
circuits.
11.
etc.). The heating of the battery charger during the charging process could
12. Do not abuse the cord of the charger. Never use the cord for carrying, pulling
or unplugging the charger.
13. Keep the cord away from heat, oil, sharp edges or moving parts.
14. Damaged or entangled cords increase the risk of electric shock.
5125-016k EnProdManual P.indd 7 2020-12-17 2:09 PM

5125-016
40V MAX BRUSHLESS LAWN MOWER
8
15. Do not operate the charger with a damaged cord or plug, which could cause
cause a short circuit and electric shock. If damaged, immediately discontinue
use. Replace the charger with the identical unit as listed in the Product
it must be replaced by the manufacturer, a customer service agent of the same
16. Do not use a charger that has been dropped or received a sharp blow.
17. The voltage indicated on the charger rating plate must correspond to the
voltage of the power source.
18. Never touch the main plug with wet hands.
19. The battery of the appliance is not fully charged at the time of delivery.
the base and plug the battery charger into an outlet.
20. It is good practice to unplug the charger and remove the lithium-ion battery
pack when not in use.
21. This charger is not intended for use by persons (including children) with
reduced physical, sensory or mental capabilities, or lack of experience and
knowledge, unless they have been given supervision or instruction concerning
use of the charger by a person responsible for their safety.
22. Children should be supervised to ensure that they do not play with the charger.
RECYCLING AND DISPOSAL
WARNING: Do not dispose of batteries/rechargeable batteries
into household waste!
5125-016k EnProdManual P.indd 8 2020-12-17 2:09 PM

9
SAFETY SYMBOLS
WARNING: Please read all of the safety and operating instructions carefully
before using this lawn mower. Please pay particular attention to all sections of this
User Guide that carry warning symbols and notices. Some of the following symbols
may be used on this tool.
Only use the battery charger
indoors.
Recycle electrical waste products
in an environmentally safe way
where facilities exist.
Ampere
VoltsV
A
Hz
W
kW
L
kg
mA
mAh
Watts
Hertz
Kilowatts
Litres
Kilograms
Milliampere
Milliampere-hour
min
-1
mm
dB(A)
S
m/s²
Per minute
Millimetre
Metres per second
squared
Unlock / to loosen
Decibel (A-rated)
Seconds
Alternating current
Direct current
Double insulation
No load speed
Diameter
Directional arrow
Polarity
With fuse (xx °C)
Lock / to tighten orsecure
5125-016k EnProdManual P.indd 9 2020-12-17 2:09 PM

5125-016
40V MAX BRUSHLESS LAWN MOWER
10
Protection class II
(Double insulation)
Guaranteed sound power level
value in96 dB
Read the operator’s manual
Warning! Danger.Inspect the area where the
product is to be used and remove
all objectswhich can be thrown
by the product.
If objects are hidden while
operating stop the product
and remove the object.
Cutting device continues to rotate
Wait until all machine components
have completely stoppedbefore
touching the product.
Objectsthrown by the product
could hit the user or other
bystanders. Always ensure that
other people and pets remain at
a safe distance from the product
when it isinoperation. In general,
children must not come near the
area where the product is.
Keep hands and feet away from
sharp rotating parts – dangerof
injury! When cleaning, repairing,
or inspecting, make certain the
cutting device and all mowing
parts have stopped.
Wear hearing protection.
WARNING! Beware of electric
shocks.
Wear CSA Approved
Eye Protection.
the battery pack todisconnect
from the power supply before
assembly, cleaning, adjustments,
maintenance, storage and
transportation.
Wear a face mask.
Wear protective helmet
and eye protection.
Wear protective gloves.
Wear protective footwear.
Do not expose the product
to rainor wet conditions.
Mow across the face of slopes,
neverup and down.
5125-016k EnProdManual P.indd 10 2020-12-17 2:09 PM

11
Remove plug from the power
source immediately if the power
cord is damaged or cut.
Beware of sharp blades. Blades
continue to rotate after the motor
device before maintenance.
GO – grass catcher ready
forgrass collection
STOP - grass catcher full, empty it
Crossed out dust bin. Batteries and
battery packs should not be
disposed of with household waste.
Please recycle where facilities exist.
Checkwith your Local Authority or
local store for recycling advice.
Batteriescontain Lithium-ion.
Do not dispose of batteries in
household waste.
Do not dispose of battery packs
in rivers or immerse in water.
Do note expose battery packs
to heat inexcess of 45ºC.
Do not dispose of battery packs in
cause injury.
Approx. charging time
This symbol designates that this tool is listed with Canadian and U.S.
requirements by cSGSus Testing Laboratories, Inc.
UL1447, CSA C22.2 No.147
GY225502
5125-016k EnProdManual P.indd 11 2020-12-17 2:09 PM

5125-016
40V MAX BRUSHLESS LAWN MOWER
12
KNOW YOUR 40V BRUSHLESS LAWN MOWER
Self Propelling Lever
Cable tension
bolt kit
Start Lever
Safety
Switch
Foam
Grip
Control
Cord
Cord
Retainer
Grass
Catcher
Rear Wheel
Side Discharge Chute
Green LED
Air Vents
Red LED
Charger 5350-024 Battery JDB5154/5350-012
Upper Handle Bar
Lower Handle Bar
Safety Key
Front Wheel
Height Adjustment
Lever
5125-016k EnProdManual P.indd 12 2020-12-17 2:09 PM

13
ASSEMBLY
UNPACKING
1.
2. Remove all packing materials and shipping devices if applicable.
3. Make sure the delivery contents are complete and free of any damage.
but contact Customer Service @ 1-866-349-8665. Using an incomplete or
damaged lawn mower represents a hazard to people and property.
4. Ensure that you have all the accessories and tools needed for assembly
and operation. This also includes suitable personal protective equipment.
WARNING: The product must be fully assembled before operation! Do not
use a product that is only partly assembled or assembled with damaged parts!
Follow the assembly instructions step-by-step and use the pictures provided
as a visual guide to easily assemble the product!
Do not connect the product to battery power before it is completely assembled!
NOTE: Take care of small parts that are removed during assembly or when making
adjustments. Keep them secure to avoid loss.
LOWER HANDLE BAR
1. Align the mounting hole of the lower handle bar with the bolt of handle support
(Fig. 1).
2. Attach the washer to the bolt and secure the lower handle bar by turning the
lever (1) up for tightening.
3. Make sure that the control cord runs up the upper side of the lower handle
bar (right).
FIG. 1
5125-016k EnProdManual P.indd 13 2020-12-17 2:09 PM

5125-016
40V MAX BRUSHLESS LAWN MOWER
14
UPPER HANDLE BAR
1. Align the upper handle bar to the lower handle bar and ensure the foam handle
is pointed up when viewed from behind.
2. Pass the bolts through the mounting holes of handles (Fig. 2).
3. Attach the washer to the bolt and secure the upper handle bar by turning the
lever up for tightening (Fig. 2).
4. Secure the control cord with two wire clips (Fig. 3).
GRASS CATCHER/MULCHING OPTION/SIDE CHUTE
1. Align and insert the carry handle into the slots of top frame of grass catcher
until both ends "click" into place (Fig. 4).
2. The grass catcher is ready for use.
3. If you choose the mulcher function, then ensure the plate is inserted over
the grass chute, do not install the grass catcher. Remove plate to use
the grass catcher.
WARNING: Do not attempt to use the product without the grass catcher
catcher or the mulching plate installed. The grass catcher must be fully assembled
4.
5. Align and hook the grass catcher into the attachment slots of rear discharge chute.
FIG. 2
FIG. 4
FIG. 3
5125-016k EnProdManual P.indd 14 2020-12-17 2:09 PM
FIG. 5

15
5. To use the side chute option, remove the grass catcher (bag) and insert the
mulching plate. a) Lift the side chute discharge cover (1) with one hand and
hook in the side discharge chute (2) with the other hand (Fig. 5b). b) Release
the side discharge cover to secure the chute in position.
FIG. 5b
1 2 1
CHECKING THE BATTERY CHARGE STATUS
The level of charge remaining in the battery can be checked by using the battery
LED power indicator that is contained on the end of the battery.
NOTE: The battery charge remaining may be checked while the battery is installed
in the tool with the ON/OFF switch turned OFF. It may also be checked while the
battery is removed from the tool. DO NOT check the battery charge remaining
while the battery is in the charger.
You will get a false reading and you may also damage the
battery status system.
1. Press and hold the battery status button located on
the end of the battery
2. One or more of the four LED lights in the LED window
will come ON to indicate the amount of charge that is
remaining in the battery as follows:
Charge level
indicator
Amount of charge
remaining 0-10% 10-25% 25-50% 50-75% 75-100%
3. Release the battery status button to turn the LEDs OFF.
ASSEMBLY AND OPERATING
CHARGING THE BATTERY PACK
1. Place the battery charger (1) in a dry location near a 110–120V 60 Hz
electrical outlet (Fig. 6).
2. Plug the battery charger into the outlet and make sure the green LED indicator
light (5) comes ON. If it does not, refer to the chart (Fig. 7) to identify the problem.
5125-016k EnProdManual P.indd 15 2020-12-17 2:09 PM

5125-016
40V MAX BRUSHLESS LAWN MOWER
16
3. Turn the battery (2) upside down and slide it onto the charger.
NOTE: Make sure the grooves (3) in the sides of the battery slide over the matching
tabs on the charger (4) until the battery latch “clicks” into place.
NOTES:
1. When the charger is plugged into the wall receptacle and NO battery is on the
charger, the green indicator light (5) will turn ON indicating the charger is “live”.
2. When a discharged battery is installed on the charger, the green indicator light
will turn OFF and the red indicator light (6) will turn ON. The red indicator light
indicates the battery is being charged.
3. If the red indicator light does not come ON, check to make sure battery pack is
slid fully onto the charger and the electrical outlet is working properly.
4. See Fig. 7 below for other indicator light functions.
5. A discharged battery pack shouldbe fully charged in approximately 150 minutes.
6. It is normal for the battery charger to hum and be warm to the touch during
operation.
7. If the battery pack does not charge properly, check to make sure the electrical
outlet is “live”.
8. Do NOT charge batteries when the work area or the battery temperature is at or
below 5°C / 41°F or above 40.5°C / 105°F.
GREEN
LIGHT
RED
LIGHT
BATTERY
INSERTED
INTO CHARGER
CHARGING STATUS
ON OFF NO Charger connected
to power supply
OFF Blink YES Battery being
charged
ON OFF YES Battery fully charged
OFF ON YES Battery is charged
but not operational
on tool. This may
indicate defective /
bad contact
on battery.
ON ON YES Charging conditions
are either too hot
or too cold
FIG. 6 FIG. 7
1
2
4
6
5
6
5
4
3
2
5125-016k EnProdManual P.indd 16 2020-12-17 2:09 PM

17
OPERATION
INSTALLING THE BATTERY PACKS
1. Open the battery compartment cover.
2. Unplug the safety key (1) (Fig. 8).
3. Remove the discharged battery packs by pressing downward on the battery
release button and sliding the battery pack backward until it is removed from
the battery compartment (Fig. 8).
4. Slide the fully charged battery packs onto the matching taps in the battery
compartment where the discharged battery packs have been removed.
5. Reinstall the safety key.
6. Close the battery compartment cover.
CUTTING HEIGHT ADJUSTMENT
WARNING:
to a complete stop before adjusting the cutting height!
Remove the safety key before adjusting the cutting height!
Adjust the cutting height according to the needs of your lawn. The cutting height
depends on the kind of lawn and its actual height. When mowing high grass,
start with the maximum cutting height and make a second cut with a lower
cutting height.
1. Press the lever towards the rear wheel (Fig. 9).
2. Move forward or backward to adjust the cutting height.
3. Release the lever and ensure it is engaged in the slot properly.
WARNING: Ensure that the lever engages in the slot after each adjustment.
NOTE: There are 6 cutting height levels available. The adjustable heights are 1"
(25 mm) to 3" (75 mm).
WARNING: Make sure the grooves in the sides of
the battery slide over the matching tabs of the battery
compartment. The battery release button will “click”
into place when the battery is fully installed.
WARNING: Do not immerse the battery pack
in water. Sudden cooling could cause a hot battery
to explode or leak.
NOTE: Mower will only operate when both batteries
are charged and installed. FIG. 8
5125-016k EnProdManual P.indd 17 2020-12-17 2:09 PM
1

5125-016
40V MAX BRUSHLESS LAWN MOWER
18
GRASS CATCHER
WARNING: Do not attempt to use the product without the grass catcher
before removing the grass catcher!
Attach the grass catcher. Always carry the grass catcher by its carry handle.
EMPTYING THE GRASS CATCHER
Empty the grass catcher frequently during use. Do not wait until it is completely full.
We recommend emptying it when it is half full.
NOTE: A full grass catcher will reduce the performance of this product.
1. Release the start lever ensuring that the motor has stopped and the blade
has stopped rotating.
2.
3. Remove the grass clippings from the rear discharge chute into the grass
catcher. Use a proper tool such as a brush.
4. Remove the grass catcher by its carry handle.
5. Empty the grass clippings onto a compost heap.
6.
WARNING: Never use your hands or feet to remove grass clippings from the
rear discharge chute !
FIG. 9 FIG. 10
5125-016k EnProdManual P.indd 18 2020-12-17 2:09 PM
GENERAL OPERATION
1. Check the product, its battery pack and charger as well as accessories
for damage before each use. Do not use the product if it is damaged
or shows wear.
2.
3. Check the battery status. Recharge if necessary.
4. Always push the product by its handle. Keep the handle dry and free from
lubricant to ensure safe support.

19
5.
people entering the working area. Always let the product come to complete
stop before leaving it unattended.
6. Do not overwork yourself. Take regular breaks to ensure you can concentrate
on the work and have full control over the product.
WARNING:
and on what special days products are allowed to be used and what restrictions
apply! Ask your community for detailed information and observe the regulations
in order to preserve a peaceful neighbourhood and avoid committing
STARTING/STOPPING
1. Insert batteries.
2. Plug the safety key into the slot fully.
3. Stand behind the starting lever.
4.
towards the handle.
5.
6. Press and hold (1), you can move forward at a constant speed,
but cannot go back (Fig. 11).
7. Release the start lever to stop the mower.
USING THE SELF PROPELLING FEATURE
1. Self-propelling is controlled by holding the starter level down (1) to the handle
and pulling the self-propelling lever (2) to the handle. (Fig. 11).
2. To stop forward motion without stopping the engine, release the self-propelling
bar (2). Hold the starter level (1) down against the handle to continue mowing
without self-propelling. (Fig. 11).
NOTE: After releasing the self-propelling bar, if the mower will not roll backwards,
push the mower forward slightly to disengage the drive wheels.
5125-016k EnProdManual P.indd 19 2020-12-17 2:09 PM
ADJUSTING THE “SELF PROPELLING” CABLE
This lawnmower is equipped with a cable (1) (Fig. 12) that engages the self-propel-
ling feature. The cable tension is set at the factory, however, if needed it can be
adjusted using the rotating adjustment nut located on the cable.
If the lawnmower is NOT self-propelling or is not self-propelling as desired, then
adjust the tension on the cable as follows:
When standing behind the lawnmower, turn the rotating adjustment nut (2)
(Fig.12) on the cable clockwise to tighten the cable. Then lock the adjustment nut
(2) (Fig.12) into position by tightening the small nut (3) (Fig.12).
To loosen the cable, turn the adjustment nut (2) (Fig.12) counterclockwise and
then lock into position by tightening the small nut (3) (Fig.12).
Table of contents
Other Benchmark Lawn Mower manuals
Popular Lawn Mower manuals by other brands

Black & Decker
Black & Decker 598968-00 instruction manual

Original inside
Original inside CAT NOVA 3100 T ED Operator's manual

Husqvarna
Husqvarna AUTOMOWER 550 Operator's manual

Craftsman
Craftsman EZ3 917.256611 owner's manual

Toro
Toro 04060 Greensmaster 1600 Operator's manual
Toro
Toro 20065 Operator's manual

