Benimar Sport 310 User manual

Benimar Sport 310
Motorhome Guide

Benimar Sport 310 Motorhome Guide
Below there are few simple rules and guides to help you make the mostof your motor
homing holiday. Please read through all points at your earliest convenience.
Should you have any queries please do not hesitate in contacting us on 01706 715775.
Should a major problem arise out of office hours please contact one of Easirent’s own
24hrs mechanics on 07736 610776.
Before Starting Any Journey Please Check That:
1. All cables and hoses are unplugged.
2. Check that gas is turned off at the bottle and fridge is converted to 12v.
3. All windows in the motor home are fully closed.
4. All sky lights are fully closed.
5. Loose articles in the motor home are secured, and cupboards and drawers are
locked shut.
6. All occupants of the motor home must use seat belts at all times whilst the vehicle
is in motion. This is a legal requirement.
7. Ensure that the rear steadies are raised.
General Care of Your Motorhome
When opening windows please ensure centre button is depressed fully.
Please use ladders when gaining access to overhead bunks.
Do not stand on the tables
Make sure table catches and legs are correctly positioned when lowering and
raising tables.
Keep an eye on battery levels if not using electrical hook up.
Always ensure that the fresh water tank is at least ¼ full, to prevent damage to the
submersible water pump.
Please keep plug socket safetycovers in the socket at all times,especially when
children are present.
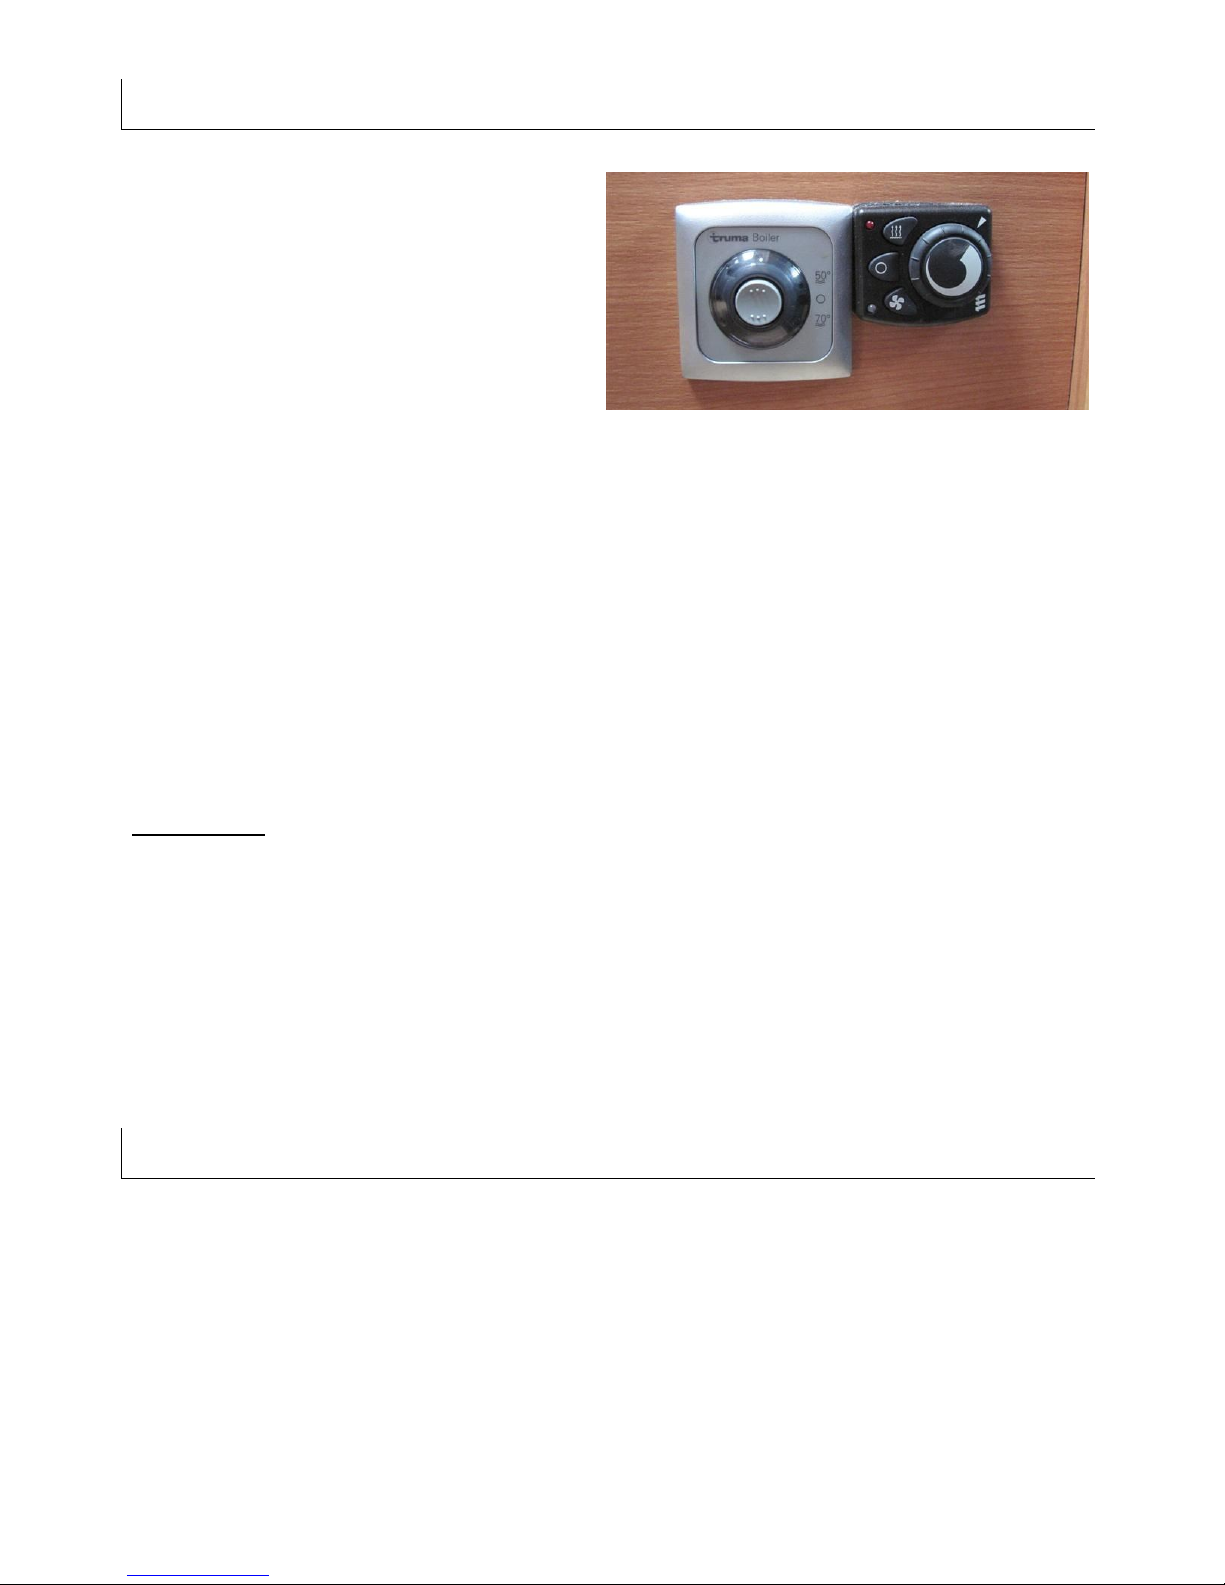
Heating and Hot Water
The heating and hot water within the
Benimar Sport 310 is powered by plugging
in to the mains via the electric hook up
cable supplied or off the gas which has
also been supplied. The control panel for
the heating and hotwater is situated on
the side of the rear facing seat in the
motorhome. The left hand dial selects the
hot water and the right hand dial controls the heating.
For hot water, Press top of the switch for 50’c or press the bottom of the switch for 70’c.
For heating press the top left button, and rotate the dial to control the required
temperature.
Top left button will turn the heatingon,
Middle button will turn the heating off,
Bottom left will turn of the cool air blower on,
Ensure that the control panel above the main caravan door is turned on; check that the
water pump is on; check the gas is turned on; connect the hook-up cable if possible and
that there is sufficient water in the system.
Fault finding (red light showing on temperature dial)
Gas bottle empty – Change bottle
Hook-up not connected correctly – check display
No water in system – fill with water
Water pump not switched on – switch on
Main control panel not turned on – turn on the power
Air in system. Turn dial on and off 2 or 3 times until green or amber light shows. Leave of
for 15 seconds.
Toilet Cassette
To empty toilet cassette, ensure the toilet waste release is in the closed position (handle
at the sideof the toilet basin),open the external toilet door andremove the cassette by
lifting the bottom yellow flap and pull the cassette towards you. Extend end tube and
unscrew yellow cap. Whilst depressing small round breather inlet pour waste into
designated area and rinse cassette out with fresh water. Pour about 50 ml of toilet
chemical and 2 litres of fresh water in cassette.

Thetford Fridge
Small square tab under the display is
the main on / off switch.
Left hand push buttonselects power
source.
Right hand push button selects
temperature.
Symbols within the display:
Battery (engine) for use when the vehicle is in motion.
Flame (gas) for use when vehicle is parked without mains connection.
Power lead (mains) for use when vehicle is parked with mains connection.
Auto In this setting the fridge will always find the
strongest source.
Should a small blue light begin to flash or a spanner symbol appears in the display a fault
has occurred. Check that the fridge is in the correct mode, check the gas is turned on;
check the electrical hook-up is connected securely. Turn the fridge off for 15 seconds and
turn on again using the small grey button, repeat this on 2 or 3 times should the blue
light re-appear.
Main Control Panel Symbols
Top left: Time and external temperature
Middle left: leisure and engine battery level
Bottom left: Clean & waste water level
Top right: External door light
Middle right: Main power on / off switch
Bottom right: Water pump on / off switch
The display will show the results of the above, the
display will also show a cable and plug when the mains
hook-up is correctly ‘hooked-up’
Filling Vehicle with Fresh Water
Place fresh water hose into water filling inlet, to the rear of the passenger door. Fill
slowly until required amount reached. Please note that we do not recommendyou use
this as drinking water.
Waste Water Discharge
Park over appropriate space and pull the red handle underneath the passenger side off
the vehicle, makingsure that you stand well back. Close handle when finished.
Return of Vehicle
As we have a quick turn around of motor home hires, please aide us by following the few
simply rules below.
All vehicles must be returned to the office between 08:00am & 10:00am on completion
of hire, unless otherwise agreed by our office staff. The vehicle must be returned in a
clean and tidy condition, with waste water and toilet cassette emptied and cleaned.
Please also ensure that the fridge is emptied and wiped down for hygiene reasons.
Should you find any faults or incur any damage whilst away please inform us on 01706
715775 to allow us to order replacement parts for your return.
A standard valet charge will be a minimum of £100 should you return your vehicle in an
unsatisfactory manner.
A £40 charge will be incurred should the toilet cassette not be emptied and cleaned on
return.
IMPORTANT NOTE REGARDING
WATER SYSTEMS ON MOTORHOMES
Please ensure that there is always water in the water tank which is situated under the seats in the
motorhome. This is because thewater pump is electric and is situated within the tank and if
attempts are made to pump water with an empty tank then the pump will burn out and no water
will be available. This is easily rectified by installing a new pump in the tank but would be very
inconvenient to you if one could not obtained for what ever reason. The water content of the tank
is clearly displayed on the controlpanel above the door.

Electrical and Gas SafetyNotice
Our motor homes are the very latest with modern safety precautions built in by the manufacturers. It is important, however,
that you dounderstand the dangers associated with the electrical systemswhich are 240 volts (as well as 12 volts), which can
inflict fatal injuries.
We must now look at these two areas in detail as you and your family’s safety are of utmost importance to us.
Electrical Systems
All our motor homes have twoelectrical systems, 12volt and 240volt:-
12VOLTS
The 12v supply for the engine is from a normal 12 volt battery and is used to start the vehicle and to supply all the normal
electrical accessories a used in your car. This battery does NOT supply electrical power to your motor home living area. The
manufacturers separate these twoareas so that the engine battery cannotbe depleted by motor home usage.
A separate 12v supply is provided for the motor home/living area by 12v LEISURE BATTERIES. These batteries are 12v but of a
different type to the engine battery since they do not need to give large surges of power to start an engine, but give
continuous 12v supply for the internal lights and accessories. If the leisure batteries are flat because of over usage they can
be recharged by plugging the 240v power lead into a supply. The onboard battery charger will charge up the leisure batteries.
The vehicle alternator will also charge the leisure batteries when you are driving, but not if they are completely flat. The
leisure batteries are normally in a separate compartment in the motor home with access from the outside.
240VOLTS
Connecting up Mains Cable
Check all switches and appliances are in the off position.
When connecting up attach the motor home up first and then plug into themains.
When disconnecting, unhook frommains first and then the motor home.
Return all cables to rear storage.
Gas
LPG is highly flammable and explosive and if the control tapor valve leaks then there can be dreadful outcome.
Never store or transport cylinders horizontally, as this could prevent the pressure relief safetyvalve from working. LPG is
heavier than air and will sink to the bottom of anyarea. That is why the locker that holds theLPGcylindershas apertures to
allow an escape route for any leaking gas. Do not obstruct these apertures and do not store items in this locker which may
obstruct this outlet. On each gas cylinder is a gas regulator. Do not try and dismantle this and do not move cylinders outside
the locker, since if water collects in the breather hole on the regulator it will cease to work properly.
Overloading
It is the drivers/hirers responsibility to ensure that the motor home is not overloaded. An overloaded vehicle is unstable and
unsafe. Axle weights and total gross weights are clearly shown on the vehicle plate. If unsure of overloading please have
vehicle weighed at your local weighing station. Please note that traveling with fresh and waste water tanks full could cause
you to be overloaded, and be costing you more in fuel consumption.
Table of contents


